New Fingerprint Option for Curve Similarity Search
Curve Similarity Search now supports an Offset Preserving fingerprint type for cases where the absolute position of a curve matters, not just its shape. The default fingerprint normalizes the X and Y axes, so curves with similar shapes can score highly even when their peaks or baselines are shifted. Offset Preserving keeps more of the original positioning and returns a lower similarity score when curves are meaningfully offset.
This is useful for workflows like color matching, spectroscopy, and thermal analysis, where a shifted curve may represent a different result even if the overall profile looks similar.
For example, these curves are close in shape but offset from each other:
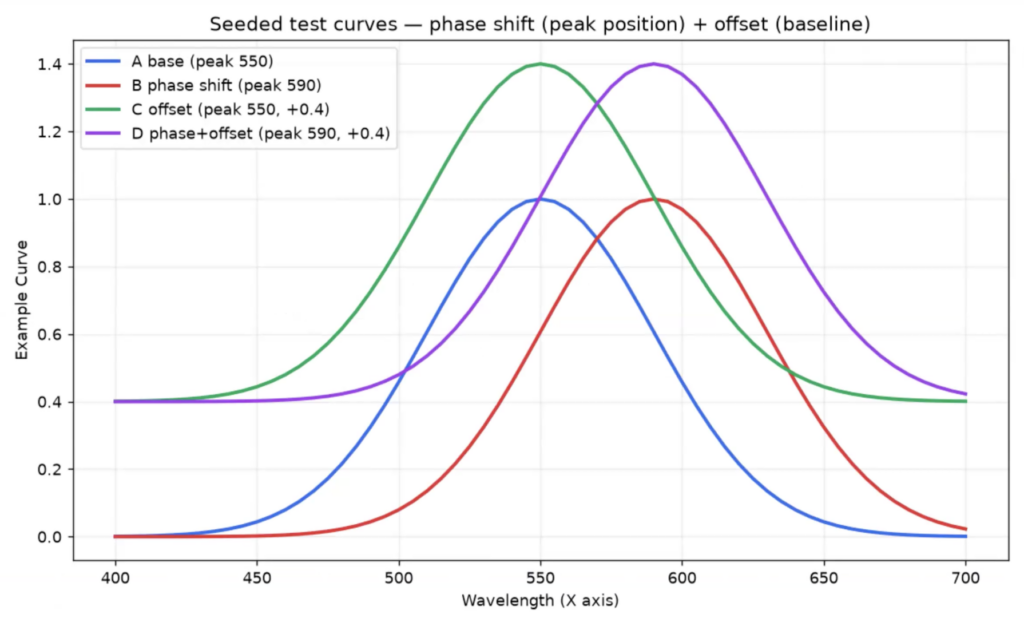
With the default shape-based fingerprint, they can still receive similar scores:

With Offset Preserving, the score is lower because the curve positions are different:

How to use:
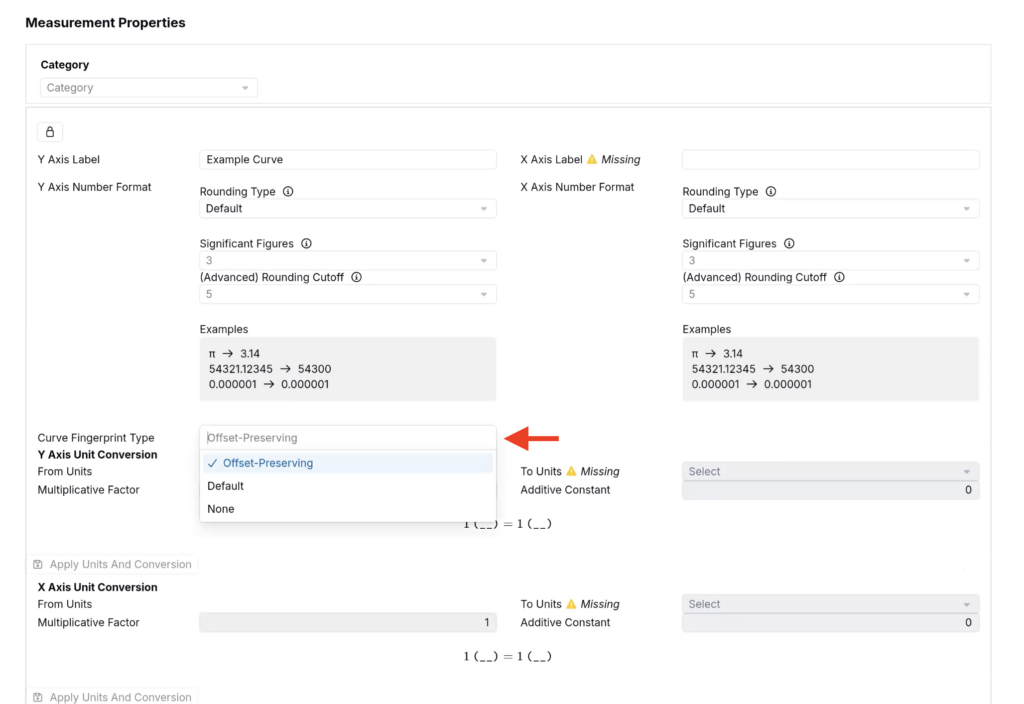
To select a fingerprint type, use the Curve Fingerprint Type field on a curve output’s Details page.
Show Spec Goal Fields on the Measurements View
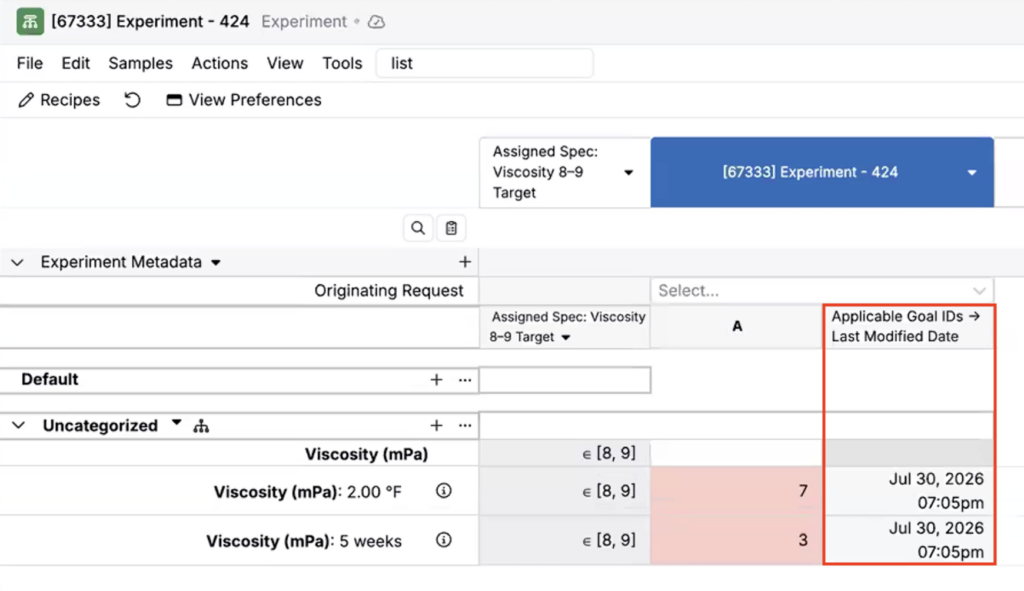
The Measurements view can now show fields from the spec goals assigned to each recipe output. Using the same listing column configuration pattern available elsewhere in the platform, users can add goal-related columns directly to the output rows on the Measurements page.
This is useful when teams need more context about the goals behind their measurements without opening each goal or navigating away from the experiment. For example, a user can add fields like Last Modified Date for assigned spec goals, making it easier to audit, review, or compare goal metadata while staying in the measurement entry workflow.
How to use:
- Open the Measurements view of an experiment.
- Use search actions to search for Recipe Output Listing Columns.
- Add fields such as “Applicable Goal IDs” or “Applicable Goal IDs + Last Modified Date”.
- Save the configuration and review the goal fields directly on the Measurements view.
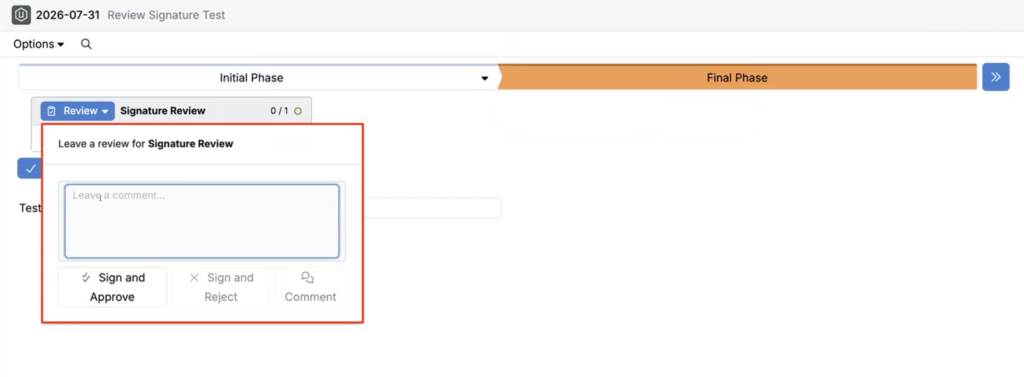
Sign and Approve/Reject for Phase Workflows
Regulatory review phases now support Sign and Approve and Sign and Reject actions, using the existing PIN-based signature flow. When a review requires a signature, the standard approval or rejection action is replaced with a signing step, so the reviewer confirms the action with their PIN before the review is submitted.
This is useful for regulated workflows where approval and rejection decisions need to be tied to a documented electronic signature. For example, a QMS sign-off, batch release, or completed experiment review can now require a signed approval or signed rejection instead of a standard button click.
Reaction Table Improvements
Reaction tables in notebooks have recently received a number of updates:
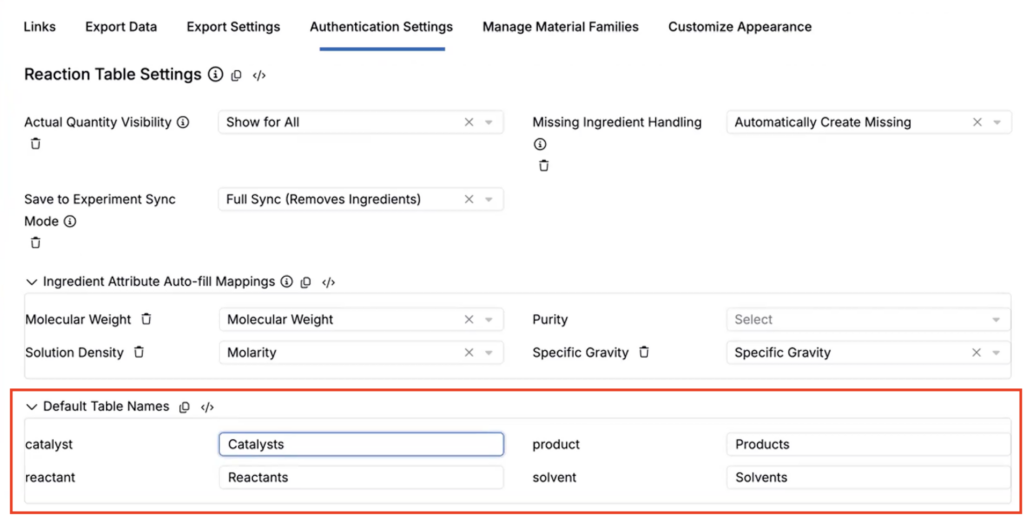
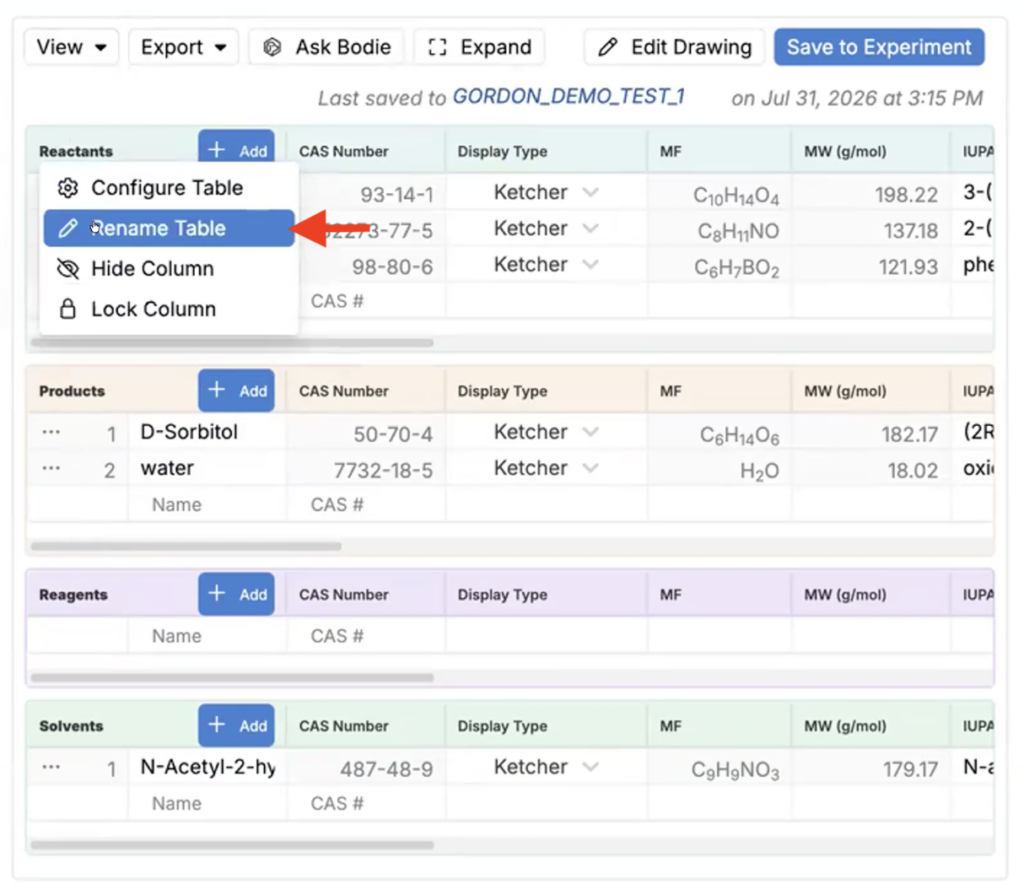
- Rename table sections — You can now rename table sections so the table better matches their internal terminology. This helps teams align the notebook interface with customer-specific chemistry workflows without requiring code changes.
To rename table sections on a schema-wide level, access Company-Wide Settings > Platform Config and use the Default Table Names section.
To rename table sections on an individual notebook level, click the section name and select Rename Table from the menu.
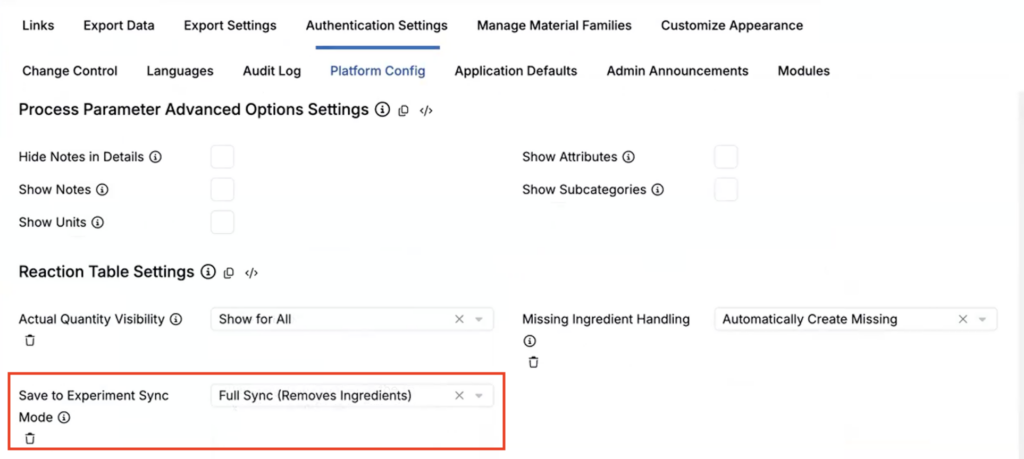
- Full sync — Reaction table sync behavior has also been improved. A new Full Sync mode can remove ingredients from the linked experiment when they are removed from the reaction table, instead of only adding or updating ingredients.
To configure this setting, access Company-Wide Settings > Platform Config and use the Save to Experiment Sync Mode field.
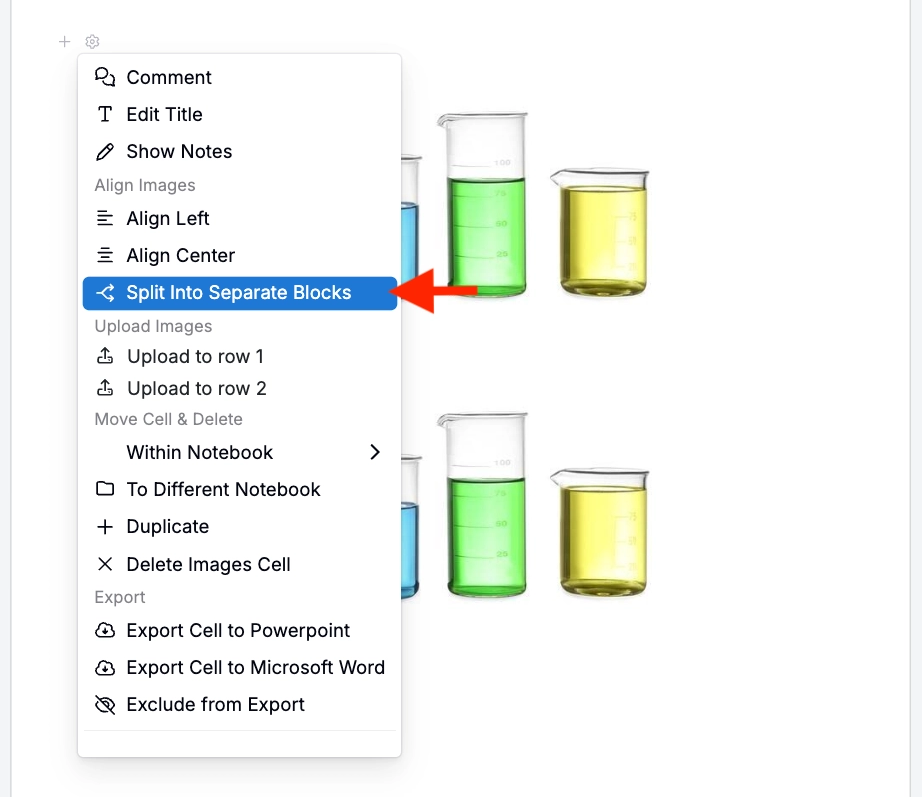
Split Multi-Image Blocks
Images uploaded together into a single notebook image block can now be split into separate image blocks. This lets users move, edit, crop, annotate, or delete each image independently after upload.
This is useful for teams that capture multiple images in one upload but later need to organize them separately in a notebook, assign them to different sections, or compare them side by side.
CAD File Editor Improvements
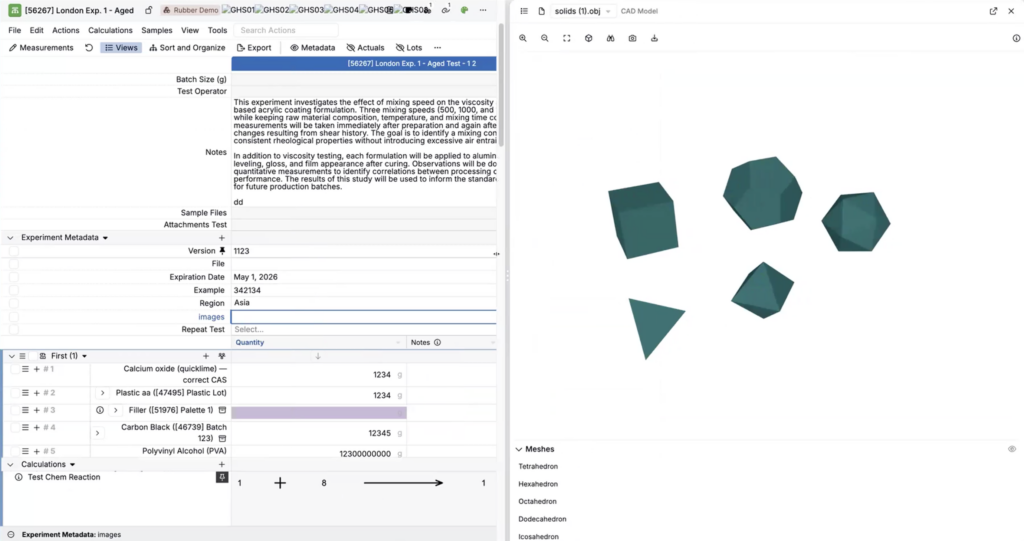
CAD files attached to an experiment now open in a side panel instead of taking over the center of the screen, so users can inspect a file while continuing to reference the surrounding experiment, notebook, or file context.
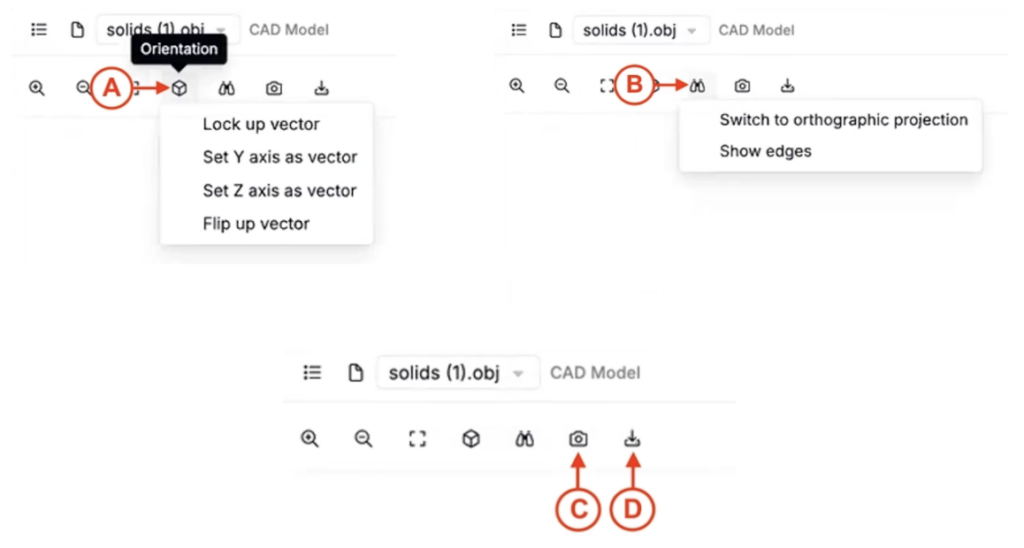
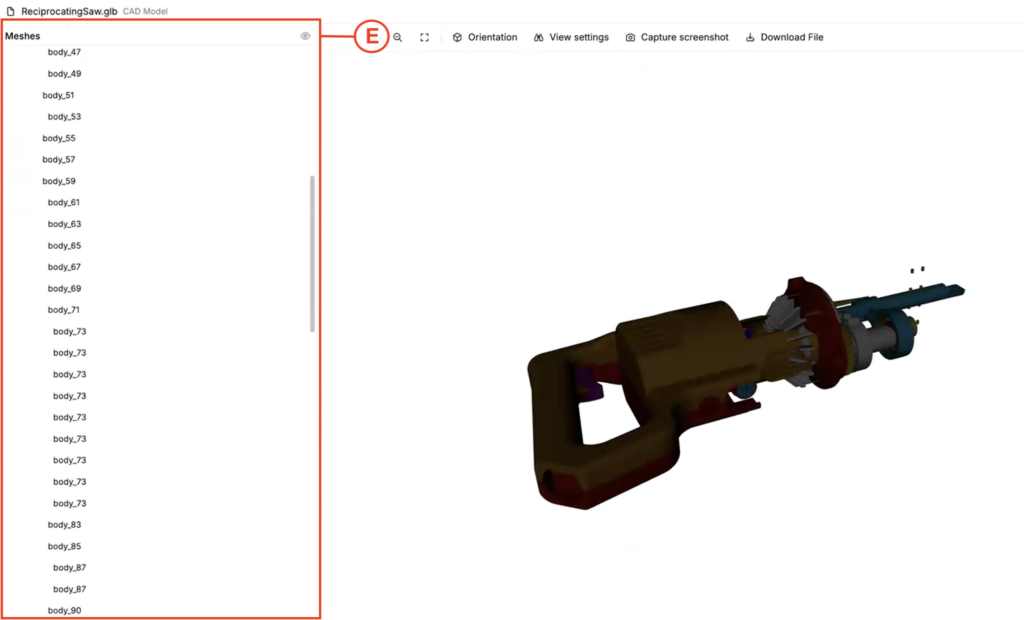
The CAD viewer also includes new toolbar and inspection controls. Users can adjust orientation (A) and projection/edges/vectors (B), capture screenshots (C), download files (D), and use a mesh panel to navigate the model (E).
This is useful for engineering and materials teams that need to inspect 3D models of equipment, parts, molds, samples, or test fixtures without losing their place in the platform.
Unit Conversions on Process Parameters
Process parameters now support more granular unit conversions. With this change:
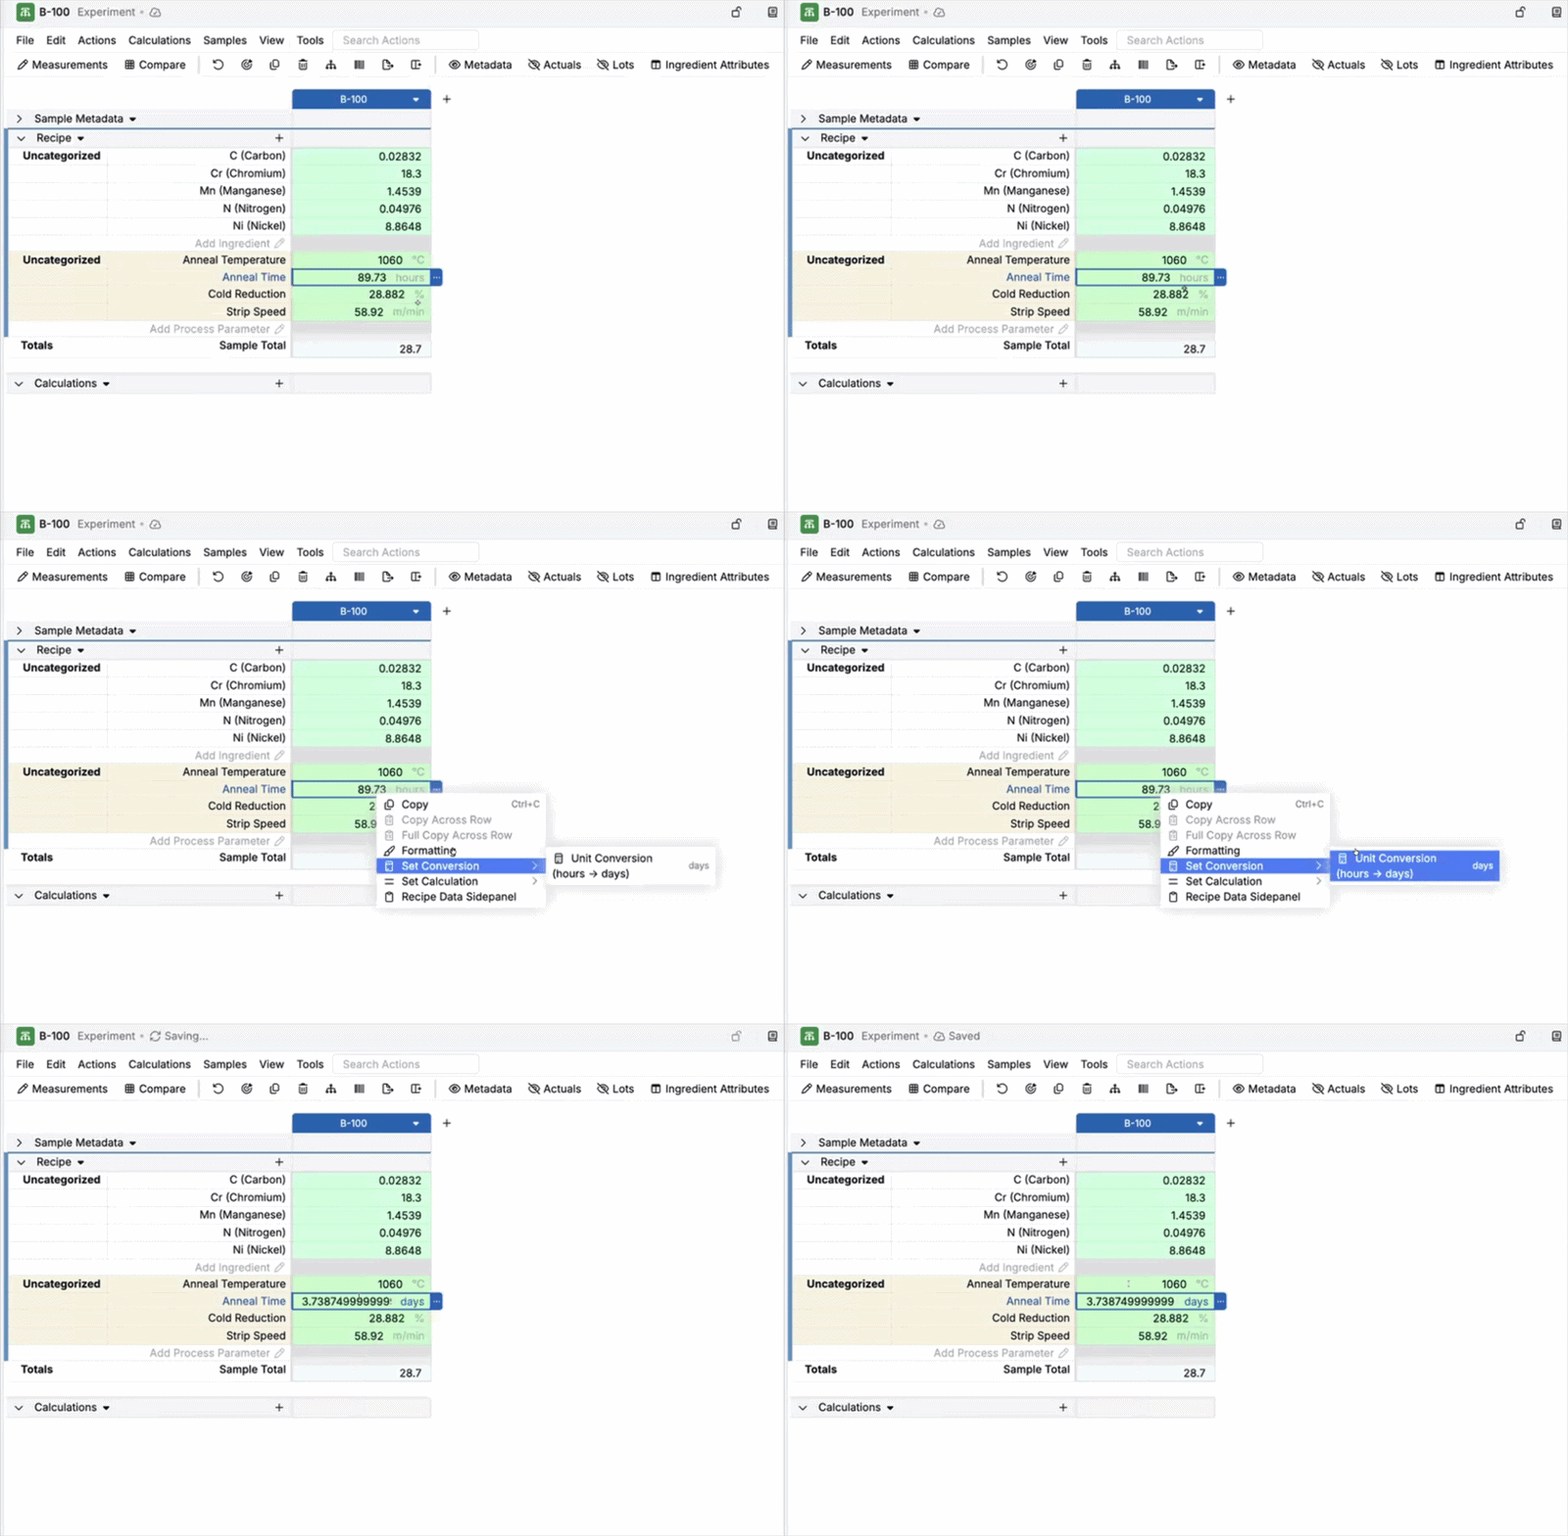
- Recipe-specific process parameter units — You can change the displayed unit for a process parameter in the context of a specific recipe. This means the unit can be standardized for everyone viewing that recipe.
- Configured alongside ingredients — The conversion is set in the same recipe workflow where you configure inputs/ingredients, so the unit choice travels with the recipe rather than living only in a user preference.
Note: Outputs and condition parameters are user-specific (preference-based), but process parameter unit conversions are recipe-specific and take precedence over user-level unit preferences.
How to use:
- On the recipe view, right-click a process parameter cell.
- Select Set Conversion and choose from the available compatible conversions.
- The displayed value and unit update for that recipe context (e.g., hours → days).
Spec Goal Filtering
You can now scope specs goals to only the recipes that match specific properties. Each goal row has a new filter icon — click it to set up a filter group, for example applying an Elongation at Break goal only to recipes with a specific number of coats above a certain value.
This is especially useful when different lines require different acceptance criteria — for example, applying tighter adhesion and thickness targets to exterior, weather-exposed coatings while using a more flexible range for interior prototypes.
How to use:
- On the spec page, click the filter icon next to a goal row.

- Create a new filter group, select a recipe property (e.g., number of coats), and set the condition (e.g., greater than 5).
- Save the filter. To remove it, click the filter icon and delete the group.
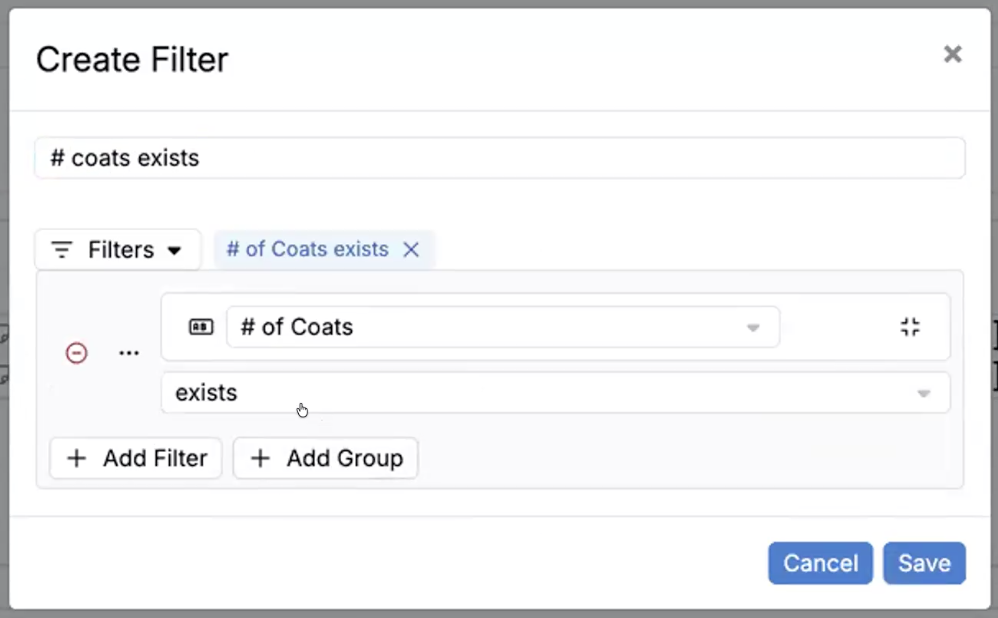
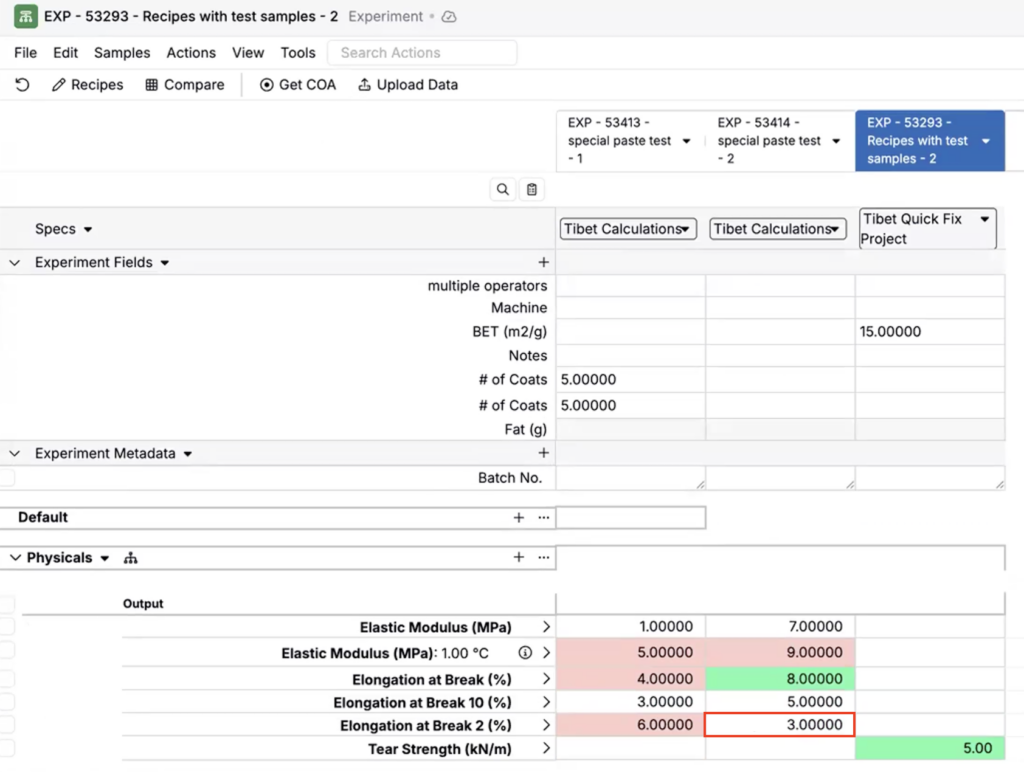
On the specs page, goals are grouped by their filter configuration. New goals added within a filter section will have the filter applied by default.

On the Recipe view, any experiment missing a filtered property simply won’t have that goal applied.
New IT Administration Page
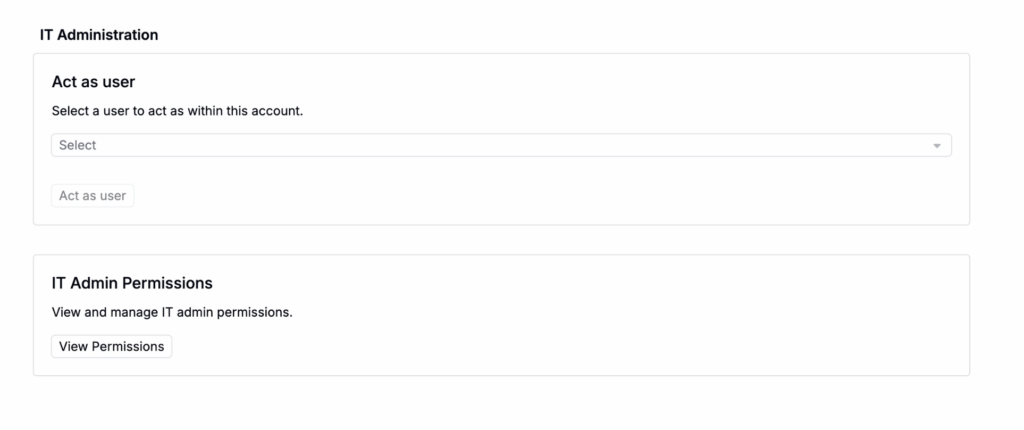
We’ve introduced a new IT Administration page as part of a broader rework of our permission system, giving customer users the ability to take on responsibilities previously limited to Uncountable staff. This is useful for organizations that need designated IT admins to manage user access and troubleshoot issues without granting full master admin privileges.
The first permission available is act as user, which lets a designated IT admin act as another user within a specific schema. Granting a permission is separate from holding it yourself, and the ability to grant IT admin permissions to others is a separate, grantable permission. Every acting-as-user session is recorded in the audit log.
To learn more, refer to IT Admin Permissions.
Placeholder Support in Table Builder
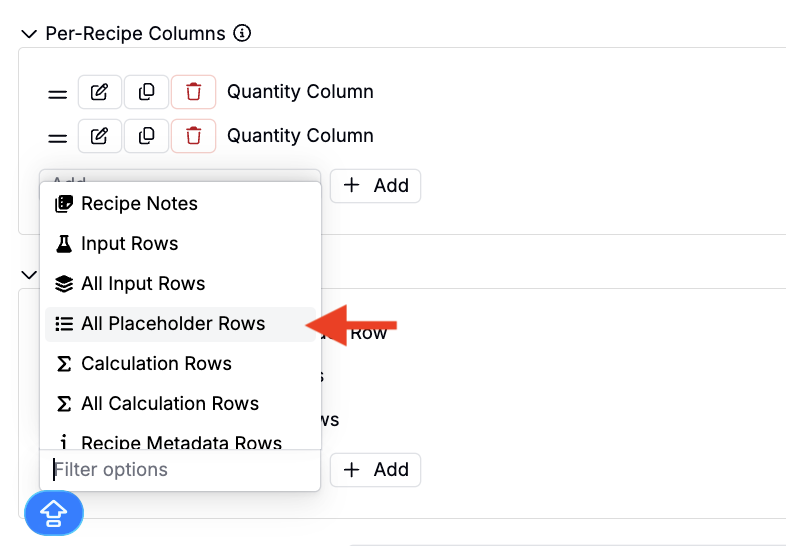
The Table Builder now supports placeholders directly. Under Rows, a new All Placeholder Rows option generates a row for every placeholder, including ones with multiple items, like an input group, which render as a comma-separated list. You can also exclude blank or empty placeholder rows so only placeholders with actual content appear.
This is useful for teams that use placeholders to represent variable recipe components (e.g., coat layers, substrate types) and want to include all placeholder values in a single table without manually adding each one.
New Inventory Tab on Add Inputs
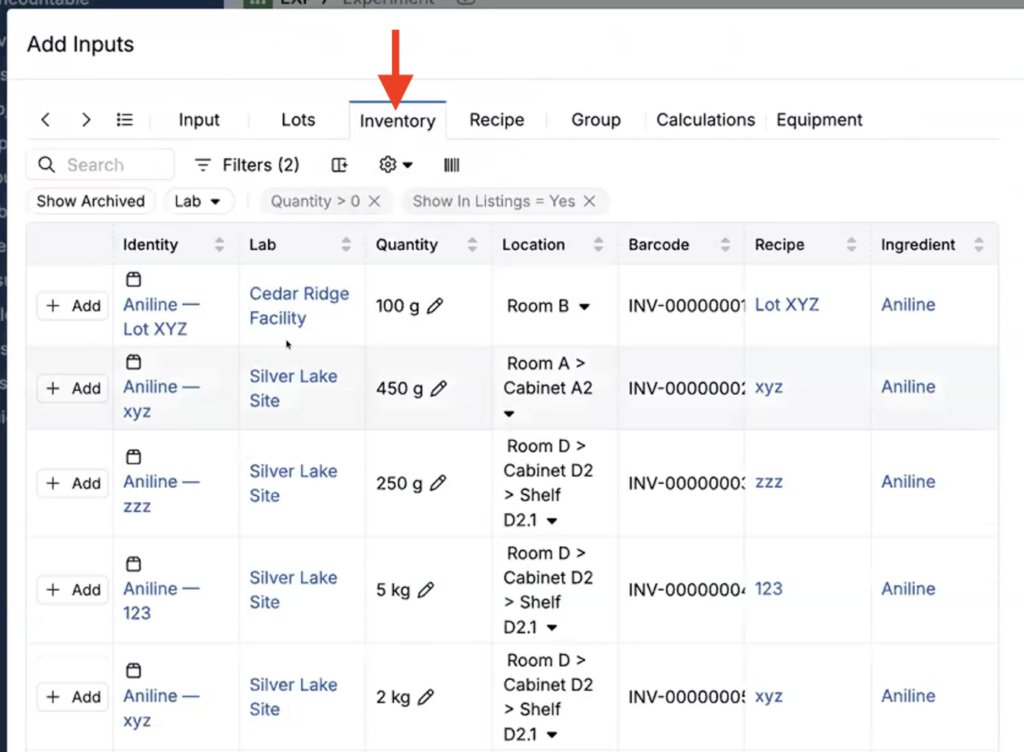
The Add Inputs modal now has an Inventory tab showing every location and the quantity of a given item or ingredient available there, complementing the existing lots view.
This is useful for teams that plan experiments based on what’s physically available in the lab — you can see available materials across locations and add them directly from the modal, which is particularly valuable for regulated environments where items must have an inventory entry to be used.
Lab Task Actions Move to Triggers
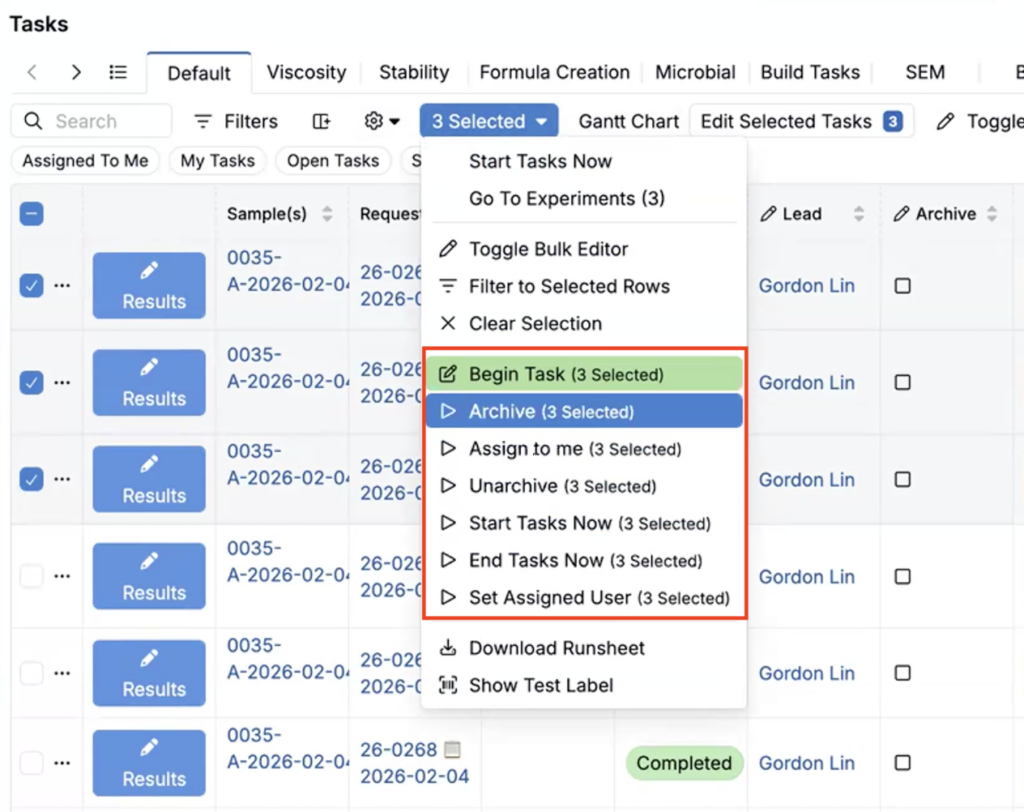
Basic actions on the lab tasks page (archive, assign, and others) have been migrated to the trigger system and now appear alongside your other triggers. They behave the same by default, but since they’re now triggers, they can be customized. This gives teams more control over lab task workflows — for example, customizing what happens when a task is archived or when a task is started.
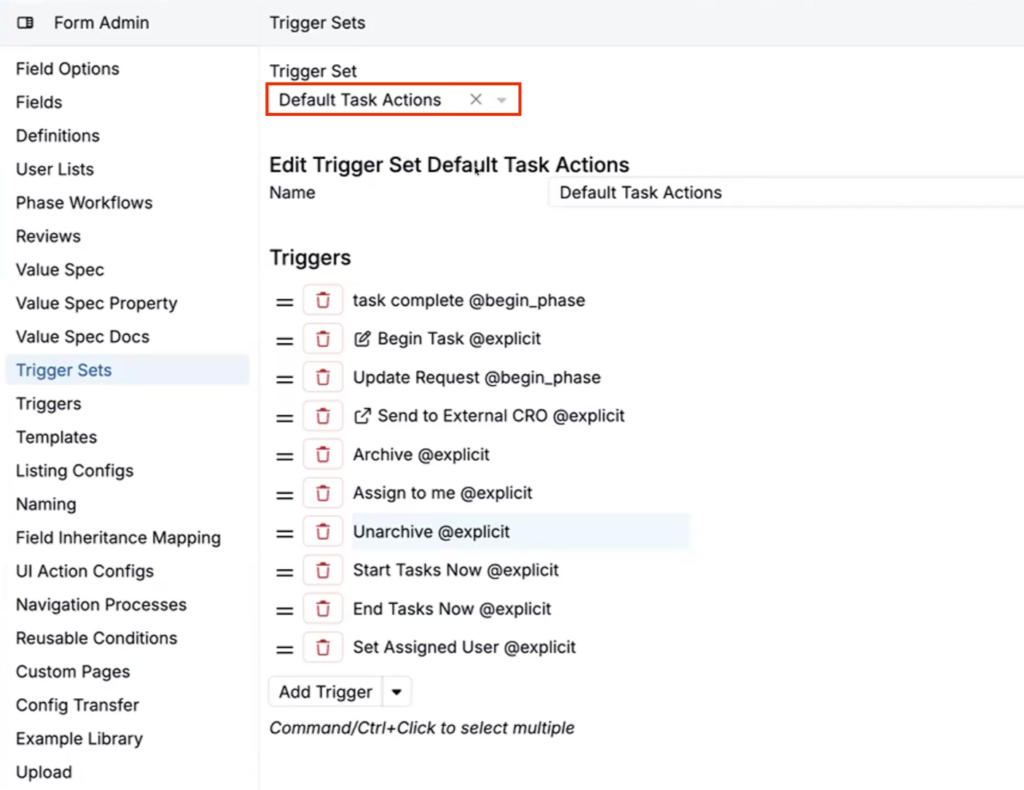
All default task actions are grouped under a new Default Task Actions trigger set, available to every user. To customize an action, go to the trigger set and edit the trigger for the action you want to modify.
Faster Attribute Selection for Input Calculations
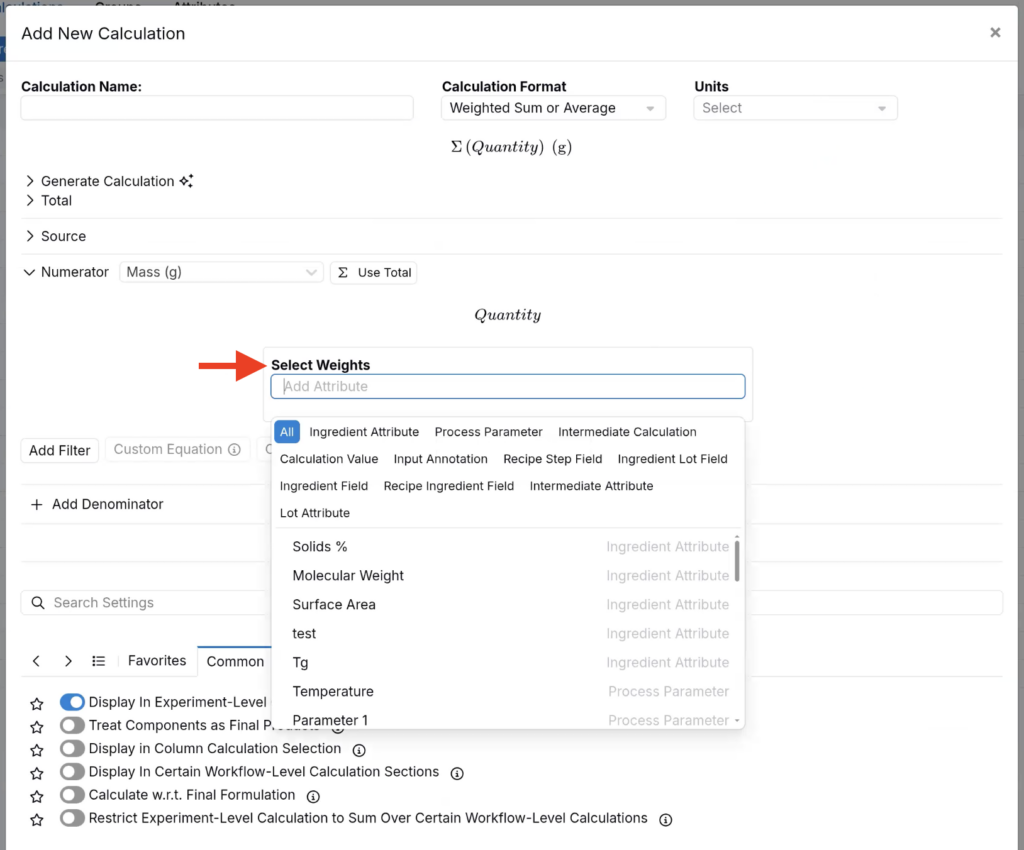
When creating or editing an input calculation, the attribute selector now searches across all attribute types and elements at once (ingredient attributes, parameters, calculations, etc.) instead of requiring you to pick an attribute type before searching.
This saves a few clicks every time you select an attribute. Just start typing and matching results from all categories appear together.
Output Unit Overrides on Recipe Outputs
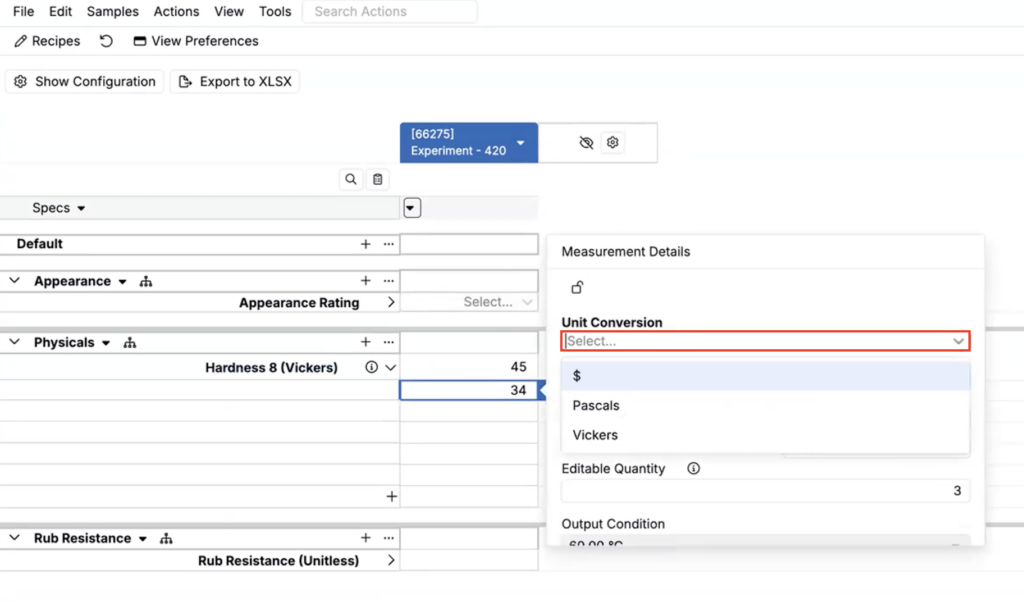
You can now choose a unit conversion override for an individual recipe output. This lets a specific recipe output display or request values in a different unit without changing the output’s default units or editing the platform-wide unit conversion definition. The underlying output value remains stored in the output’s base units.
You can also set requested units on requested measurements, independent of the output space’s default units.
How to use:
- On the Measurements view, right-click the output cell and select the unit conversion override option.
- Choose the target unit or compatible conversion for that recipe output. To set requested units on a requested measurement, open the measurement request and select the desired unit.
To learn more, refer to Output Unit Conversions.
Bidirectional Highlighting in the Label Editor
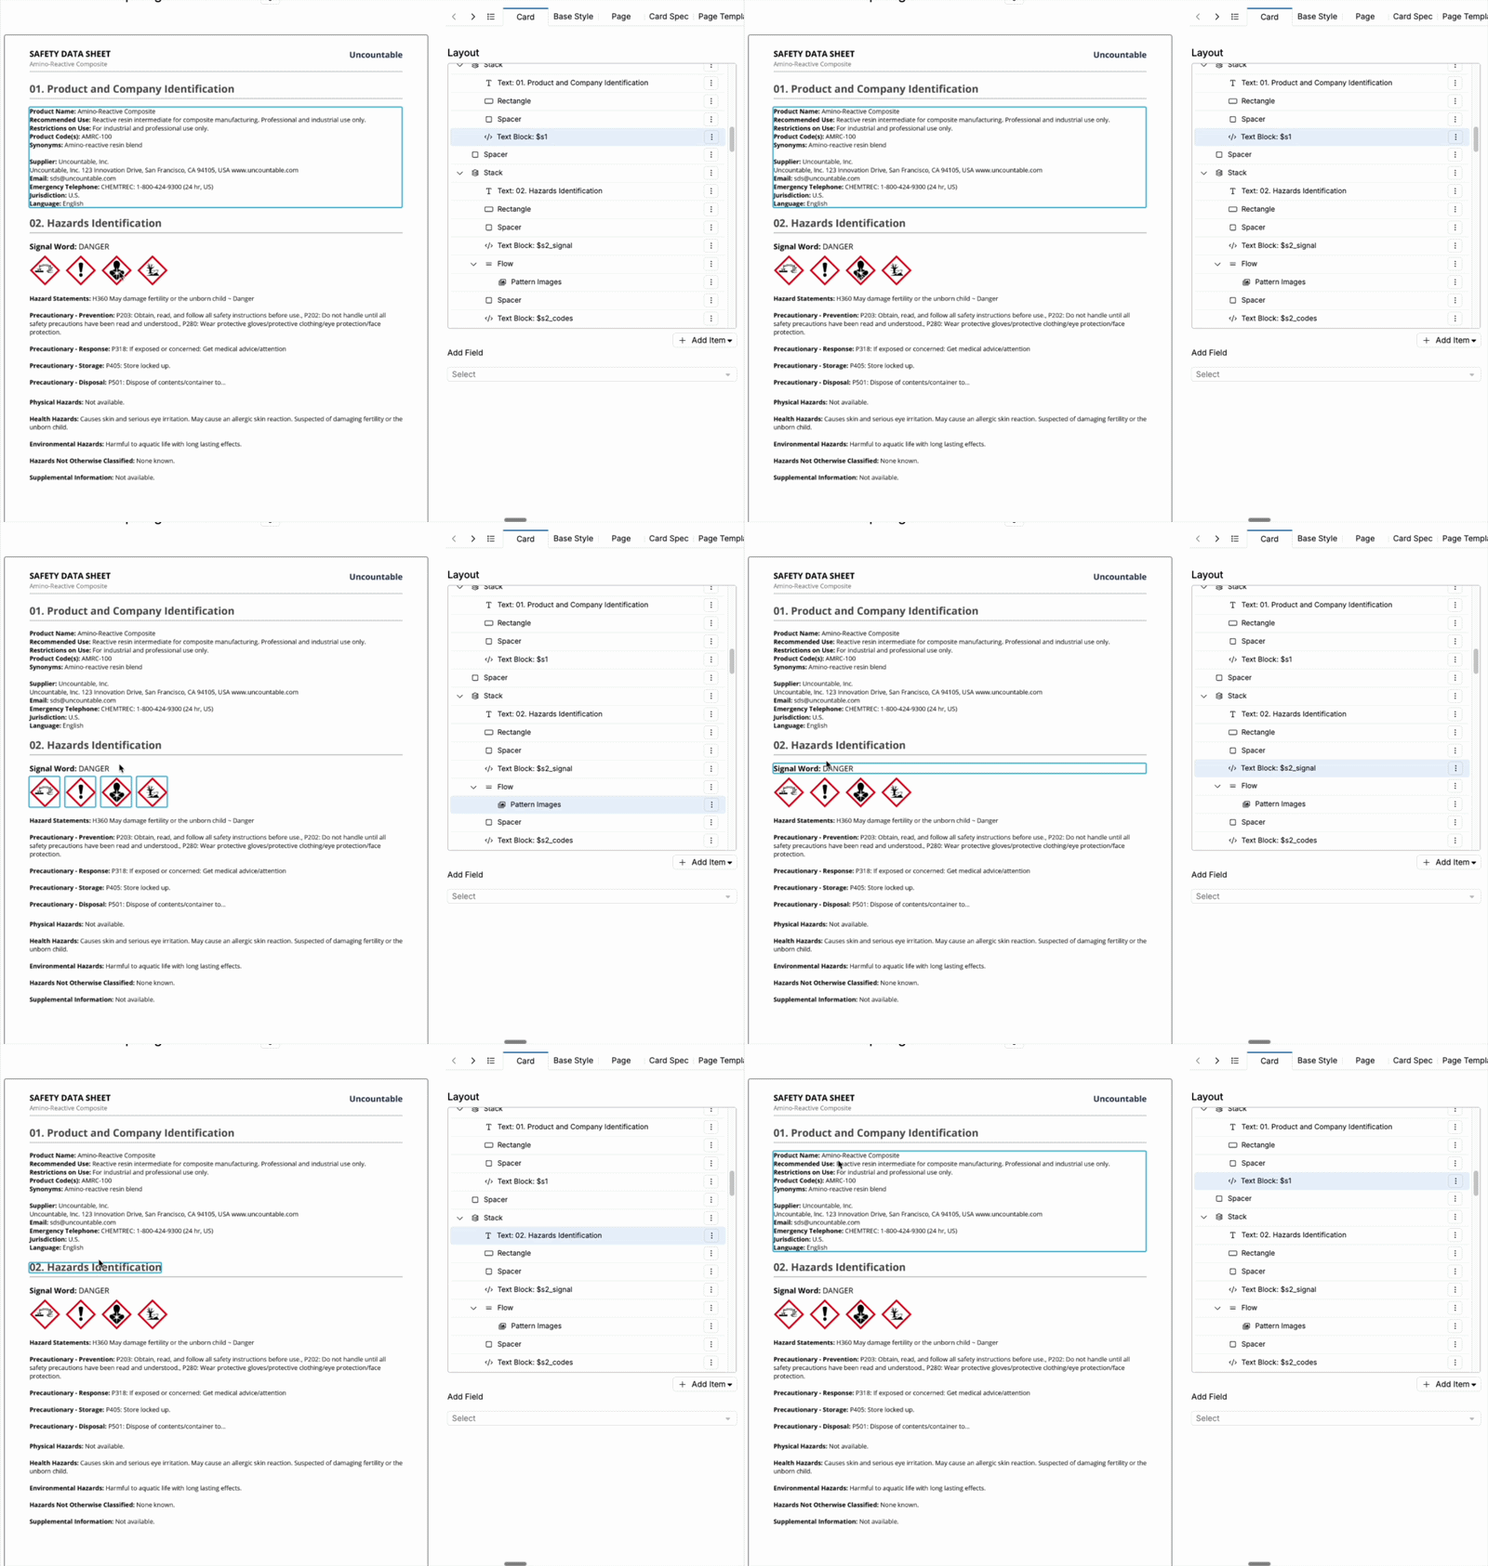
The Label Editor now supports bidirectional highlighting between the layout panel and the PDF preview. Selecting an item in the layout list highlights its rendered position in the preview, and clicking an item in the preview selects the corresponding item in the layout list.
This makes complex label templates easier to configure because users can quickly connect what they see in the rendered document with the underlying layout item they need to edit. It is especially helpful for SDS and COA templates, where labels can include many nested sections, tables, text blocks, and multi-page layouts.
Training Modules: Lessons and Exams
Training modules now support two modes: Lessons and Exams. This gives teams more flexibility in how they use training modules, whether the goal is to teach a process step-by-step or evaluate whether users understand the material.
Lessons are designed for instruction. Users move through the module linearly, page by page, and can retry the module an unlimited number of times. This mode is best for teaching internal standards, onboarding users to a workflow, or walking teams through a process where immediate feedback helps reinforce learning.
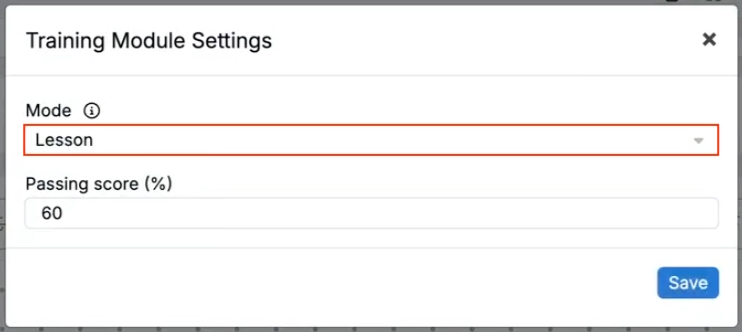
Exams are designed for assessment. Users still move through each page in order, but they do not receive correctness feedback until they submit all of their answers. Admins can also limit the number of attempts for an exam, making this mode better suited for evaluating learning or confirming readiness before issuing a certification.
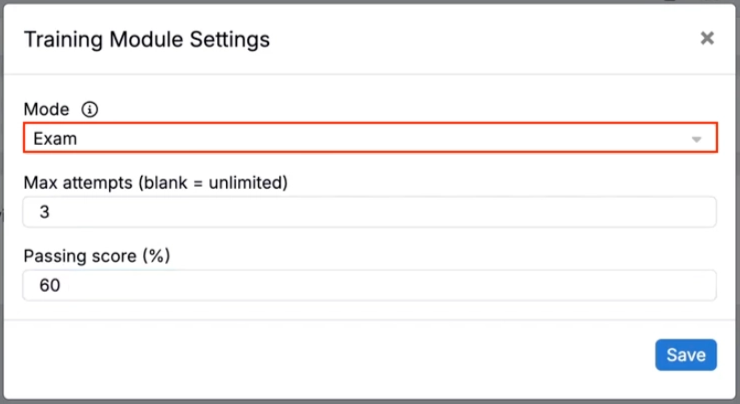
Both Lessons and Exams can grant a certification when the user meets the pass mark. Platform admins can configure the module mode, pass mark percentage, and—when the module is an Exam—the maximum number of attempts from the Settings button.
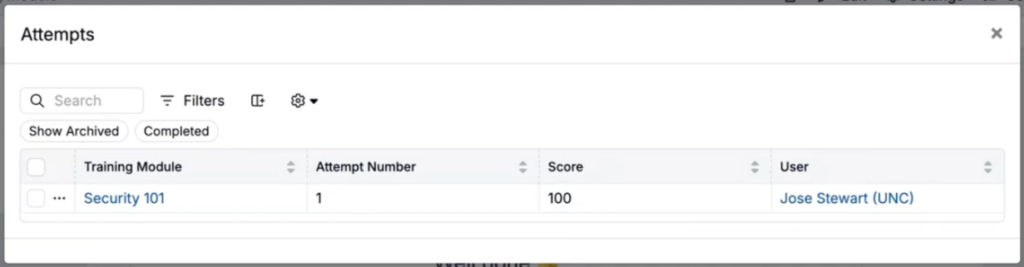
Admins can also use See Attempts to review attempts across users, including scores, attempt numbers, and pass/fail status.
MCP Tool Configuration
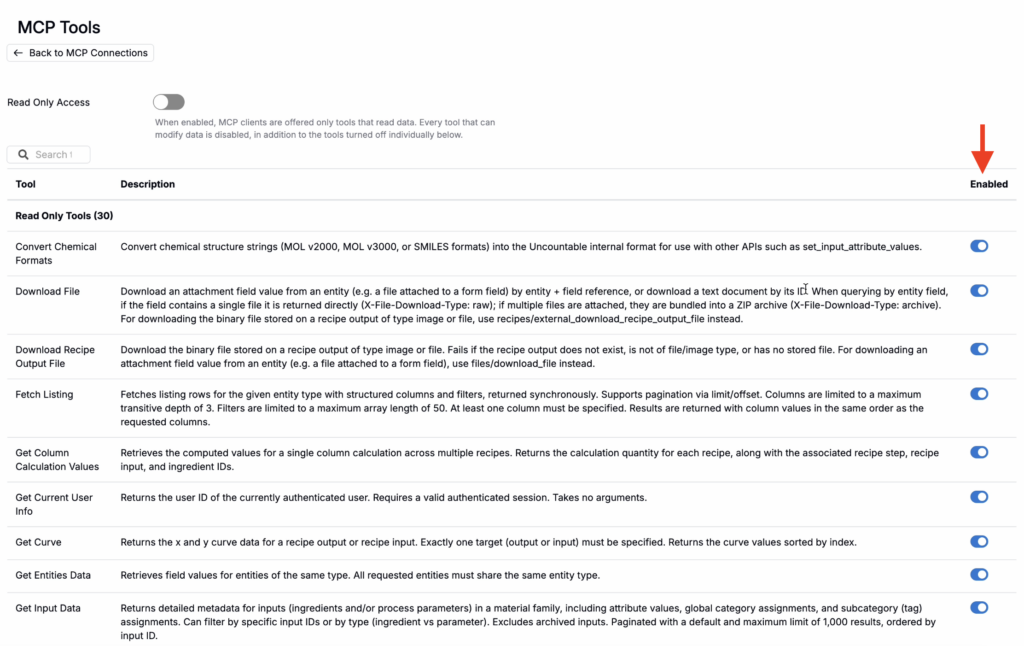
Admins can now configure which tools are available through the Uncountable MCP. This gives teams more control over how external AI assistants can interact with Uncountable data, including the ability to disable specific tools or configure a read-only MCP.
By default, the MCP can expose a broad set of Uncountable capabilities, but not every organization wants every tool available to every connected assistant. The new configuration page makes it possible to scope the MCP down to the tools that are appropriate for a given account, which can help with security review, rollout, and more focused AI usage.
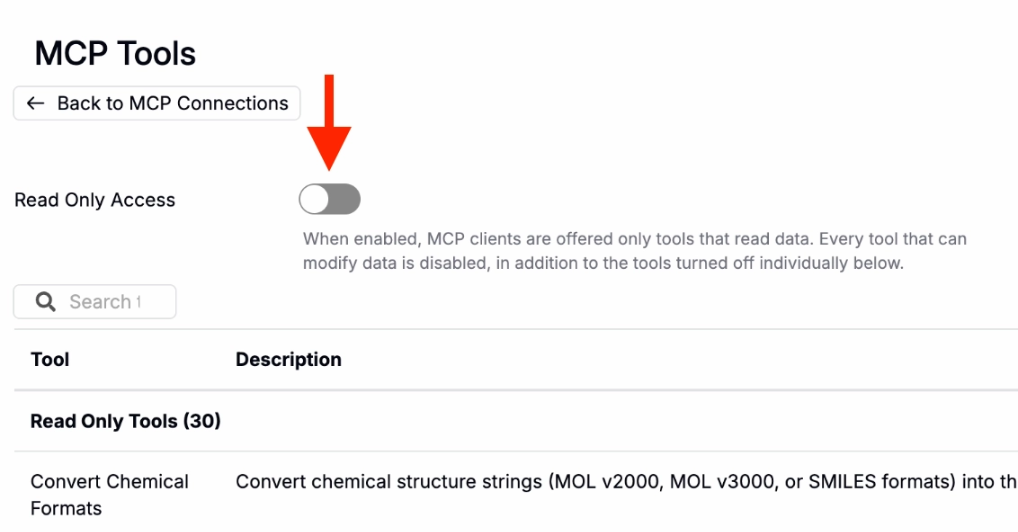
Use the Read-Only to enable a read-only configuration. This is especially useful for teams that want to let AI assistants answer questions, summarize data, or retrieve context from Uncountable without allowing write actions.
How to use:
- Go to Company-Wide Settings.
- Open the Modules tab.
- Select the MCP configuration page.
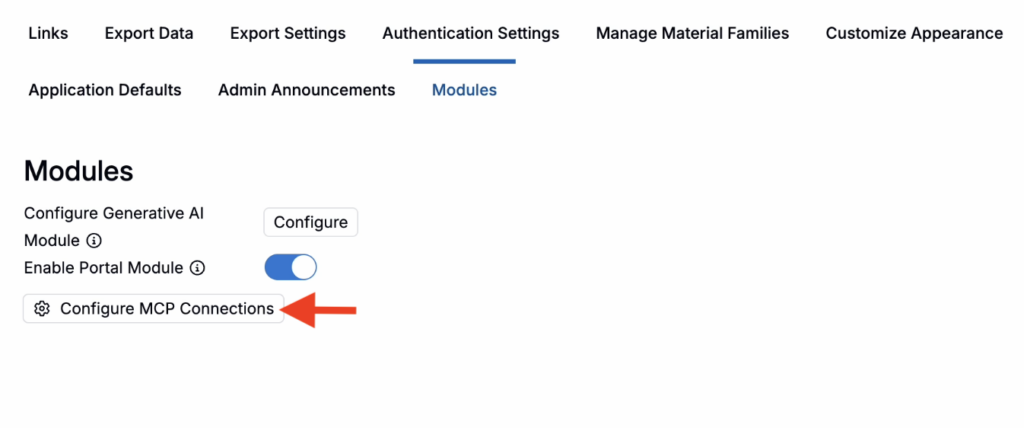
- Disable individual tools or configure the MCP for read-only use.
For now, MCP tool configuration is schema-wide. Changes apply to all users under the account, and only admin users can configure the available tools.
Refreshable Whiteboards
Whiteboards now have a new Refresh flow that keeps Bodie-generated boards up to date as the underlying data changes. When a supported whiteboard is refreshed, Bodie re-evaluates the board against current data and updates the display where needed.
This is useful for whiteboards that act like live status views, dashboards, or exploratory workspaces. For example, a user can ask Bodie to create a whiteboard showing project status, then click Refresh later if projects are added or statuses change.
Bodie-generated whiteboards also now store the user’s intent as the basis for the board. On refresh, Bodie uses that intent to understand what the board was meant to show, checks the latest data, and updates the whiteboard. Users can also add one-time refresh instructions to focus the update without permanently redefining the board.
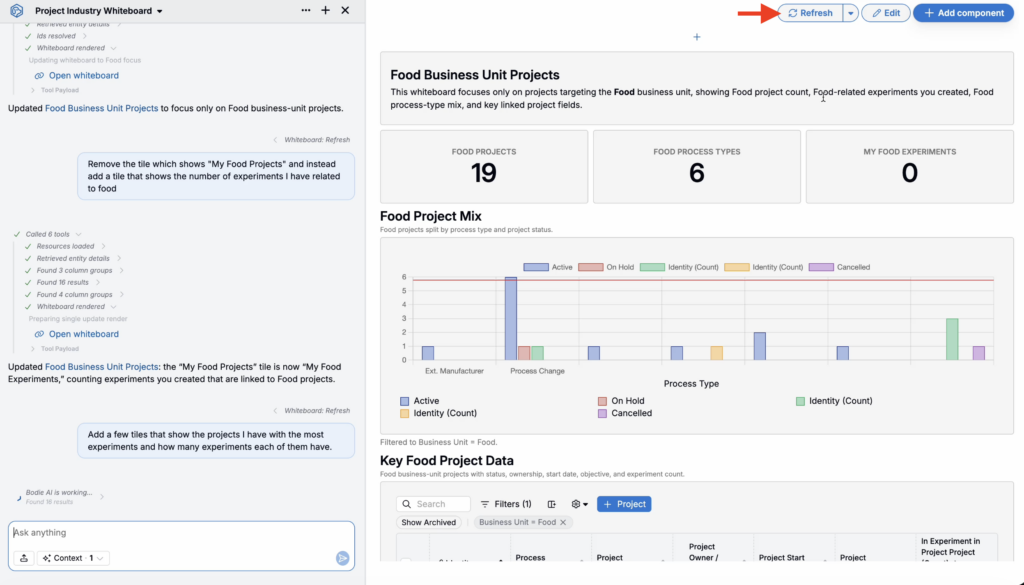
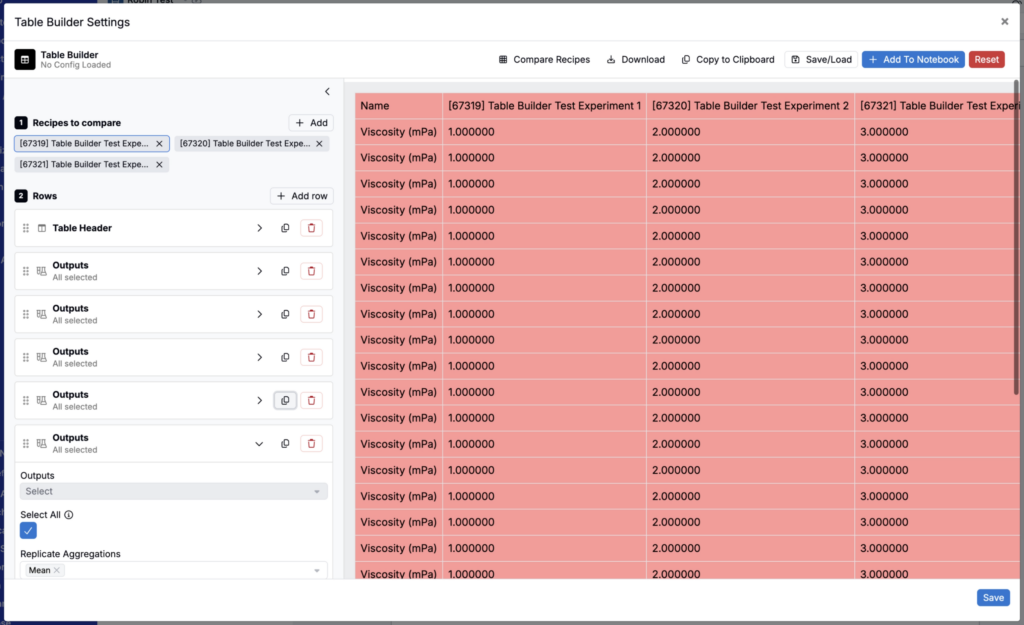
Table Builder Redesign
The Table Builder has been redesigned to make it faster and easier to create notebook tables. The new layout places configuration and a live table preview side by side, so users can see changes as they make them instead of switching between setup and output.
The redesign also removes much of the modal-heavy workflow. Settings that previously opened separate modals now appear as inline dropdowns, and users can add rows or columns by interacting directly with the table preview. This makes table setup feel closer to editing the table itself.
The update also adds new table styles, Comfortable and Compact spacing options, and a preset for importing recipes from the current project. Together, these changes help users create cleaner, presentation-ready tables with less formatting cleanup.