Formulations created within Uncountable can be linked to inventory, representing the amounts of materials used in the lab. This integration allows users to ensure that sufficient quantities of any required material are available at a location to execute a recipe or manage different batches of items.
Inventory Listing
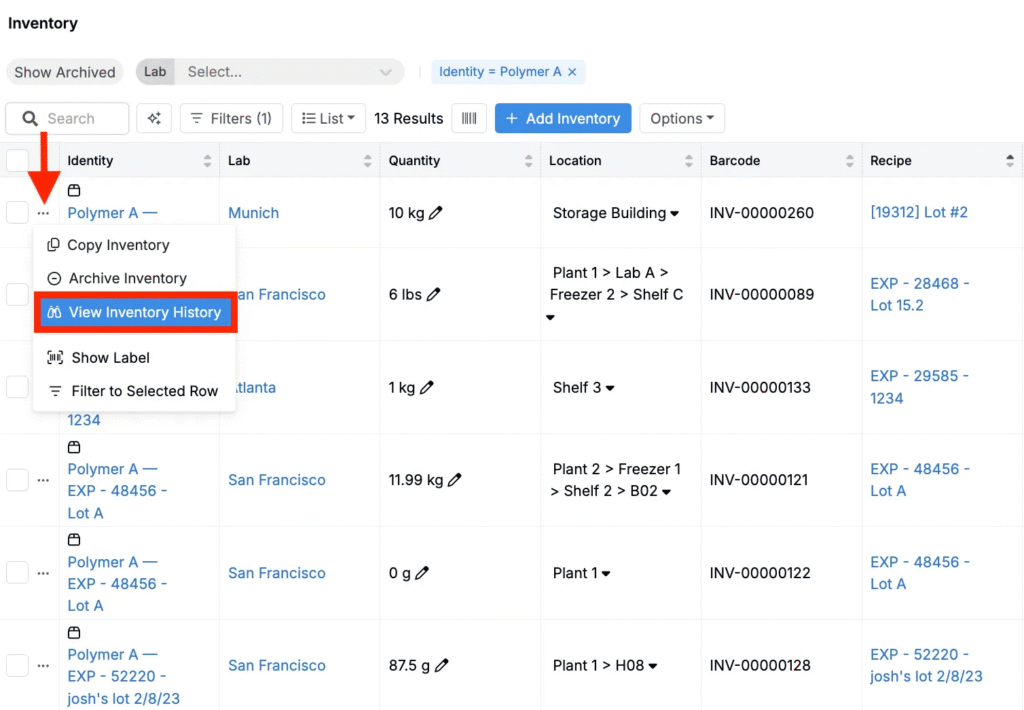
Users can manage their inventory on Inventory listing page (Lab > Inventory), which provides an overview of all inventory within the current material family. Key details, such as lab, location, quantity, ingredient, and associated recipes, are stored and displayed.
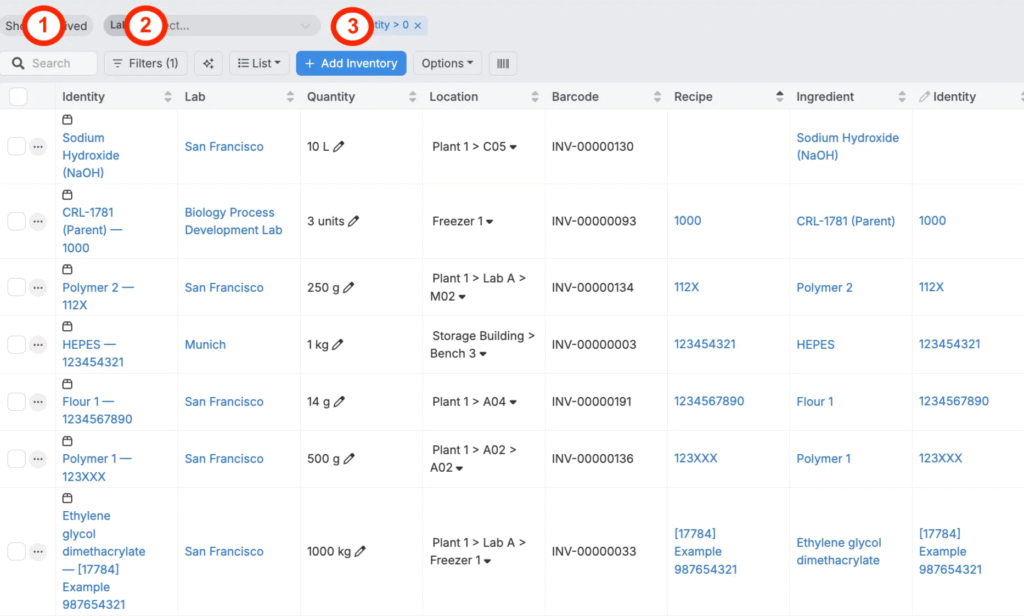
From the listing, users can:
- Search (1): Use the search bar to locate specific items within the inventory quickly.
- Filter (2): Apply filters to refine search results by including or excluding specific attributes or metadata. For example:
- Filter by location: If a lab has multiple locations, specify the desired location by adding a location filter.
- Filter by attributes: Narrow results by adding filters like Ingredient Attribute + Surface Area = [value] to display only ingredients with a specific surface area.
- Add Inventory (3): Click the blue + Add Inventory button to add new items to the inventory.
To learn more about adding experiment-related columns to the Inventory listing, see this guide.
Adding New Inventory
To add inventory from the listing page:
- Click Add Inventory.
- In the modal, select one of the tabs to dictate where the inventory should be added.
- New Lot: Add inventory to a new lot
- Existing Lot: Adds inventory to an existing lot
- Experiment: Adds inventory to an experiment
- No Lot: Adds inventory to a location, without a lot
- Experiment Group: Adds inventory to an experiment group

Inventory information can be added manually or via the unique barcode provided by the manufacturer and tied to any given ingredient:
- Via barcode — Enter the barcode information into the Barcode field (1) to autofill lot information.
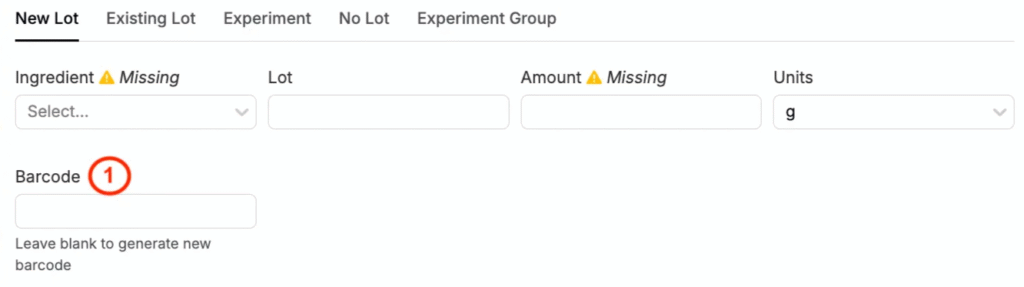
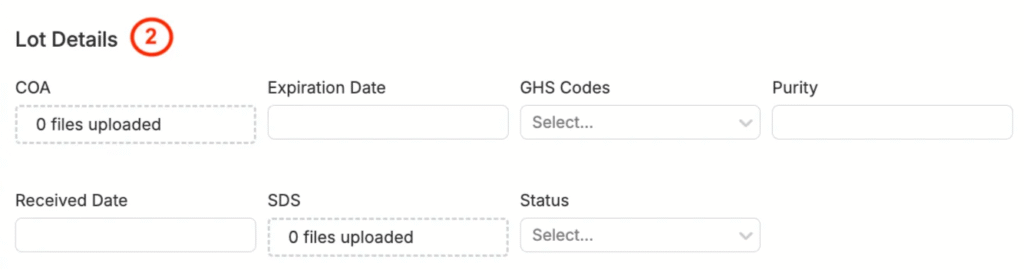
- Manually — If not using a barcode, users can manually enter Lot Details (2). Leaving the Barcode field blank will generate a new barcode.
- Fill out the following required fields:
- Inventory Information — when adding to a new lot, existing lot, or “no lot”, select the ingredient and amount, with units. When adding to an experiment or experiment group, select the experiment or experiment group to add to.
- Location: Select a lab and inventory location to add the inventory to. Users can manually select, by clicking the Lab icon, or use the barcode scanner.
- Note: When adding inventory to a new Lot (creating a new Lot) leave the Lot field blank. A name will be generated automatically.
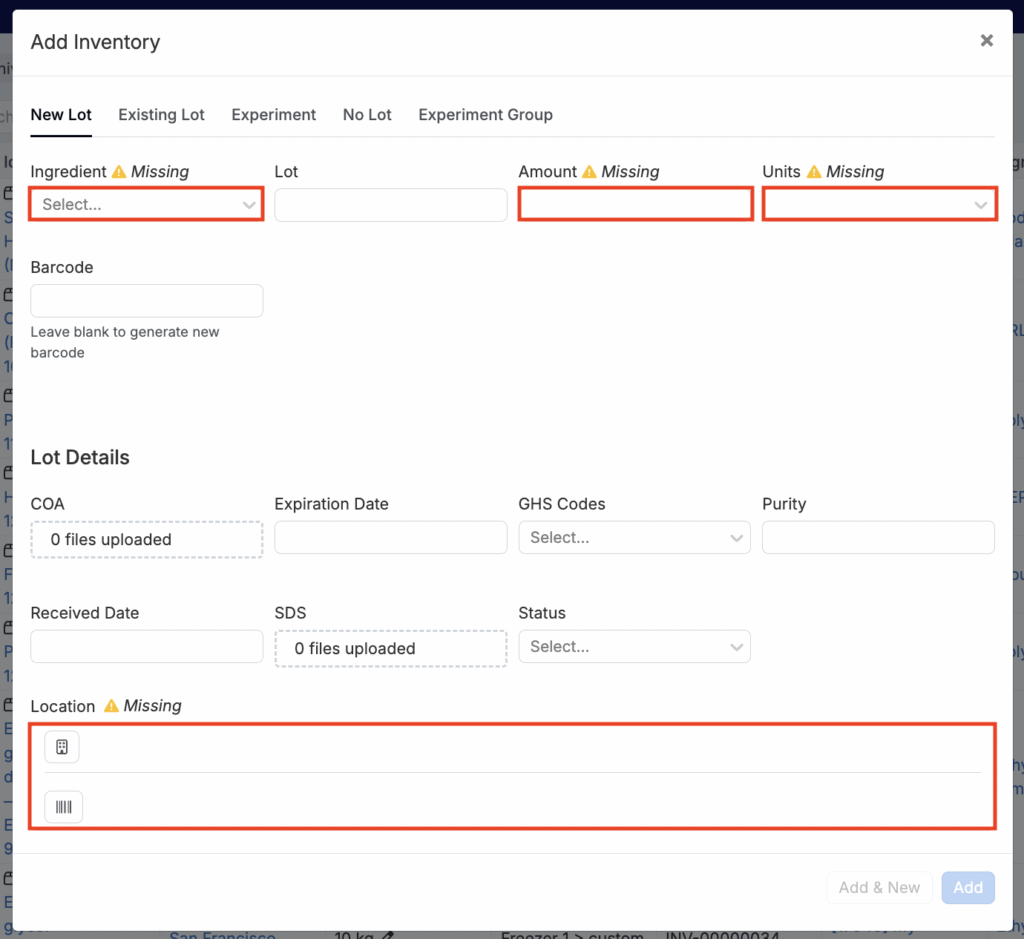
Note: The fields available within this modal are configurable. Learn more.
Bulk Importing or Updating Inventory
You can also create or inventory in bulk via the Inventory Importer. To learn more, refer to Importing Inventory.
Viewing Inventory History
Each item listed on the Inventory Listing page has an associated Inventory History page, which logs changes to the inventory over time.
To view history for a specific inventory item:
- Click the “…” button on the left side of the item’s row.
- Select Inventory History from the dropdown.
The Inventory History page shows a table of all changes to that inventory item. Each row includes:
- Date — date of the inventory change
- Amount — change amount (e.g., +50 g, -30 mL)
- Lot — the specific lot of the inventory used
- Location — the inventory’s location within the lab
- User — the individual who made the change
- Reason — the reason for the change in inventory (e.g., “Used in Experiment X,” “Transferred from Lab A to Storage Building,” or “Created with quantity Y”)
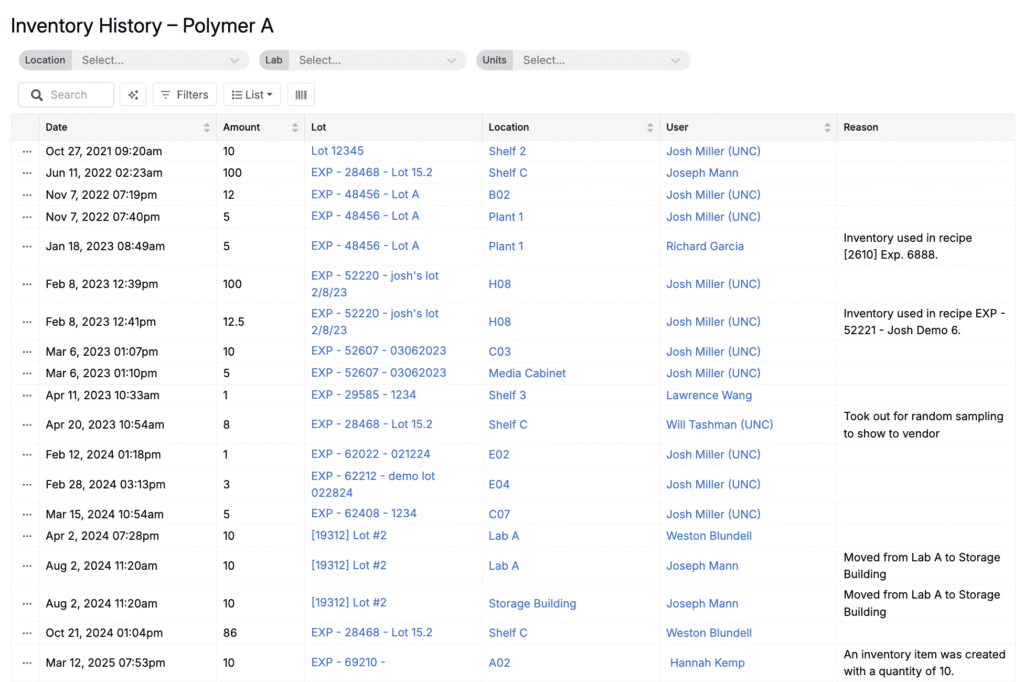
At the bottom of the page, a graph visualizes the inventory quantity over time.
