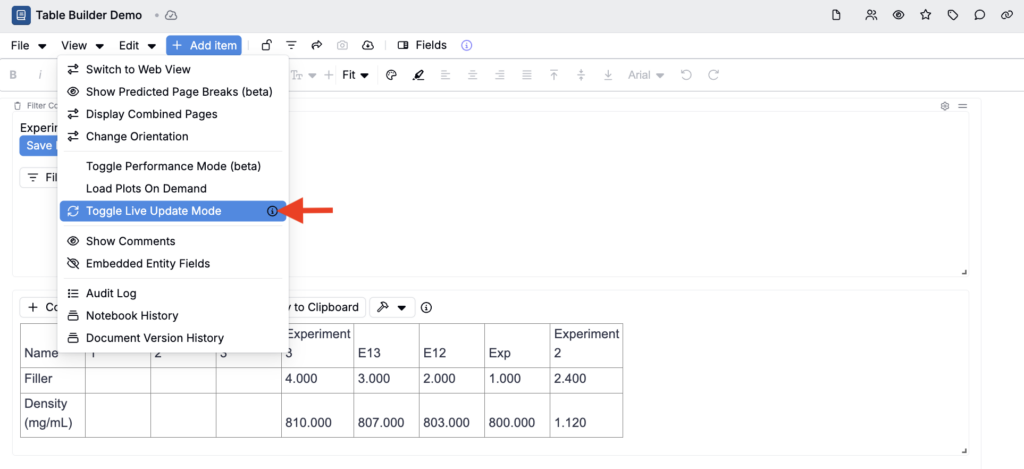
Uncountable’s Table Builder lets you assemble highly customizable data tables inside a notebook, with more control than a standard Compare table. Use it to present recipes, conditions, outputs, specs, and annotations in a single, formatted table that you can save and reuse.
Add a Table Builder Cell
- Open a Notebook.
- Click Add Item and choose Table.
- This adds a blank table cell to your notebook page.
- To build the table, click the 🔨 icon > Build Table.
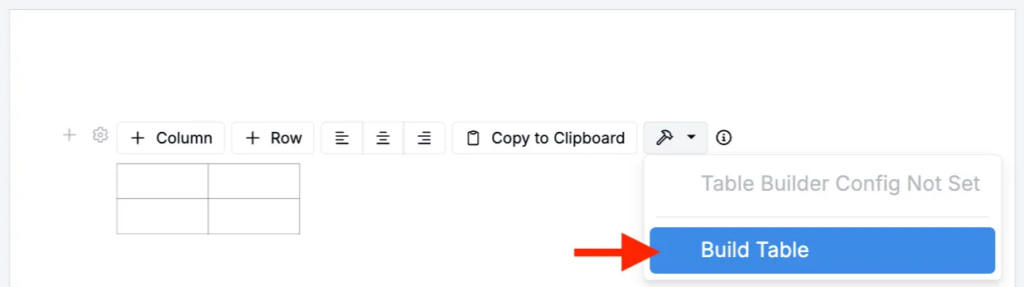
Table Builder Settings
The Table Builder editor has three main sections:
- Recipes – Choose which recipes the table covers; optional transpose.
- Header Columns – Define the columns that appear at the top of the table.
- Rows – Choose the row types to populate the body of the table.
Recipes
Use the Recipes dropdown to select the recipes included in the table.
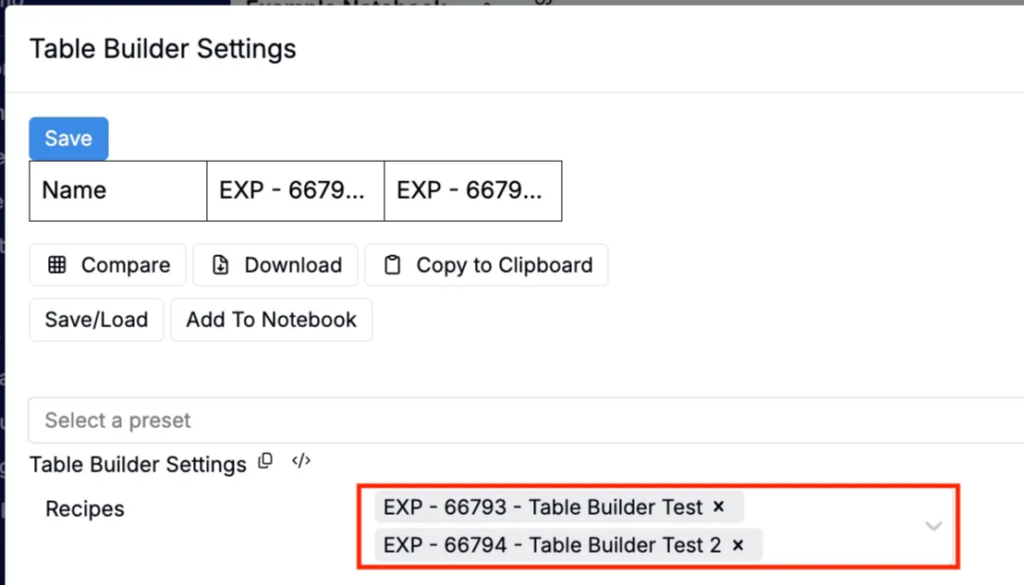
Selecting table recipes
Header Columns
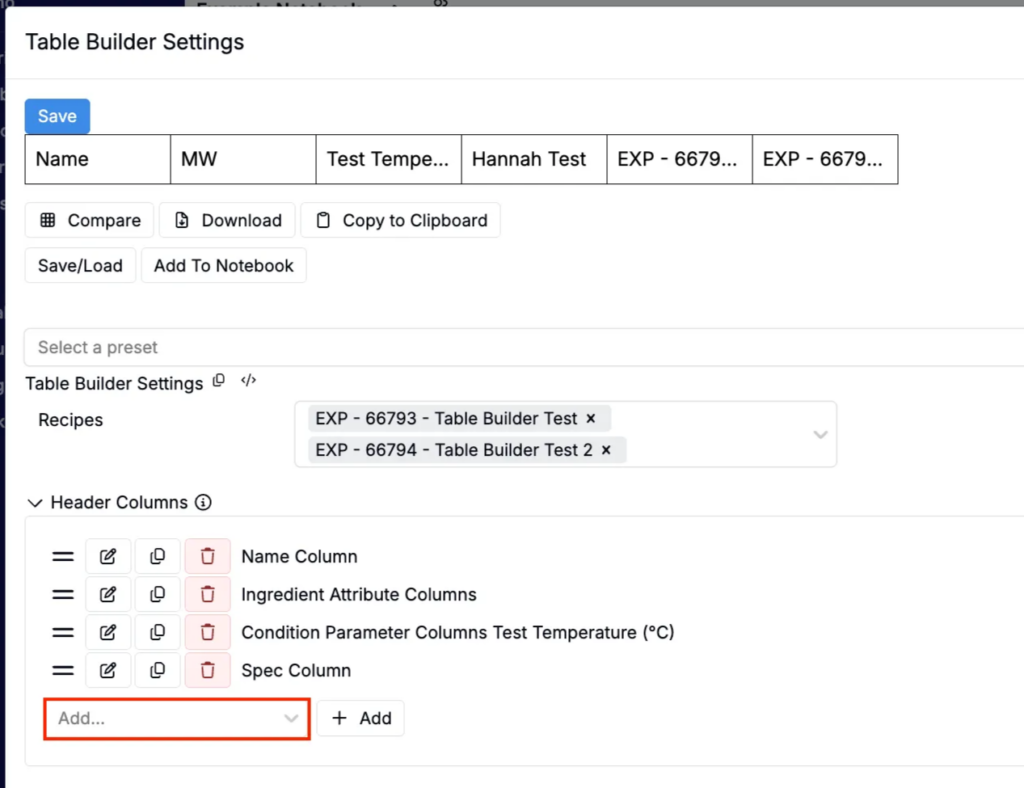
Start with the preloaded Name column, then use the Add dropdown to include:
- Ingredient Attribute Columns – e.g., Molecular Weight, Supplier, Purity.
- Condition Parameter Columns – e.g., Test Temperature, Method, Cure Time.
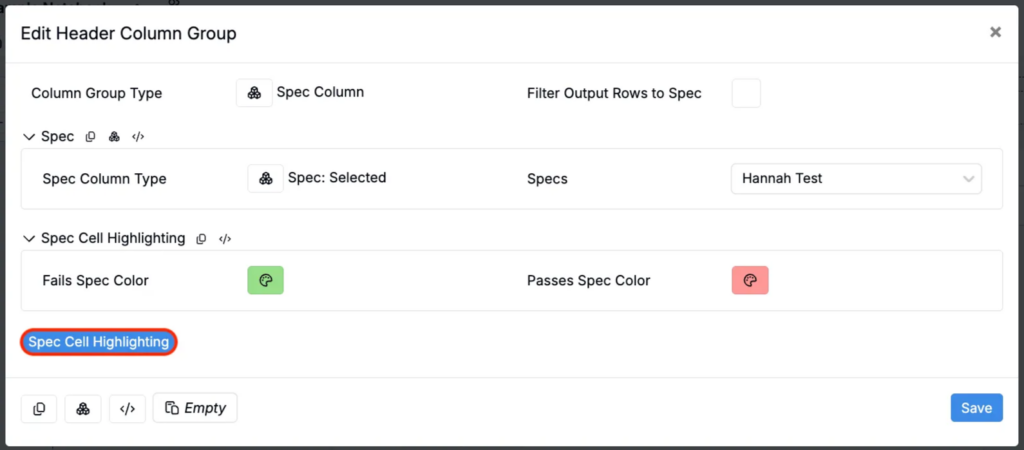
- Spec Columns – Pull in Project Specs or per‑recipe specs.
- Add optional Spec Cell Highlighting to highlight table cells to reflect whether or not cells pass or fail the spec in the column.
- Condition Name Columns — Add the names of selected condition parameters as columns. Use when you want a per‑recipe column that labels the condition applied, such as Temperature or Cure Method.
- Ingredient Lot Columns — Show the lot identifiers for chosen ingredients per recipe to document material provenance and traceability.
- Workflow Step Columns — Add a column showing the associated workflow step.
Rows
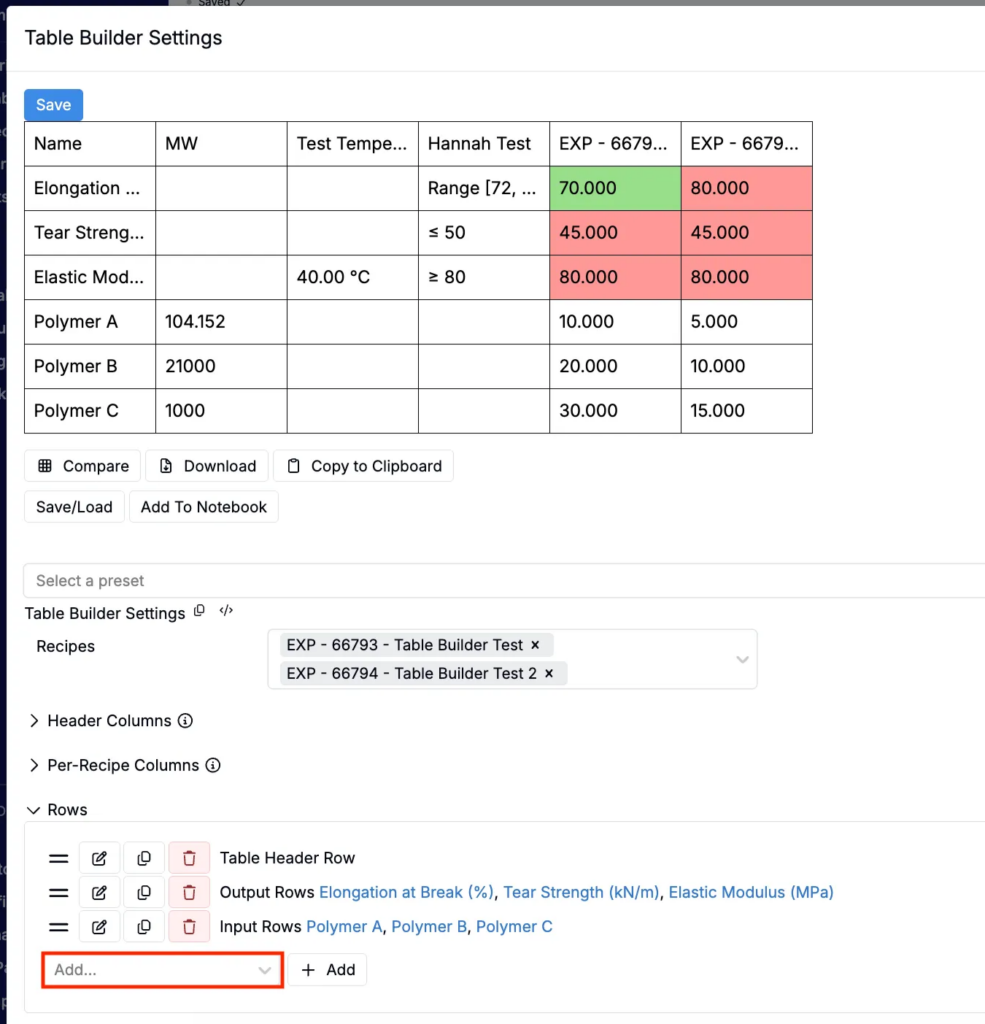
Start with the preloaded Table Header row, then use the Add dropdown to include:
- Ingredient Rows
- Ingredient Rows — Manually pick which ingredients to include.
- All Ingredient Rows — Automatically include all ingredients from the recipe view.
- Output Rows
- Output Rows — Manually pick which outputs to include.
- All Output Rows — Automatically include all outputs from the measurements view.
- Calculations Rows
- Calculations Rows — Manually pick which input calculations to include.
- All Calculations Rows — Automatically include all input calculations.
- Recipe Metadata Rows
- Recipe Metadata Rows — Manually pick which metadata to include.
- All Recipe Metadata Rows — Automatically include all metadata from the experiments.
- Value Spec rows — Compute and display values directly in your table using value spec. Learn more.
Formatting
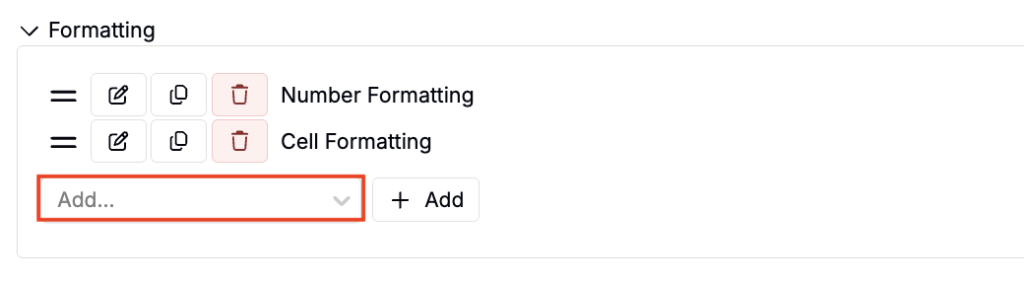
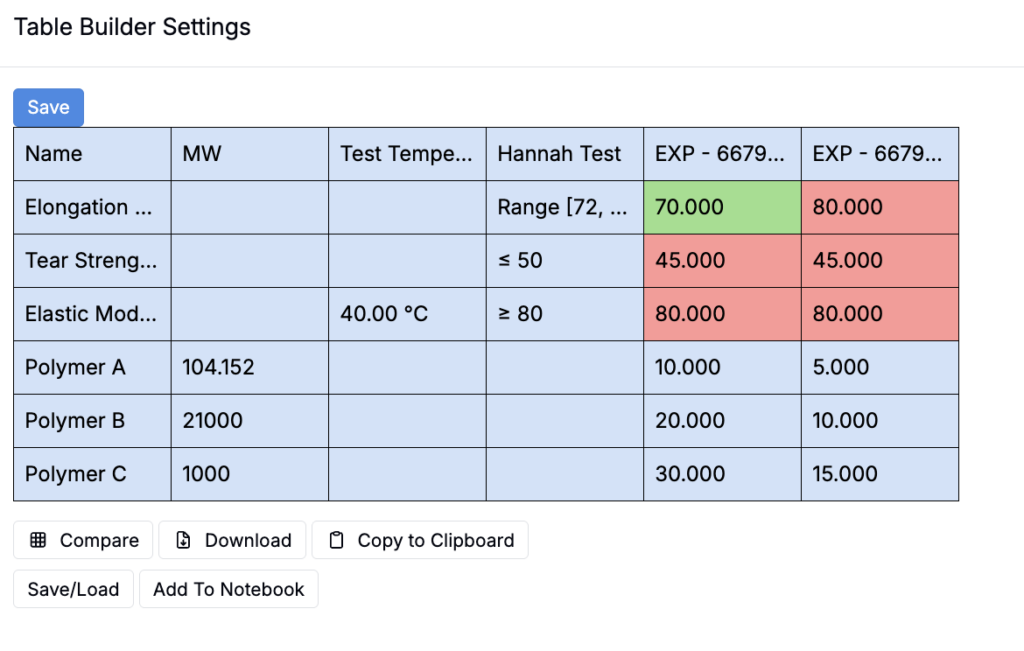
Under Formatting, use the Add dropdown menu to add custom text, number, and cells formatting and styling. As you adjust formatting, the preview updates immediately.
- Text Formatting
- Bold, color, and font size
- Expand Text to Fit, Cut Off Text, or Wrap Text control cell layout.
- Number Formatting
- No Rounding – Show values exactly as entered in on the experiment.
- Decimal Rounding – Set decimal places; optionally display trailing zeros.
- Significant Figure Rounding – Set significant figures.
- Cell Formatting
- Apply background colors to highlight cells or sections.
- Regex Color Scale Point
- Add regex-based background color formatting for cell values, so specific patterns automatically highlight.
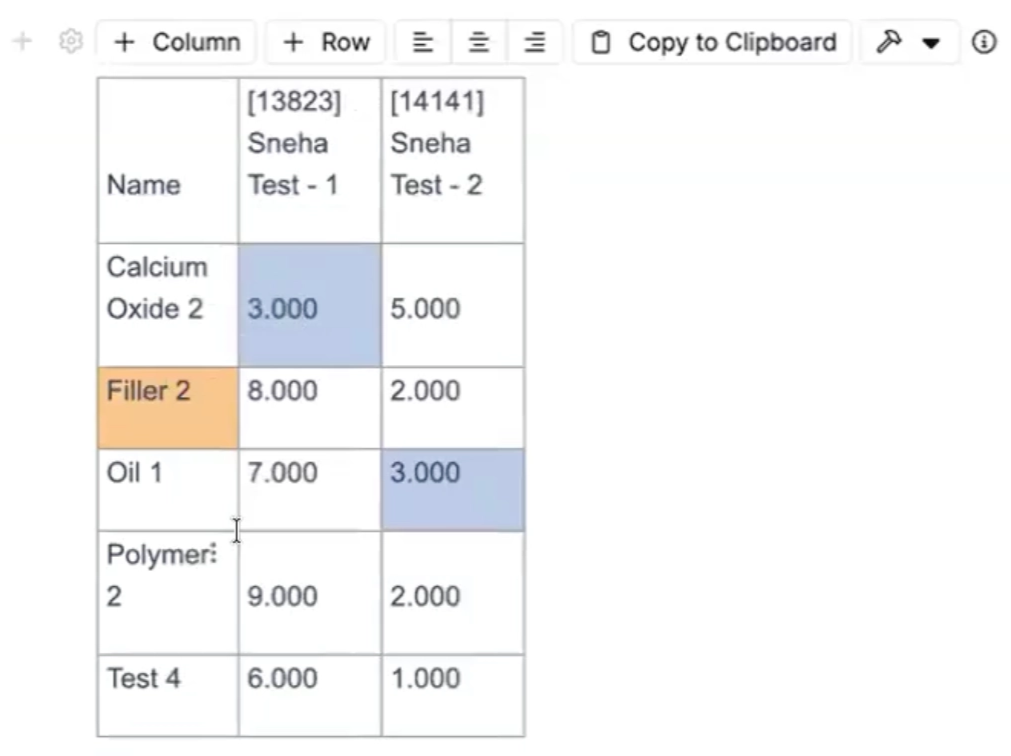
To add regex-based formatting:
- Add Cell Formatting.
- Add Background Color formatting. Set Color type to Color Scale and points to Regex Color Scale Point.
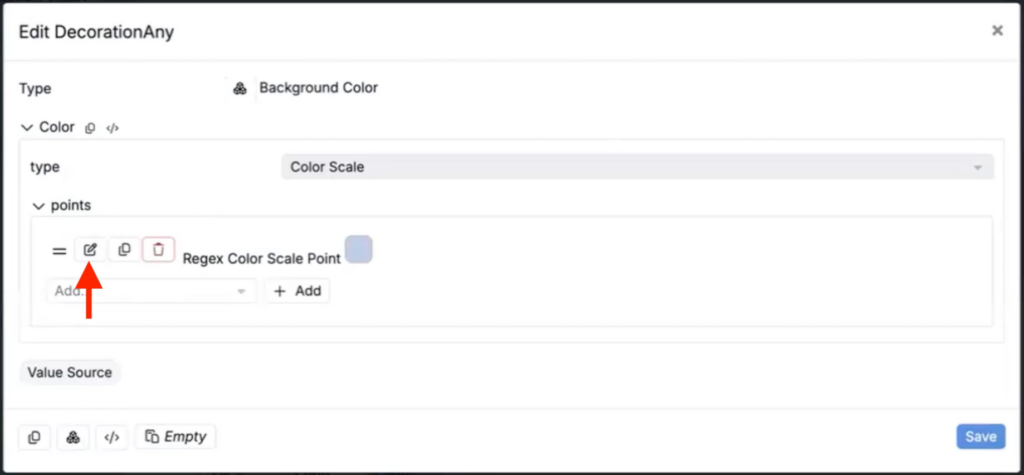
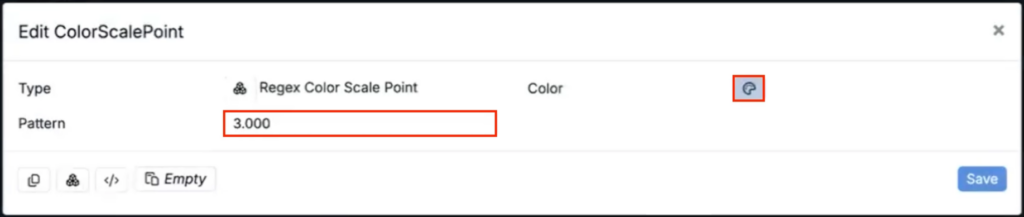
- Choose the background color and pattern.
- Save. Any cell matching the pattern will automatically display the configured background color.
Cell Formatting by Output
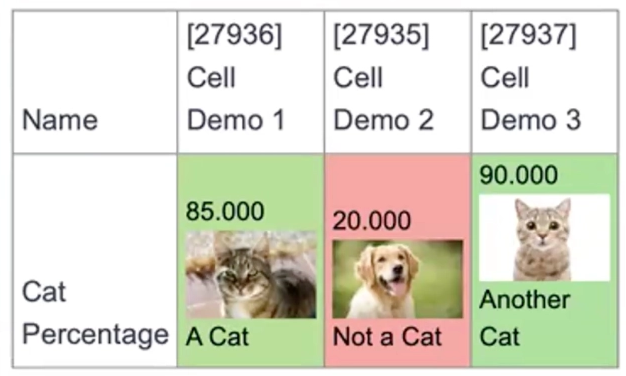
Using an Output value source for cell decorations, users can select an output to color by and define color scale points. Cells are colored based on the points you set, with a gradient applied between them.
This is useful especially useful for Combined rows, where each cell’s background color is driven by a specific output but the table’s visible outputs are frequently re-ordered or replaced. By selecting the output controlling cell color directly, the formatting continues to work even if that output appears in a different position or isn’t shown.
How to configure
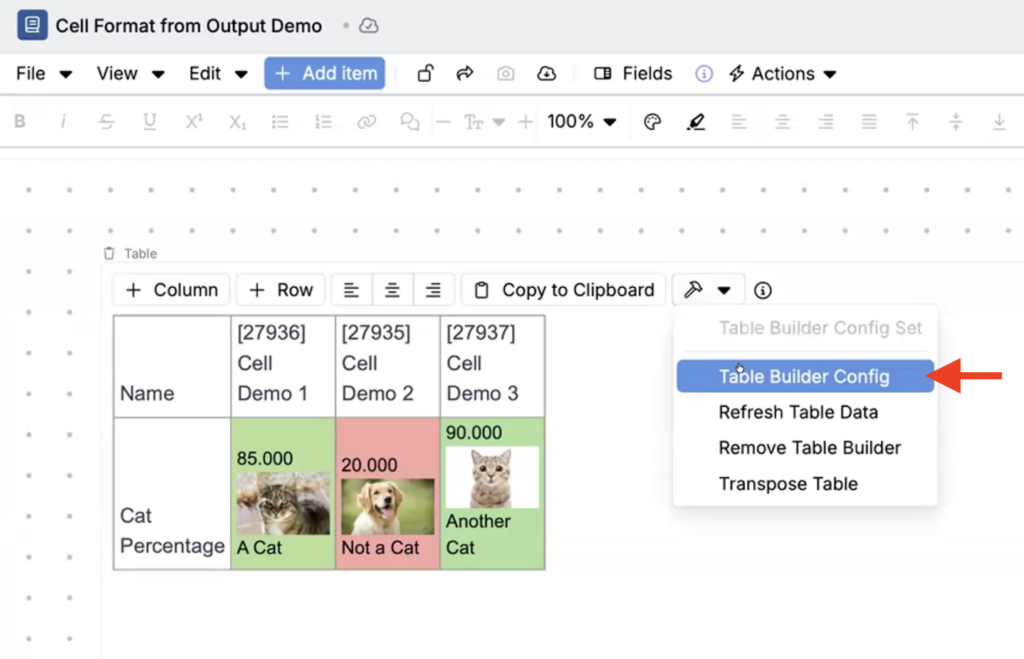
- On your notebook table, open the Table Builder Config.
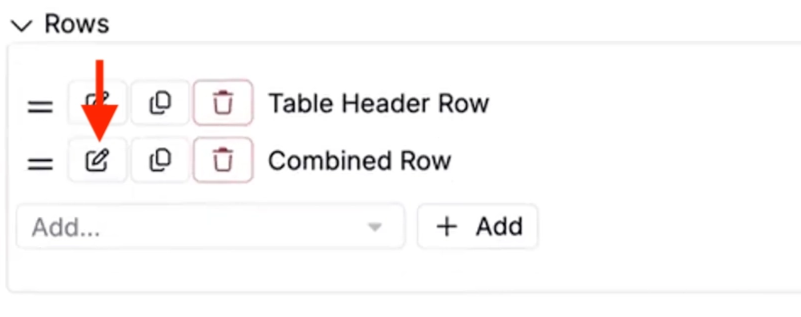
- Edit the column or row you want to add formatting for.
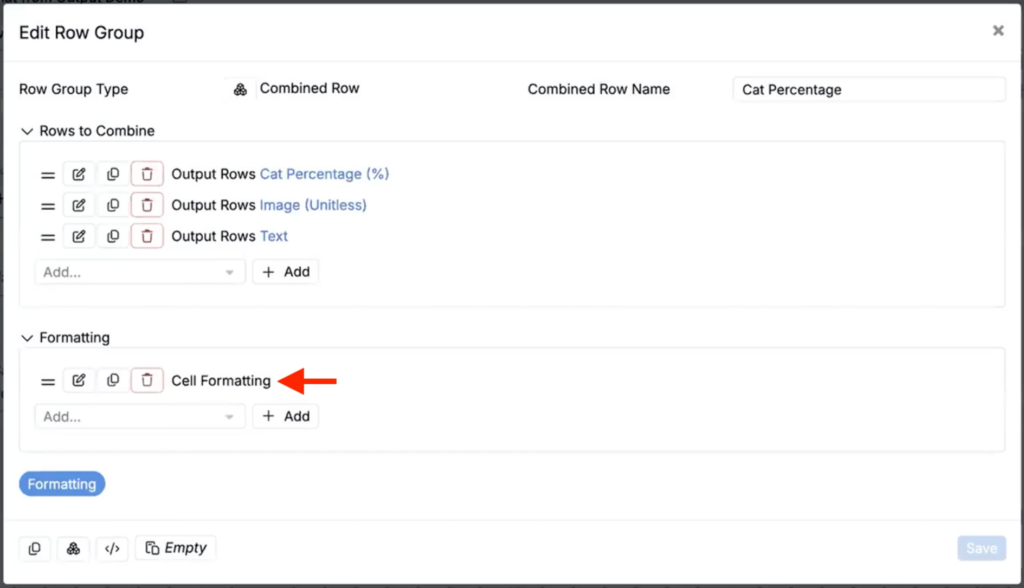
- Under Formatting, add Cell Formatting.
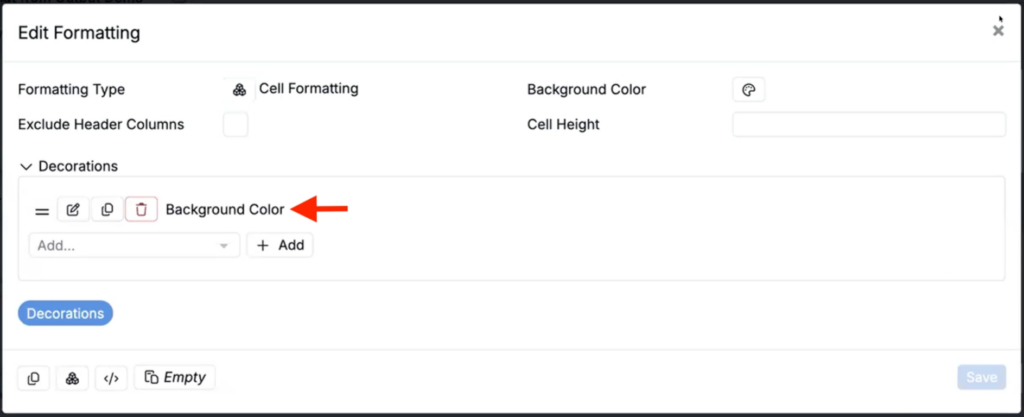
- In the Edit Formatting modal, add a Background Color decoration.
- In the Edit Decoration modal, add an Output type value source and select the output you want to format/color by.
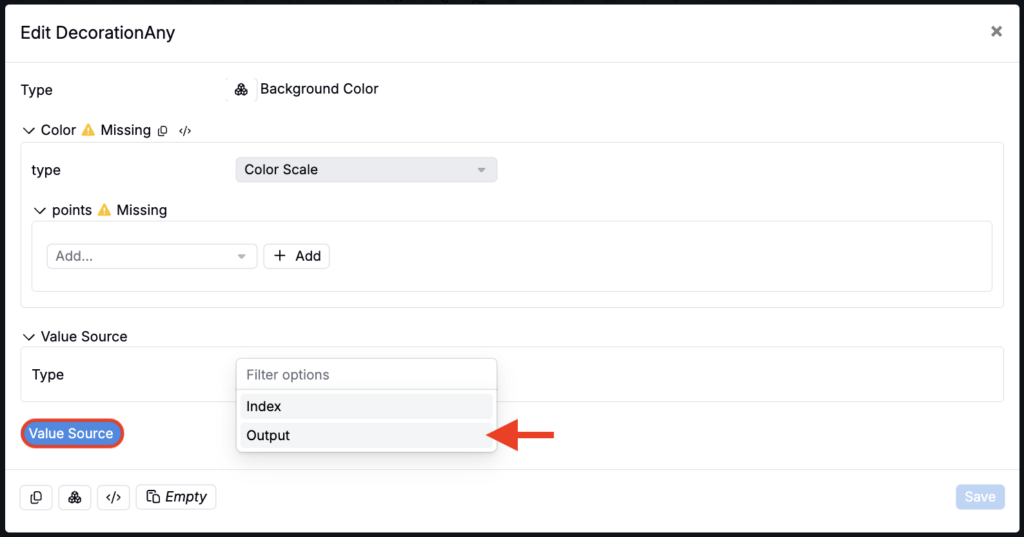
- Under Points, add Color Scale Points by selecting a color and setting the value for that point. Values between points will display as a gradient between the selected colors.
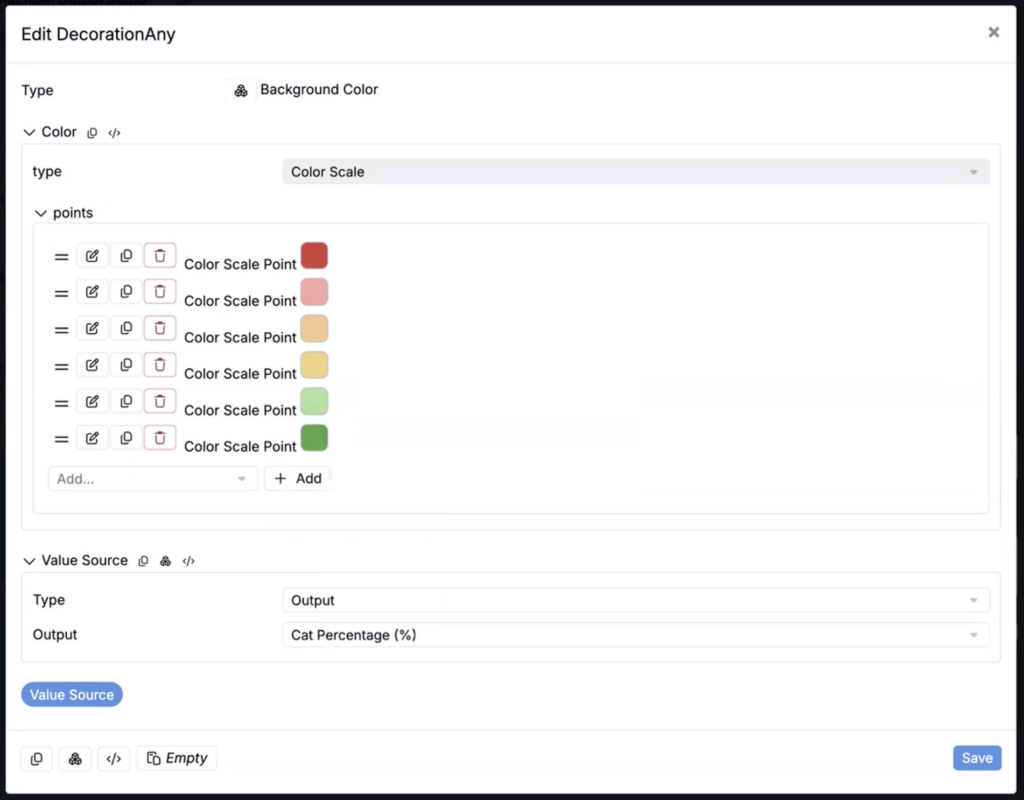
- Click Save to save apply your changes.
Adding to Notebook
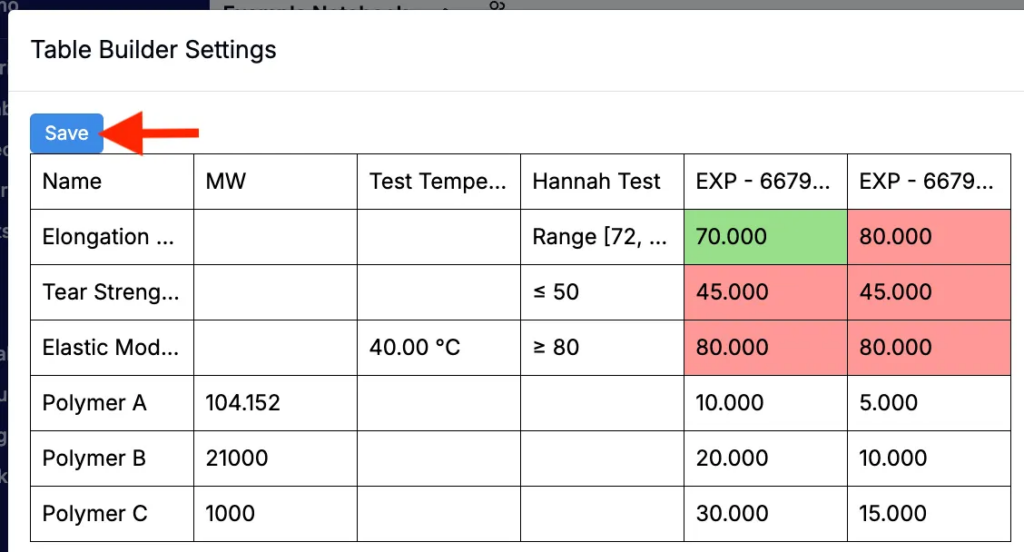
Once your preview reflects your desired table, click Save to add it into your Notebook.
Save & Load Configurations
Preserve a configuration for reuse:
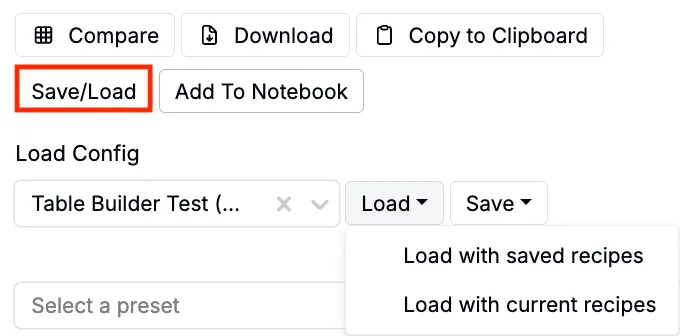
- To save to a notebook, click Save/Load > Save > Save to Notebook.
- To save as a template, click Save/Load > Save > Save as, name it, then Save.
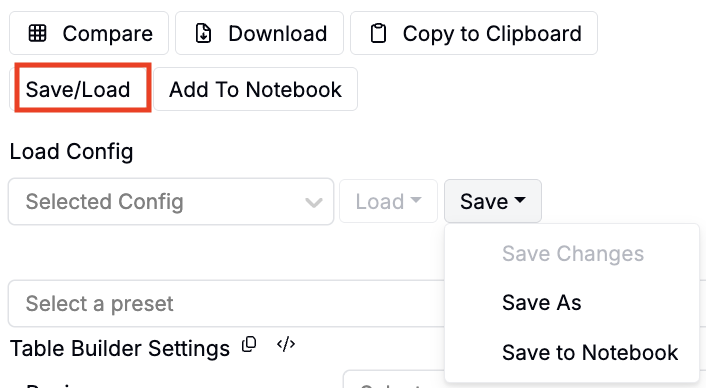
Later, to load a saved configuration:
- Save/Load > choose the configuration > Load.
- Use Load with saved recipes to restore the exact recipe set
- Use Load with current recipes to reuse the layout with your current selection.
Filtering with Filter Controls
Table Builder cells can now be affected by Filter Controls in your notebook. This makes it easier to interactively slice the data shown in a Table Builder cell (for example, narrowing to a specific recipe or subset of experiments) without editing the Table Builder configuration.
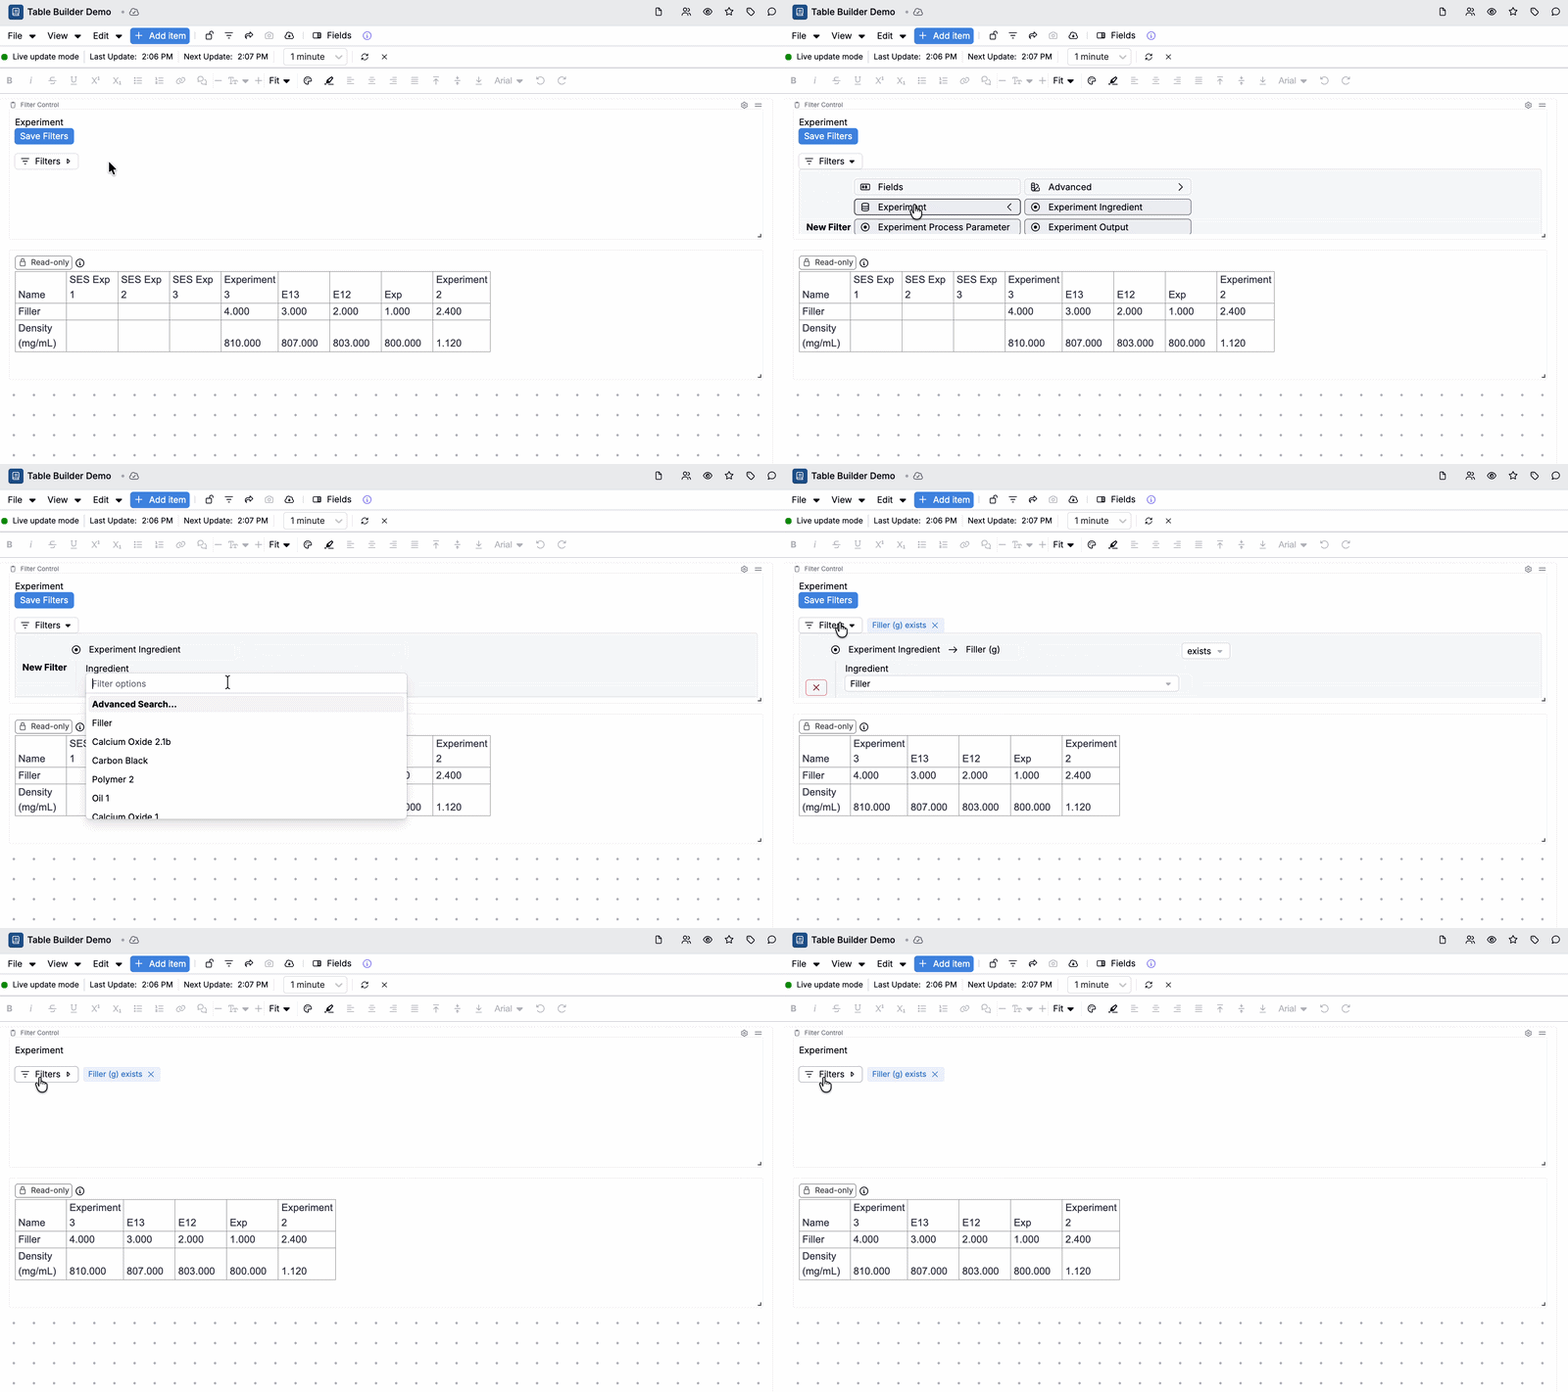
To apply Filter Controls to a Table Builder cell, enable Live update for the cell. When live updates are enabled, the cell will recompute using the current filter state.