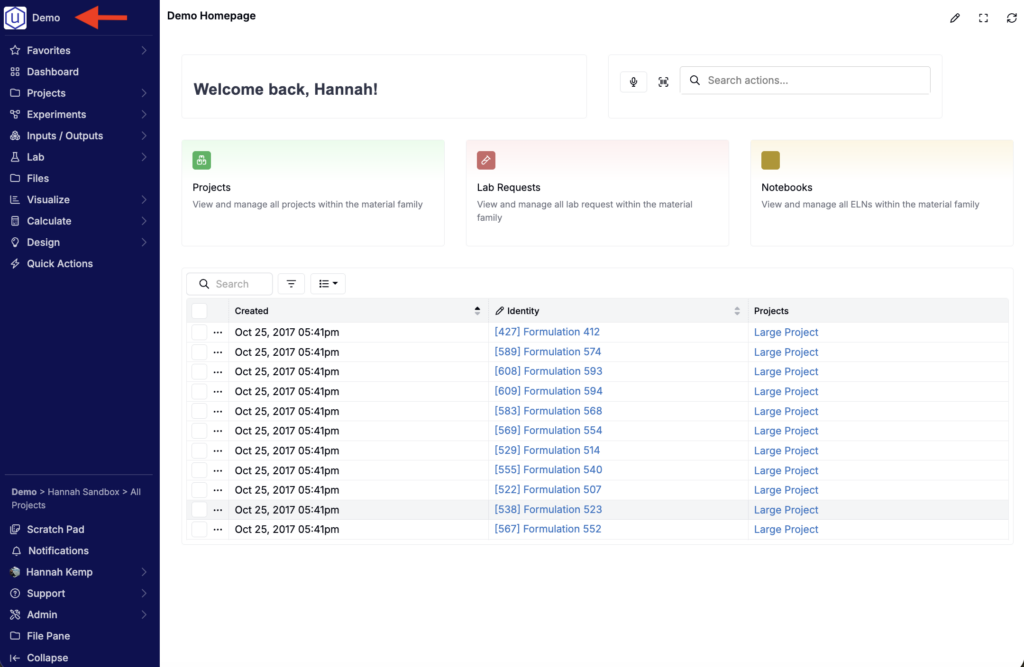
In Uncountable, clicking the logo in the top navigation bar takes users to their homepage. By default, new material families direct users to the Select Projects page. However, you can now configure a custom homepage for each material family.
Custom homepages are built using a dashboard notebook that serves as a tailored landing page for your team. Use a custom homepage to highlight key workflows, centralize important links, and display relevant information as soon as users log in.
Custom homepages are different from landing pages, which are the pages which load when you log into the platform. To learn about landing pages, refer to our Uncountable Landing Pages documentation.
What You Can Add to a Homepage
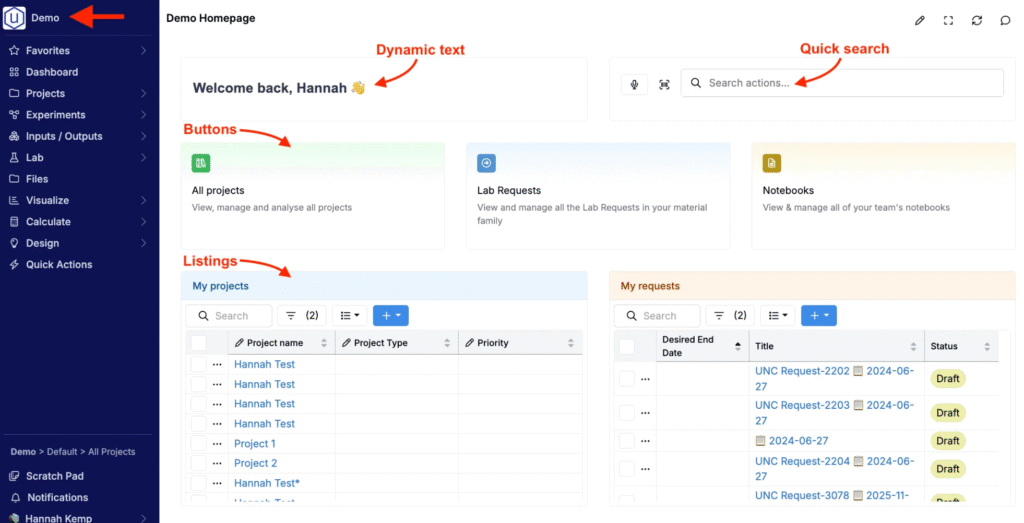
Homepage dashboards are entirely customizable, so each team can design a landing page that fits their workflow and schema. Common elements include:
- Text blocks, including dynamic welcome messaging that updates based on the logged-in user
- Quick Search, so users can quickly find items like lab requests, notebooks, or other entities
- Buttons that link to key pages or workflows (Projects, Lab Requests, Notebooks, and more)
- Listings that display important records, including views filtered to the current user (e.g., “My Projects,” “My Requests”)
Creating a Custom Homepage
Step 1 — Create a dashboard notebook
To create a new homepage, begin by creating a new dashboard notebook.
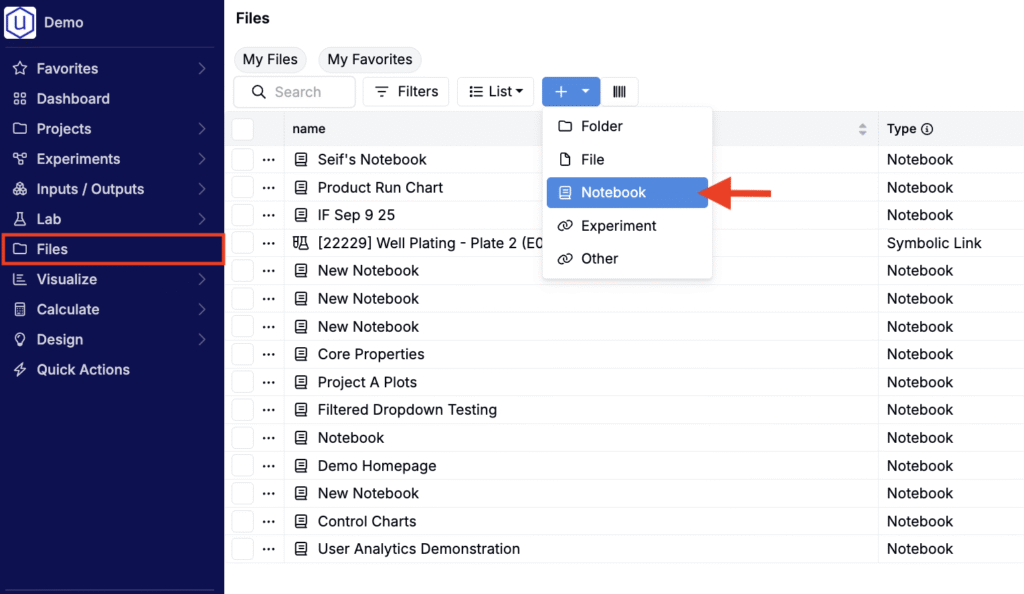
- In the navigation bar, select Files.
- On the Files page, create a new Notebook (+ > Notebook).
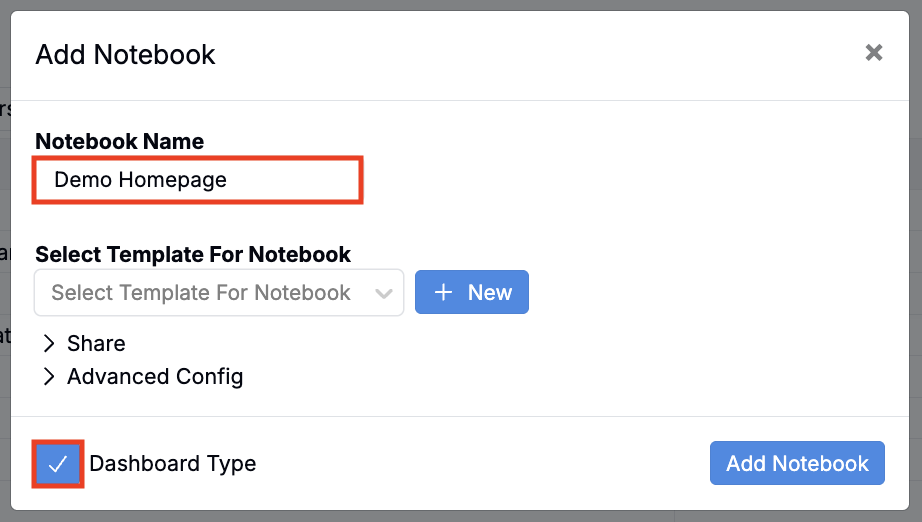
- In the modal, name the notebook and check the box to make it a Dashboard type.
- Click Add Notebook.
Step 2 — Add and configure elements
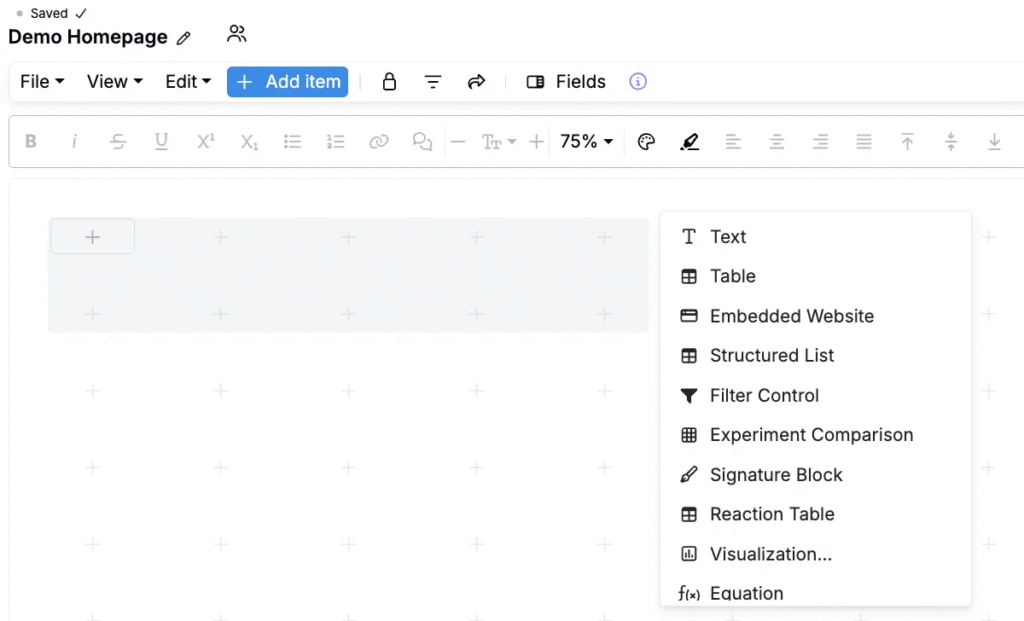
Once created, you’ll be directed to a blank dashboard canvas. Add elements to by clicking Add Item or any of the + icons on the page and selecting from the list of available cell types.
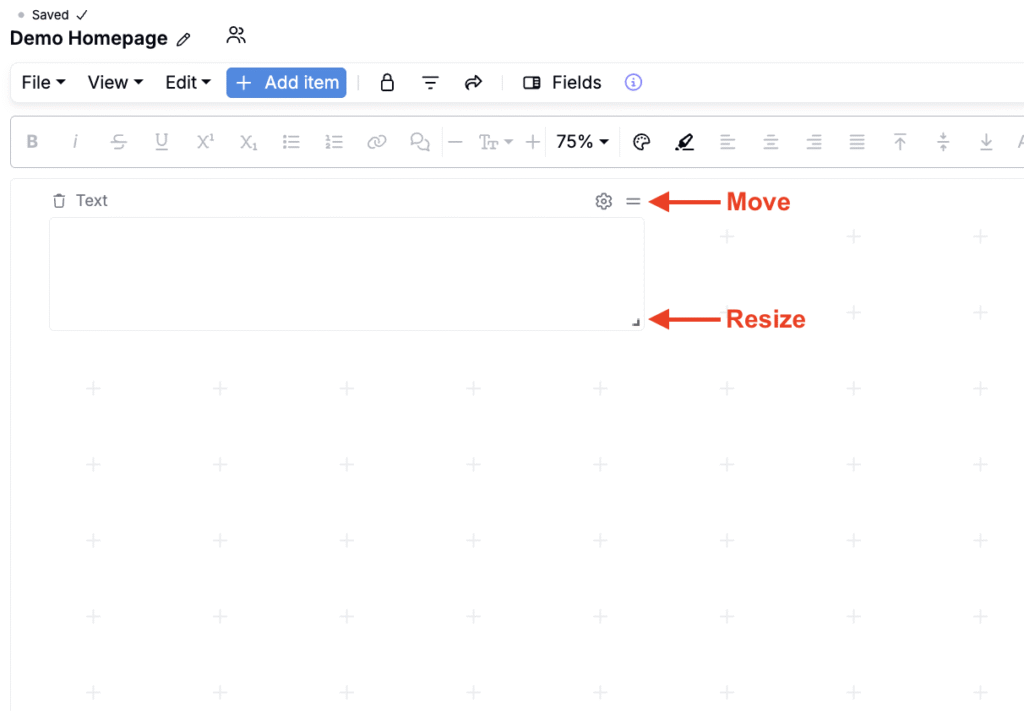
Once added, cells can be moved by clicking and dragging the drag handles in the top right corner and resized by clicking and dragging the arrow in the lower right corner.
Add Text
To add a text block:
- Add a new cell block.
- Select Text.
- Type the desired text into the cell.
- To add text formatting, click the ⚙️ icon above the text cell and select a heading or background color.
Add Dynamic Text
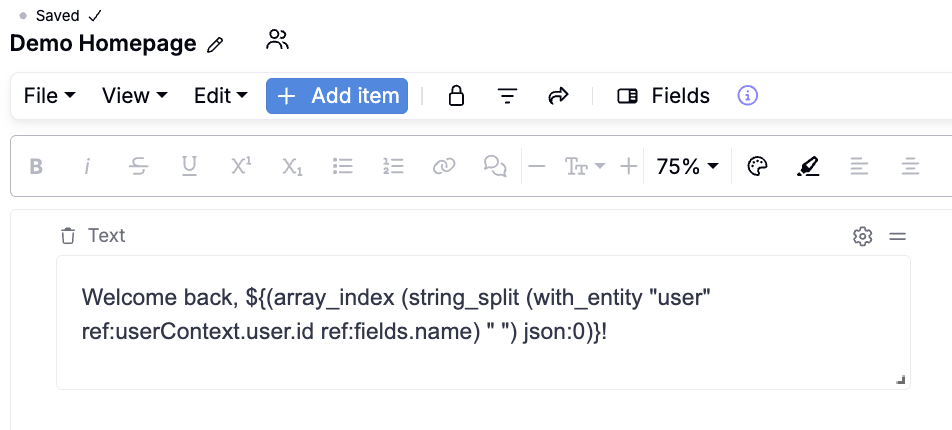
To create dynamic text, you can also include value spec in your text cell.
For example, to create a welcome message that pulls the current user’s name, you could input “Welcome back, ${(array_index (string_split (with_entity “user” ref:userContext.user.id ref:fields.name) ” “) json:0)}!
Add Quick Search
To include a Quick Search cell which lets users find key items directly from the homepage:
- Add a new cell block.
- Select Quick Search.
Add Buttons
Add buttons to homepage to create navigation shortcuts to most important pages within the material family.
- Add a new cell block.
- Select Button.

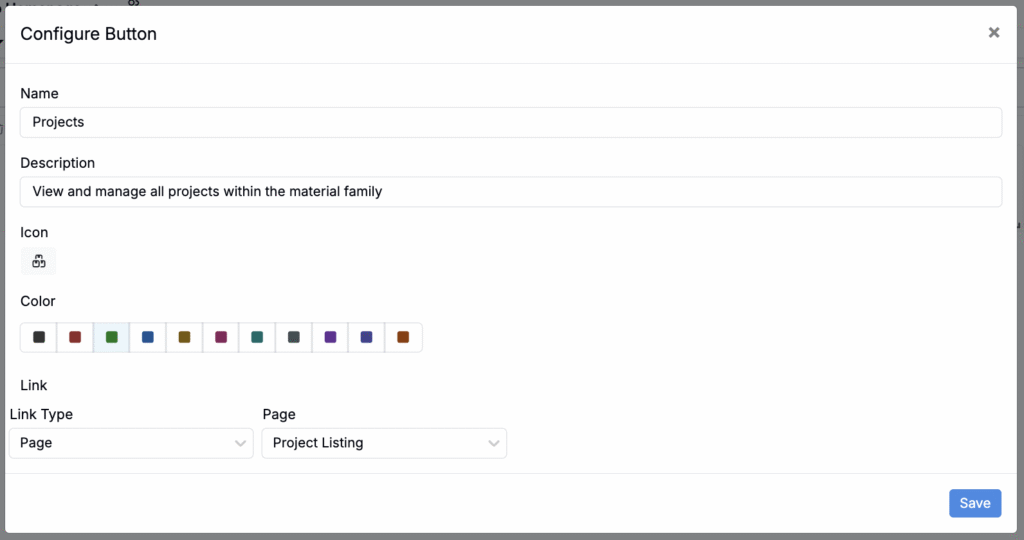
- In the modal:
- Give the button a clear name (e.g. “Projects,” “Requests,” or “Notebooks”) and description.
- Add an icon and background color.`
- Use the Link Type field to select a button destination (Entity, Page, Listing, Custom, or Custom Page).
- Select or input the specific entity, listing, page, or URL you want the button to open.
- Click Save.
Add Listings
Add listings to surface relevant records directly on the homepage.
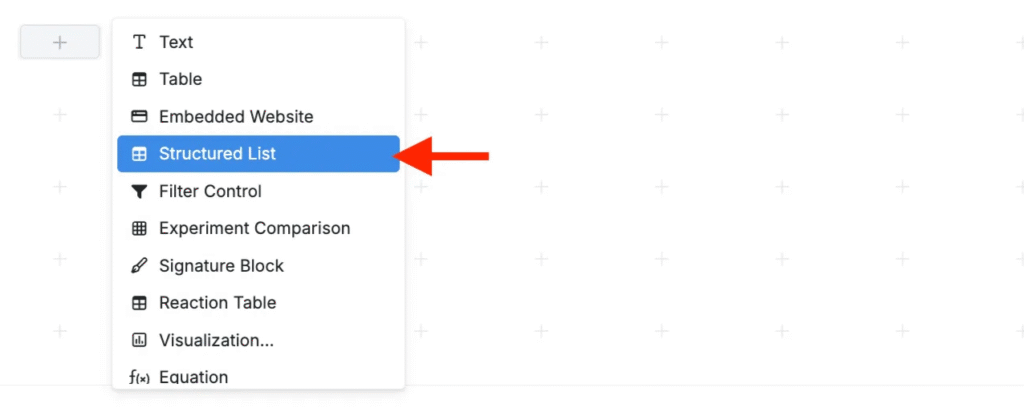
- Add a new cell block.
- Select Structured List.
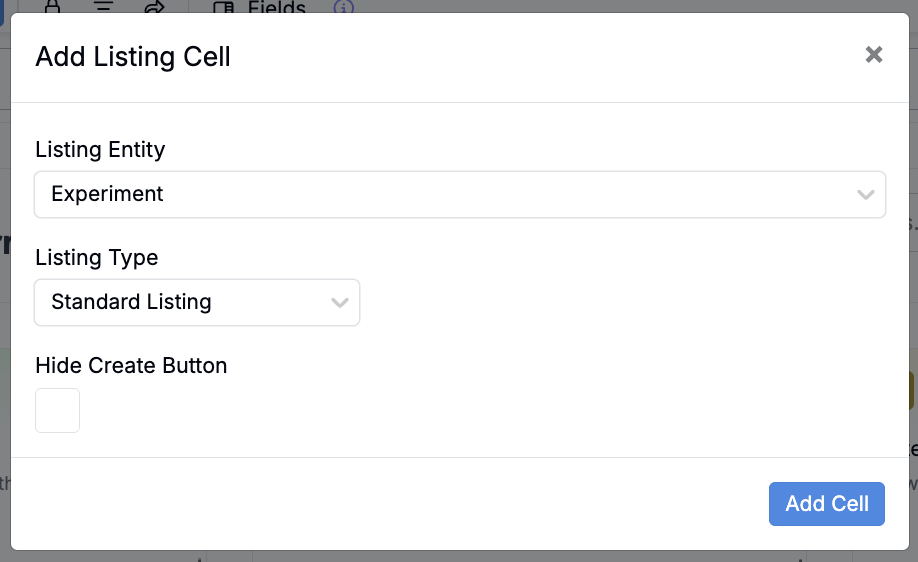
- In the modal, select a Listing Entity and Listing Type.
- To prevent users from creating new entities on homepage listing view, check the Hide Create Button setting.
- Once added, you can add also:
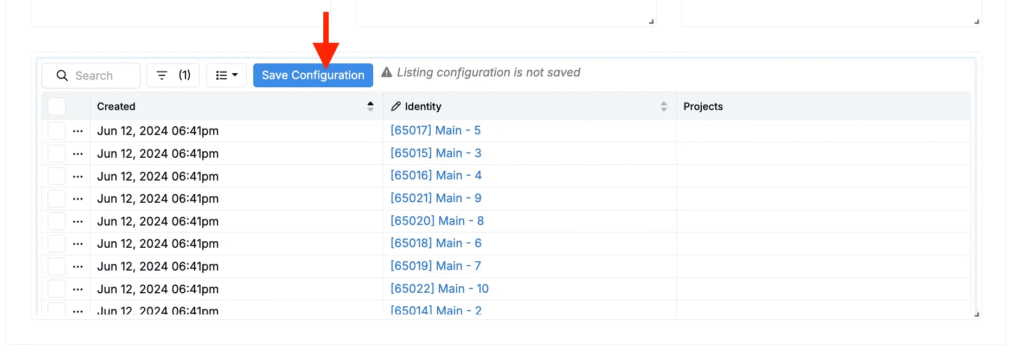
- Enable a Simplified View (List > Tools > View Mode > Simplified View). Learn more.
- Add/remove columns (List > Set Columns). Learn more.
- Add filters and sorting.
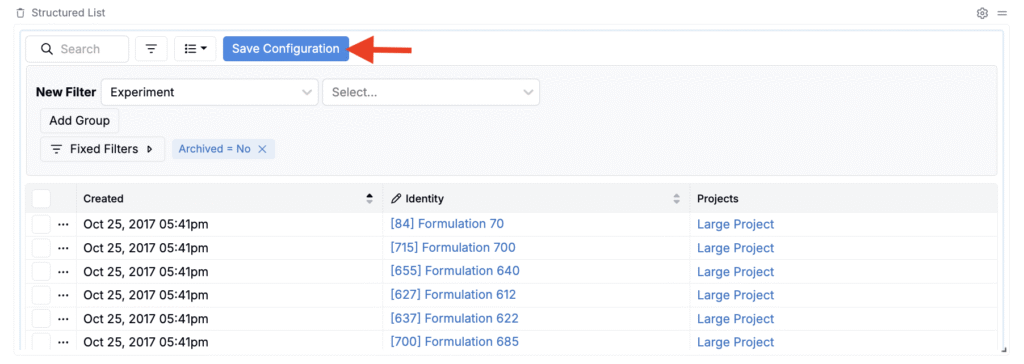
- Once set, click Save Configuration.
Add Dynamic Listings
To create a dynamic listing, add a filter using value spec.
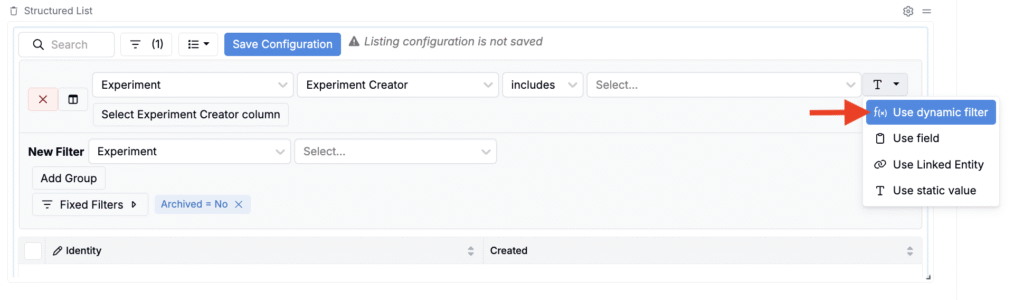
For example, to filter an Experiments listing to display only experiments created by the current user:
- Add an Experiment + Experiment Creator filter.
- Click the T icon and select Use dynamic filter.
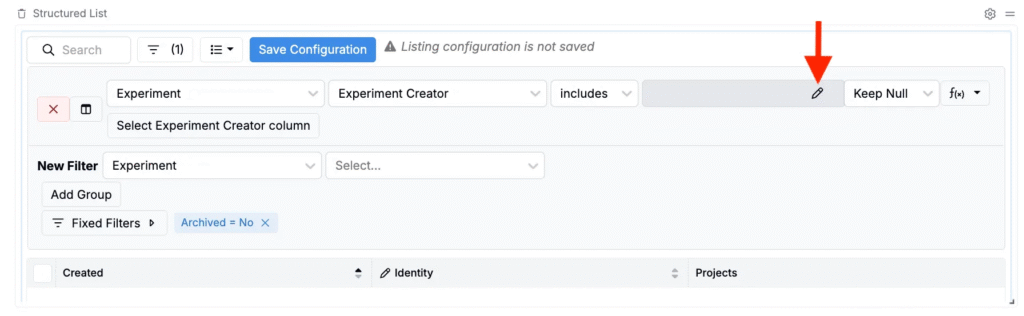
- Click the ✏️ icon to open the value spec editor.
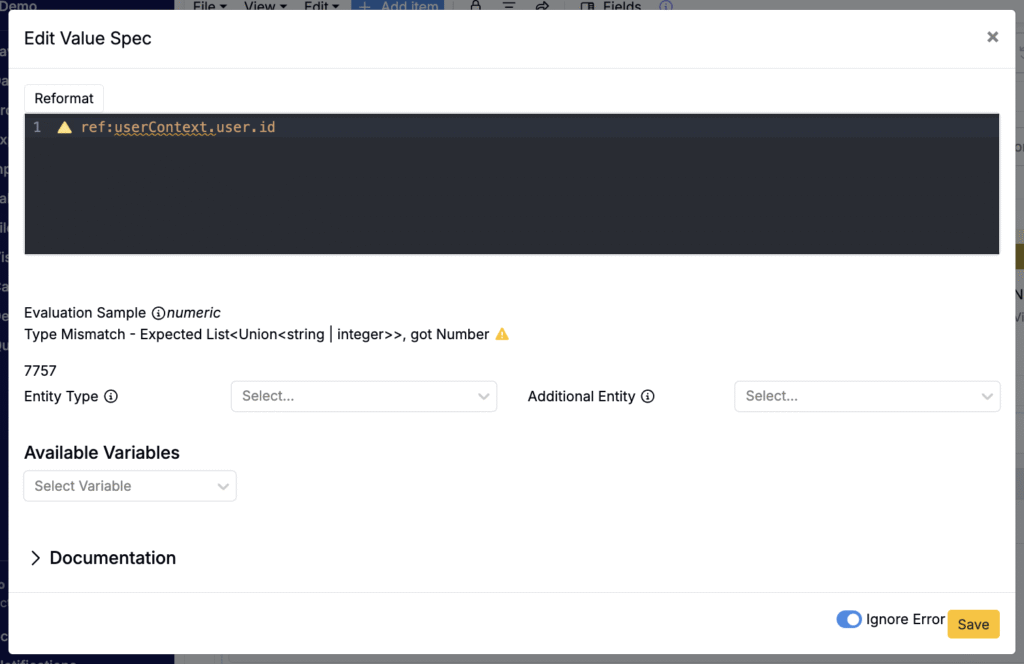
- In the editor, input ref:userContext.user.id.
- Click Save.
- Once set, click Save Configuration.
Step 3 — Set the dashboard as the homepage for a material family
Admins need to set the homepage in two places.
Edit Favorites
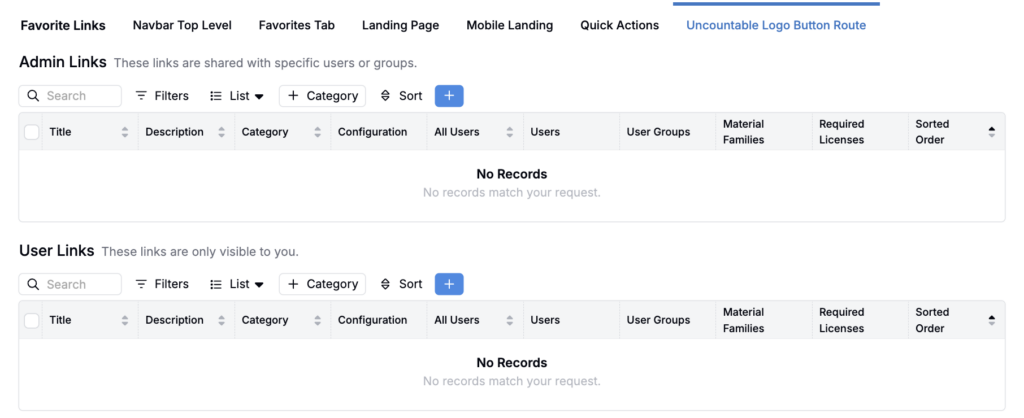
- Open the Uncountable Logo Button Route tab of the Edit Favorites page.
- Click the blue + icon.
- Use Admin Links to set a homepage for a group of users.
- Use User Links to set it only for yourself.
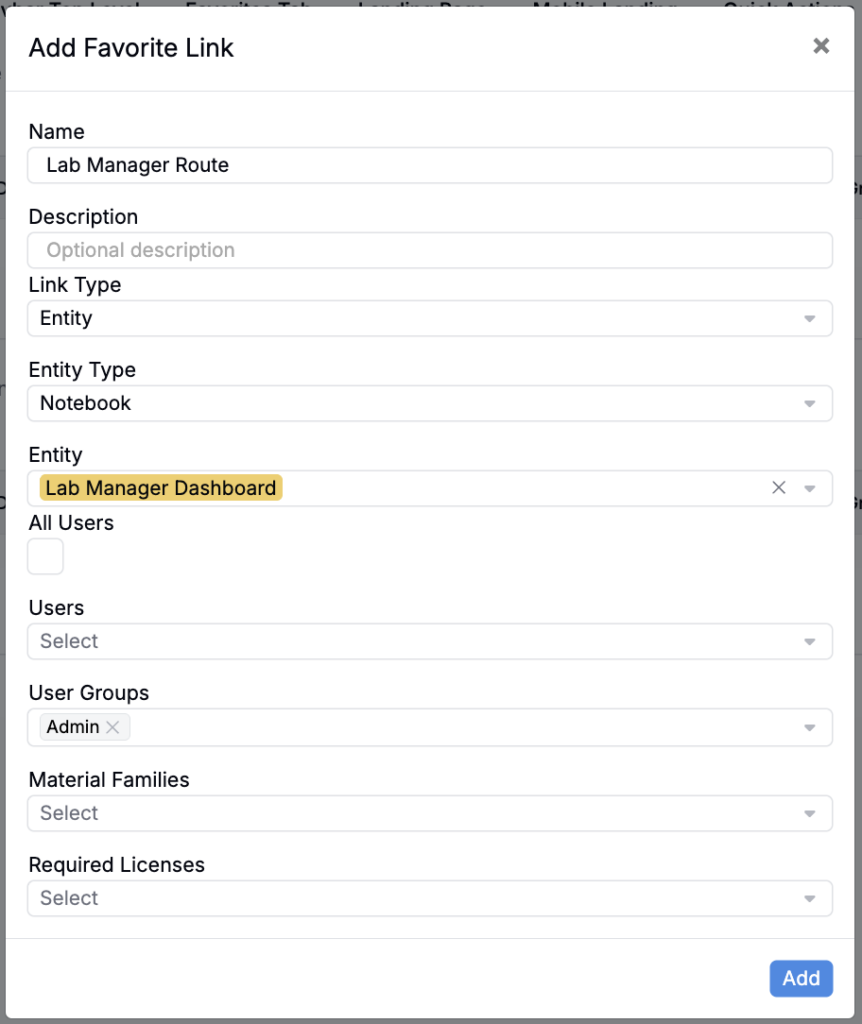
- Add a route name and optional description.
- In Link Type, select either:
- Page — Select a standard platform page (e.g. the Lab Requests listing, the Tasks listing).
- Entity — Select a notebook/custom homepage or other entity.
- Choose the user group(s) and required licenses that should be routed to this landing page.
- Choose the material families where this landing page should apply, then save.
Manage Material Families
- Navigate to the Manage Material Families tab of the Company-Wide Settings page (Admin > Company-Wide Settings > Manage Material Families).
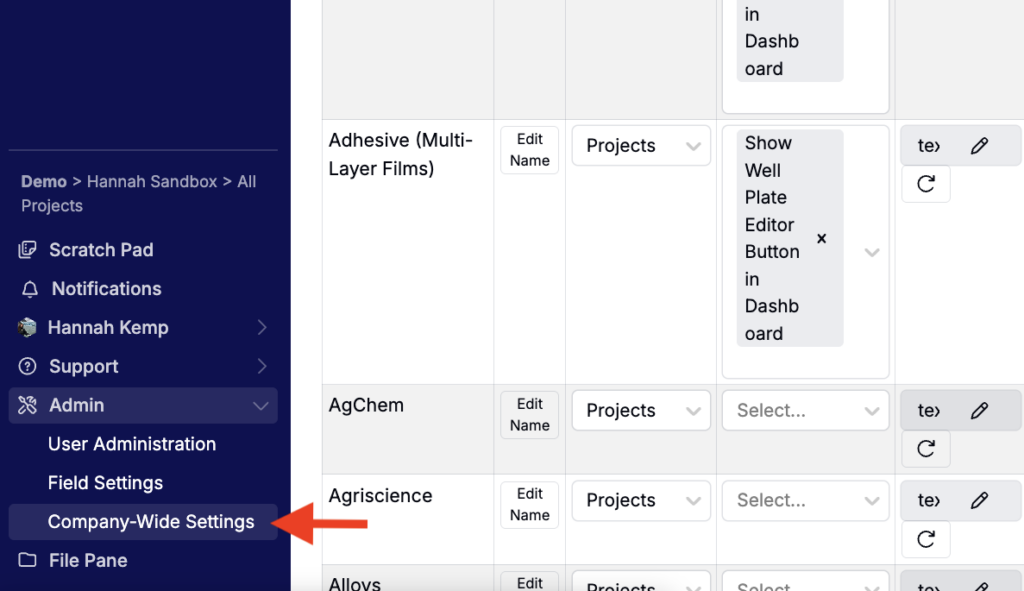
- Search for the material family you want to update.
- In the Uncountable Logo Button Route column:
- Use the first field to select Notebook Dashboard.
- Use the second field to select your saved notebook.
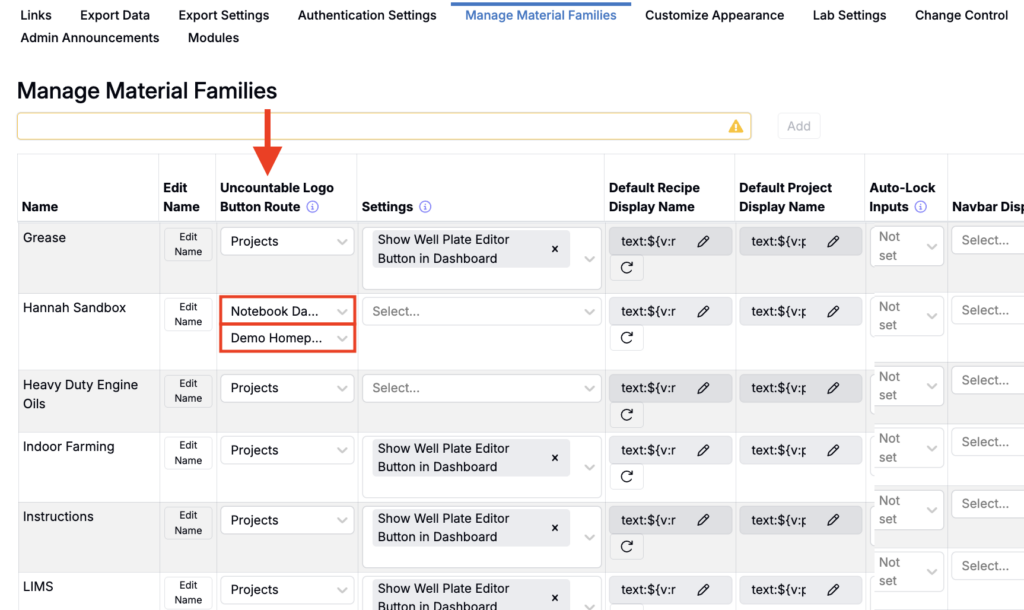
Once both are set, clicking the logo in the navigation bar will route users in that material family to your homepage dashboard.