In Uncountable, most platform data is organized into structured listings. Listing pages act as libraries for viewing, searching, and organizing platform data (e.g. projects, experiments, inputs, outputs, lab requests).
In this guide, you’ll learn how to:
- Adjust, sort, and filter listing table columns
- Apply formatting, stacked, and layout columns
- Save and switch between presets and tabs
- Reset listings to defaults when needed
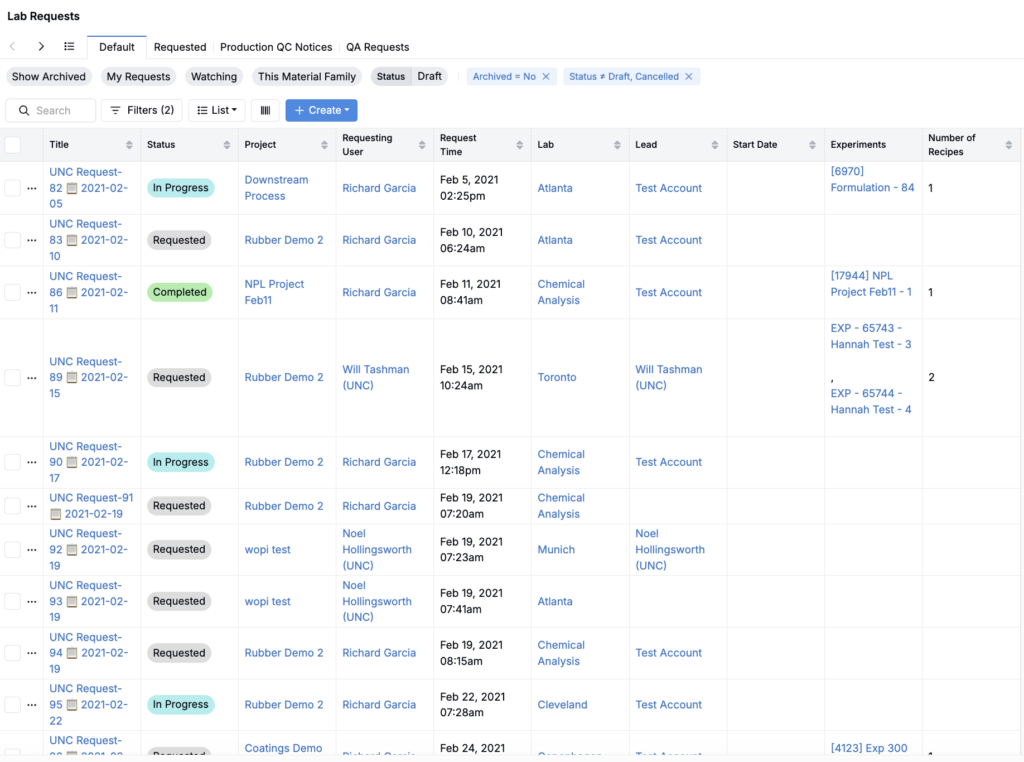
Listings in Uncountable can also be displayed in different interface modes depending on context. To learn more, refer to Simplified Listings.
Listing Configuration
Listing tables are fully customizable at the user level. You can tailor how data appears—by adjusting columns, applying filters, and saving presets—without affecting what others see.
Setting Listing Table Columns
To adjust listing table columns, click the Quick Add Columns icon and search for/select columns to add.
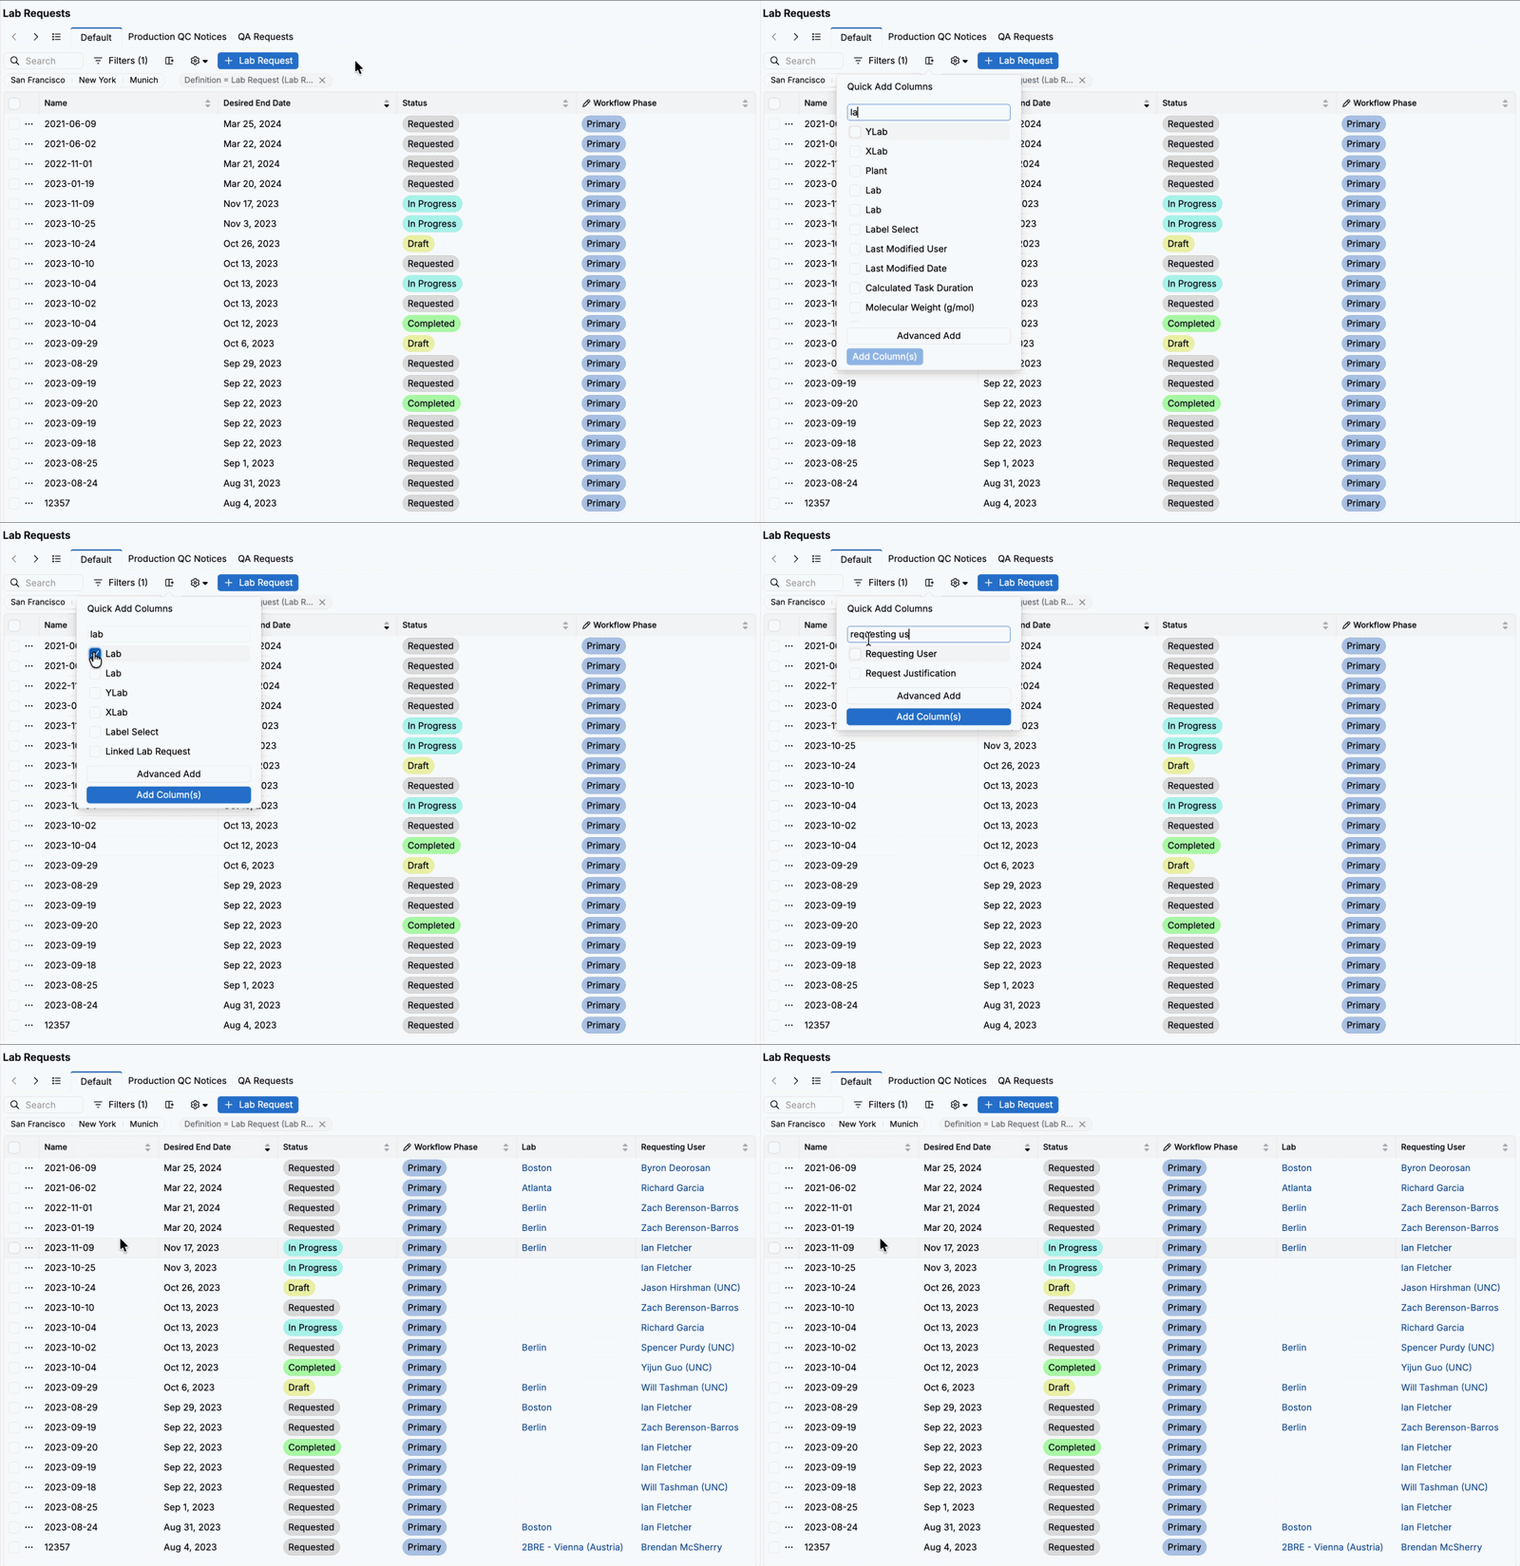
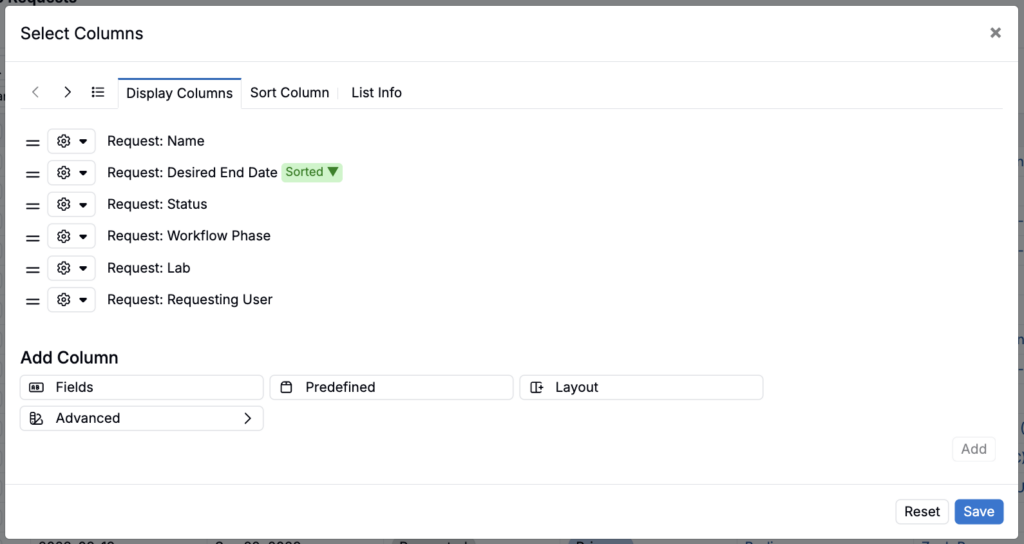
You can also select Advanced Add to access the complete Select Columns modal. Here, users can:
- Add new columns by selecting them from the dropdown menu and clicking Add.
- Remove existing columns by opening the ⚙️ menu and selecting Remove Column.
- Rearrange columns by clicking the two lines icon associated, dragging, and dropping.
- Rename columns by clicking the pencil icon next to a Display Column’s name, enter a new name, and clicking Set.
- Adjust column width by clicking and dragging column header borders.
Users can also add, duplicate, remove, and edit columns directly from the listing page by clicking a column header and opening its menu.
Sorting Listing Tables
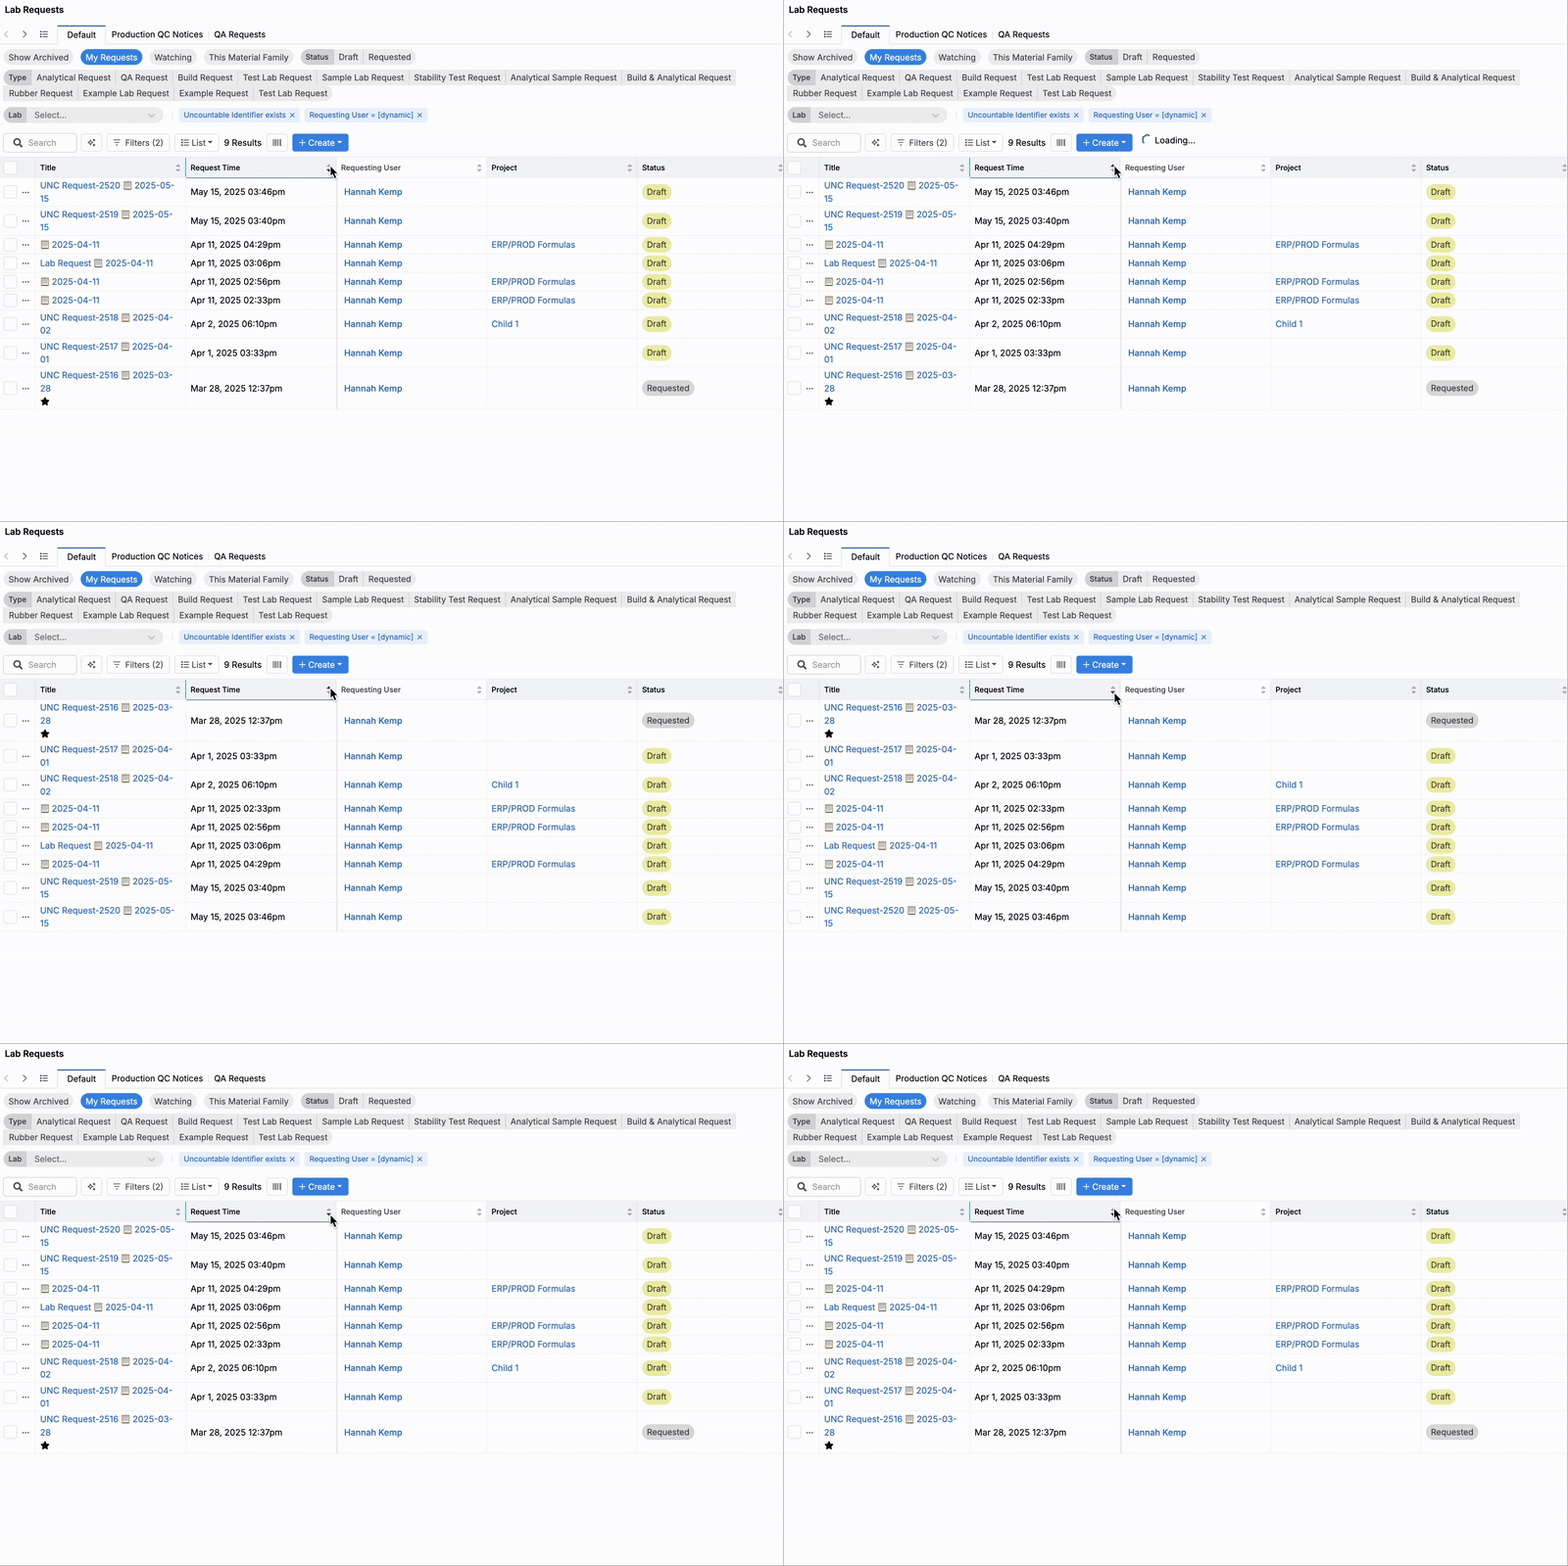
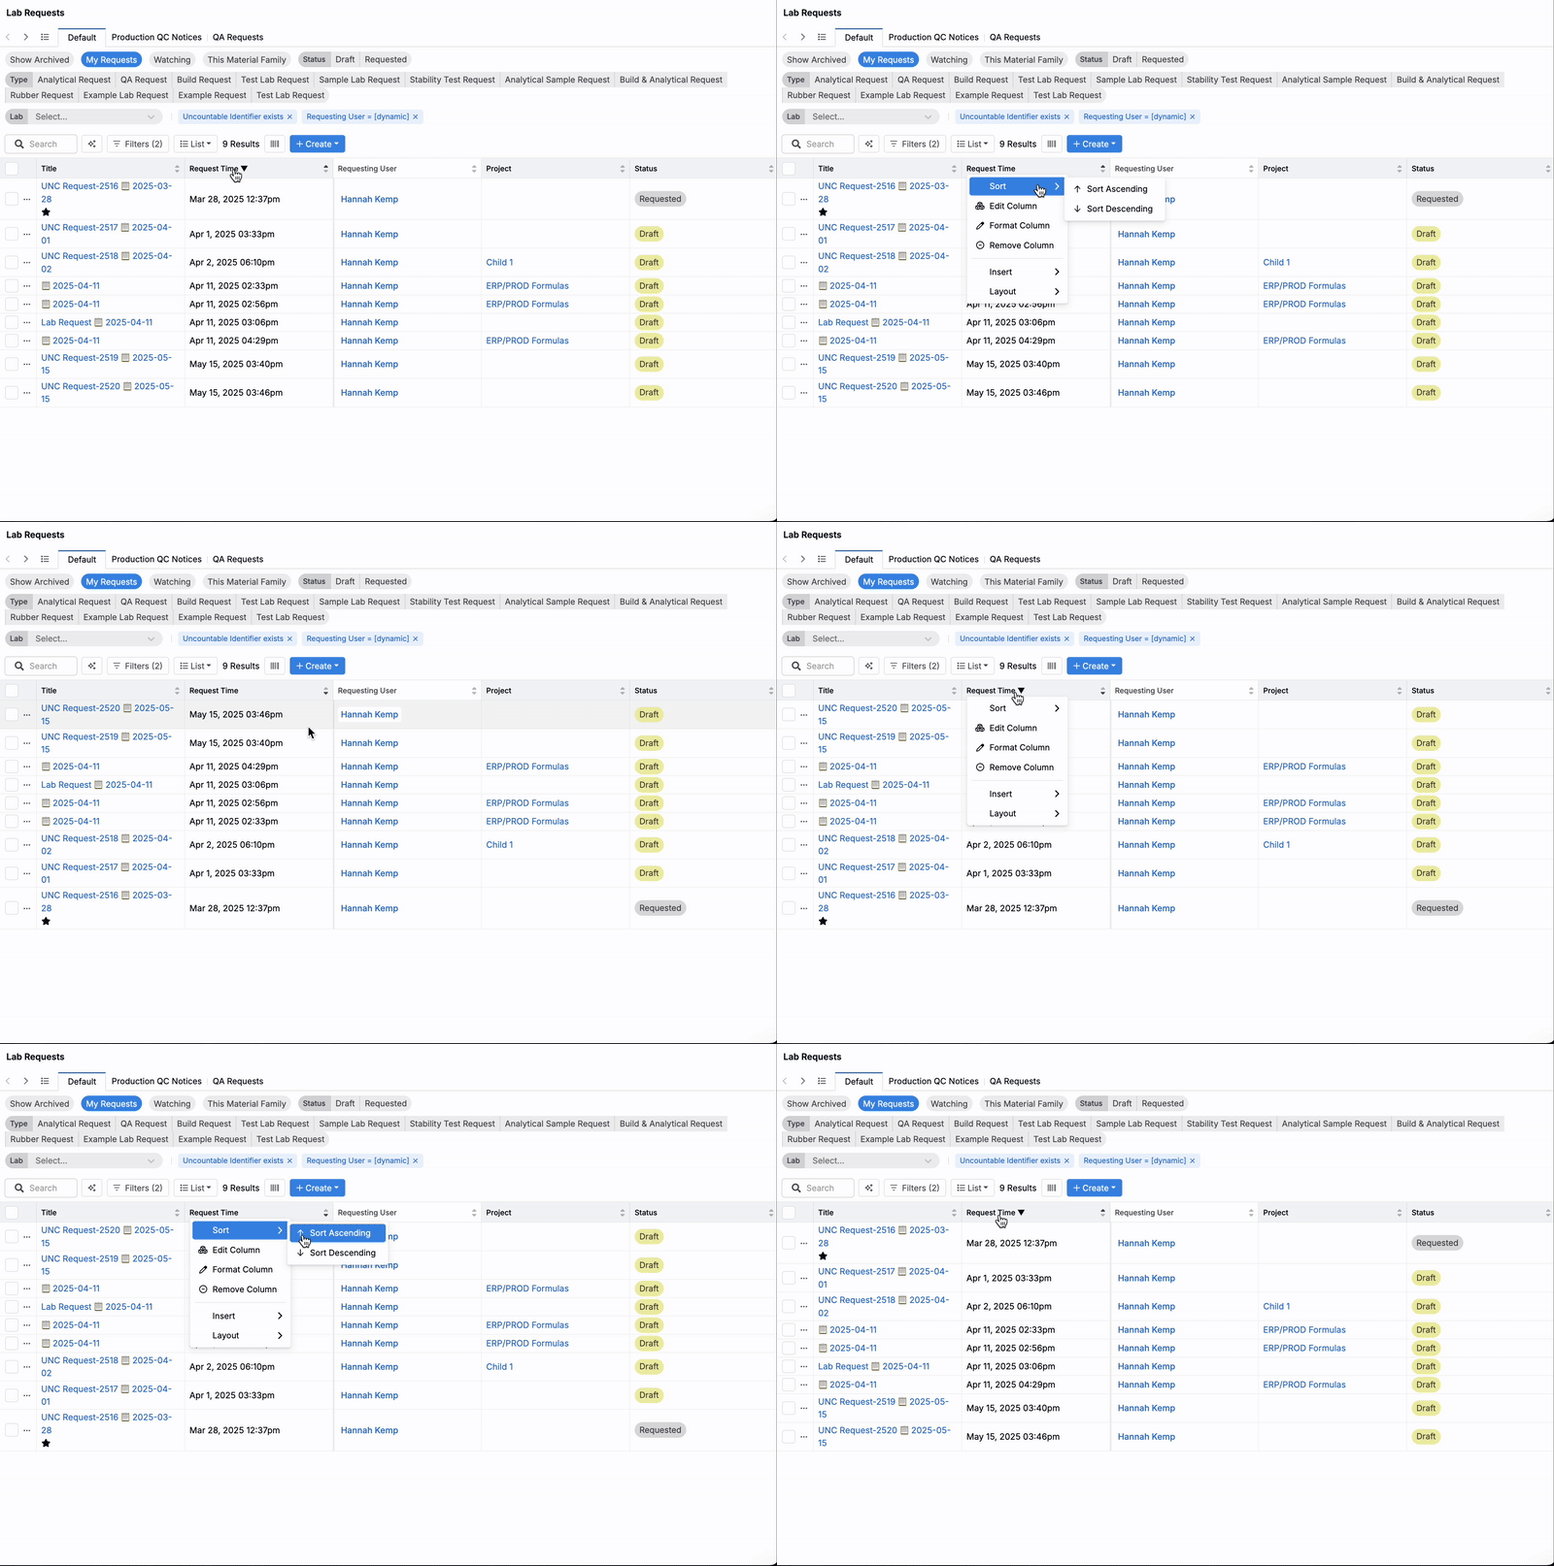
To sort listings, users can:
- Click the up or down arrows in a column header to sort in ascending or descending order.
- Click the column header, select Sort, and choose Sort Ascending or Sort Descending.
Filtering Listing Tables
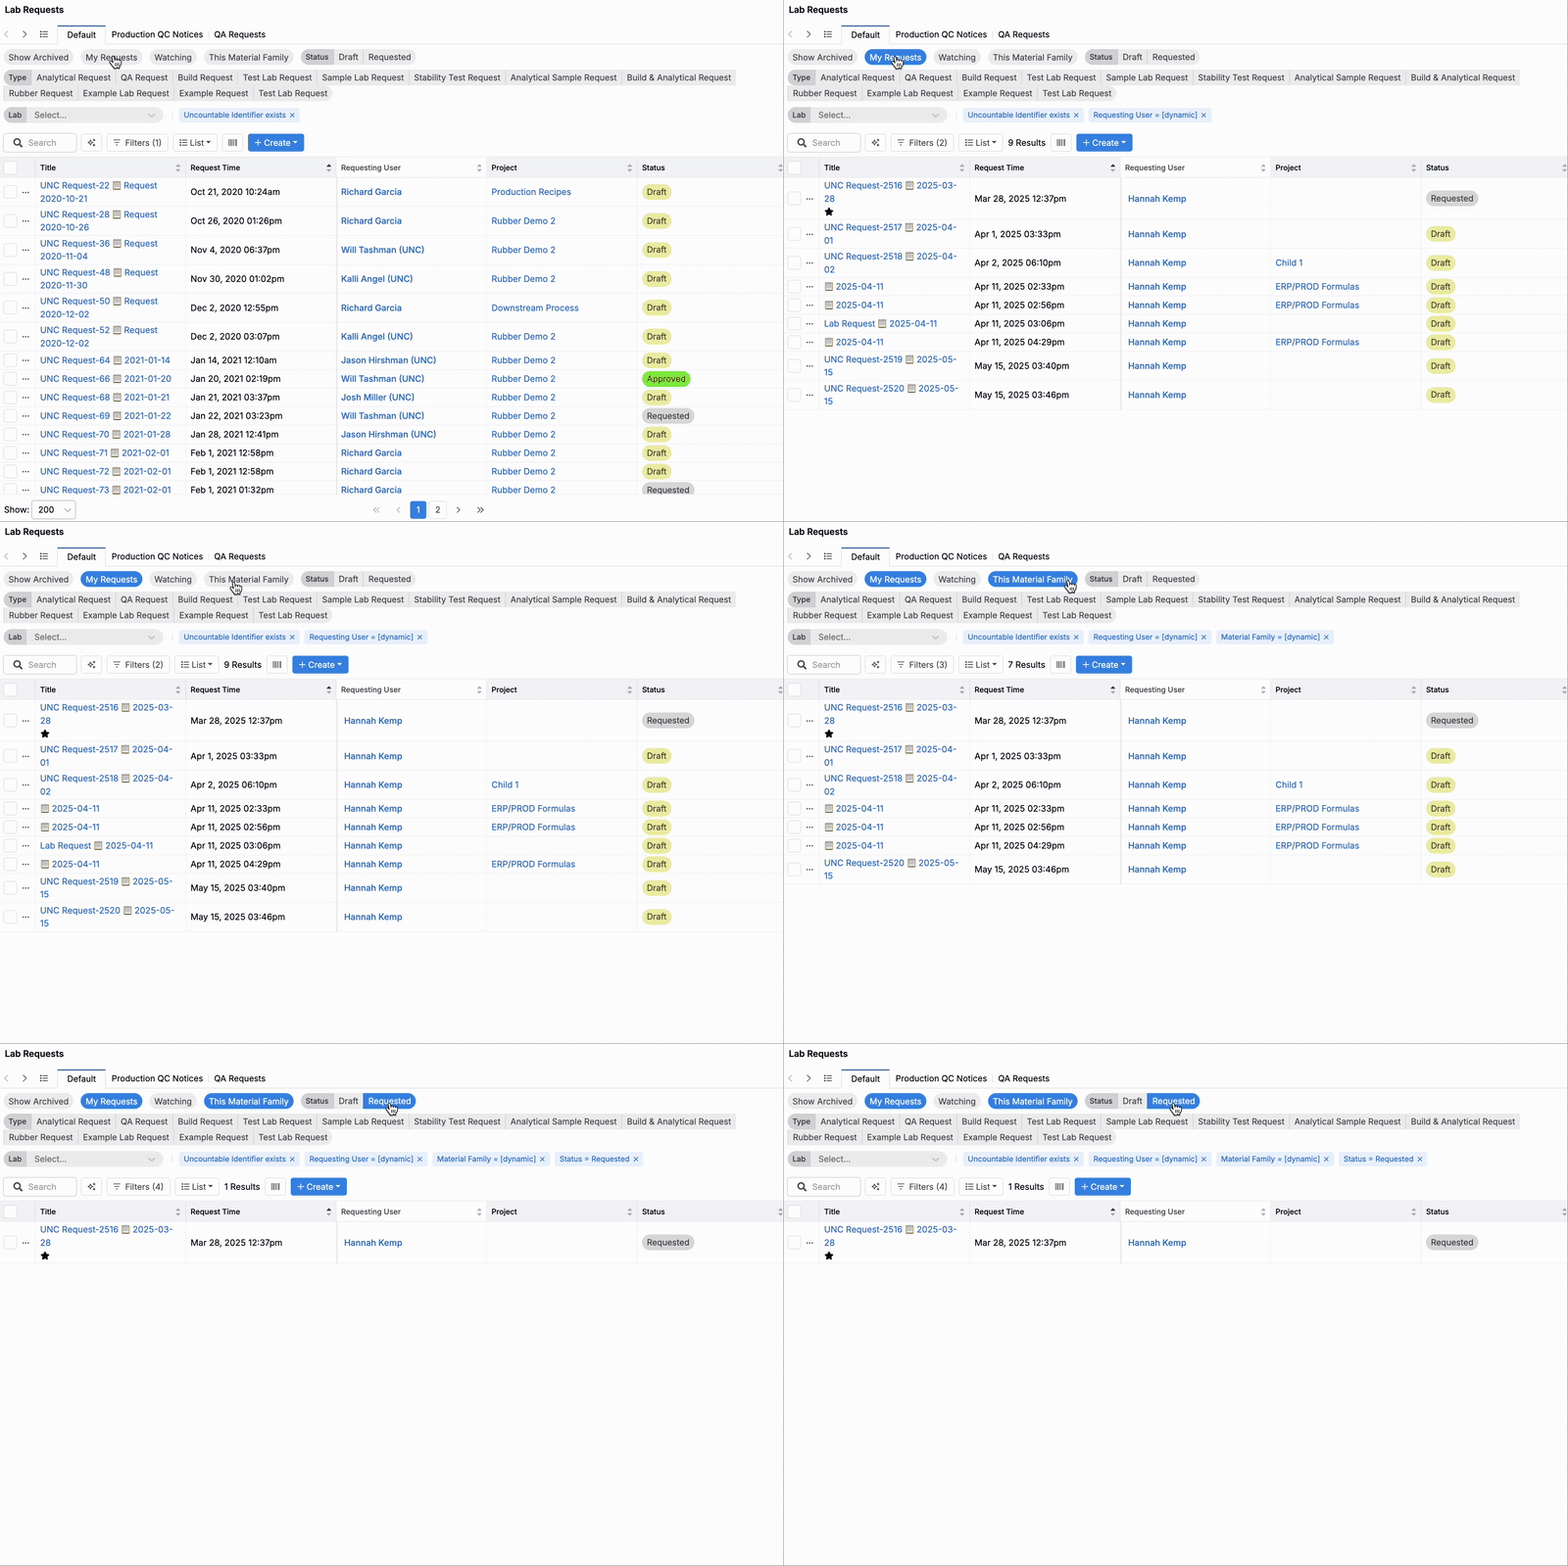
Structured listing filters are stackable, meaning that they use AND logic by default.
To filter a listing, users can:
- Click any of the Quick Filters at the top of the page to apply preconfigured filter options. Learn more.
- Click the Filters button to build a custom filter from scratch.
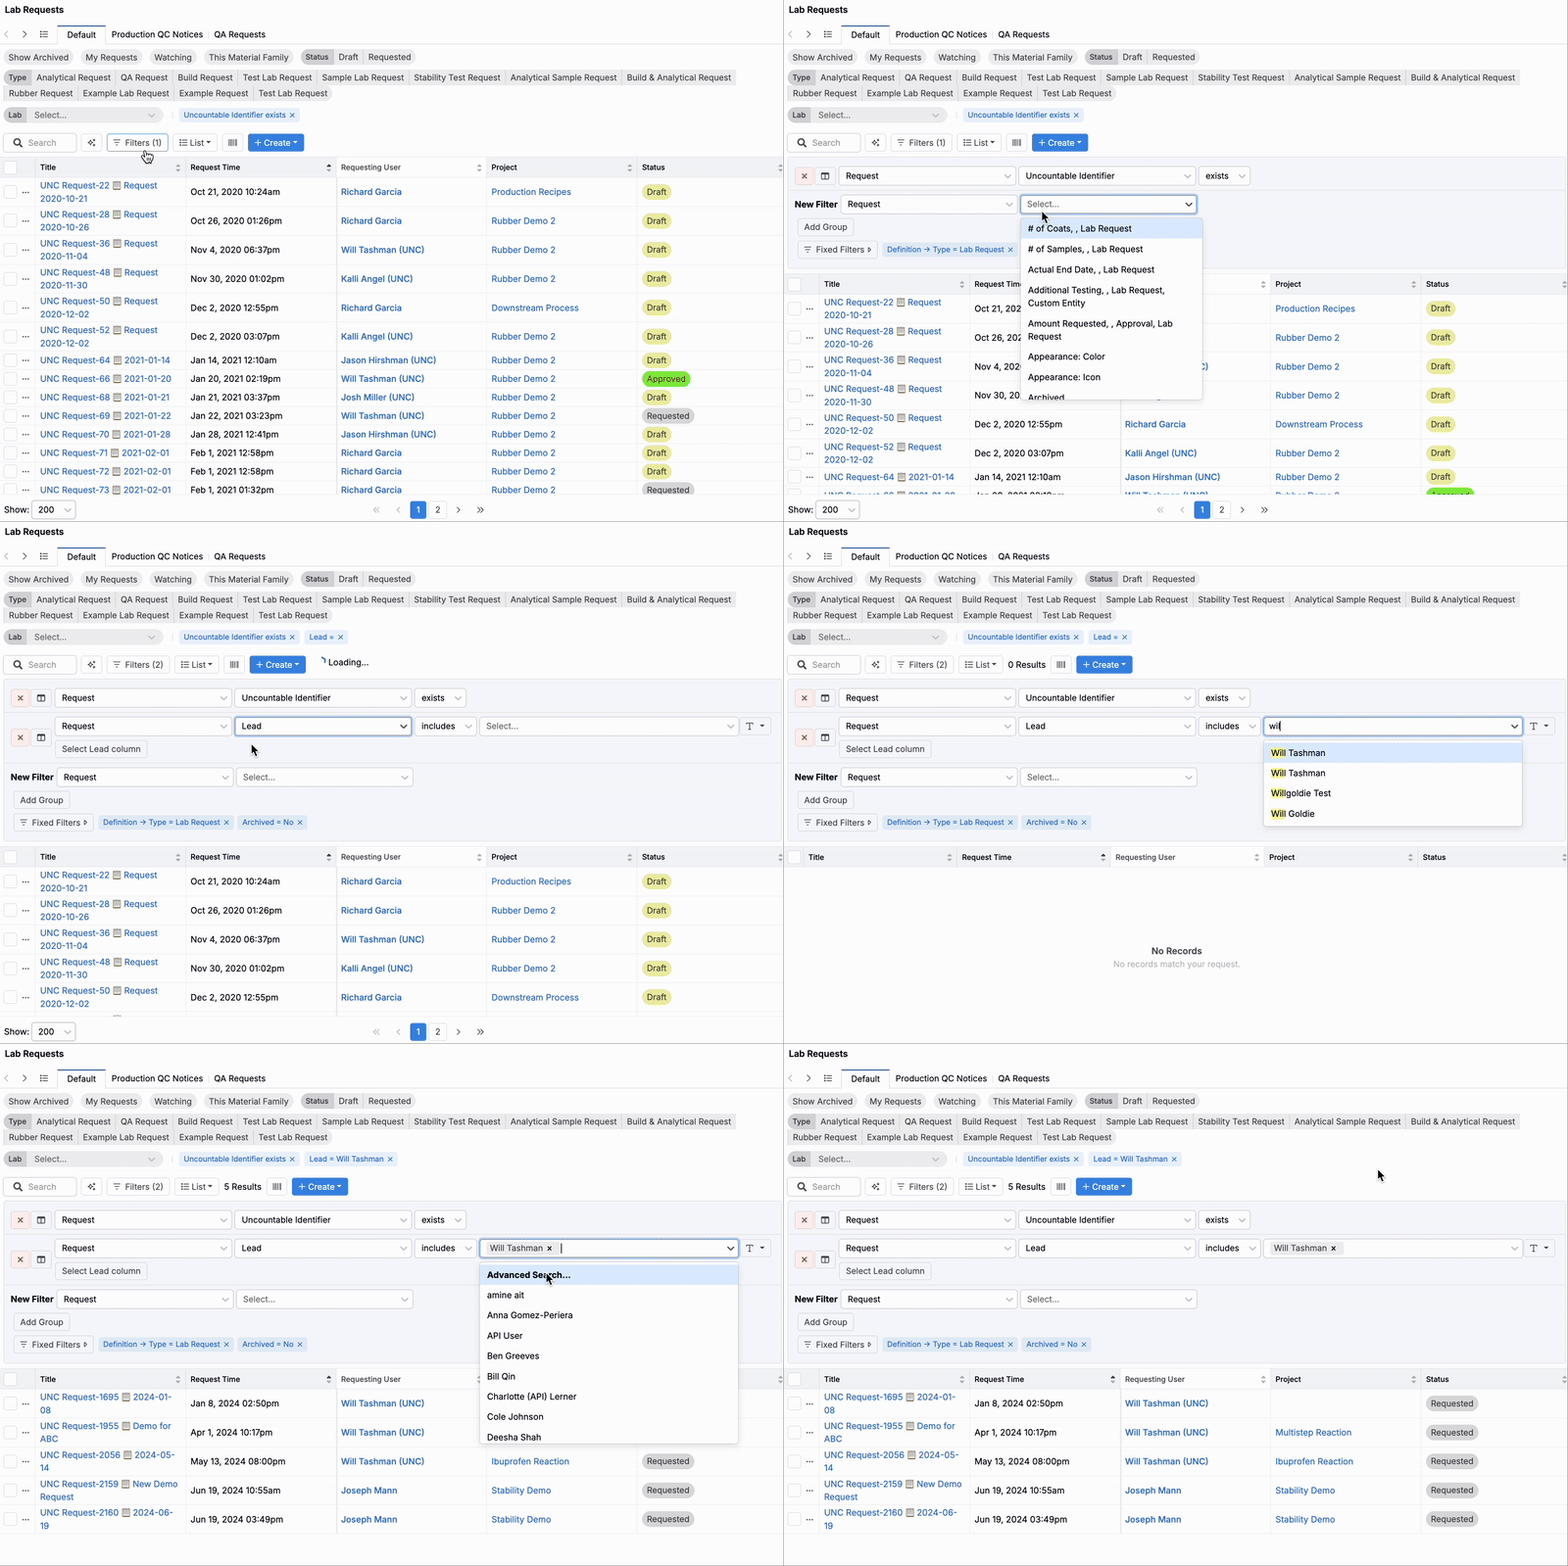
- Click a column header and select Add Filter to create a filter based on that specific column.
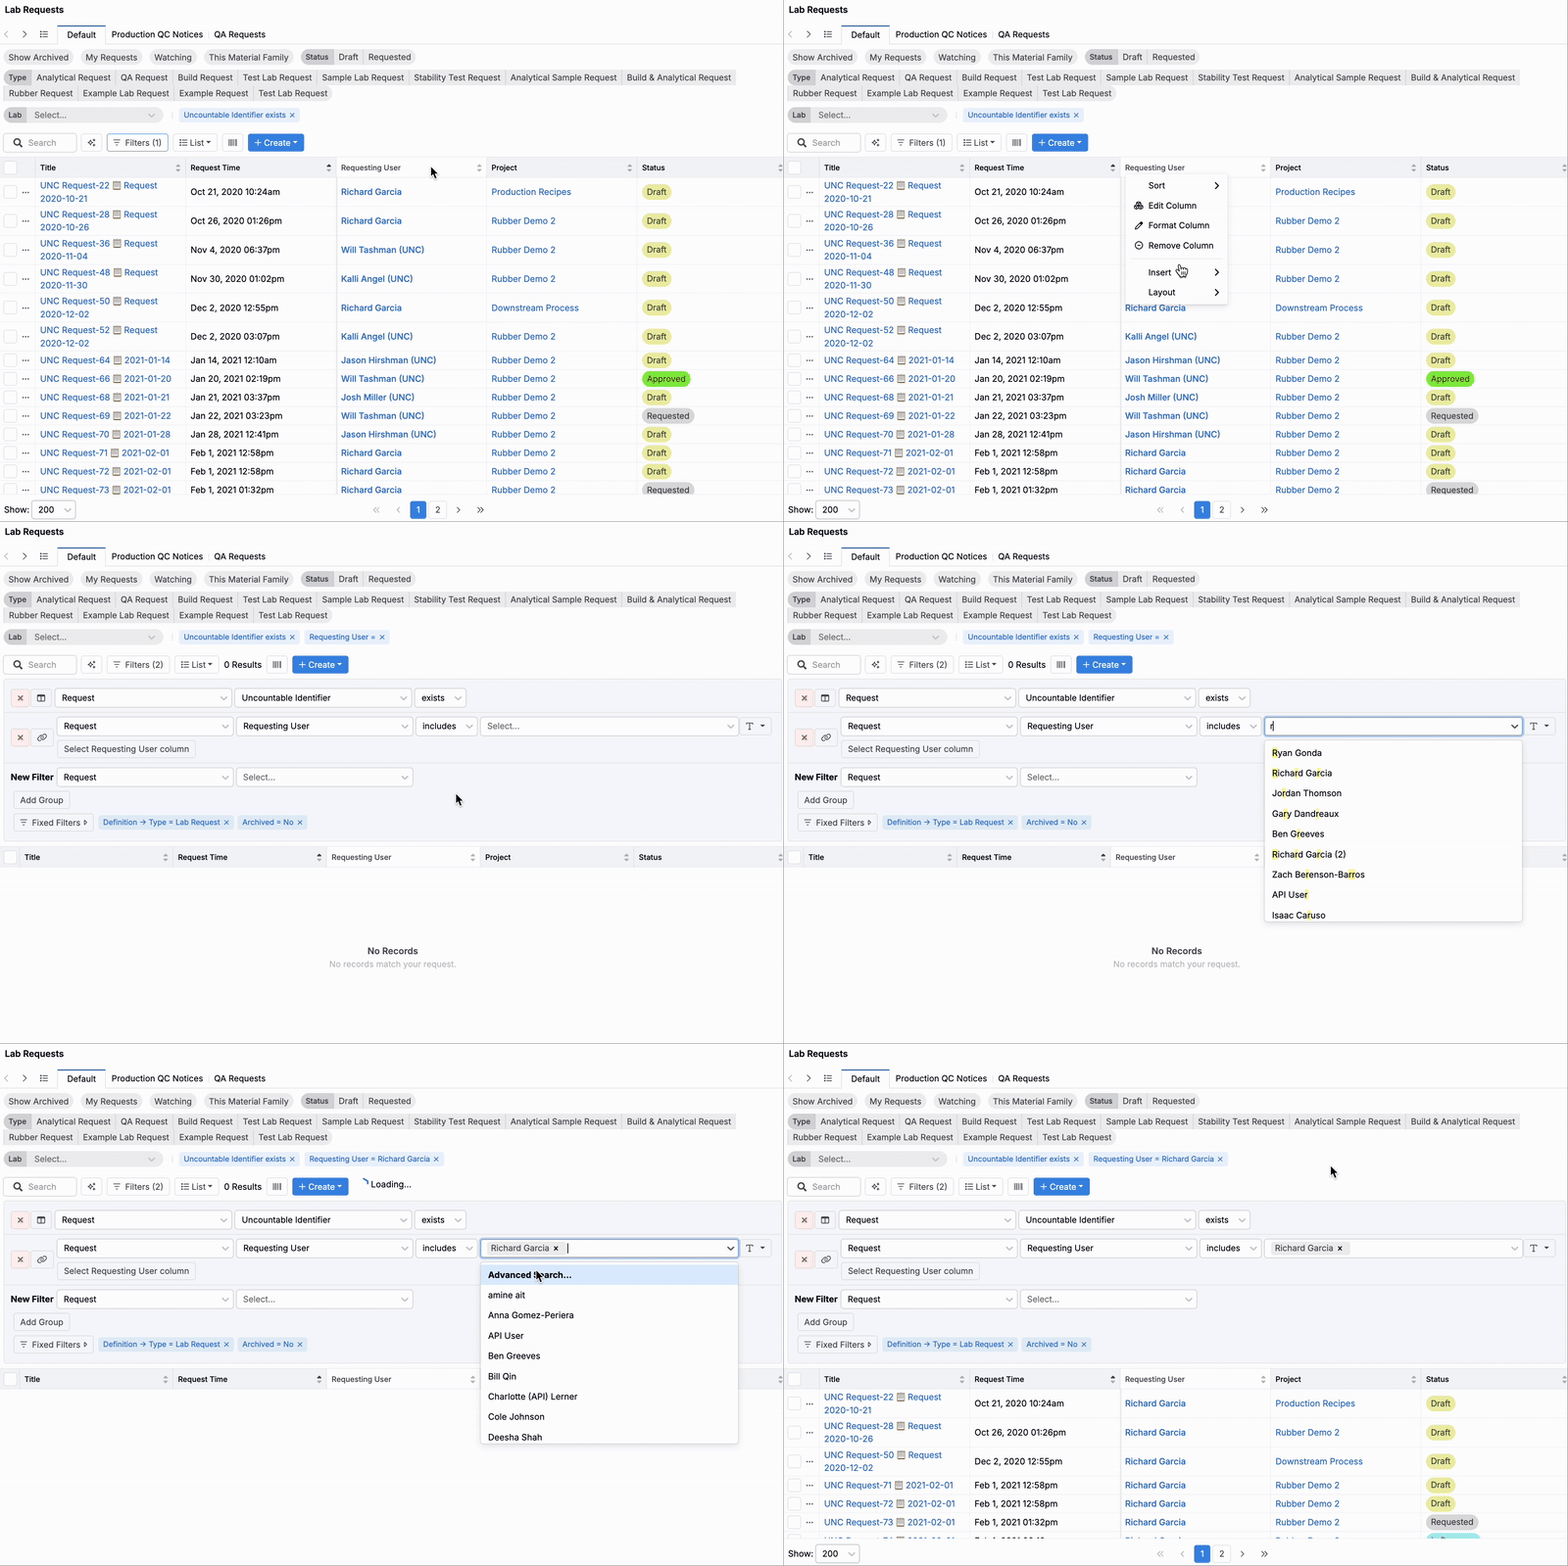
Adding Font Formatting
Users can apply font formatting (size, bold, italics, color) to individual listing columns.
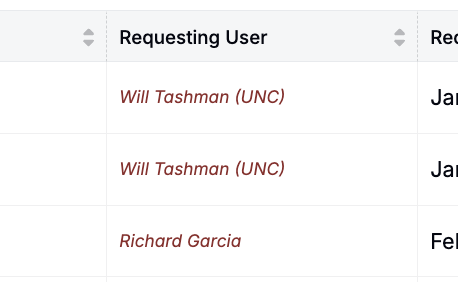
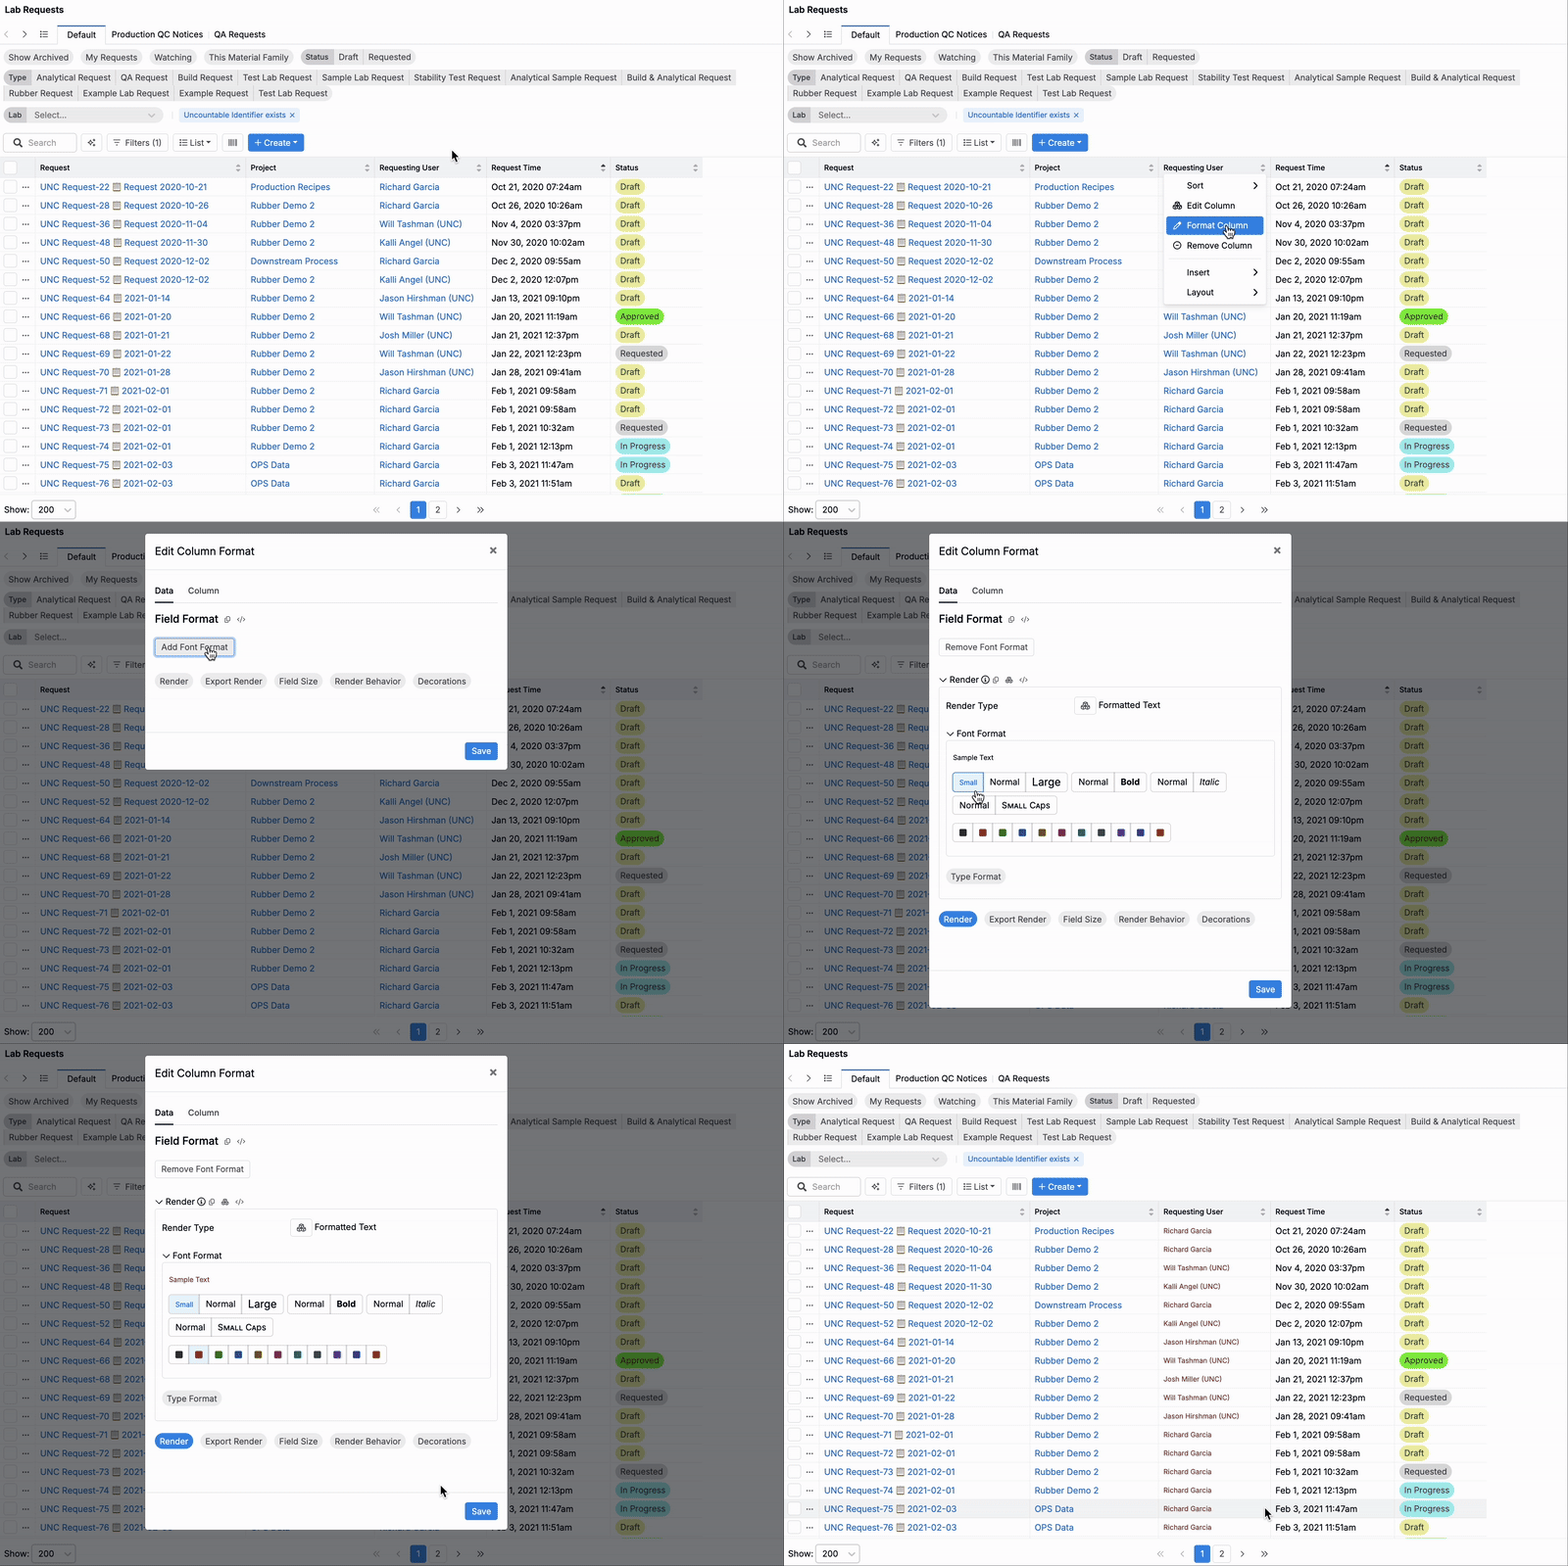
To add font formatting:
- Click the column header and select Edit Column Format.
- Click the Add Font Format button.
- Select a font format (size, bold, italics, small caps) and font color.
- Click Save to apply changes.
- Remove font formatting within the modal by clicking the Remove Font Format button.
Grouping Columns
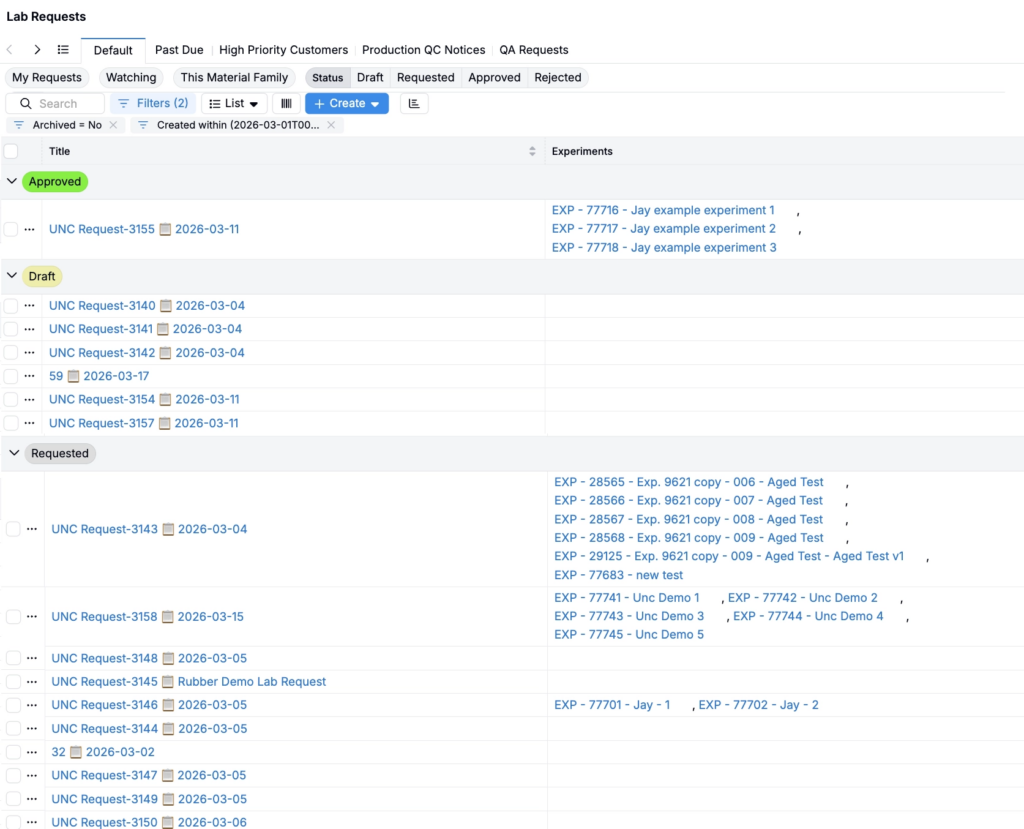
Grouping columns let you organize a listing into sections by a specific field (for example, grouping Lab Requests by Status or Requesting User).
To group a listing:
- Open List > Set Columns to access the Select Columns modal.
- Add the column you want to group by (if needed).
- In the top section of the modal, click the column name and select Group.
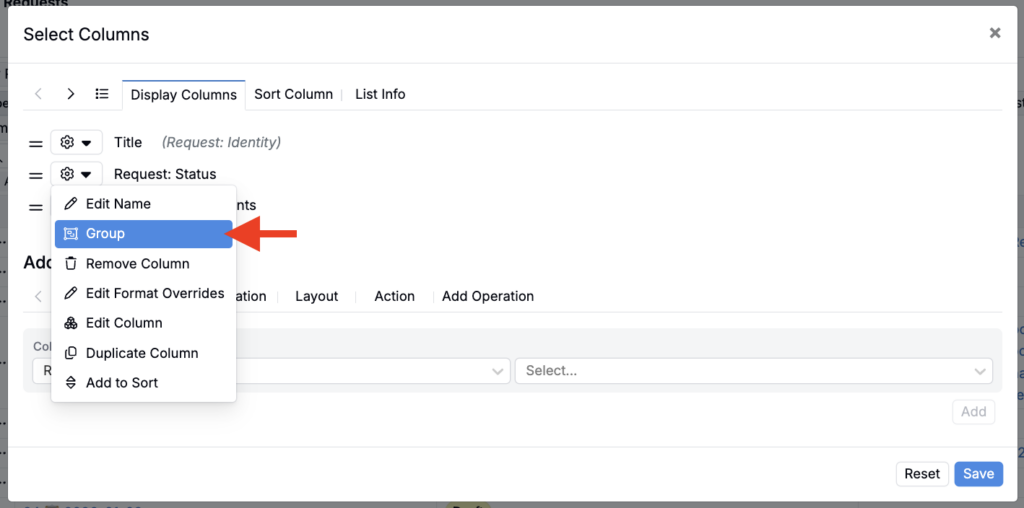
When a column is grouped, it won’t appear as a normal column in the table. Instead, the entire listing will be sorted by that column, and the table will display header rows for each value.
Creating Stacked Columns
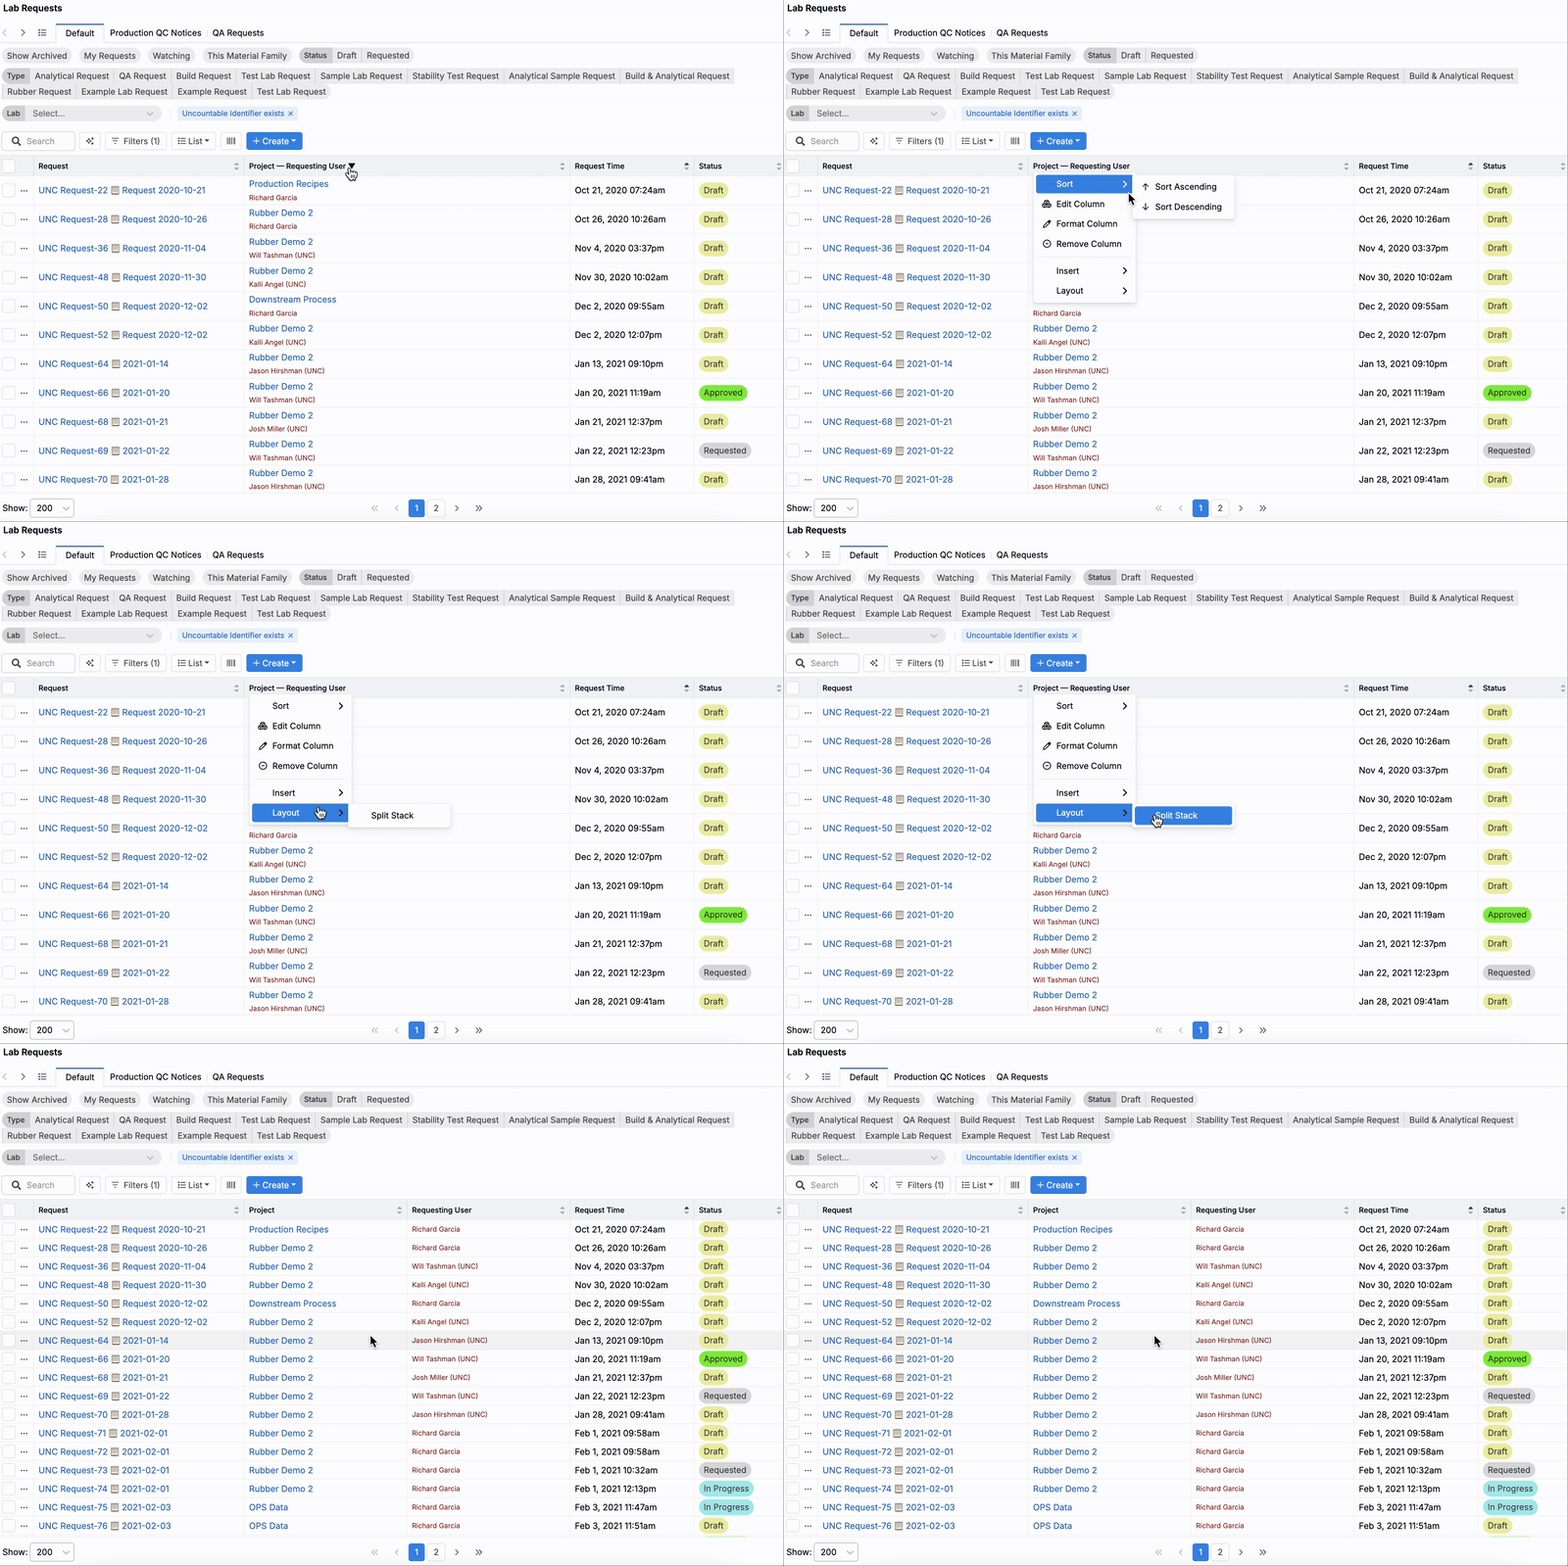
Users can also combine two listing columns into a single stacked column (e.g. Project — Requesting User).
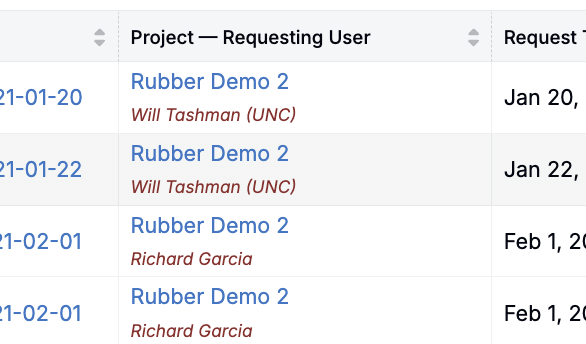
To stack columns:
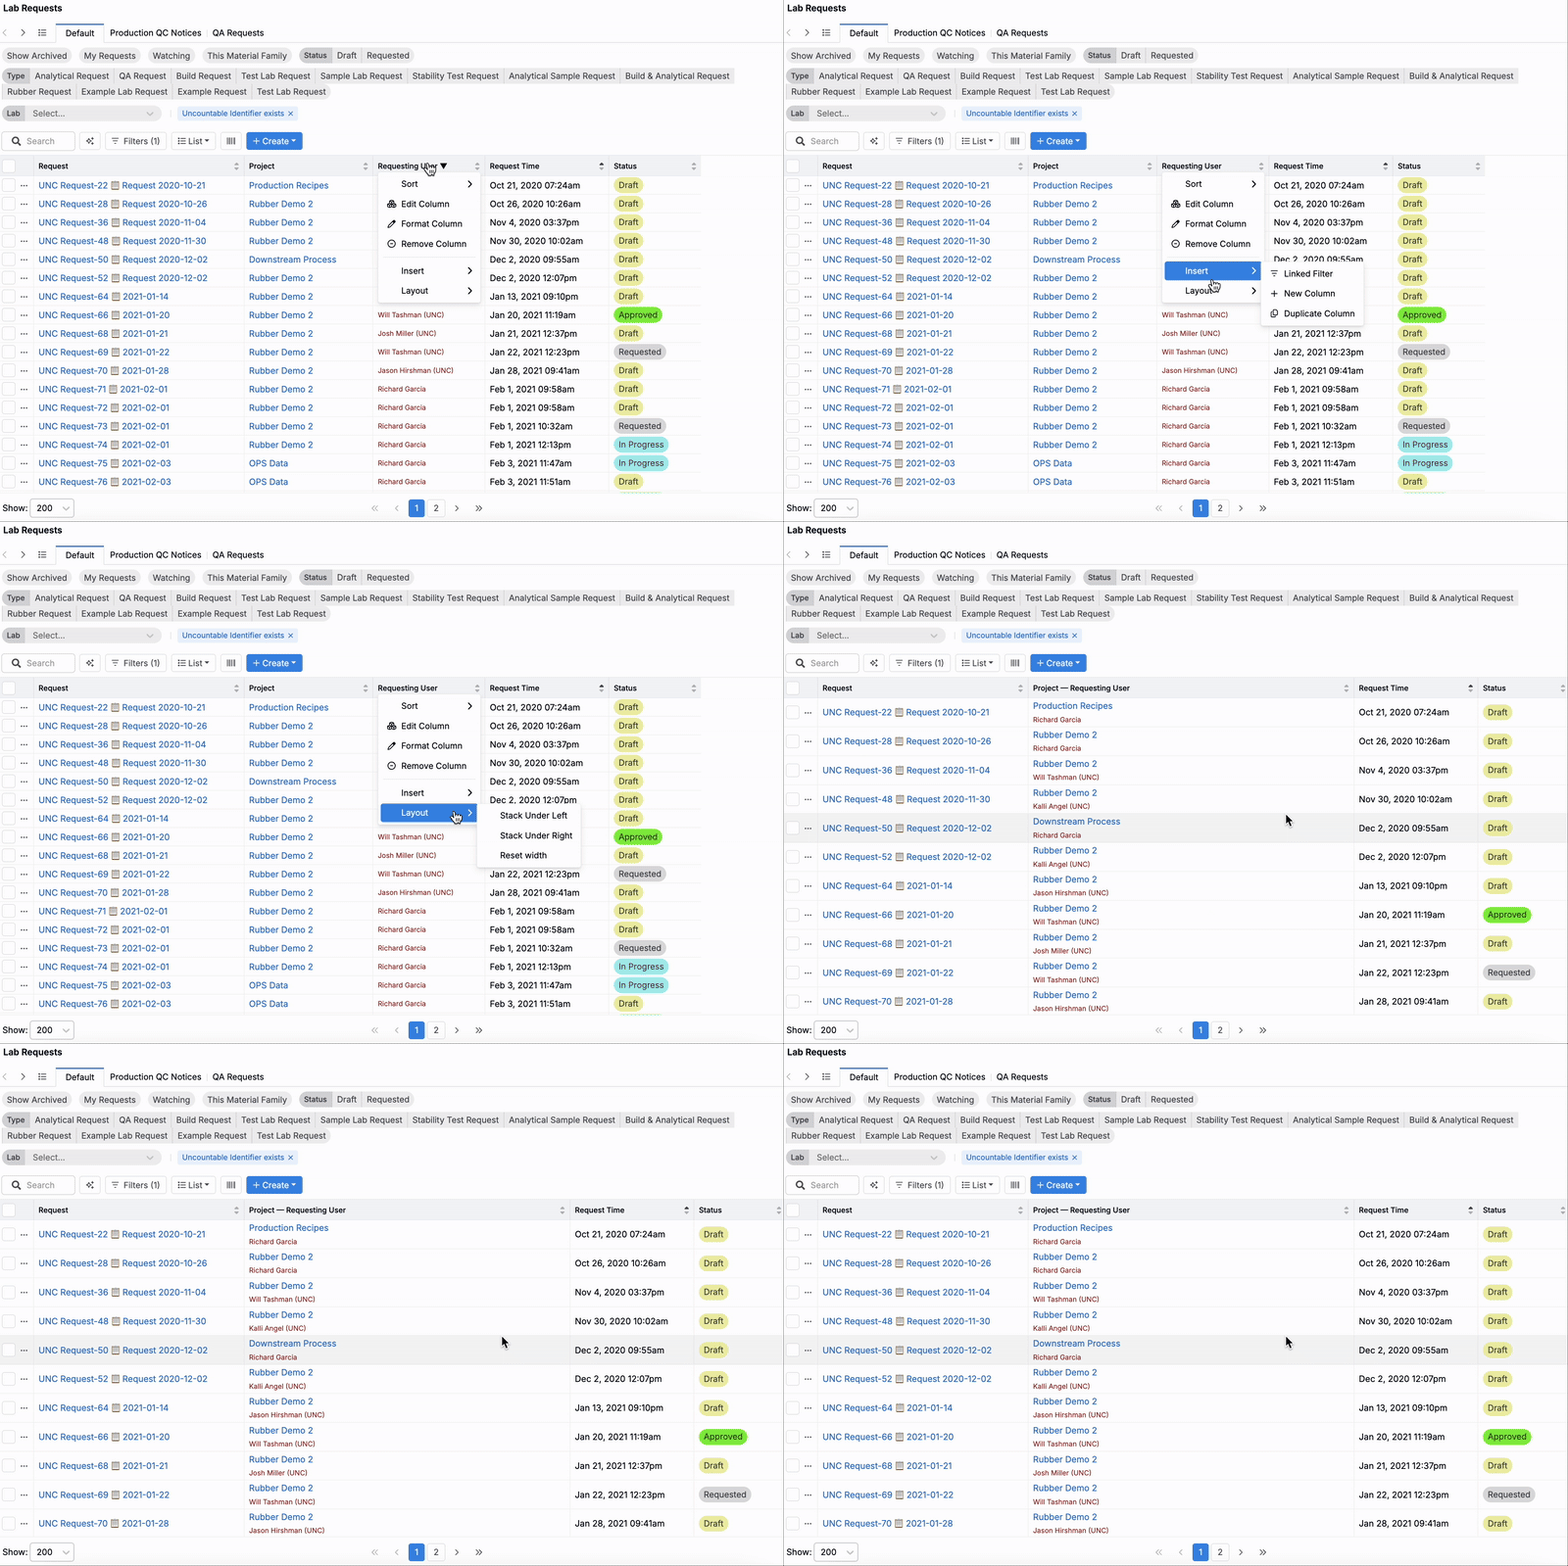
- Click the column header for the column you want to move.
- Choose Layout > Stack Under Right/Left to stack under the column to the right or left of the selected column.
- To unstack the columns, click into the column header and select Layout > Split Stack.
Creating Layout Columns
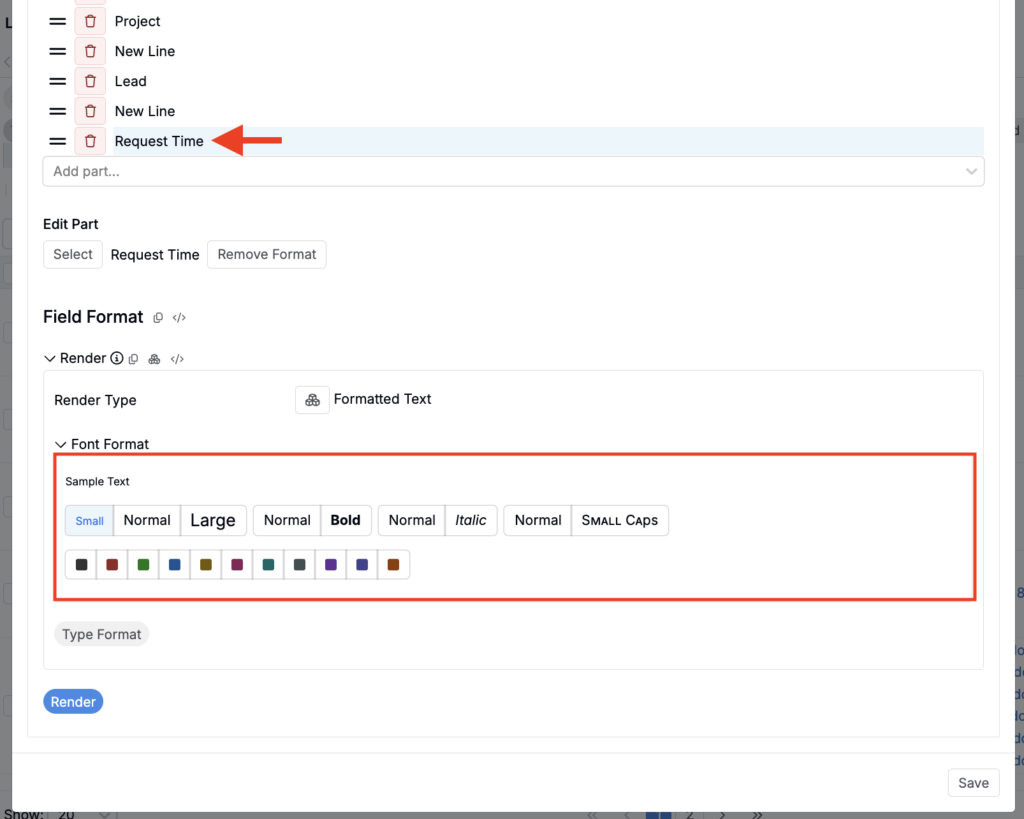
By combining stacked layouts with font formatting, you can also build more advanced layout columns—single columns that display multiple fields with custom styling and dividers.
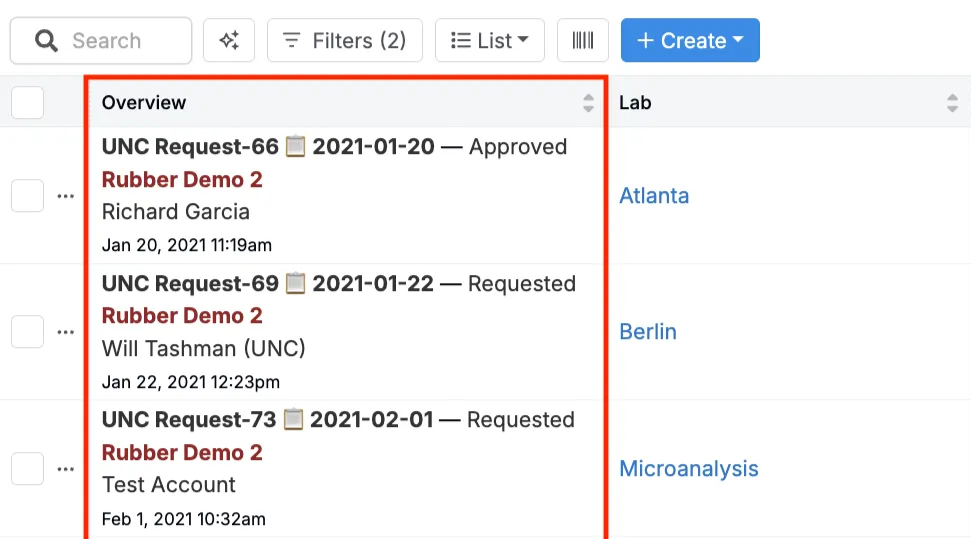
To create a layout column:
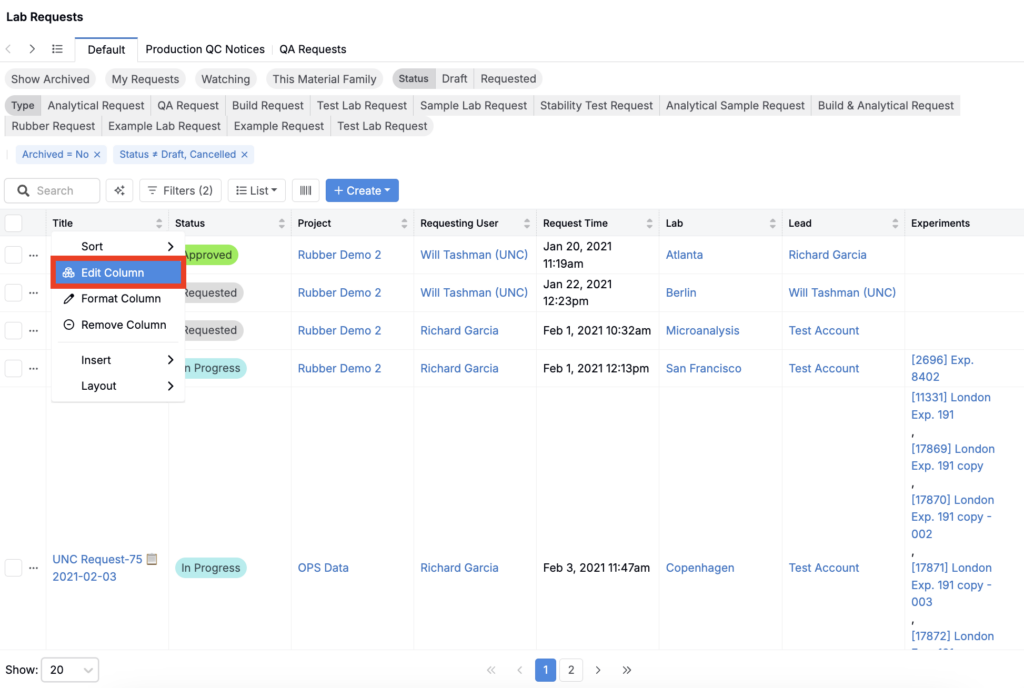
- Click the column header and select Edit Column.
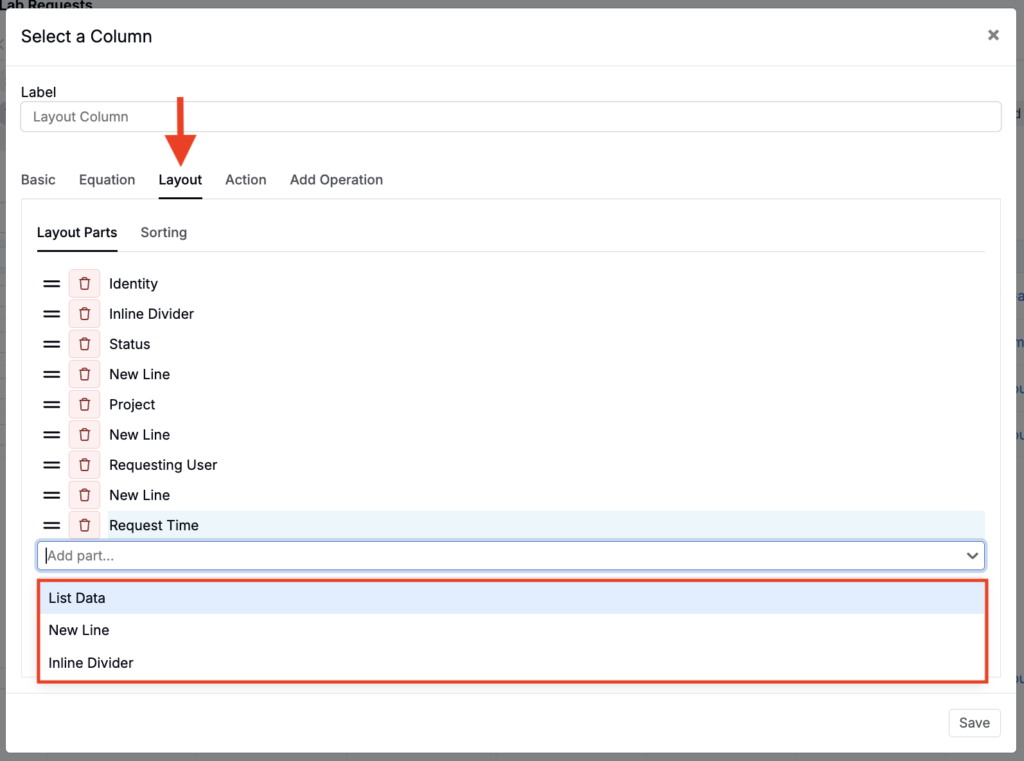
- In the Layout tab of the modal, use the Add Parts field to add:
- List Data — choose any list field to include in the column; fields are added inline by default.
- New Line — places the next field on a new line below the previous one.
- Inline Divider — adds a divider between fields, displayed on the same line.
- Select individual layout parts to apply font formatting (e.g., size, color, bold).
- Click Save to apply your changes.
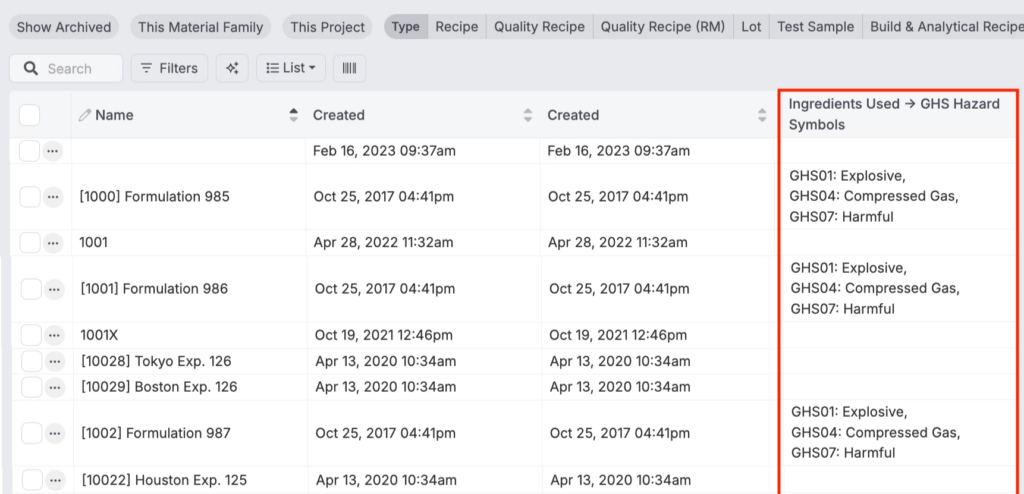
Creating Transitive Aggregate Columns
To learn how to create transitive aggregate columns, refer to Transitive Aggregate Columns.
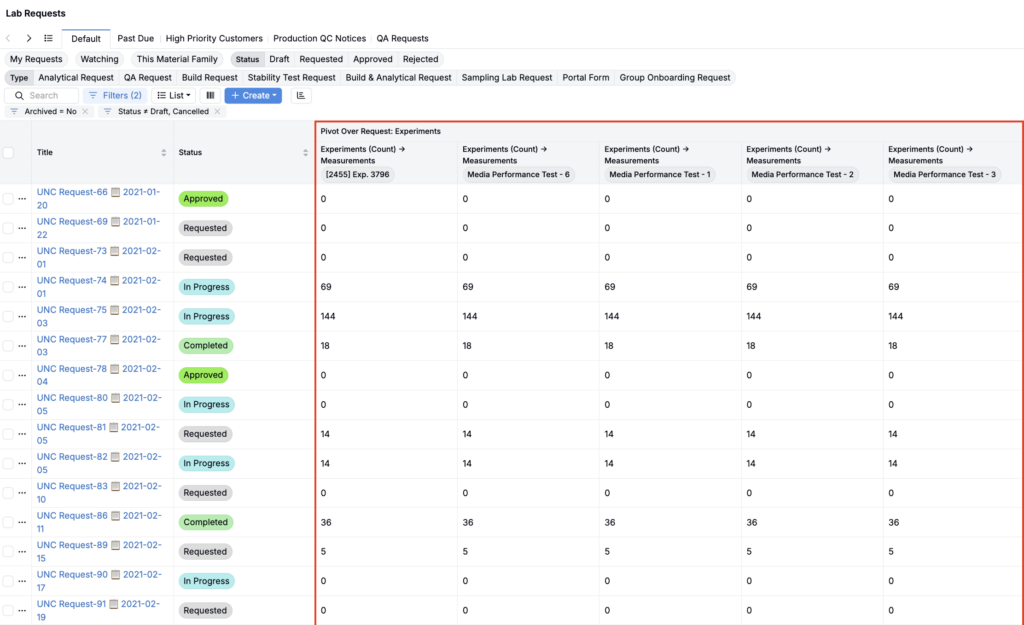
Creating Pivot Groups
To learn how to create pivot groups over transitive aggregate columns, refer to Pivot Groups.
Saving Listing Configuration Presets
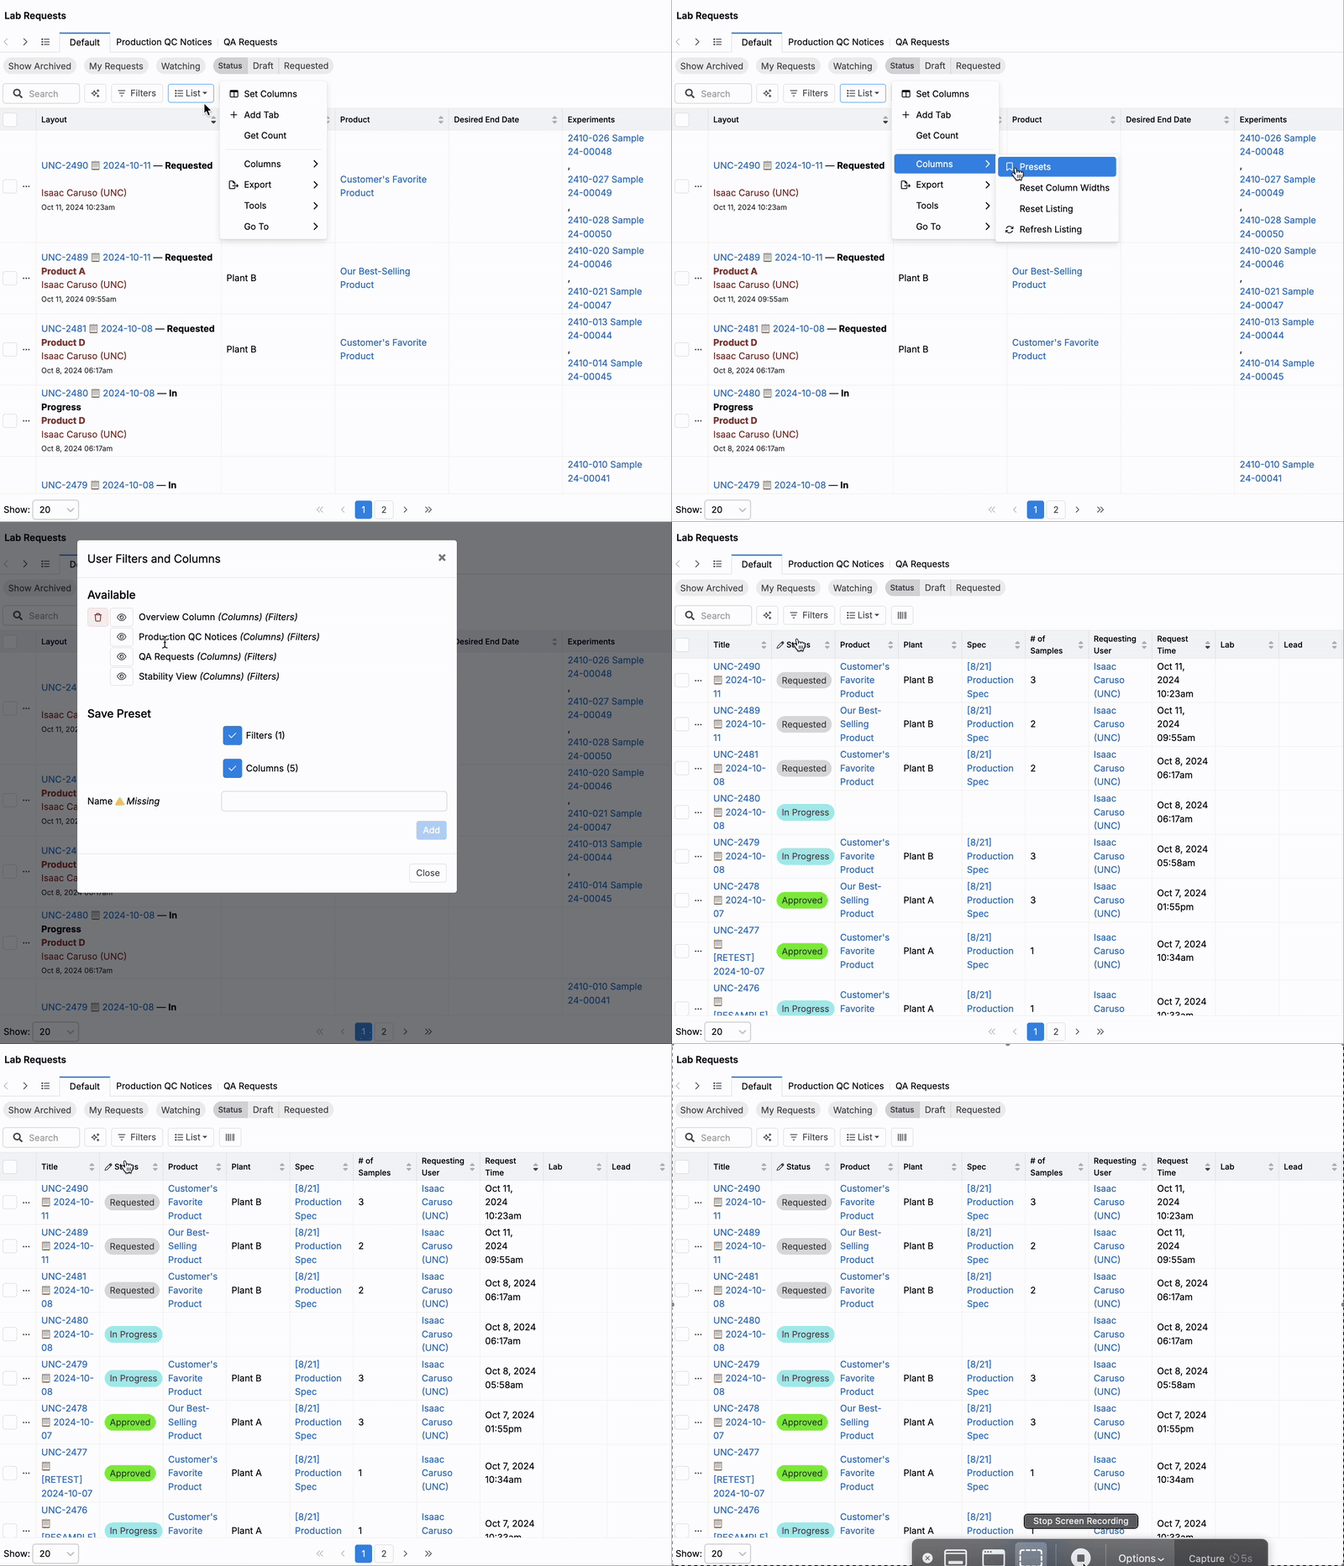
After customizing your filters and columns, you can save the current setup as a preset. Presets make it easy to return to a preferred view—even if you’ve made changes like hiding columns or adjusting filters.
Saving a Preset
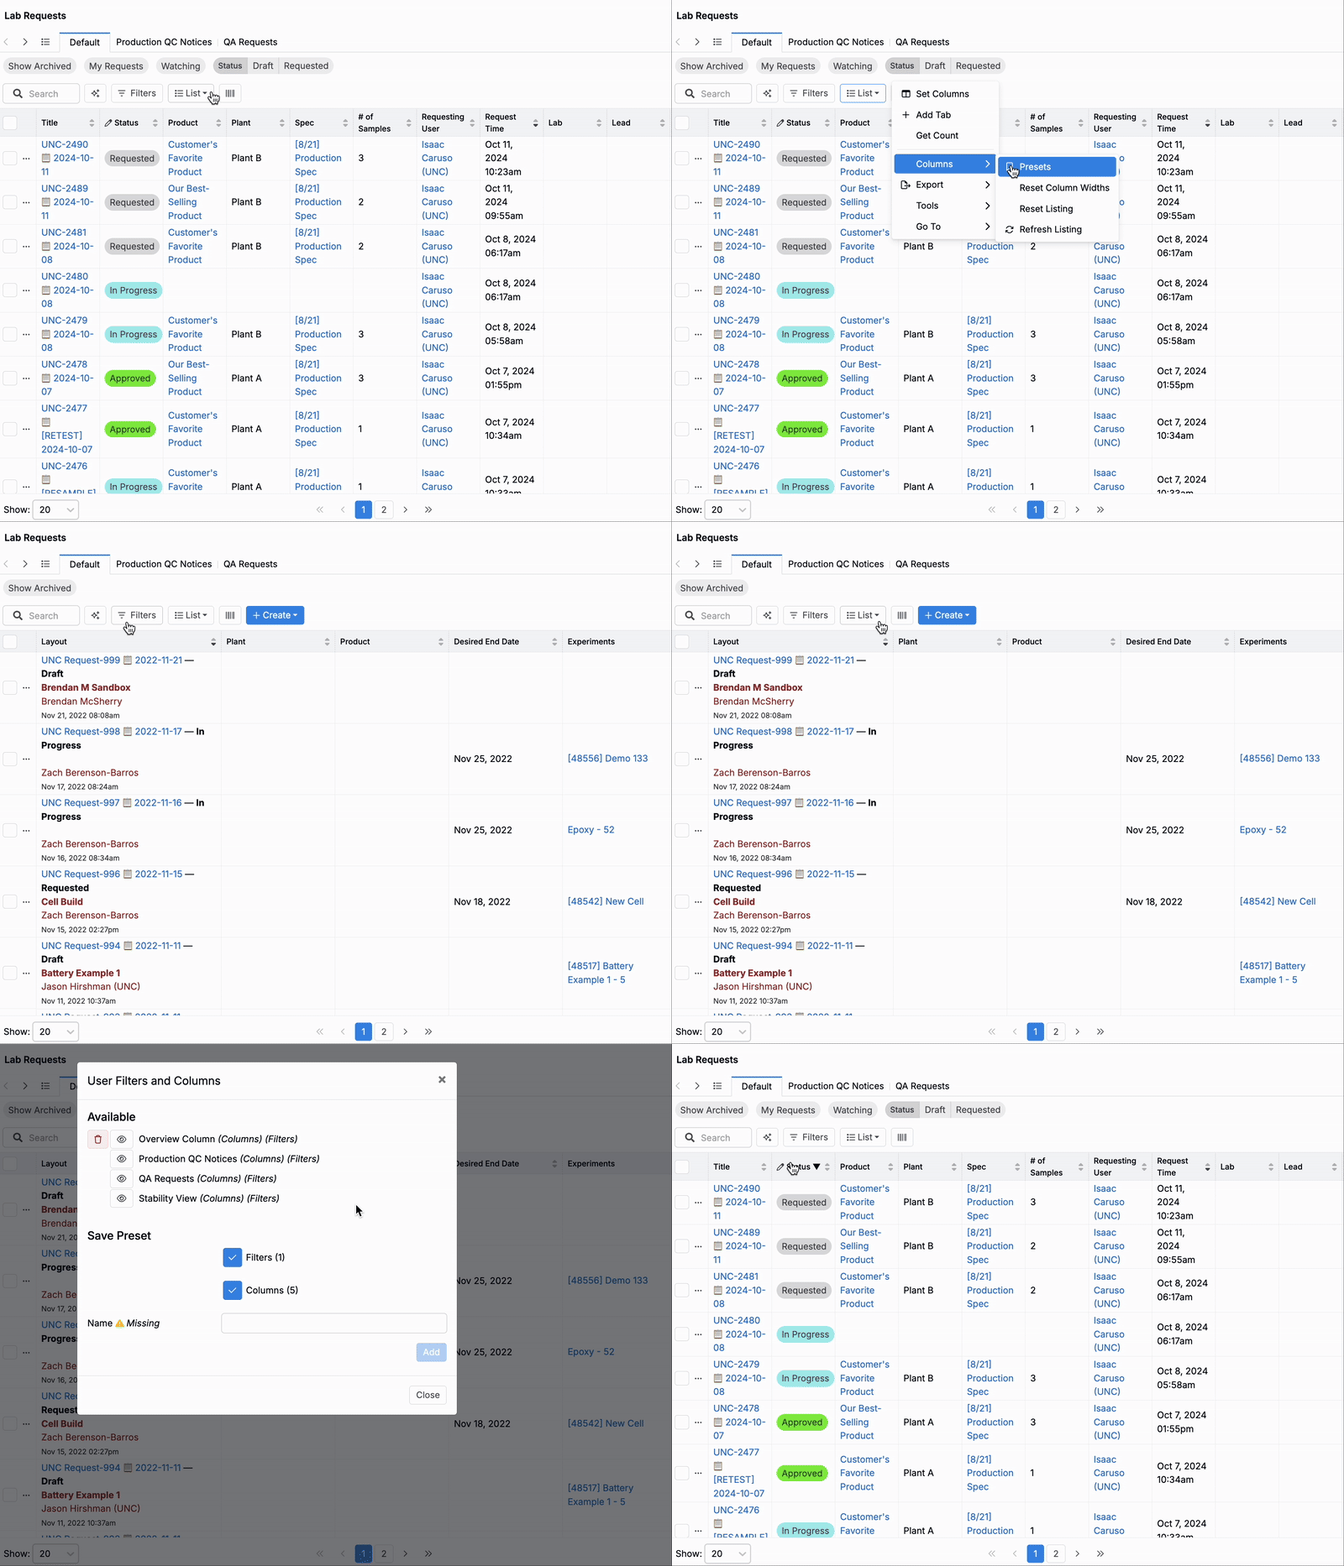
- Click List > Columns > Presets.
- In the User Filters and Columns modal, enter a name for your preset.
- Click Add to save it.
Loading a Preset
- Click List > Columns > Presets.
- Under Available presets, click the eye icon to apply the saved filters and columns.
Resetting Columns, Widths, and Filters
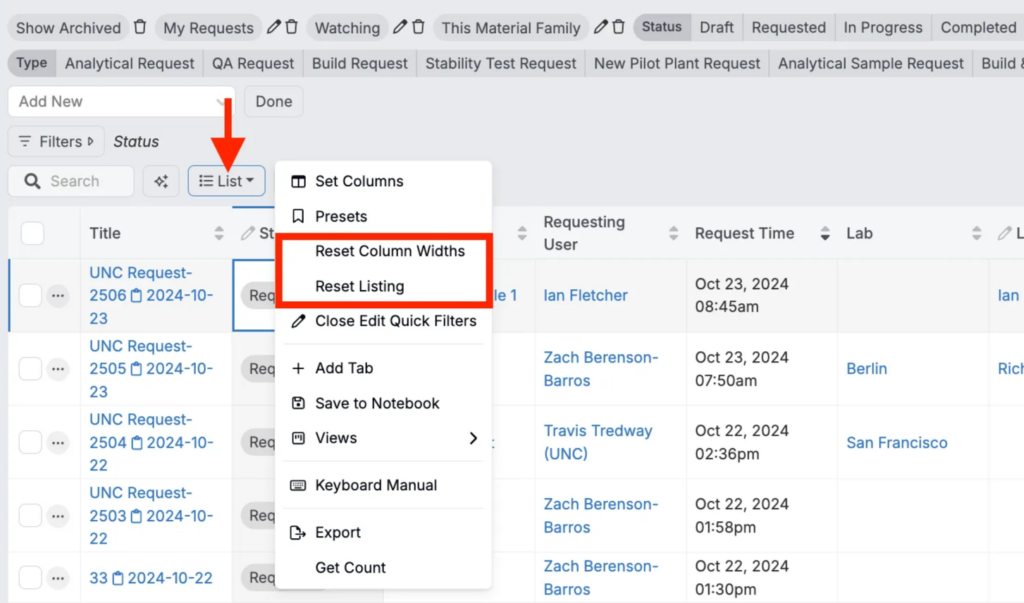
You can also quickly restore a listing page to its default settings using options in the List dropdown menu.
- Reset Column Widths: Resets all column widths to their default values.
- Reset Listing: Reverts the listing’s columns, sorting, and filters to the default configuration set by your organization.
These actions only affect your personal view and do not impact other users.
Creating Listing Tabs
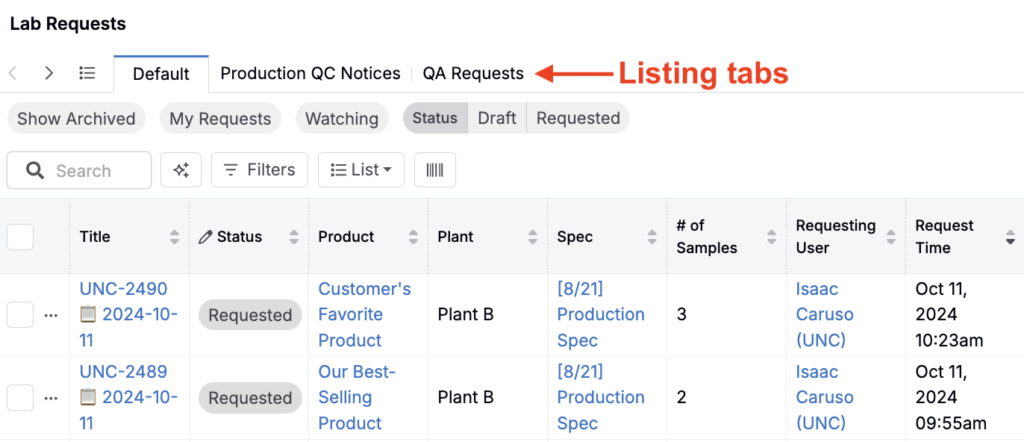
Tabs let you save and switch between different configurations of a listing page — including custom filters, columns, and sorting. Each tab acts as a separate view, giving you the flexibility to tailor listings to your specific workflows or priorities.
Tabs are user-specific, meaning your saved views won’t affect what other users see. For example, on the Lab Request listing page, you might create:
- A tab showing all lab requests
- Another tab filtered to show only the requests you created
Adding a Tab
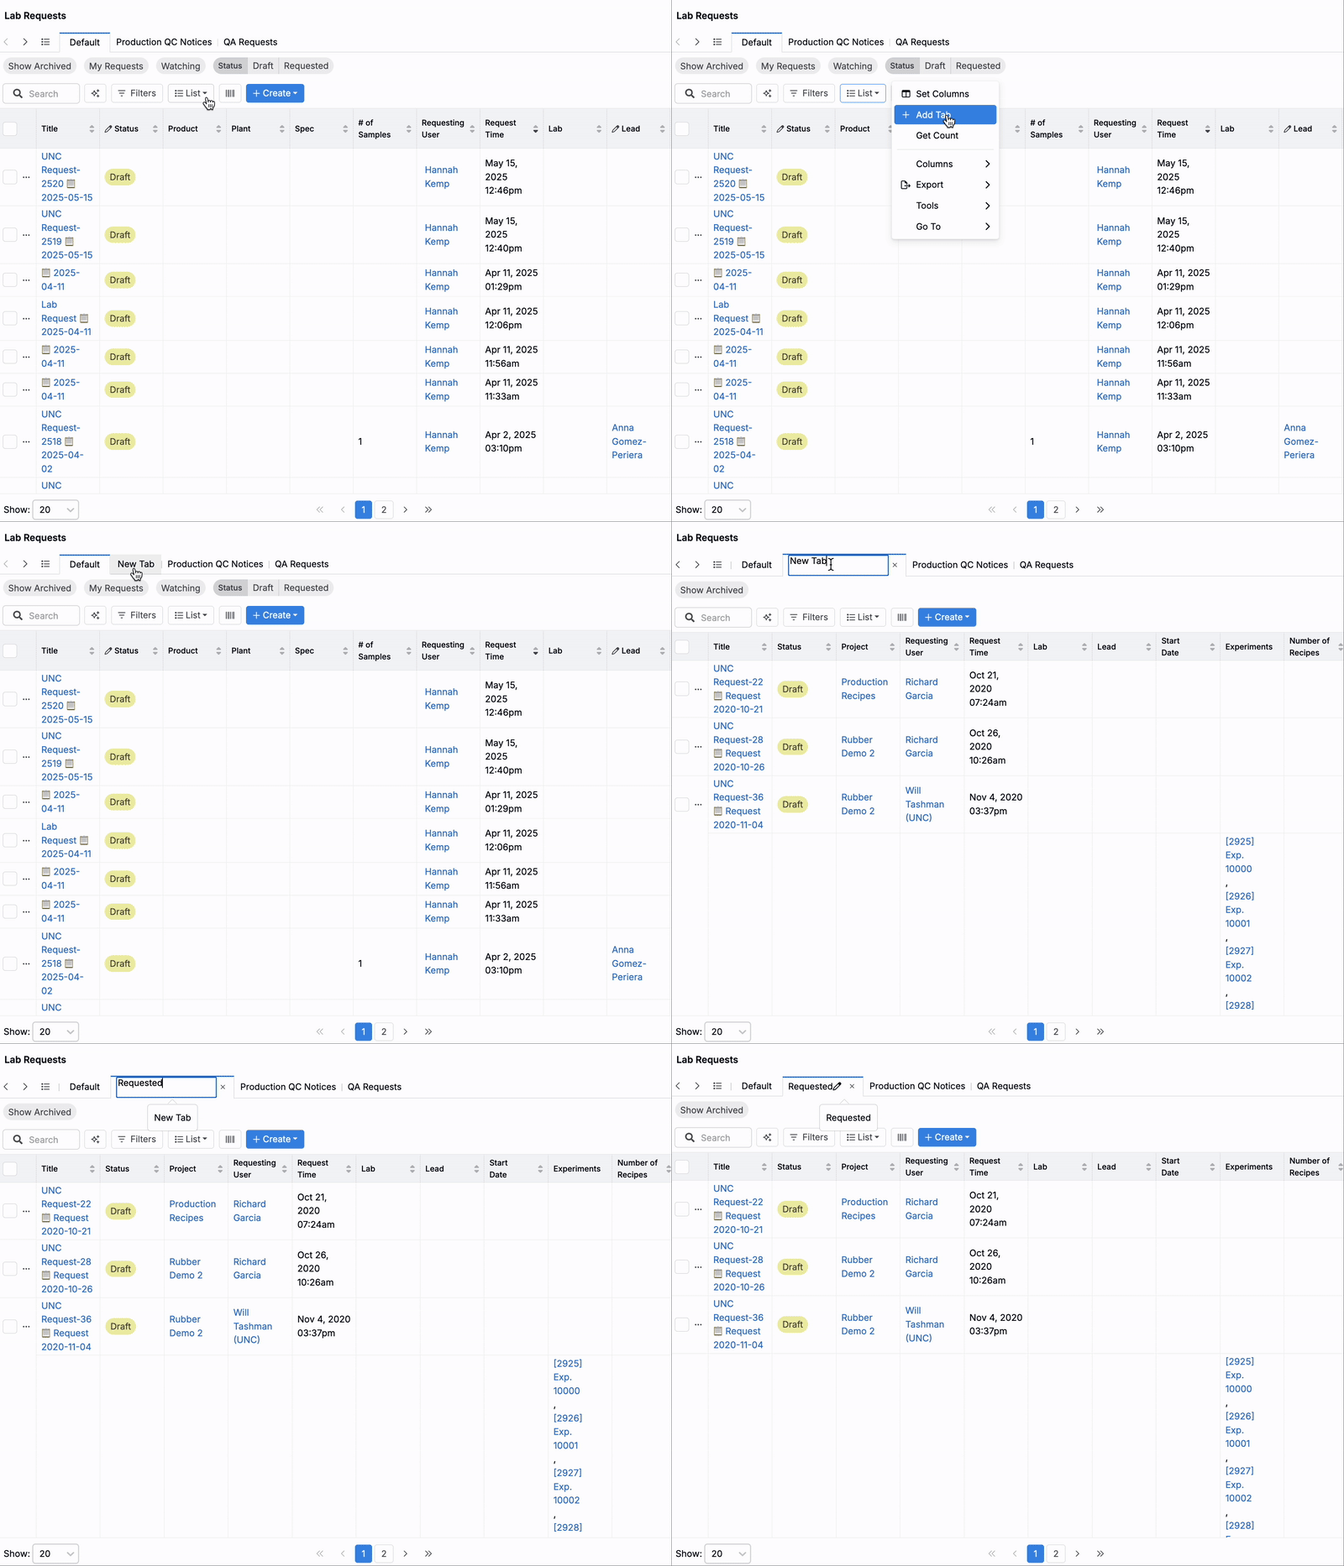
- Click the List dropdown menu and select Add Tab.
- Click the pencil icon to rename the tab. Press Enter to save the new name.
- Within the new tab, apply any filters, select columns, and configure the layout as needed.
All customizations will be saved and persist across sessions. Once you’ve added multiple tabs, you can toggle between them using the tab selector at the top of the listing page.
Saving a Listing to a Notebook
You can save a listing (with select columns and filters) to a Notebook to embed it in a report, dashboard, or shared workspace with other Uncountable users.
Saving to a Notebook
- Click List > Export > Save to Notebook.
- In the modal, choose an existing notebook or click Add to New Notebook.
- Click Save or Save and Go To to save the listing in the selected location.
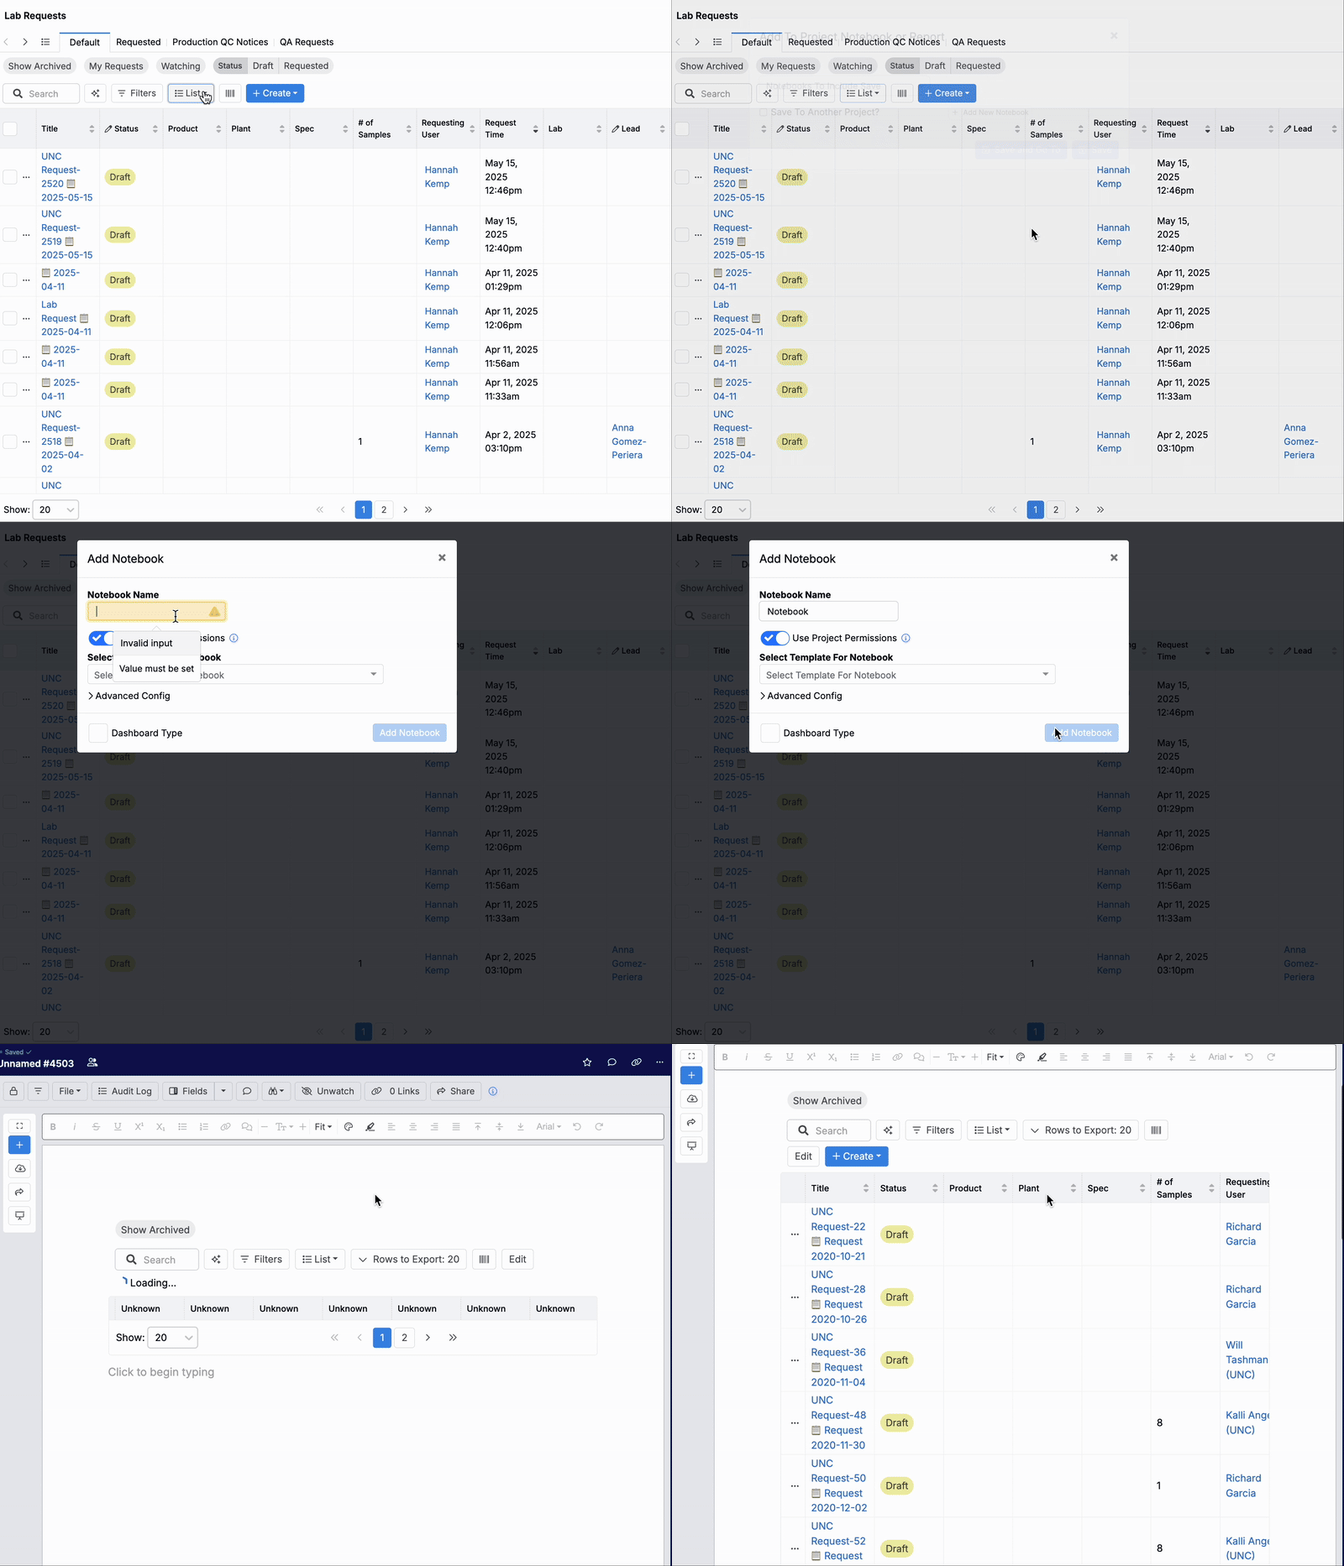
This creates a live view of the listing inside the notebook, preserving any filters or columns you’ve applied.
Exporting to Excel or PDF
To export the current view of a listing table as an Excel or PDF file, navigate to List > Export > Excel/PDF.
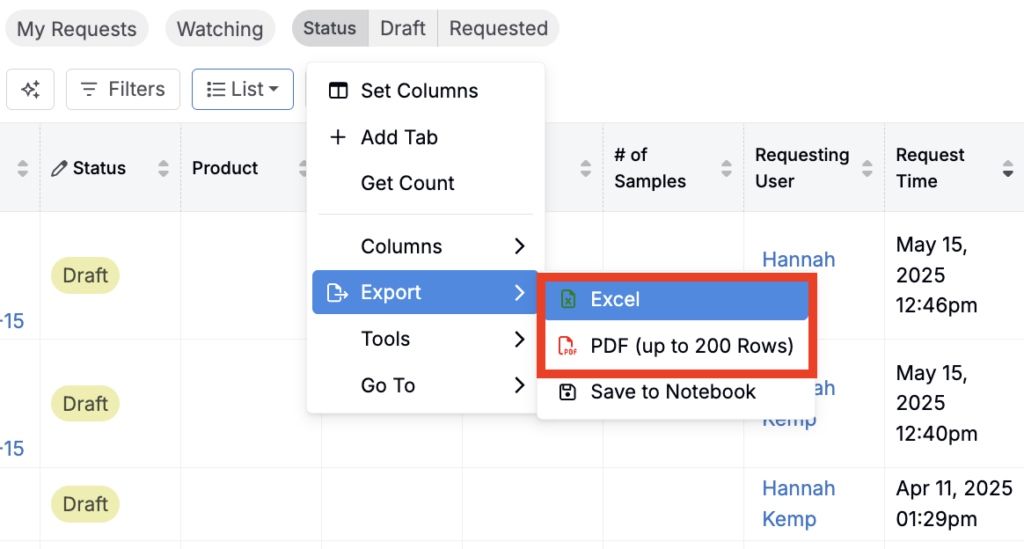
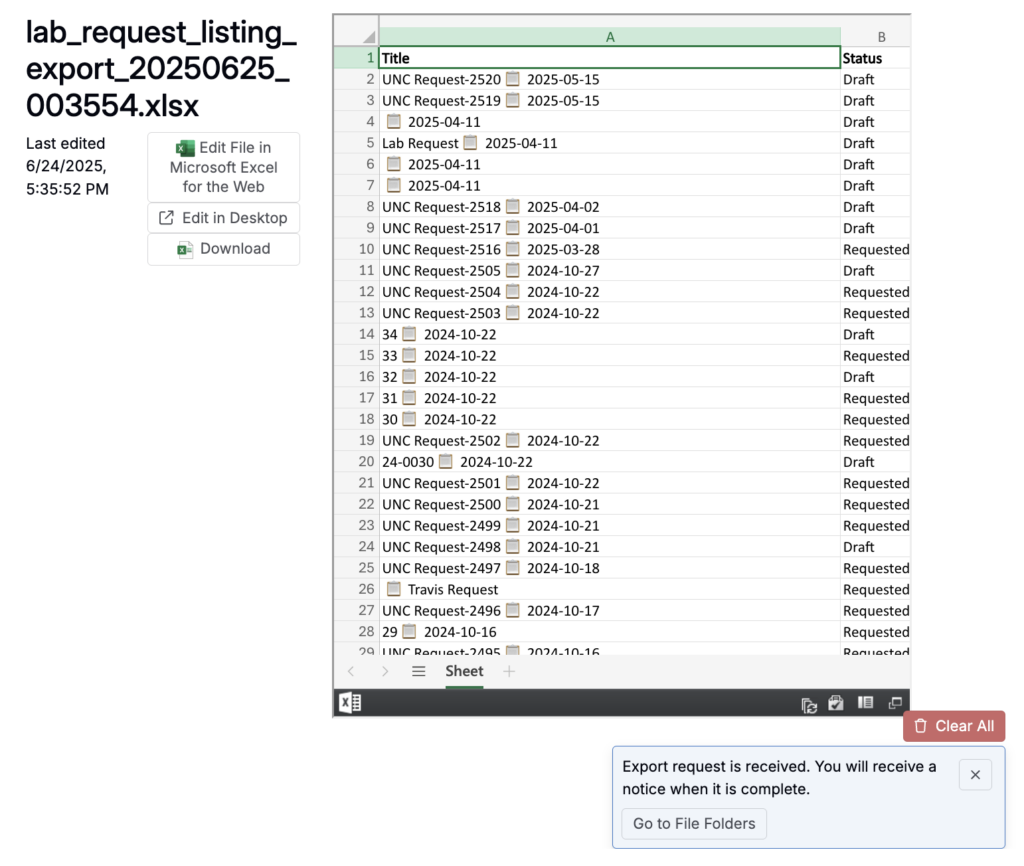
After the export is initiated, you’ll receive a notification when the file is ready. You can then find the exported file in your File Folders where you can download it directly.
Keyboard Shortcuts
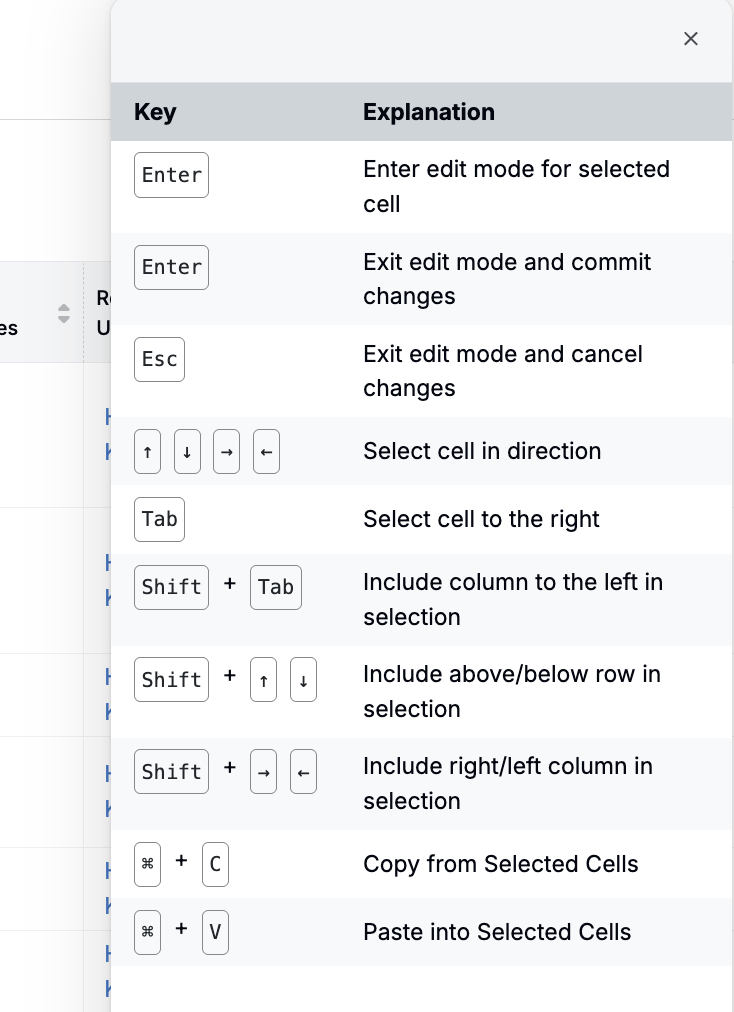
Listing tables are reactive, meaning cells can easily be copied and pasted from the Uncountable platform into a separate Excel file.
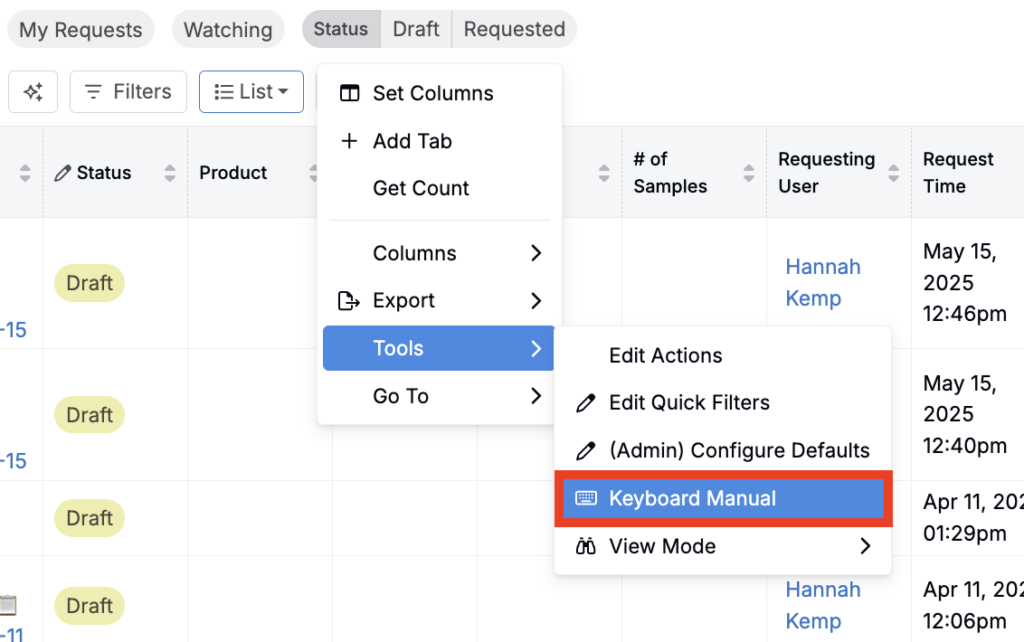
To see a list of the available keyboard shortcuts, open the Keyboard Manual sidepanel by clicking List > Tools > Keyboard Manual.