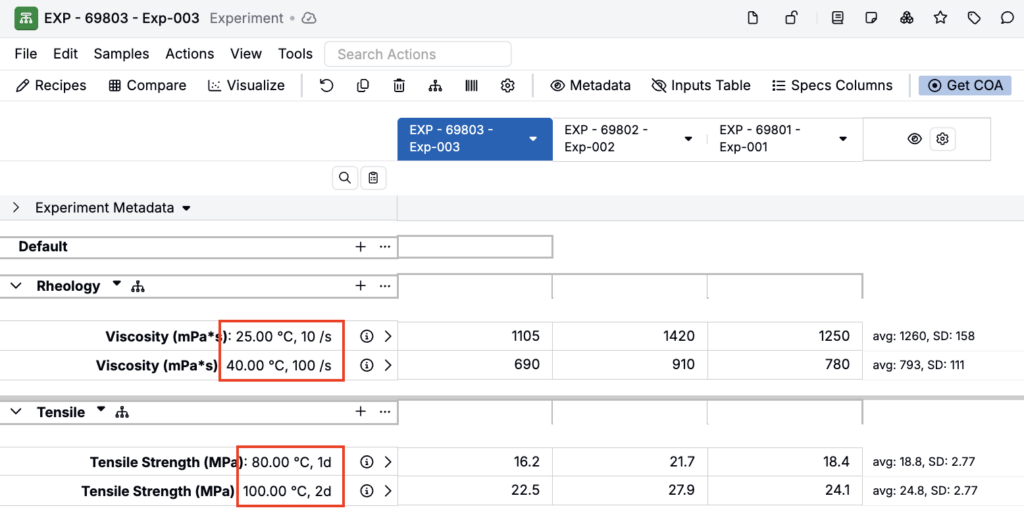
Condition parameters describe the context in which a measurement was conducted—for example, test temperature, shear rate, or aging time. They are attached to outputs at the time of data entry, allowing you to distinguish between measurements of the same output taken under different conditions. Including condition details keeps your data structured, searchable, and ready for analysis or modeling.
Adding Condition Parameters to Outputs
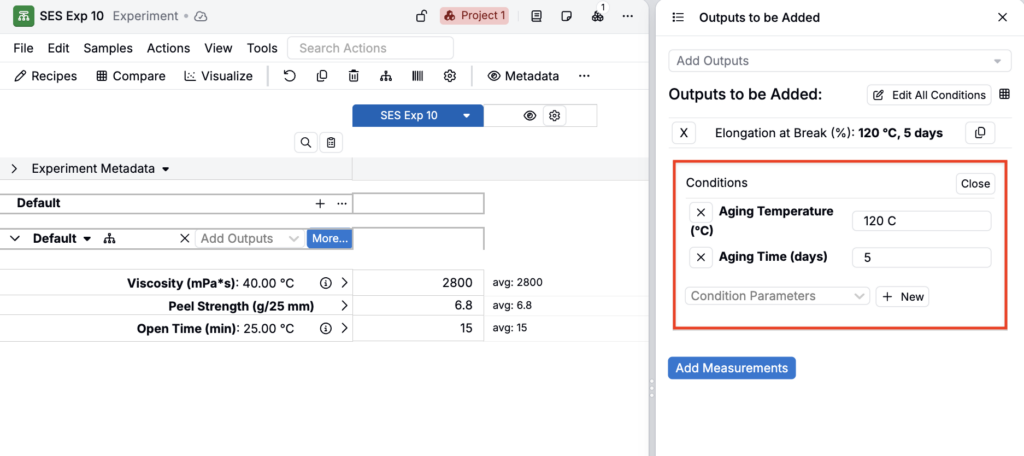
When adding outputs on the Measurements view of experiments, use the Conditions section of the sidepanel or modal to select parameters and enter values.
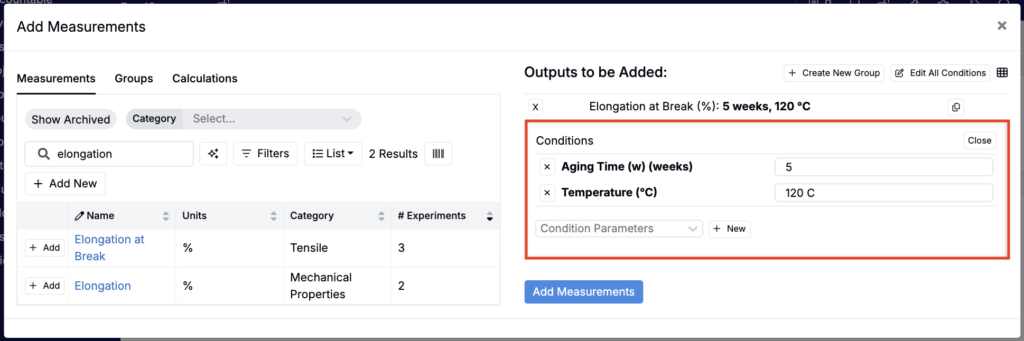
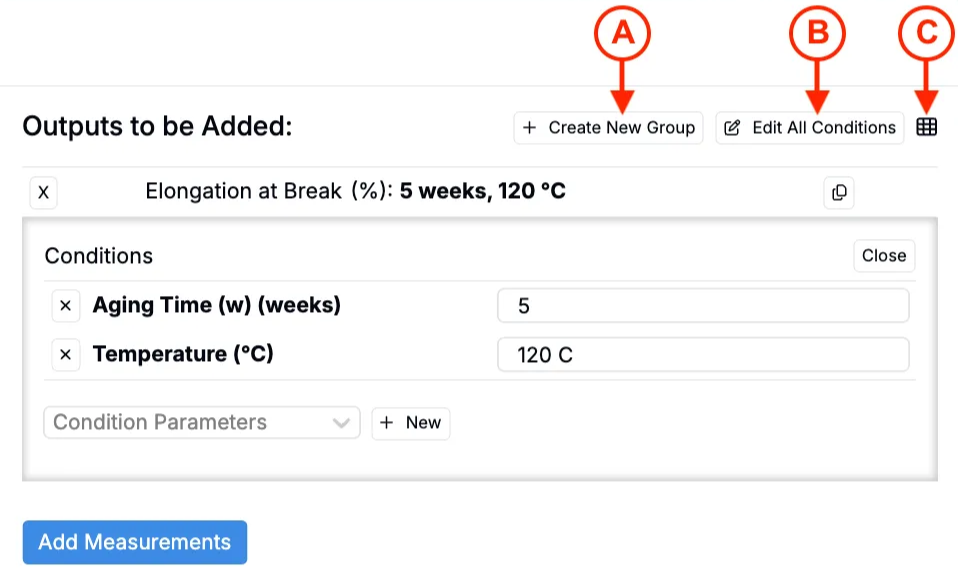
To promote consistent data entry, you can also save outputs and associated conditions as output groups. Click + Create New Group (A) in the Add Measurements modal to create one.
Additional tools include:
- Edit All Conditions (B) — applies a condition parameter to every output in the group.
- Test Condition Matrix (C) — creates multiple conditioned measurement rows at once. Learn more below.
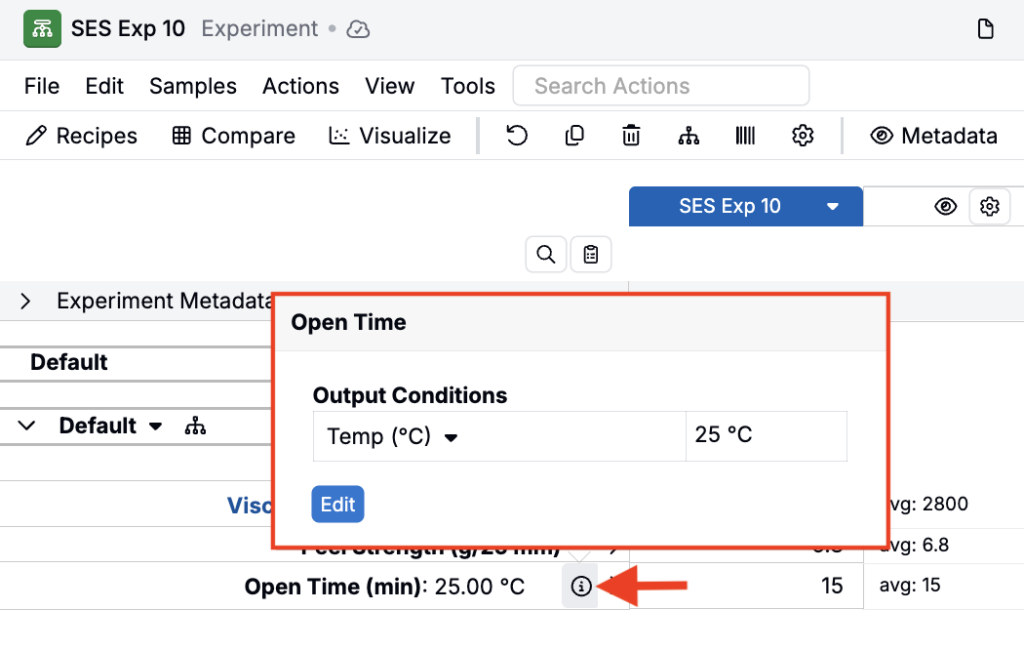
To change an existing condition parameter for a measurement, click on the information icon associated with a measurement and select Edit.
Test Condition Matrix
Use the Test Condition Matrix when the same outputs need to be measured across several test conditions. Select one or more condition parameters, enter the values to test, and choose which selected outputs the matrix should apply to.
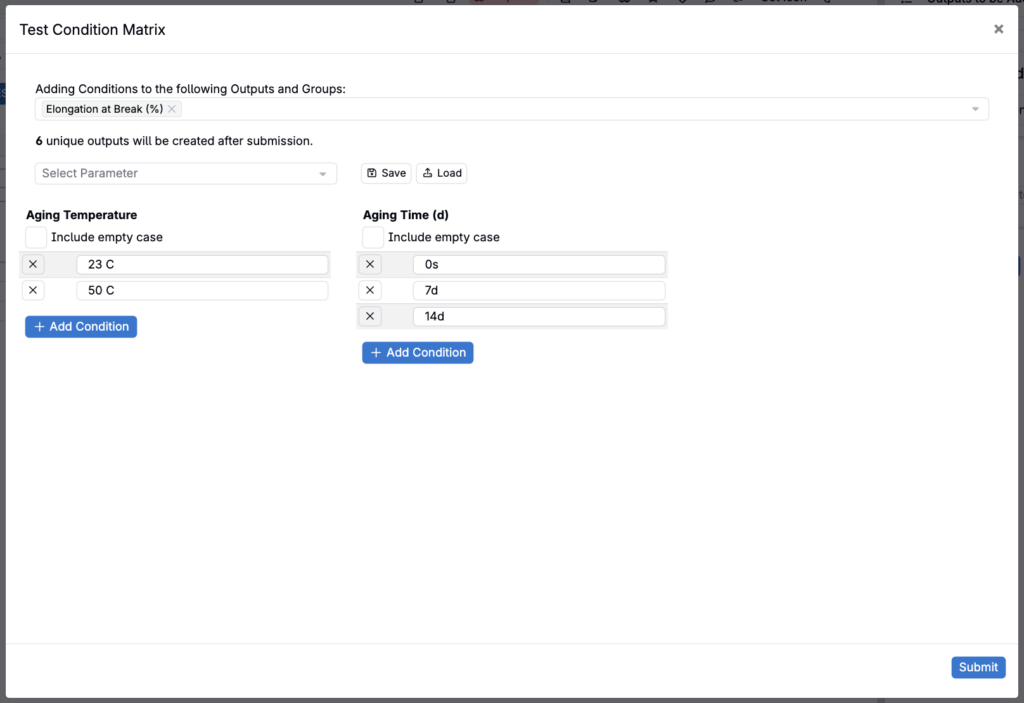
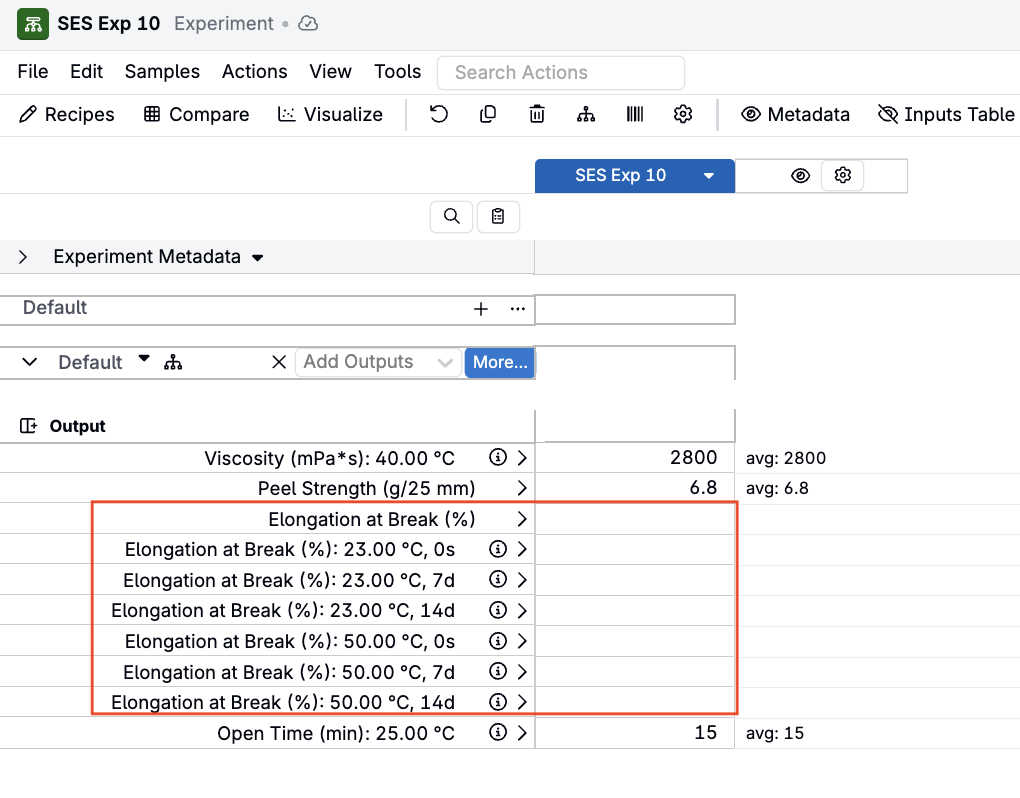
When you submit the matrix, Uncountable creates a separate measurement row for every combination of those values—for example, three aging times and two temperatures produce six condition combinations for each applied output.
This is useful for stability studies and other repeated test plans because you do not need to add each output-condition combination individually.
To change an existing condition parameter for a measurement, click on the information icon associated with a measurement and select Edit.
Creating Condition Parameters
New condition parameters can be created directly from an experiment or on the Condition Parameters listing page (Inputs/Outputs > Outputs > Condition Parameters).
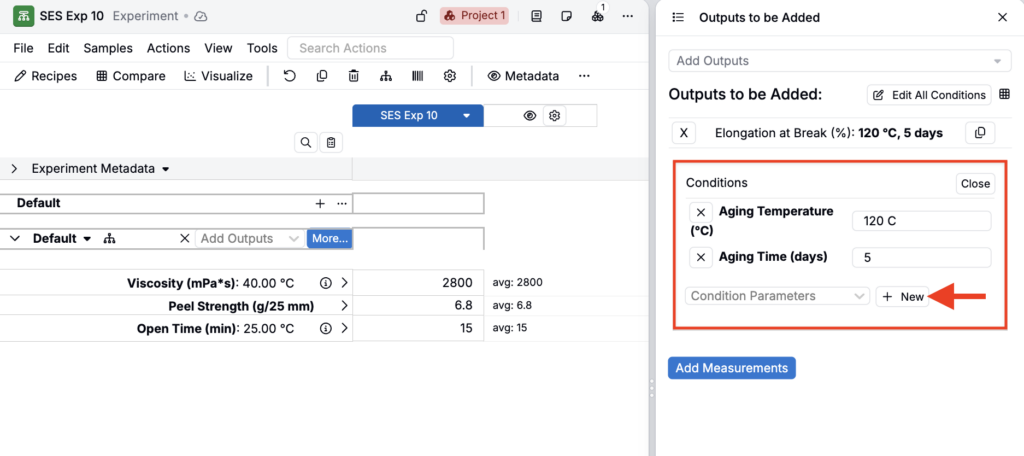
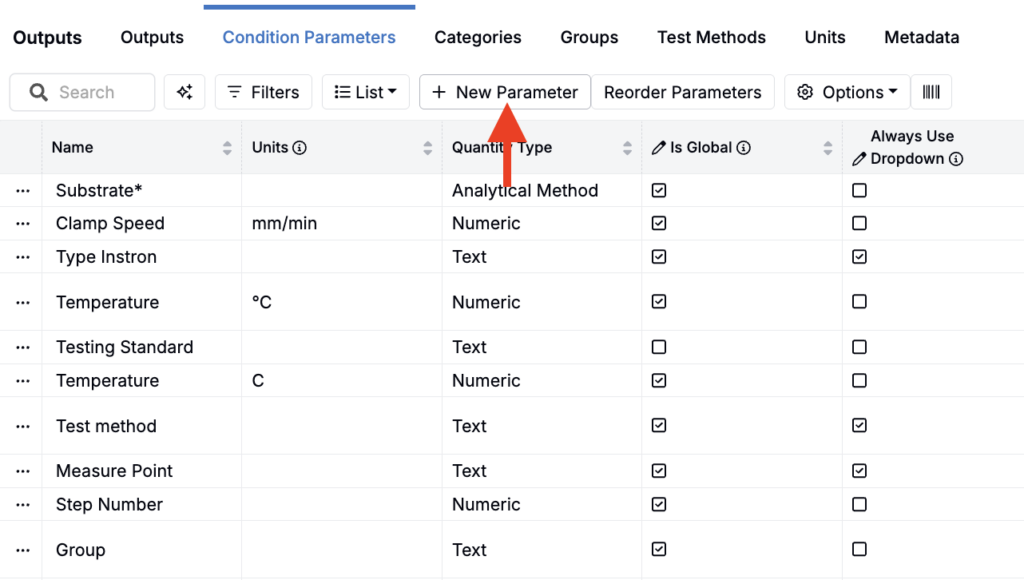
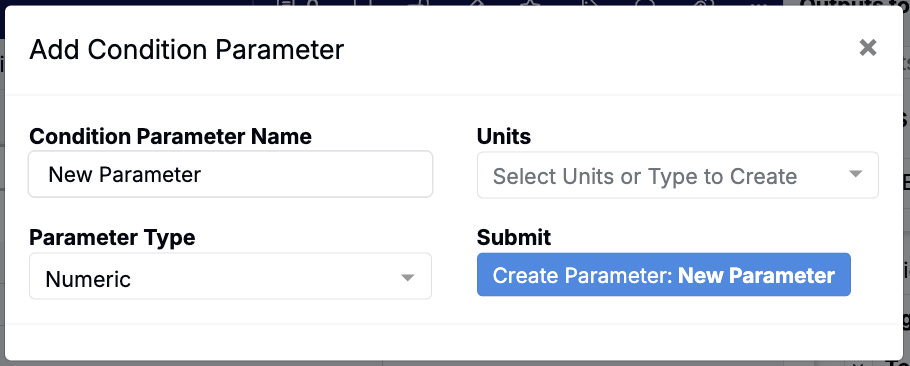
In the new parameter modal, enter the following:
- Condition Parameter Name
- Units (if applicable)
- Parameter Type — choose Numeric, Text, or Analytical Method
Configuring Condition Parameters
On the Condition Parameters listing page, you can configure additional parameter settings.
Edit Options
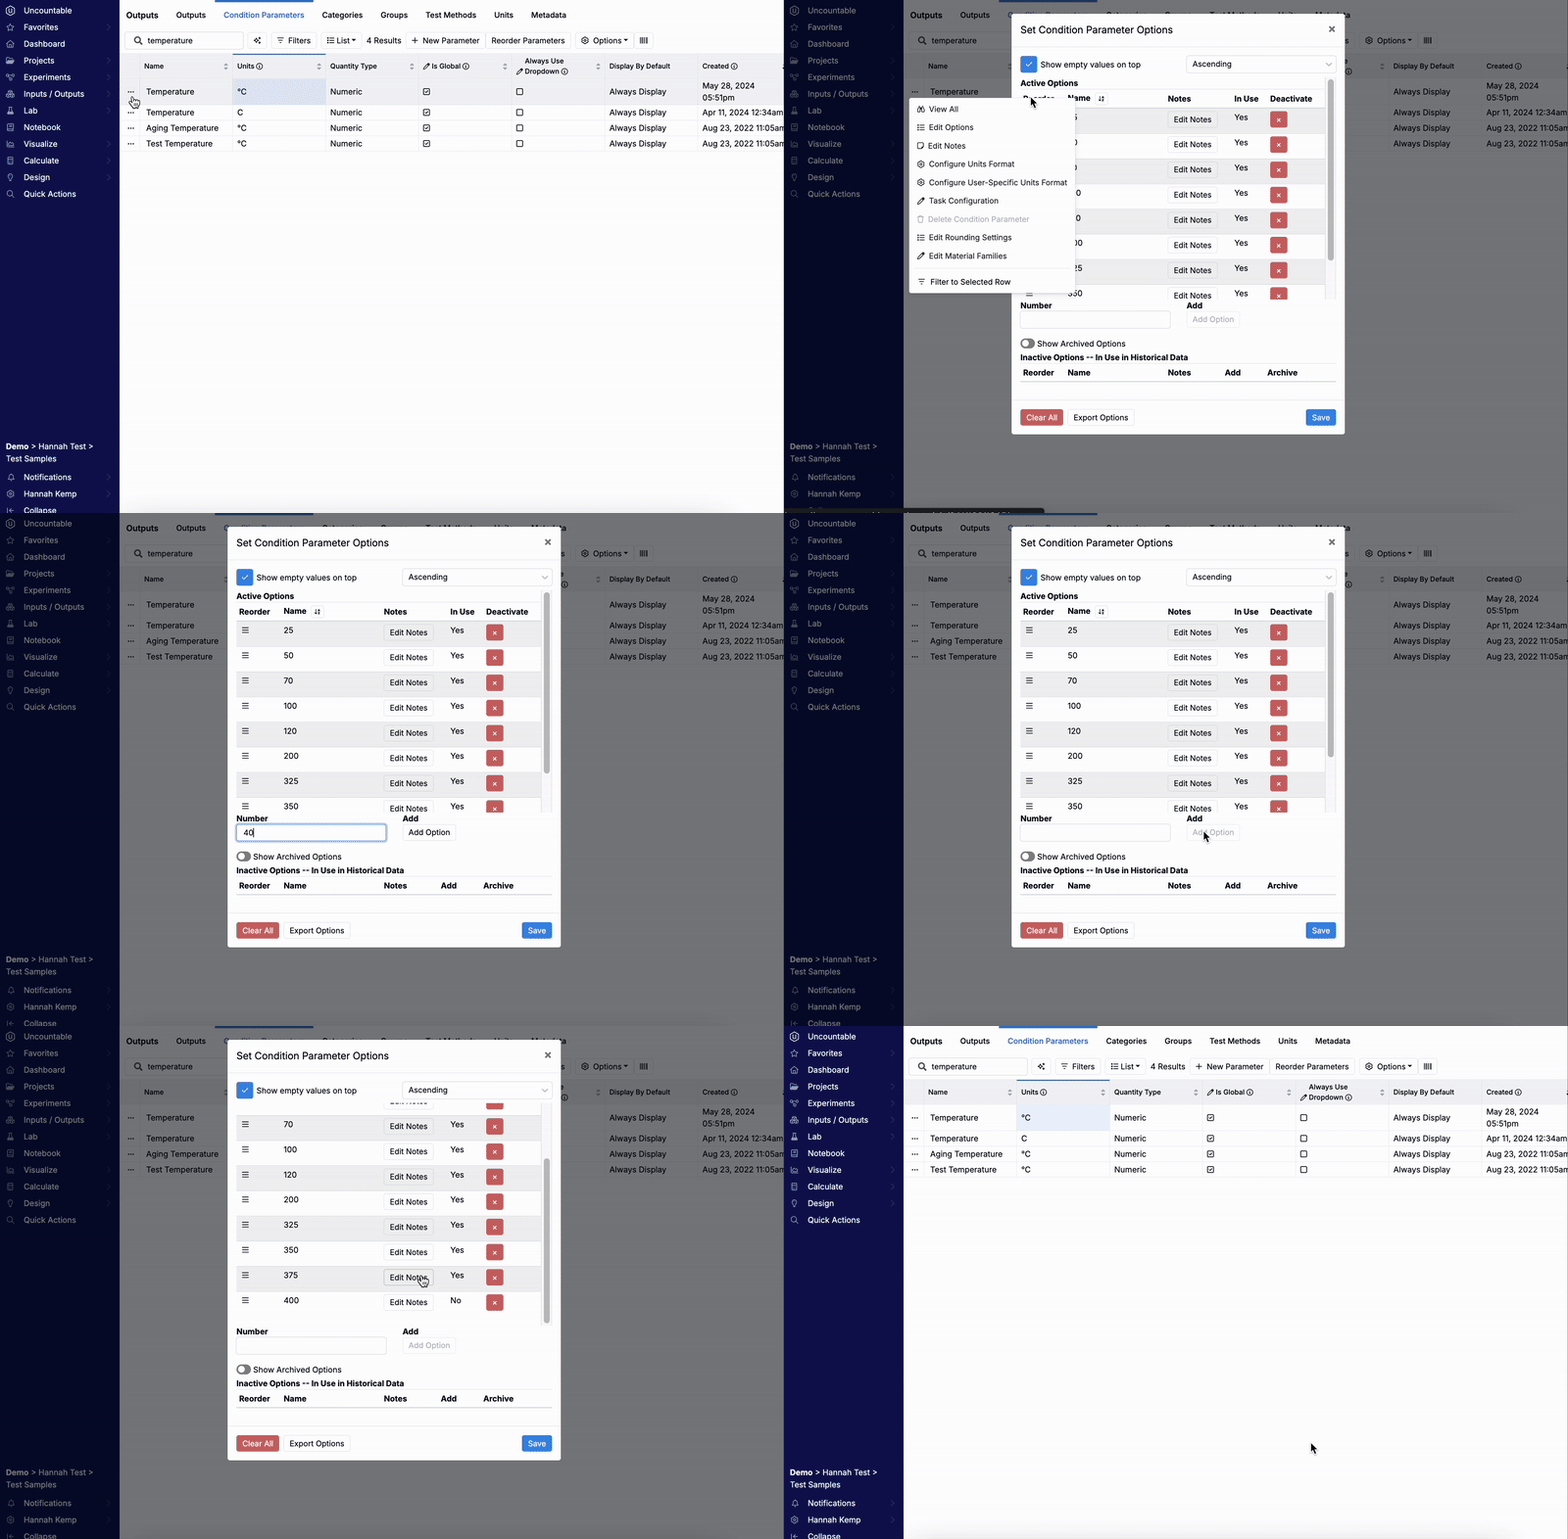
To limit a parameter to specific choices, click the … next to it and choose Edit Options. In the modal, enter allowed values, reorder them, and mark active options. Only active values will appear when the parameter is used.
Global vs Non-Global Parameters
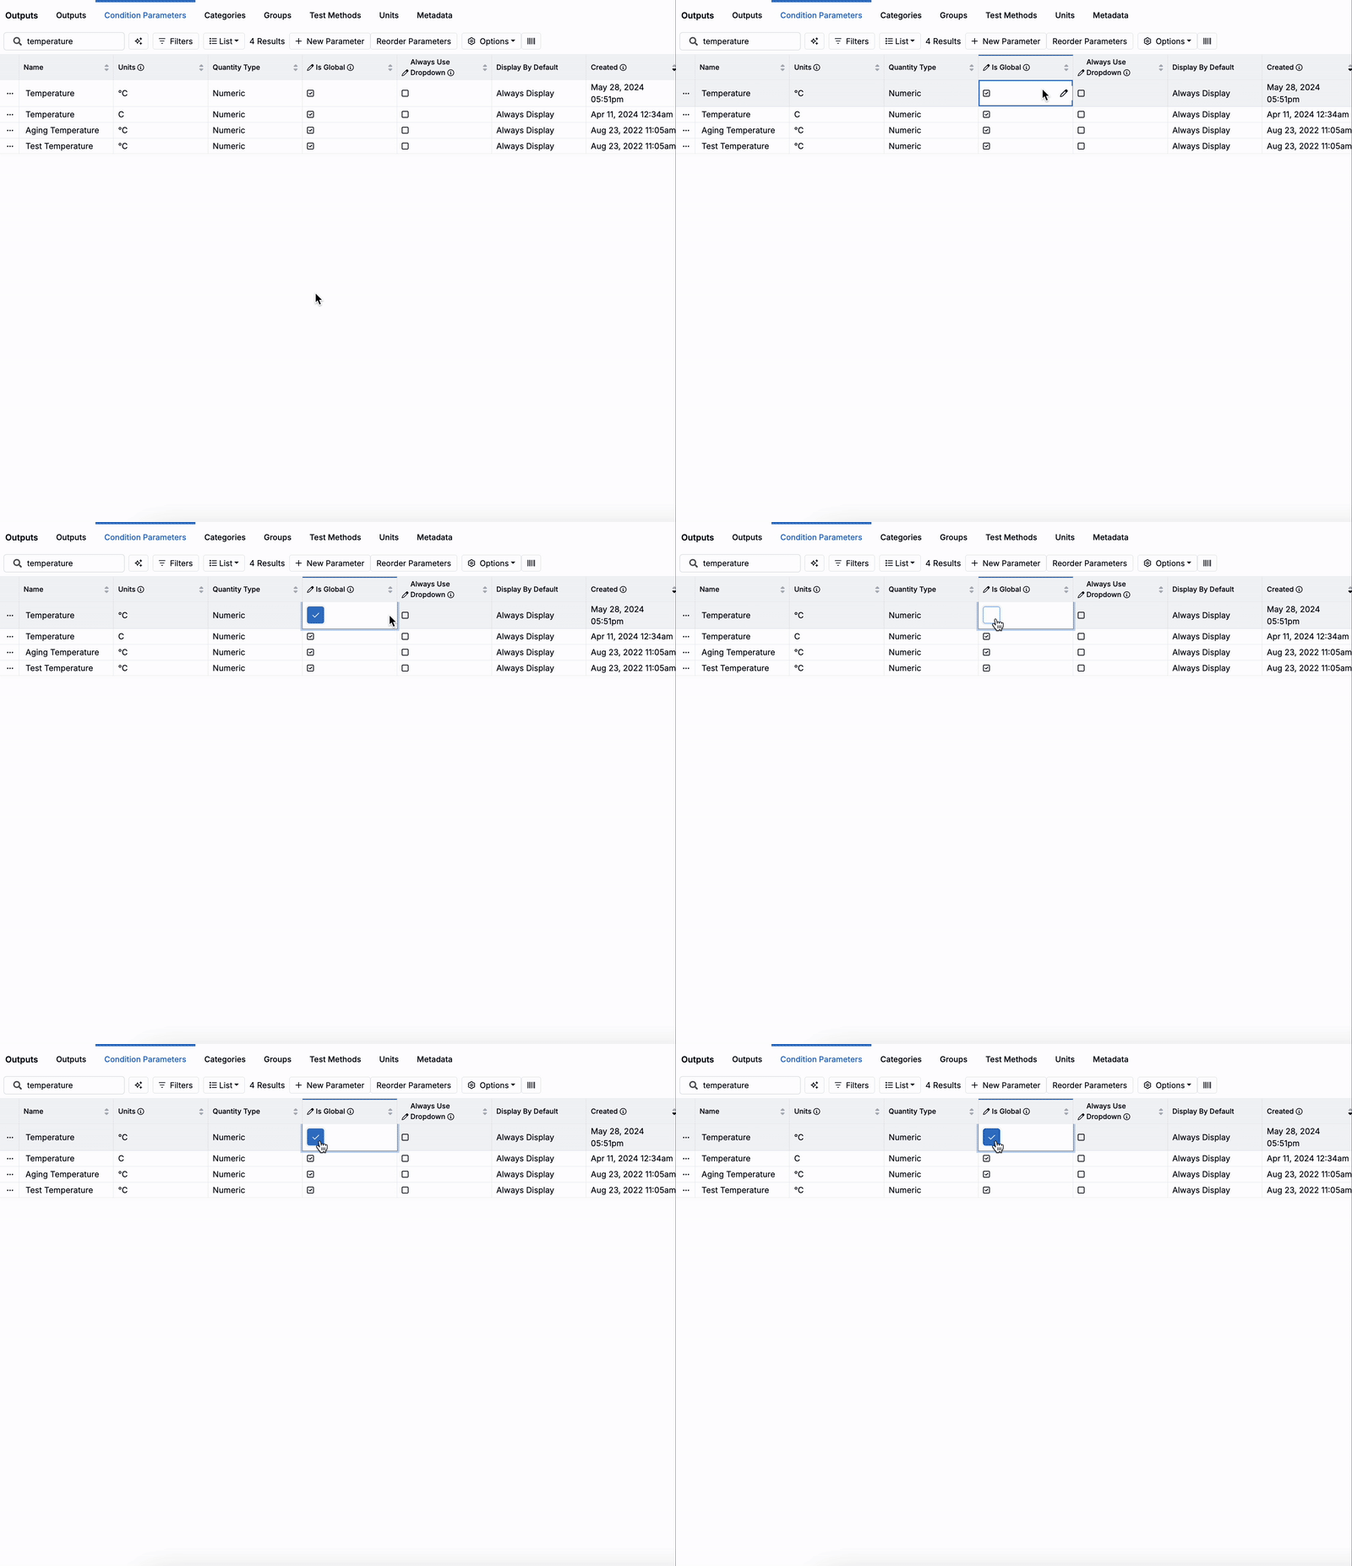
A global condition parameter is automatically available for all outputs. If a parameter is non-global, it must be explicitly enabled for each output where it’s needed.
To change a parameter’s global setting, use the Is Global column. Click the pencil icon to enable editing, then check or uncheck the box as needed.
Output-Specific Settings
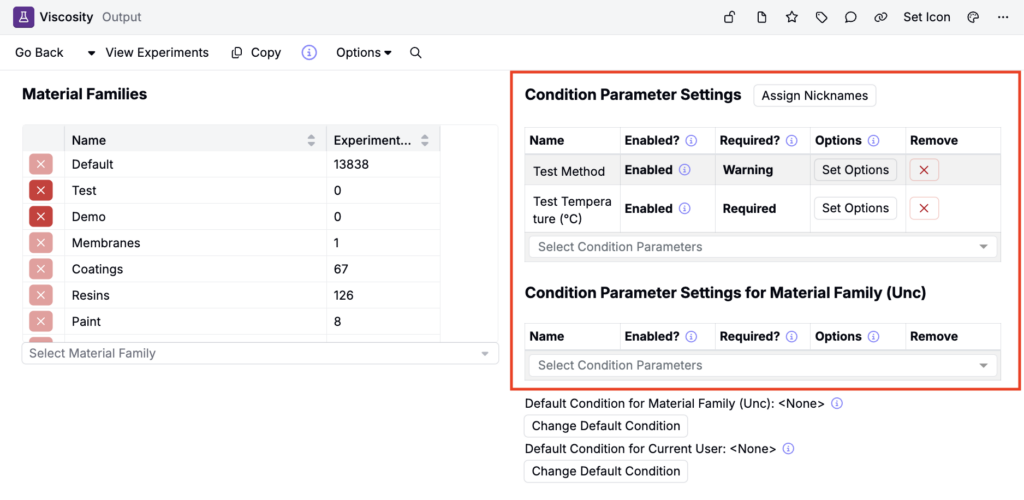
If a condition parameter is used across multiple outputs, you can configure it individually from the output’s Details page. To define settings that apply across all material families, use the Condition Parameter Settings section:
- Add a parameter using the Select Condition Parameters field.
- In the Required field, set whether the condition should be:
- Prompt — a blank field that is optional to fill in
- Warning — optional but recommended (highlighted in yellow)
- Required — mandatory to fill in before adding the output (highlighted in red)
- Click Set Options to define output-specific options.
To configure the parameter for just the current material family, use the Condition Parameter Settings for Material Family section on the same page.
Default Values
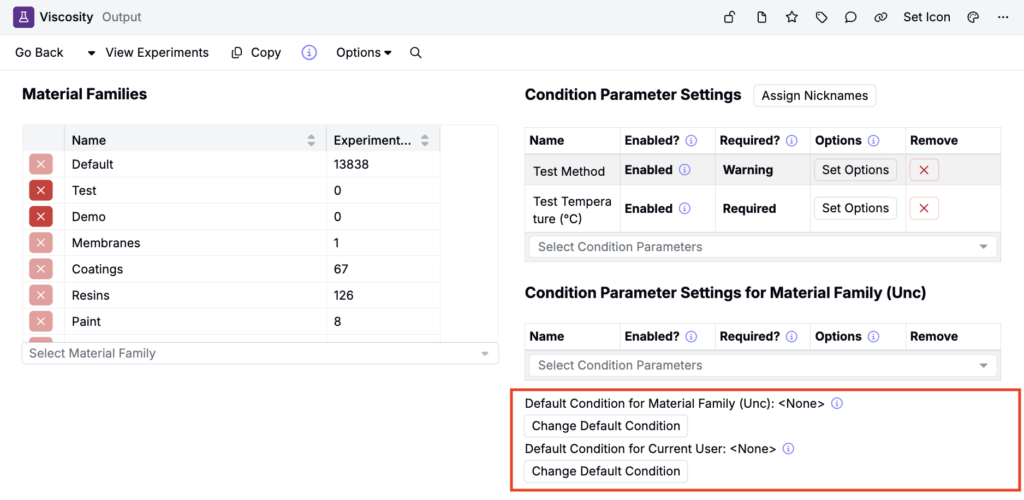
You can define default condition parameters and values for any output on its Details page.
- To set defaults by material family, go to the Default Conditions for Material Family section and click Change Default Condition. In the modal, select the conditions and enter default values. These will be automatically applied whenever the output is added within that material family.
- To set defaults for yourself only, use the Default Conditions for Current User section and click Change Default Condition. Defaults set here will apply whenever you add the output, regardless of material family.
Reusing Parameters Across Material Families
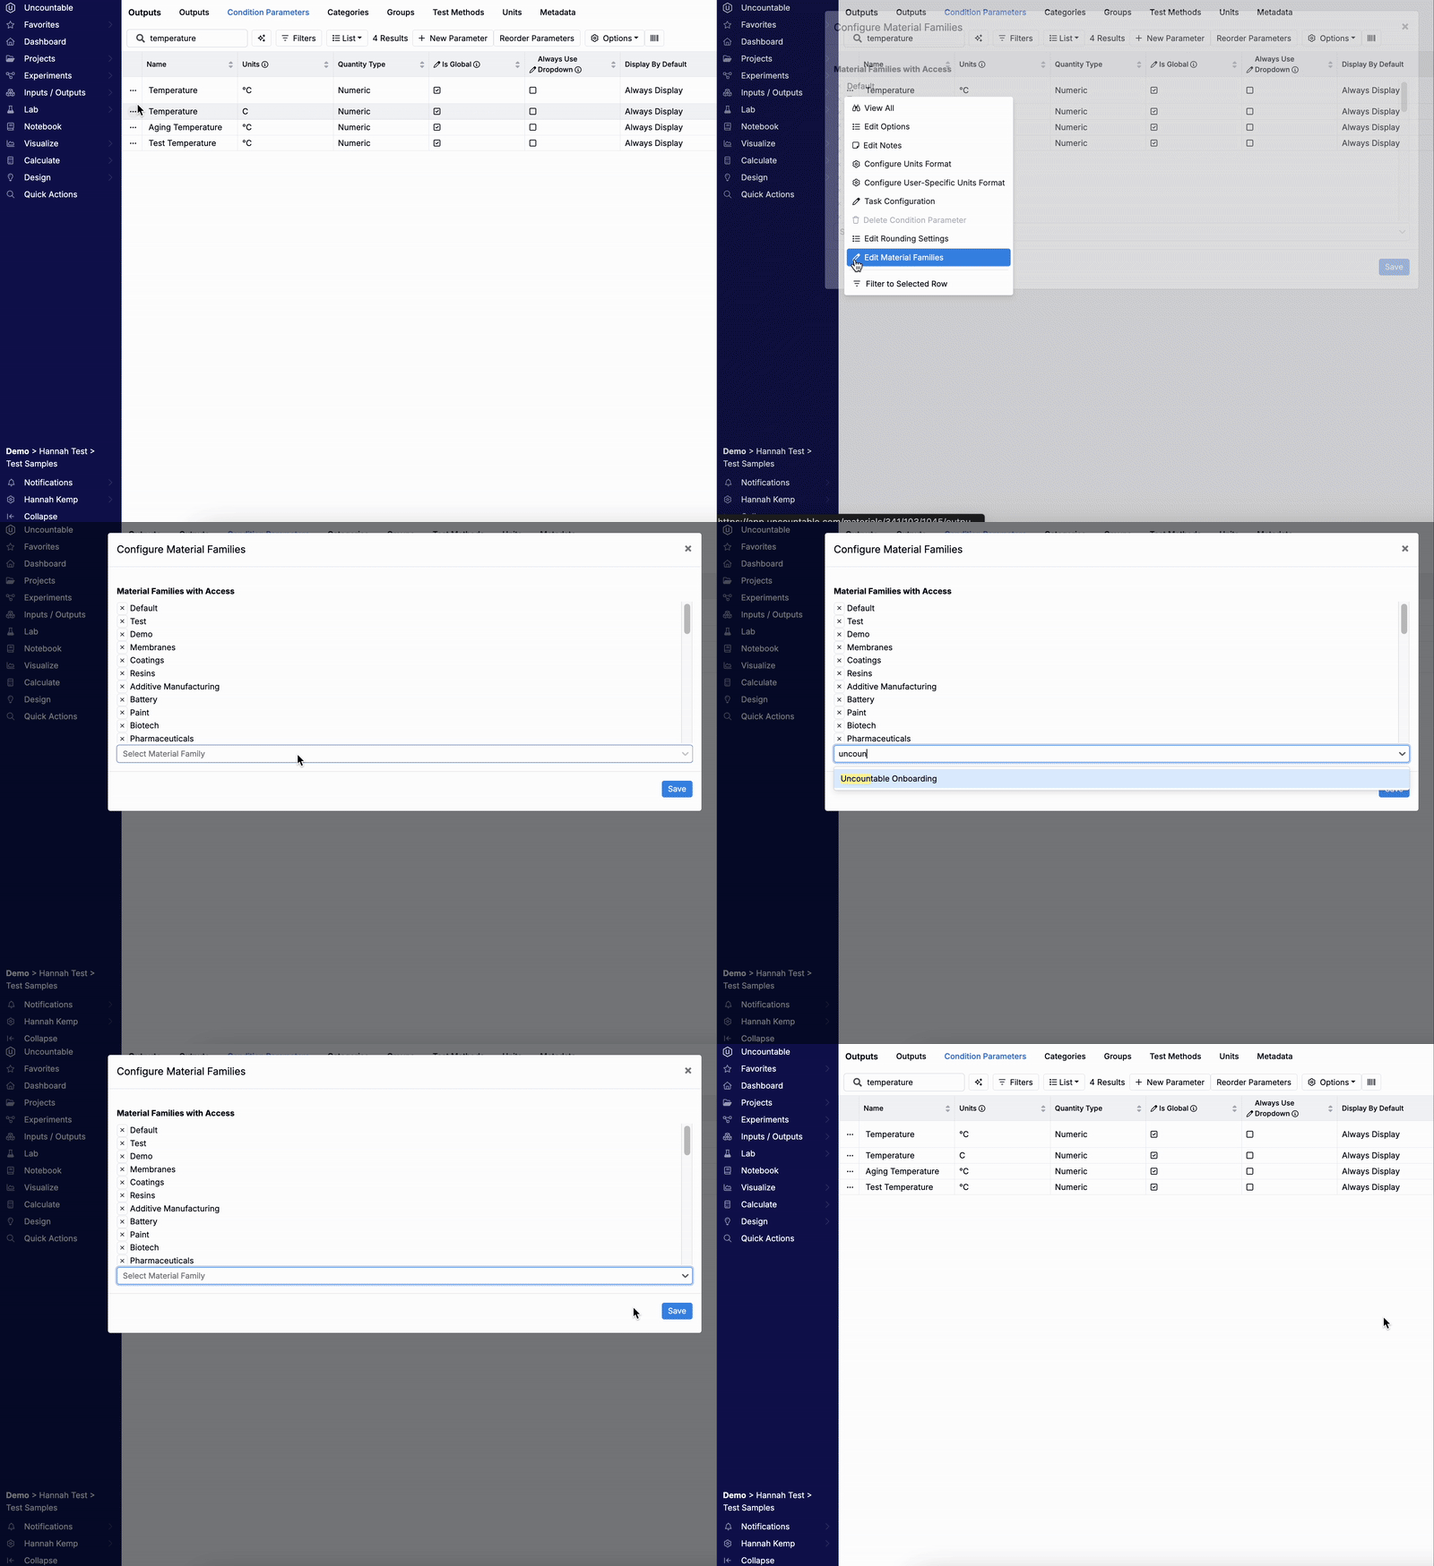
To assign an existing condition parameter to another material family:
- Find the parameter and click the … menu.
- Choose Edit Material Families.
- In the modal, add or remove families, then save.
Condition Nicknames
Condition nicknames are named shortcuts for applying a set of condition parameter values at once. Nicknames are useful when teams have multiple standard testing conditions (e.g., high humidity vs. low humidity). For simpler cases with a single default condition, output groups are often recommended instead.
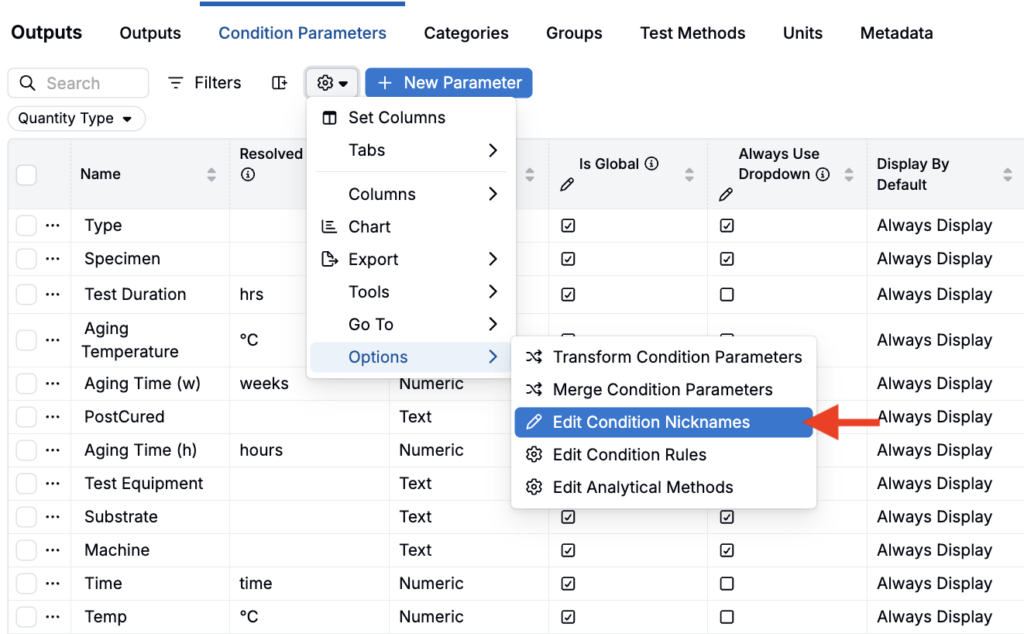
Condition nicknames can be created in two places:
- On the Condition Parameters listing page, by selecting ⚙️ > Options > Edit Condition Nicknames.

- On an individual output’s Details page, by clicking Assign Nicknames within Condition Parameter Settings.
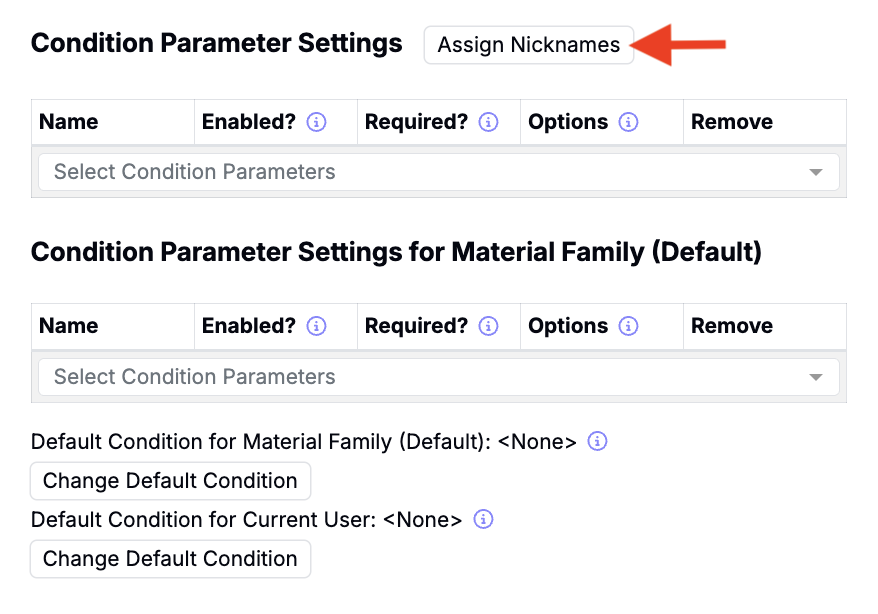
Once created, condition nicknames appear as a selector when adding parameters to an experiment output. Selecting a nickname automatically fills in the associated condition parameter values. Note that condition nicknames are starting points — selecting one pre-fills condition parameter values, but users can still edit individual values afterward.
Organizing Outputs by Condition Parameters
Condition parameters can be used to organize the measurements table, making it easier to view and compare data. From the Measurements page, click the information information icon next to an output and use the parameter’s menu to assign as column or table parameters.
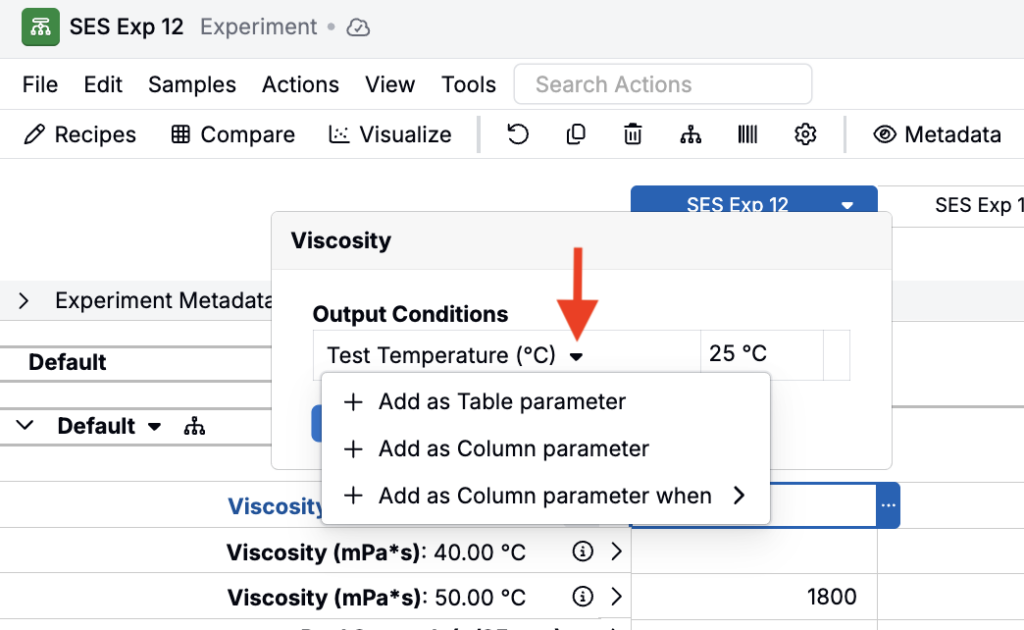
Column Parameters
Adding a condition parameter as a column parameter creates a separate column for each value to the left of the output name. If you have more than one column parameter, you can drag columns left or right using the hamburger icon to reorder them. Clicking a column header lets you re-sort categorical parameters or remove the column.
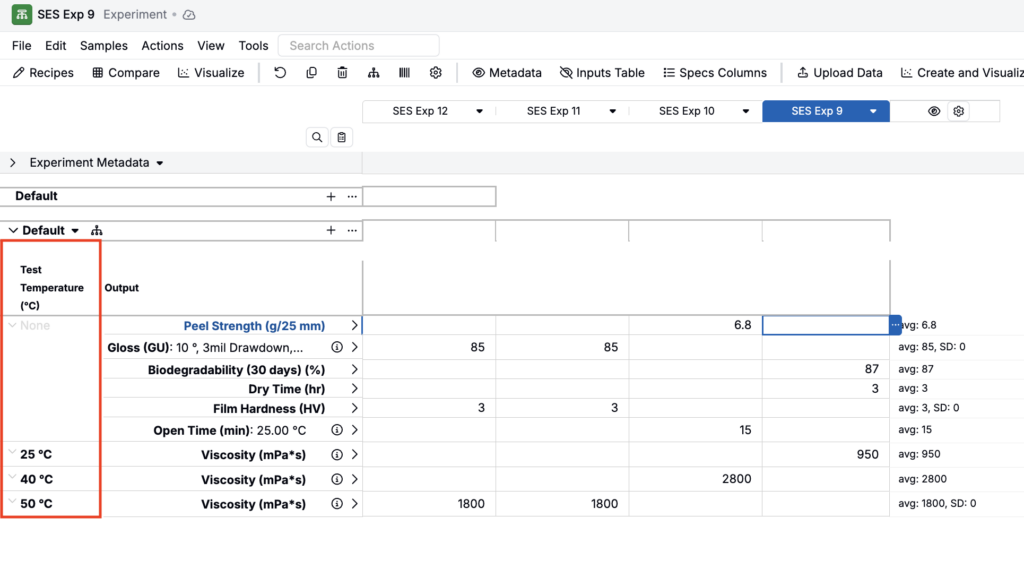
Table Parameters
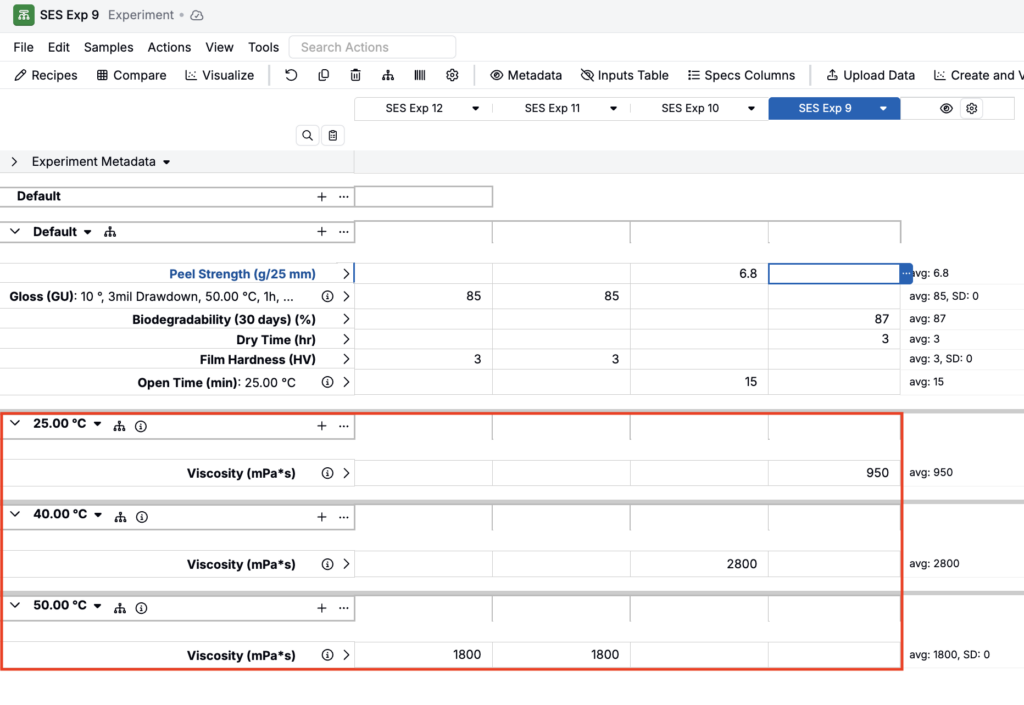
Adding a condition parameter as a table parameter groups output values by condition, displaying each condition value as a separate category next to the output name. Any new condition value will appear as a new category.
Sort and Organize
Alternatively, you can organize condition parameters from the measurements view:
- Click the Sort and Organize button for an output category or search for “Sorting and Organizing Options” (all categories).
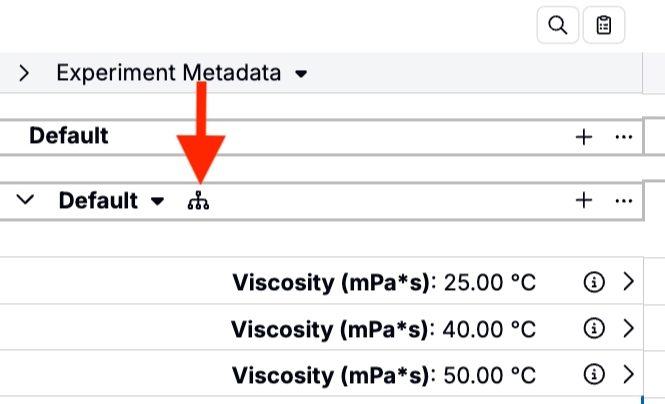
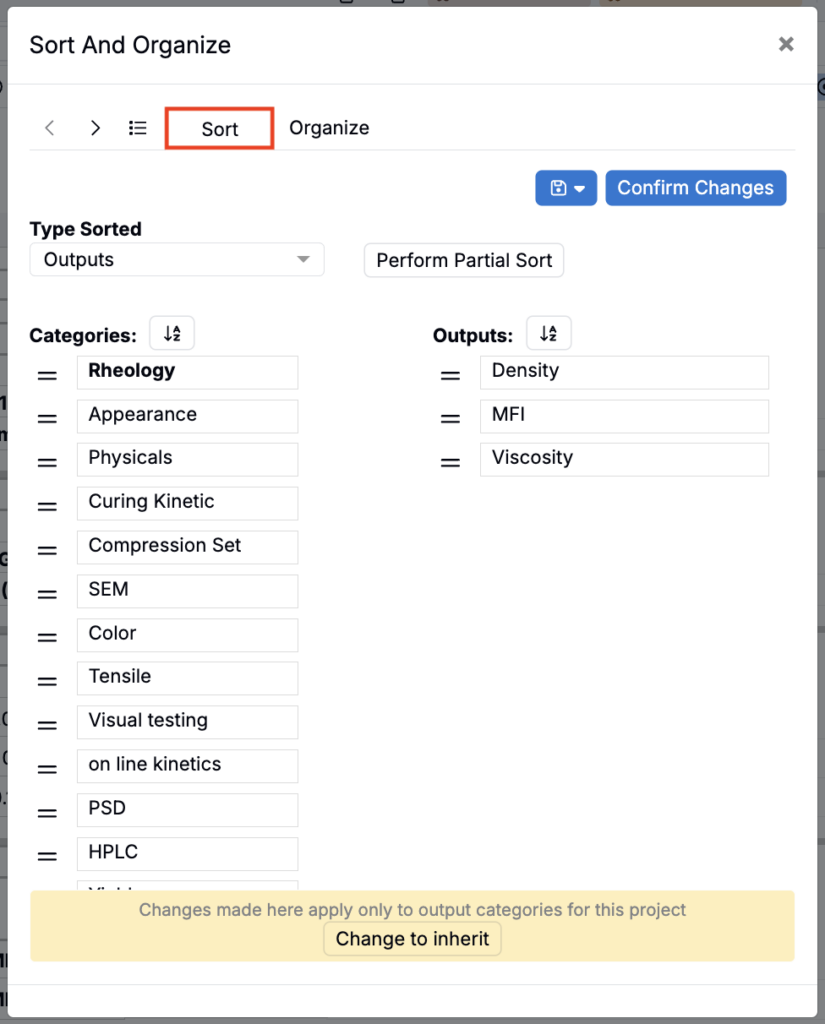
- Sort — Reorder categories and outputs.
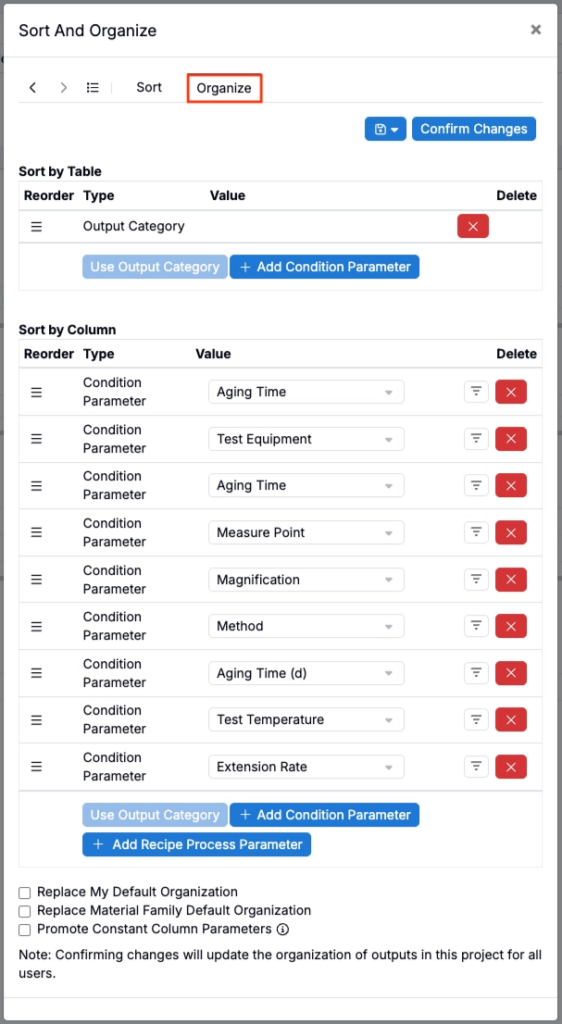
- Organize — Drag condition parameters using the three-line handles on the left.
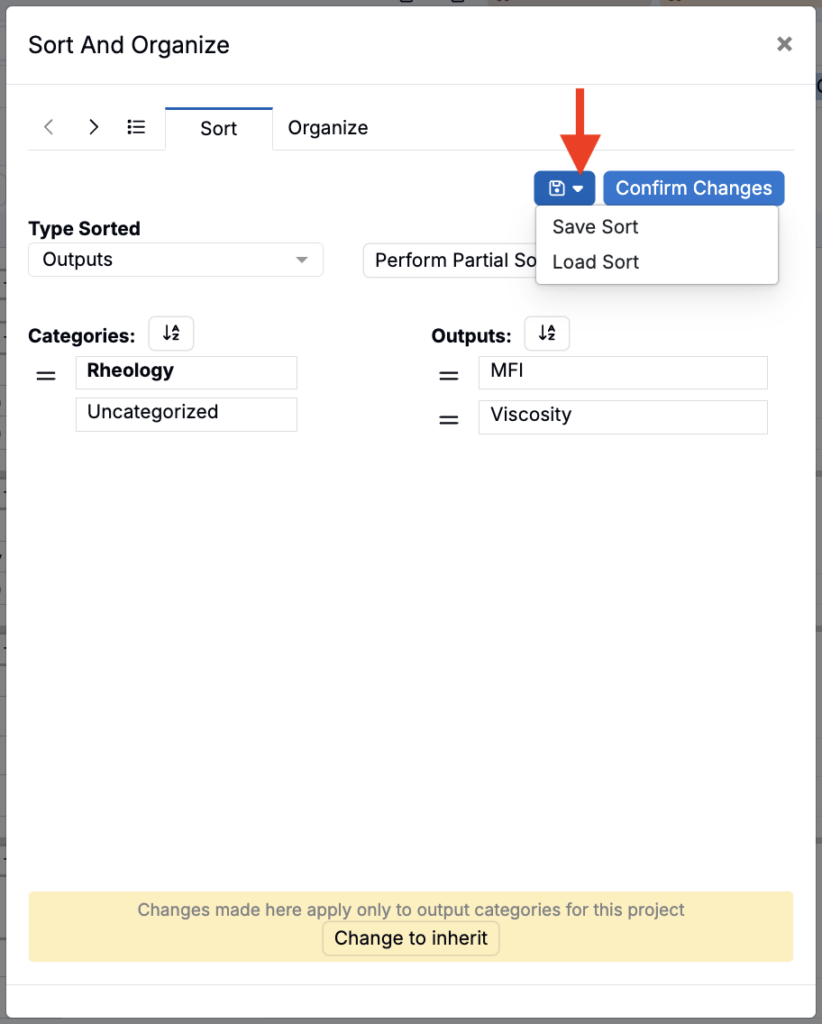
- Load saved views by clicking the 💾 and selecting Save or Load Sort.
Output Conditions
An output condition is the specific set of condition parameter values applied to an individual output measurement. Multiple measurements of the same output can have different output conditions, allowing you to compare results across different testing contexts.
Output conditions are also used in specs and triggers to define specific condition parameter values to match or apply.
For a full guide—including default vs prompted conditions, inheriting conditions from table, and condition matching in calculations—see Output Conditions.