Projects in Uncountable help organize experiments by grouping related work under a common context—such as a R&D initiative, production trial, or development phase.
Each project is tied to a material family and can include its own experiments, workflows, tags, and metadata. Projects can also be structured hierarchically using parent and child relationships.
Viewing and Navigating Projects
Uncountable provides two main interfaces for viewing and selecting projects:
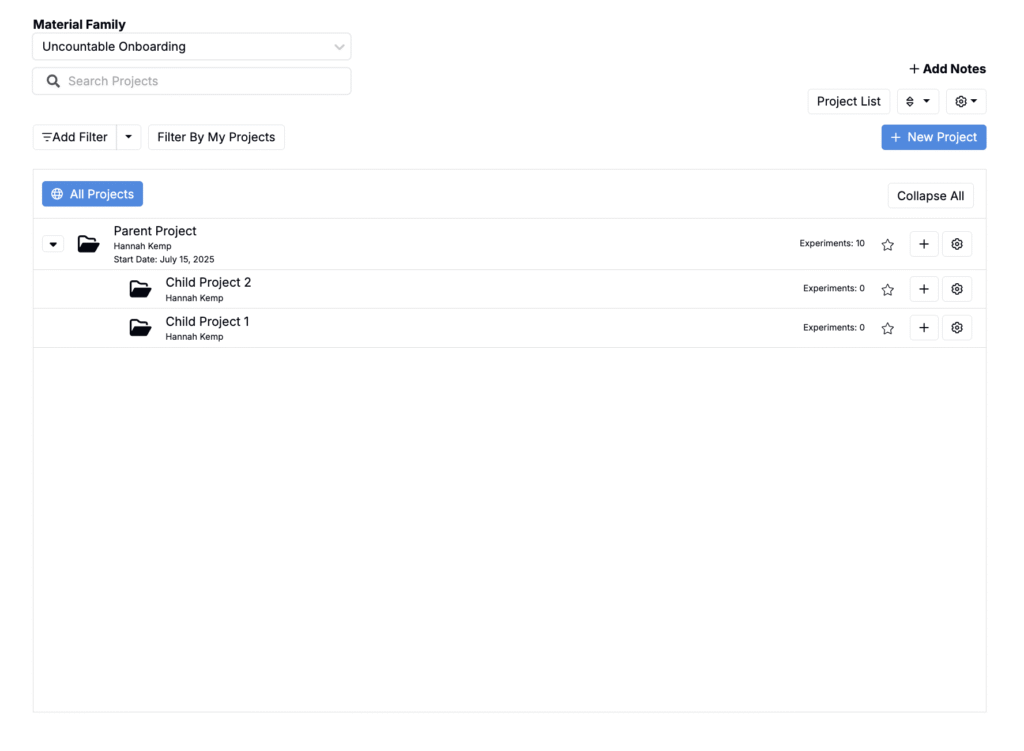
- Select Project — Dashboard-style view of all projects within the currently selected material family. From here, users can switch between material families and manage project-level settings, such as workflows, metadata, and access.
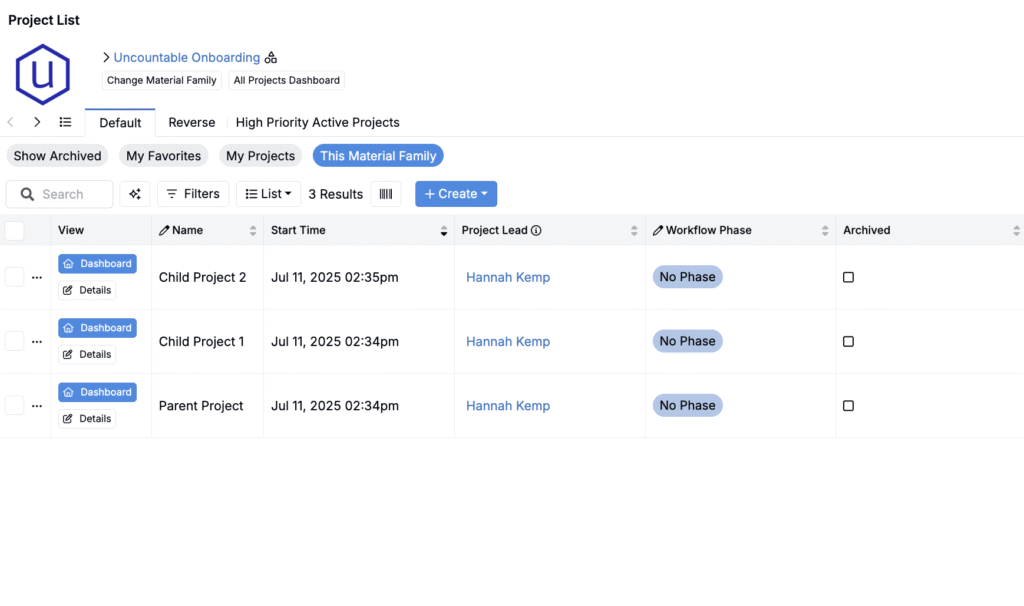
- Project List — Provides a customizable, table-based view of all projects in the current schema. Users can choose which columns to display, apply filters, and save these configurations into tabs for quick access.
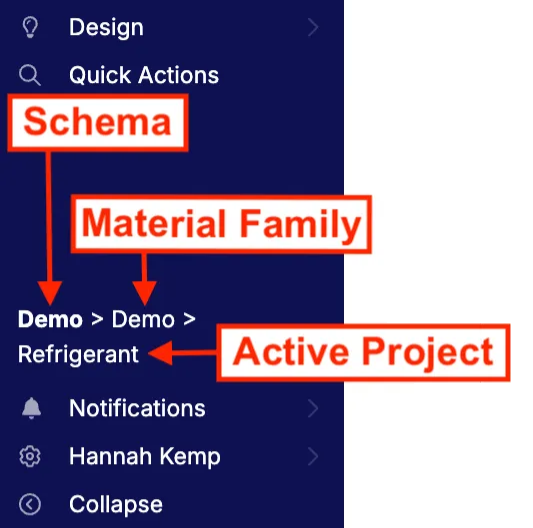
Active Project
When you select a project, it becomes the active project. This scopes certain pages and actions to the experiments and data within that project. For example on Explore Data, visualizations created based on data from the experiments your active project.
You can always view your current active project in the breadcrumbs at the bottom of the navigation bar.
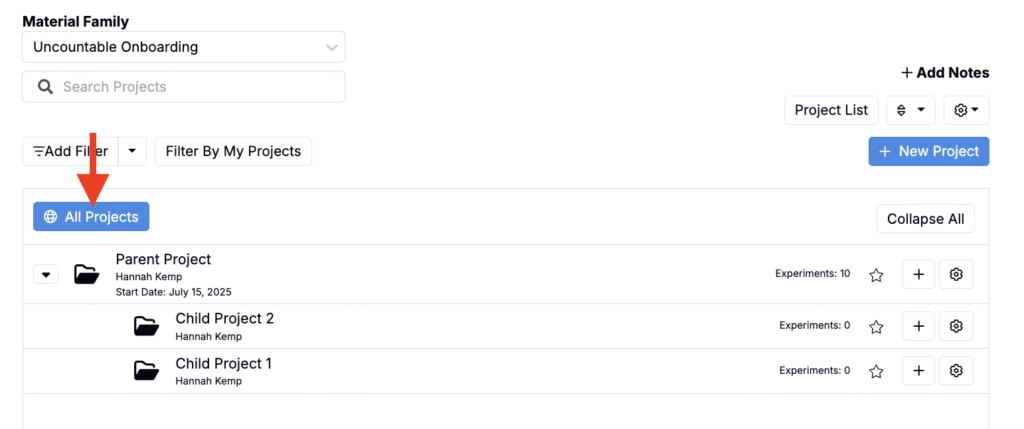
To remove this scoping and view experiments across all projects, choose All Projects on the Select Projects or Project List page.
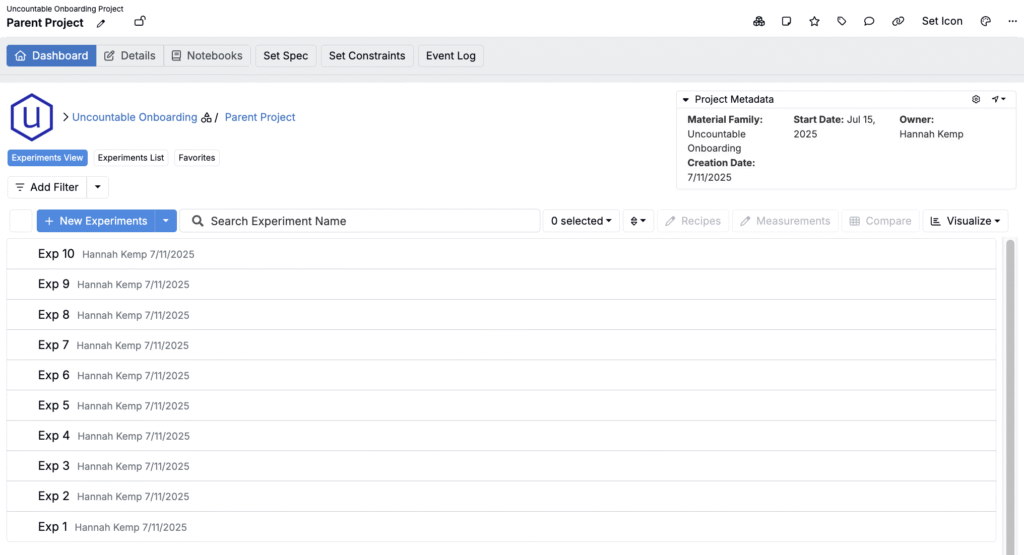
Project Dashboard
Selecting a project will also navigate you to that project’s Dashboard view where you can manage the project’s experiments and settings.
From here, you can create and preview experiments, edit project metadata, apply filters and sorts, access related pages (such as notebooks, specs, and constraints), and perform bulk actions on selected experiments. It also provides quick navigation to the recipe, measurements, compare, and visualize views.
To learn more, refer to Project Dashboard.
Creating New Projects
To create a new project, take the following steps:
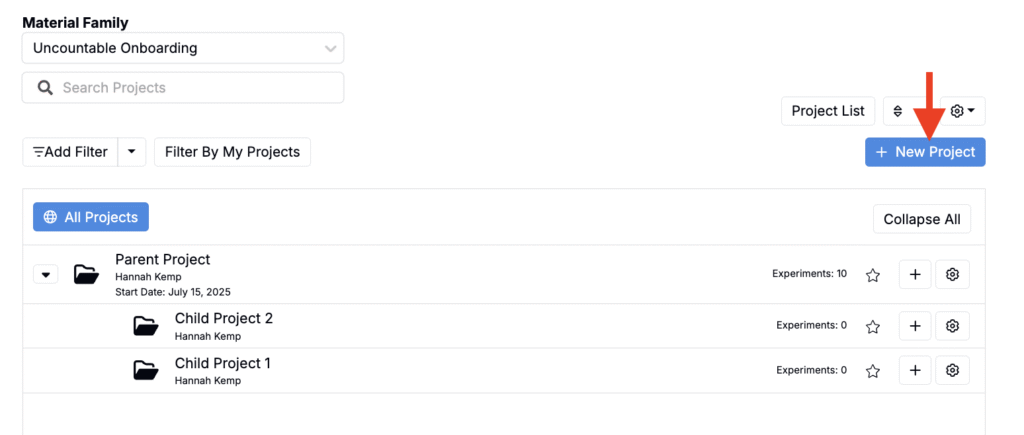
- From the Uncountable homepage, click the blue New Project button.
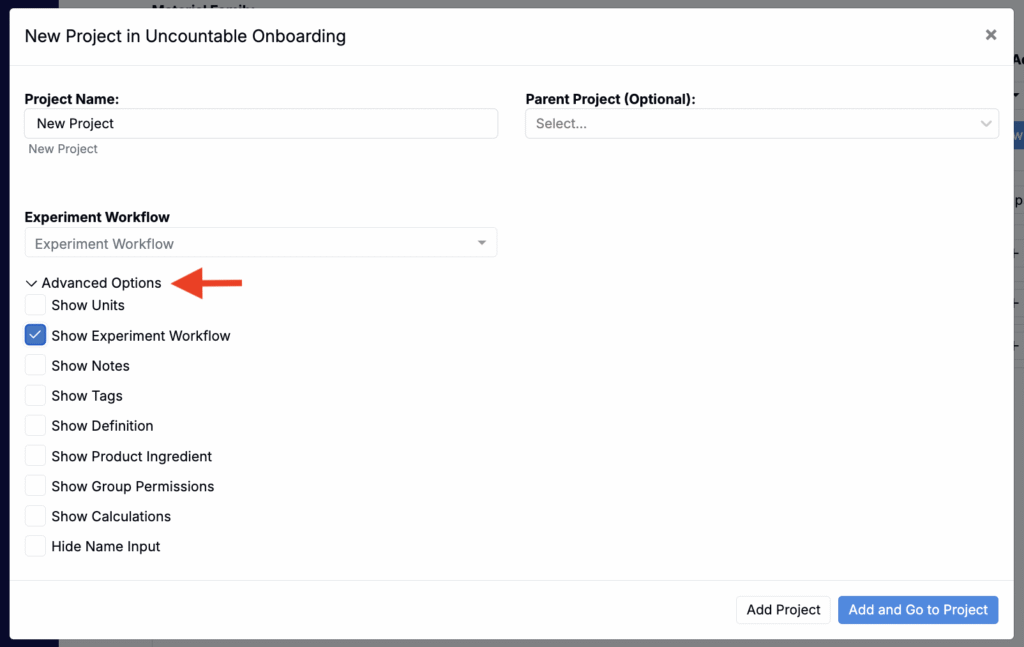
- Within the modal, fill in project details:
- Project Name — Enter the name of the project.
- Parent Project (optional) —Nest the project under an existing one if needed.
- Access additional configuration options by clicking Advanced Options at the bottom of the modal. Options include:
- Show Units — Choose between default units (Parts or Percentages)—for quantities displayed in recipes.
- Show Experiment Workflow — Select the default workflow for recipes within this project. Workflows streamline experiments by providing step-by-step templates.
- Show Notes — Add project-specific notes that are visible to all users with access.
- Show Tags — Add tags to organize and filter projects efficiently.
- Show Definition — If custom fields were added during implementation, enabling this option will display them.
- Show Product Ingredient — Tie a specific ingredient to this project and treat it as a product for focused tracking.
- Show Group Permissions — Specify access levels for different User Groups. Options include:
- Read: View-only access.
- Read (Outputs Only): View outputs but not inputs.
- Write (Outputs Only): Edit outputs while inputs remain restricted.
- Write Outputs, Read Inputs: Edit outputs and view inputs.
- Write: Full access to both inputs and outputs.
- Calculations Shown — Add calculations to track key metrics (i.e. solids percentage, volume, stoichiometry, or costs). These calculations leverage ingredient attributes and can be configured on the Enter pages.
- Hide Name Input — Removes the Project Name field to prevent users from editing the default project name.
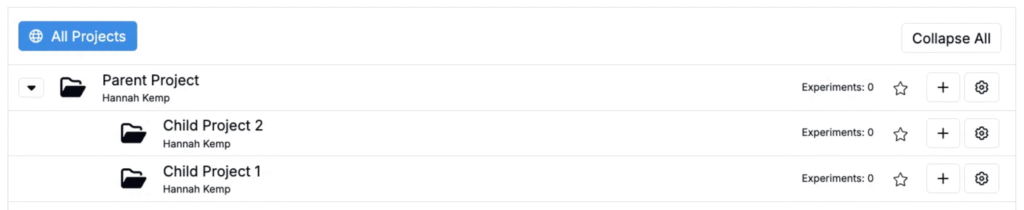
Creating Child Projects
When creating a project, selecting a parent project in the New Project modal will automatically set it as a child of that parent.
You can also create a child project directly from the homepage:
- Locate the parent project in the project list.
- Click the + icon next to the parent project folder.
- In the New Project modal, the Parent Project field will be pre-filled.
- Enter the remaining project details.
- Click Create to save.
This ensures the new project is correctly linked to its parent and inherits the parent’s data visibility settings.

Once a new project (or child project) is created, you can immediately start adding experiments. By default, all users in the schema can view and work in the project unless specific user group permissions were set during or after project creation.
To learn more, refer to Project Permissions.
Project Leads
Every project has a project lead. Upon creation, the project creator is set as the lead by default, but ownership can be transferred to any user with Write access.
To change the lead:
- Open the Edit Project Information modal (via the ⚙️ on the Project Dashboard or Select Projects page)
- Use the Project Lead dropdown to select a new lead.
- Click Submit Changes.
