Locking, signing, and witnessing notebooks help teams finalize notebook records while preserving traceability. Use these features when you need to:
- Prevent further edits to a completed notebook
- Record finalization, signatures, and witness reviews
- Preserve a clear audit trail of changes and review actions
How locking works
Locking a notebook makes the notebook read-only. Once locked, users cannot continue editing the notebook unless it is unlocked by someone with the required permissions.
Locked notebooks display lock details that can be reviewed after locking. If the notebook was both locked and signed, the lock details record the signature event, including who signed and when the action occurred.
💡 Notebook locking is separate from experiment locking. If both a notebook and its related experiment need review, lock and request witnesses for each record separately.
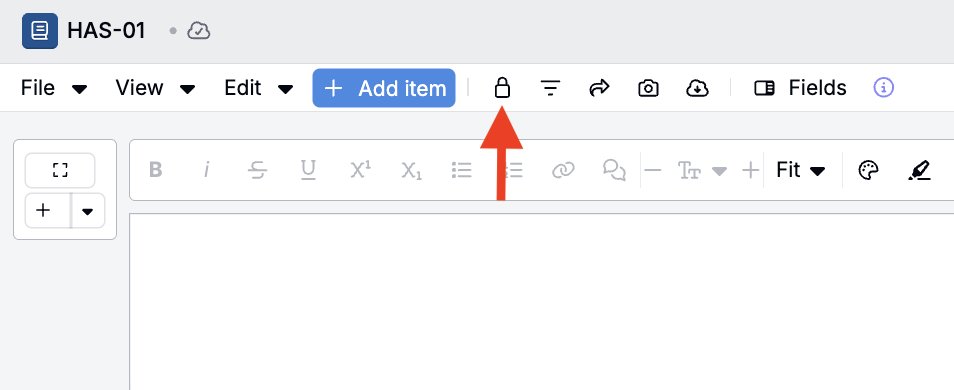
Lock a notebook
- Open the notebook.
- Click the lock icon in the notebook header.

- Choose the relevant lock option:
- Lock — Makes the notebook read-only without adding an electronic signature.
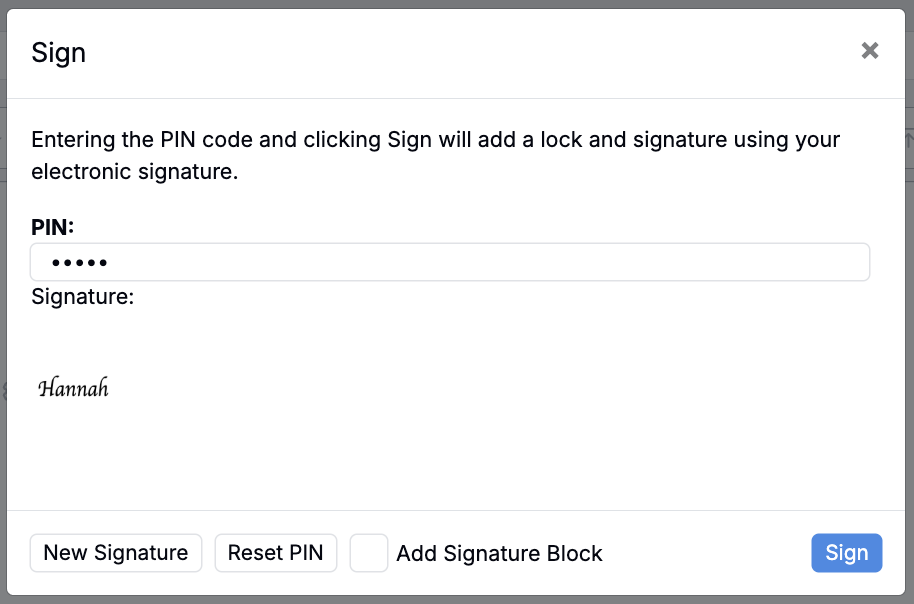
- Lock and Sign — Makes the notebook read-only and records your electronic signature.
- Review and confirm.
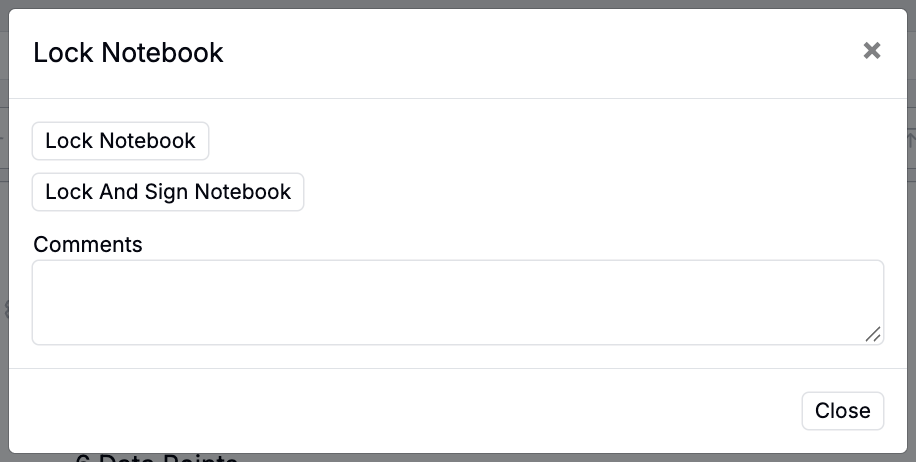
- If signing, input your PIN and click Sign.
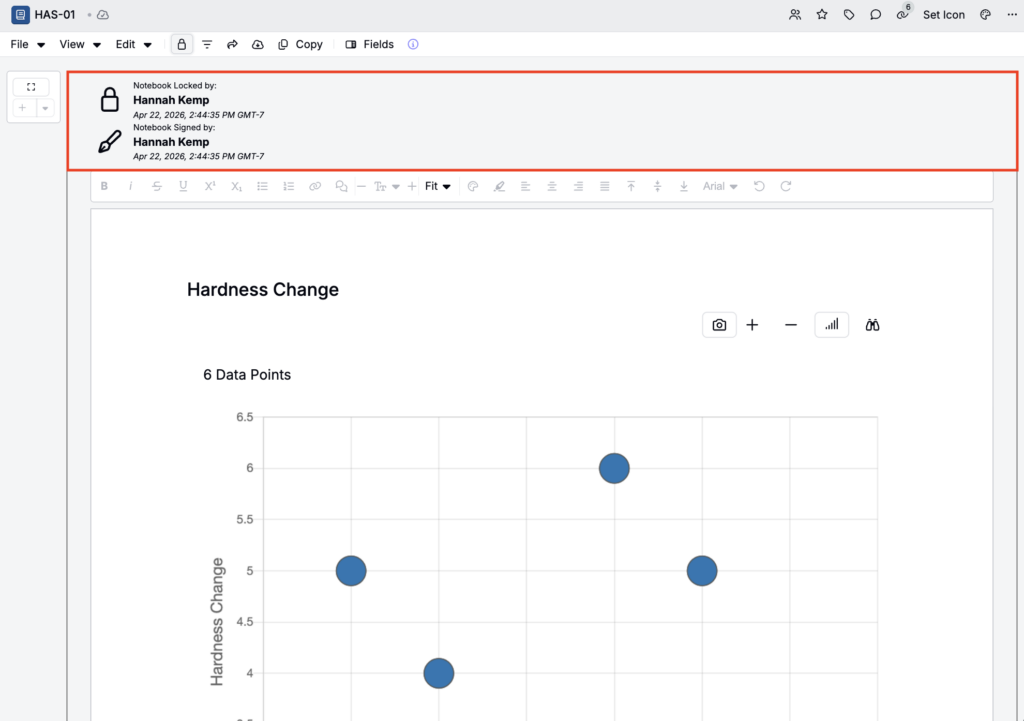
After the notebook is locked, contents becomes read-only and display lock information in a section at the top of the page.
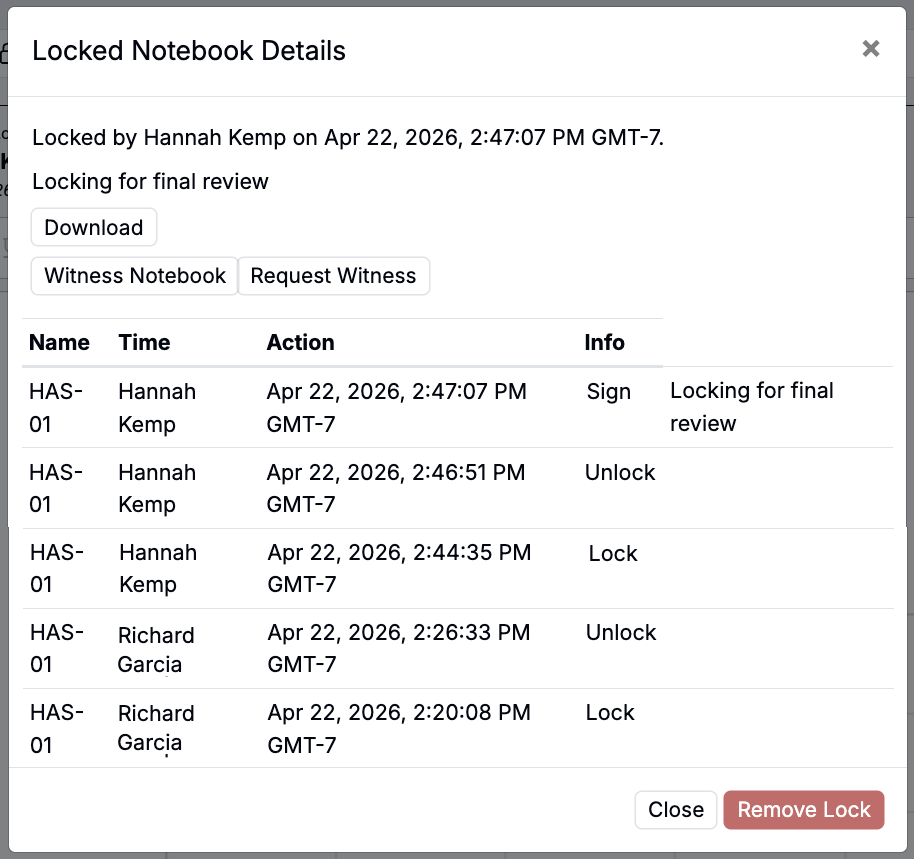
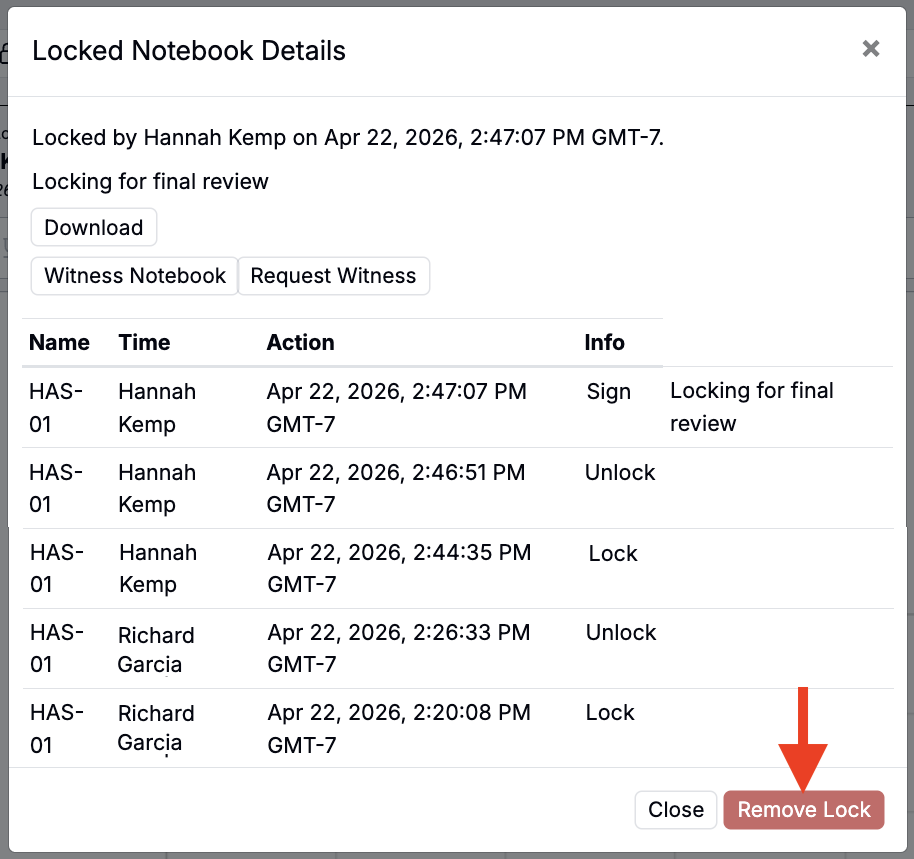
Locked notebook details
Clicking the lock symbol in the notebook header opens the locked notebook log, where all users can review all locks, signatures, comments, and witnesses.
Witness a notebook
Witnessing is a secondary review step. A witness can review the locked notebook and confirm that the record has been reviewed. This is useful when a second person, peer reviewer, supervisor, or quality reviewer needs to verify completed work.
To witness a locked notebook:
- Open the locked notebook.
- Click the lock icon in the notebook header.
- Select Witness Notebook and confirm the action.
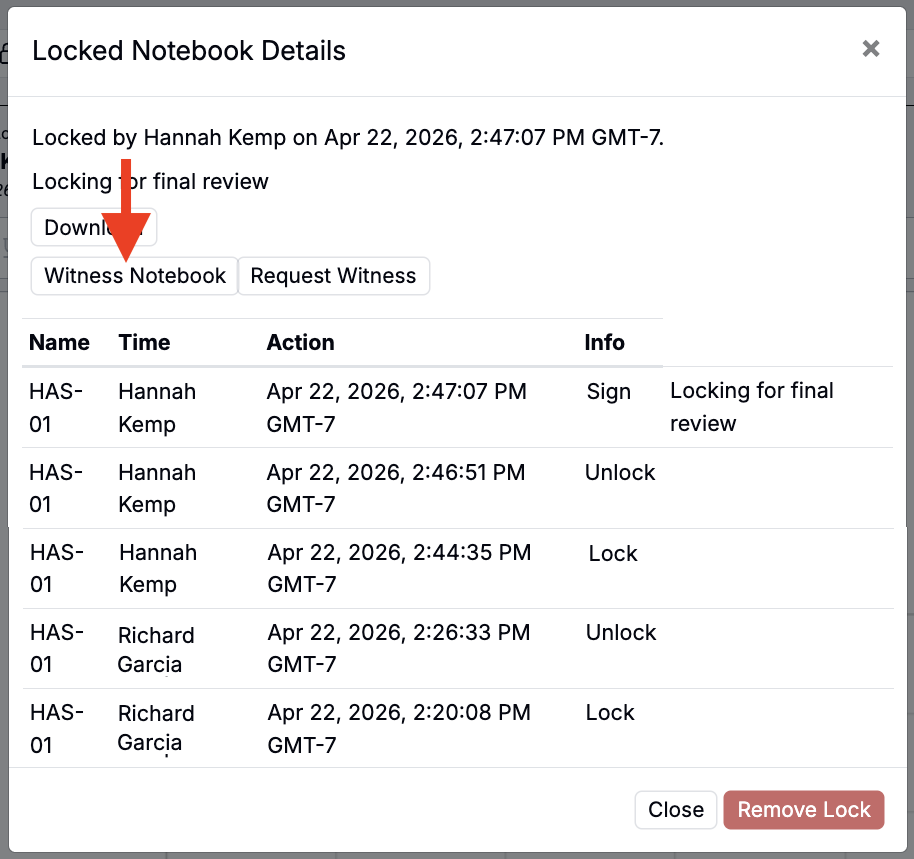
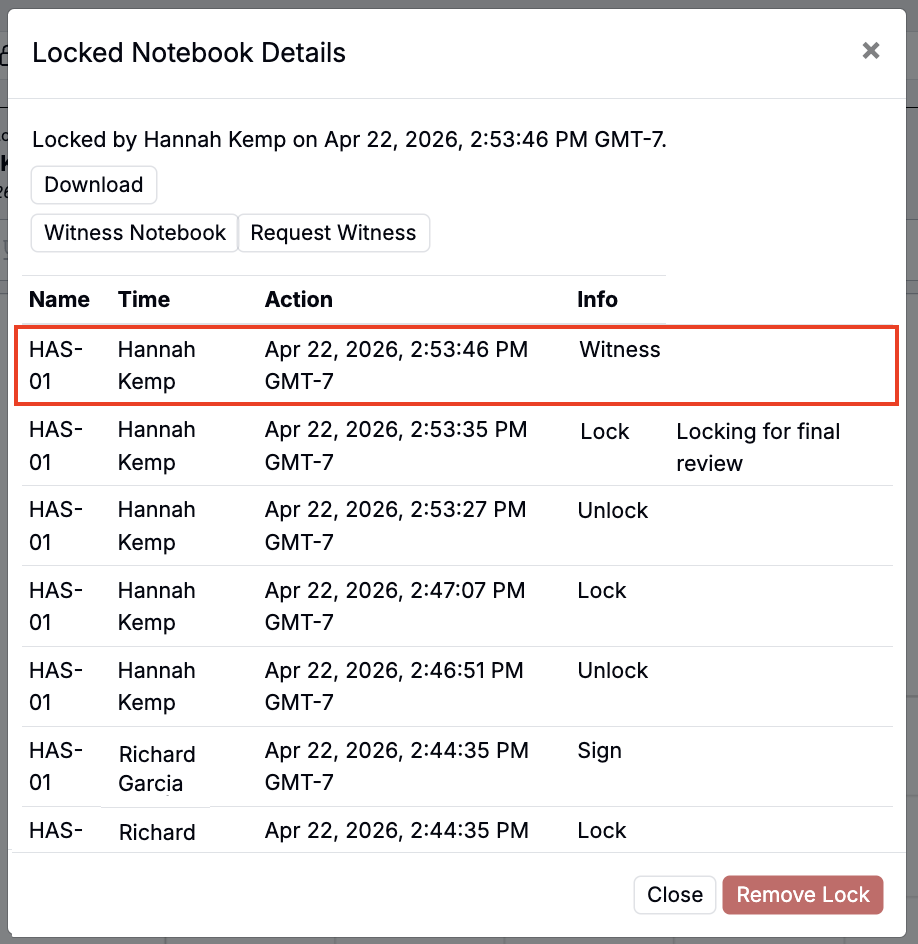
Once complete, the lock details show who witnessed the notebook and when the witness action occurred.
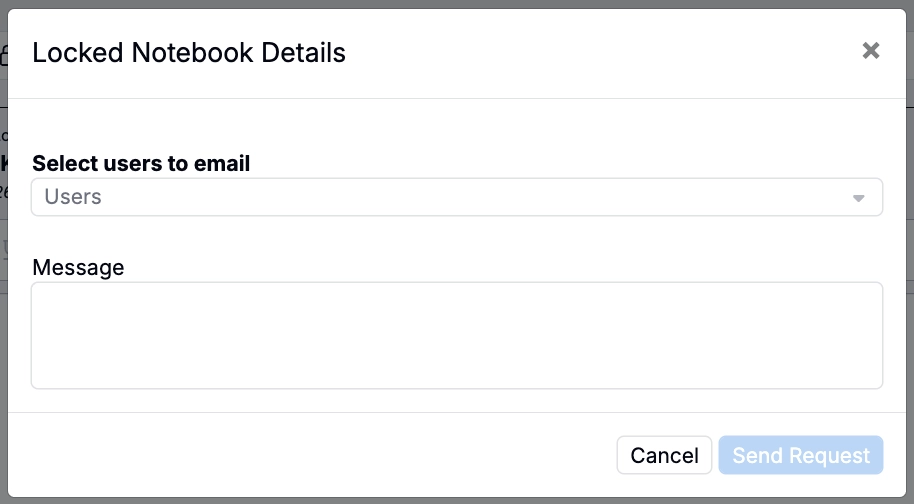
Request a witness
If another user should review the notebook, use Request Witness to notify them. This sends a request to the selected user and helps track that a witness was requested.
To request a witness:
- Open the locked notebook.
- Click the lock icon in the notebook header.
- Select Request Witness.

- Select the user to witness the notebook.
- Add a short message, if needed.
- Send the request.
The selected user receives a notification or email with a link to the notebook. The notebook’s lock details can show that a witness was requested, which helps teams see whether review is still pending.
Unlocking and corrections
Unlocking is typically restricted. By default, the user who locked the notebook may be able to unlock it. Some teams also configure a supervisor, administrator, or quality group that can unlock records when corrections are required.
To unlock a notebook:
- Open the locked notebook.
- Click the lock indicator in the notebook header.
- Select Remove Lock and confirm the action.
A common controlled-correction workflow is:
- A user identifies that a locked notebook needs a correction.
- The request is routed to an authorized supervisor or administrator.
- The authorized user unlocks the notebook.
- The correction is made.
- The notebook is locked and signed again.
- A witness reviews the updated locked record again, if required by the team’s review process.
Find notebooks that need your witness
You can use the Notebooks listing to find locked notebooks with outstanding witness requests. For example, you can add a Lock Request Witnesses filter to see all notebooks pending your review.
- Access the Notebooks listing.
- Click Filters.
- Add a Fields + Lock Request Witnesses filter.
- Select your name from the list of users.
