Inventory reconciliation sessions help you compare the inventory recorded in your system with what physically exists in the lab, allowing you to identify and resolve discrepancies. These sessions ensure that quantities, locations, and statuses are accurate, creating an auditable record of any changes made during reconciliation.
Sessions are scoped by an inventory listing config, which defines which inventory items are expected to be found during the session. During reconciliation, you can scan inventory, perform actions like moves, splits, and archives, and review which items are in scope versus out of scope.
Starting a reconciliation session
- Navigate to the Barcode Tracking page.
- Click the ⚙️ cog icon (located to the right of “Clear All”) and select Start Inventory Reconciliation Session.


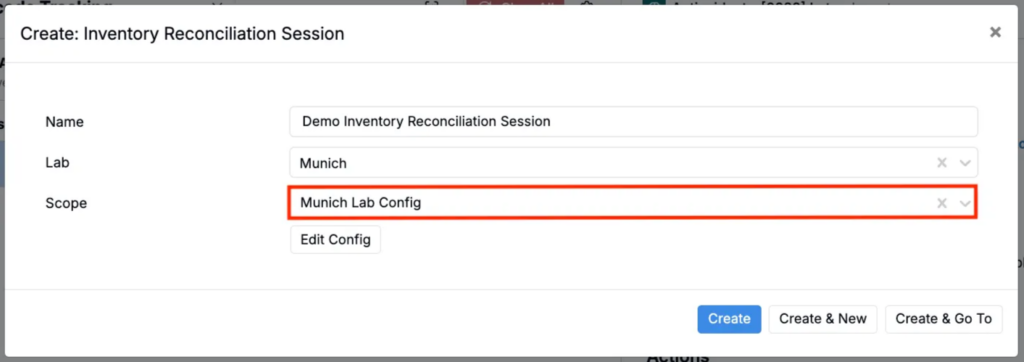
- In the modal, fill out the required information:
- Name: Give your session a descriptive name
- Lab: Select the lab where reconciliation is taking place
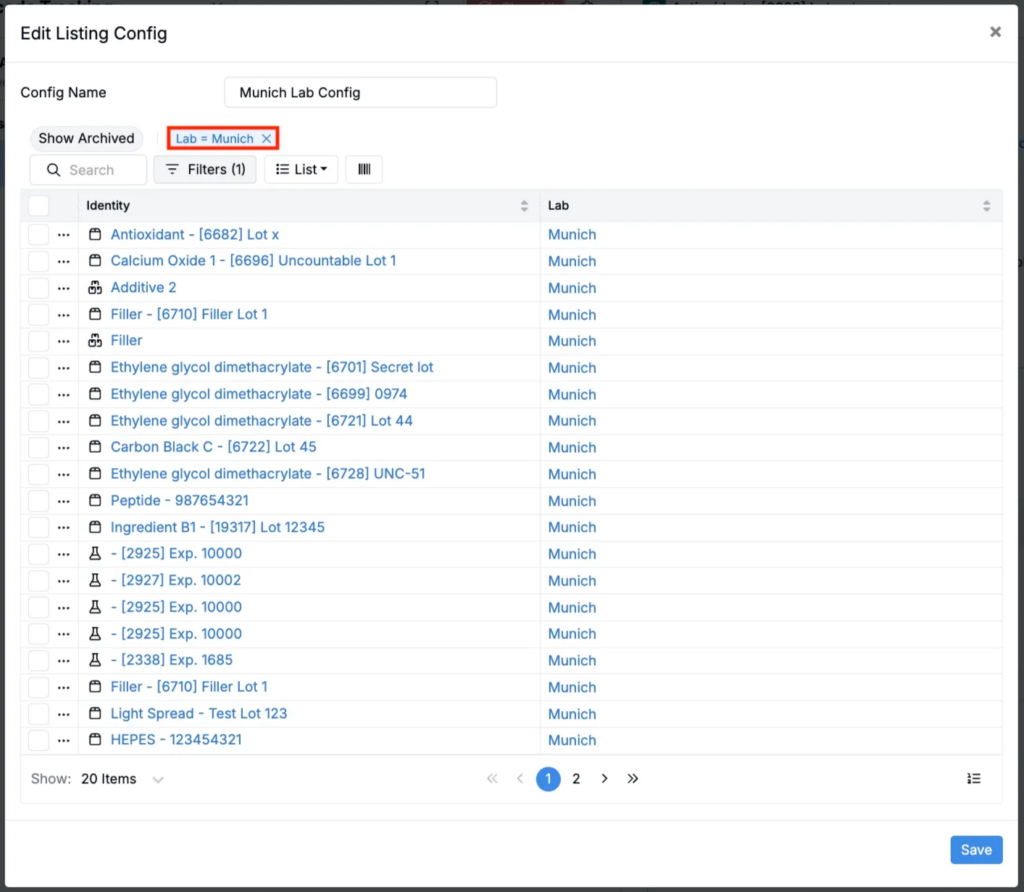
- Listing Config: Create or select an inventory listing config to define your session scope

- If creating a new listing config, add columns and filters to define which inventory should be in scope. For example, you might filter to only include inventory in a specific lab or location.
The session will automatically record the start time and the user who initiated it. Only the user who started the session can end it, though anyone with lab permissions can view the session entity after it’s been created.
Working in a session
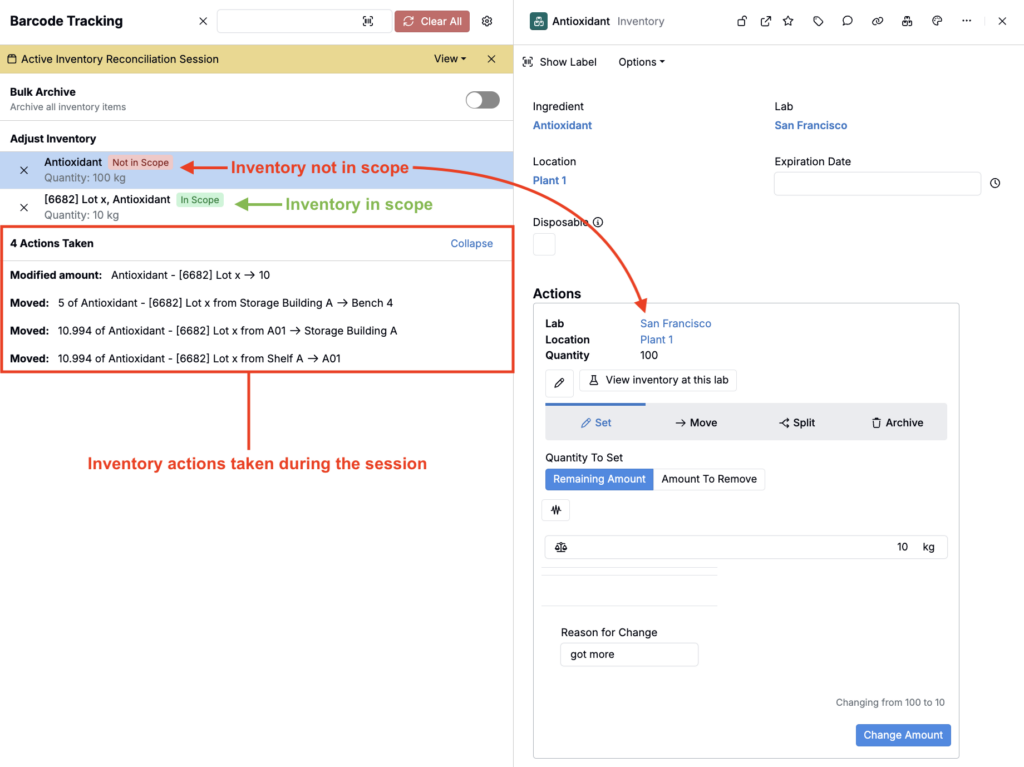
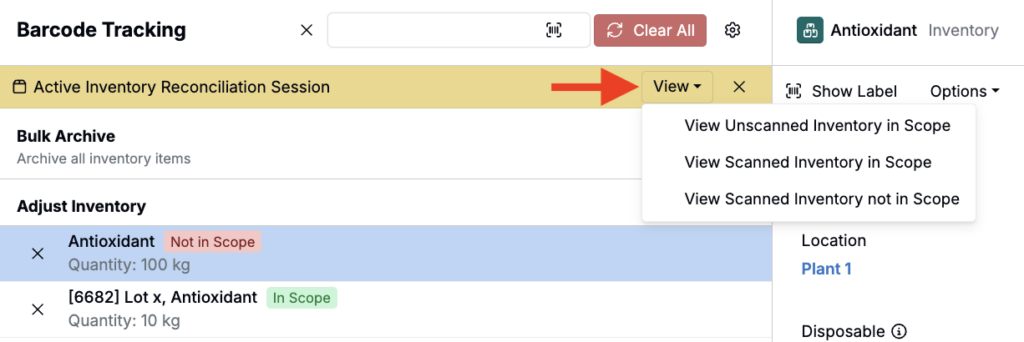
Once a session is active, you’ll see an Active Inventory Reconciliation Session banner at the top of the Barcode Tracking page.
Visual tags
As you scan inventory items during the session, each item will display one of two visual tags:
- In Scope (green): The scanned inventory matches an item in your listing config scope
- Not in Scope (red): The scanned inventory was not expected based on your listing config
Recording actions
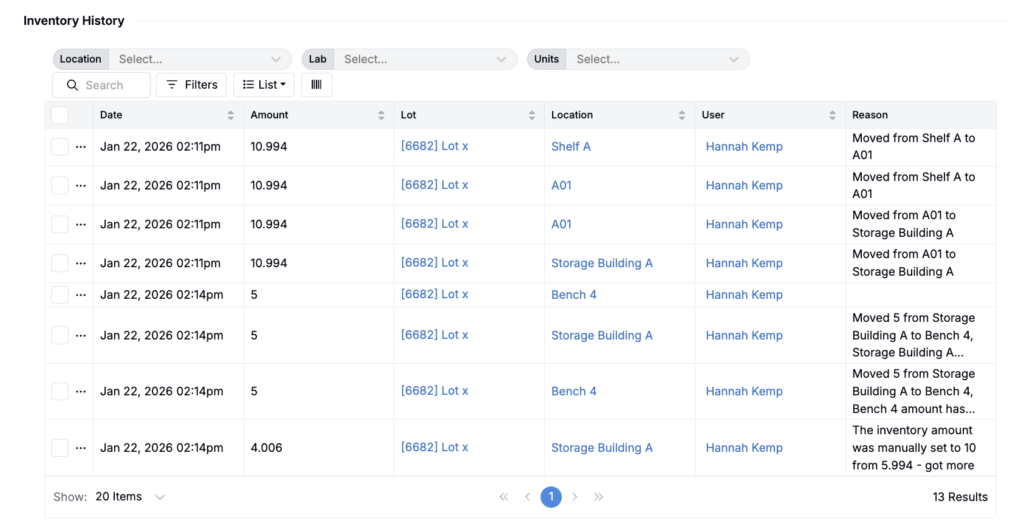
All reconciliation actions (such as moves, splits, sets, and archives) performed during the session are automatically tracked and linked to the session. These actions are recorded both:
- On the Inventory Reconciliation Session entity itself
- In the standard inventory history listing on the ingredient’s details page
Viewing inventory lists
Click the Inventory Reconciliation in Progress tag to access three viewing options:
- View all inventory not scanned from original listing: Shows items that were expected (in your listing config) but haven’t been scanned yet. This uses your original listing config with an additional filter excluding already-scanned barcodes.
- View all inventory scanned not in original listing: Shows items you’ve scanned that weren’t expected in your listing config scope.
- View all inventory in original listing: Shows all items defined by your original listing config.
Session persistence
If you navigate away from the Barcode Tracking page, the reconciliation session remains active. All scanned items and session state are maintained until you manually end the session.
Ending a session
To complete a reconciliation session:
- Click the ⚙️ cog icon on the Barcode Tracking page
- Select End Reconciliation Session
This sets the end time on the session and exits reconciliation mode.
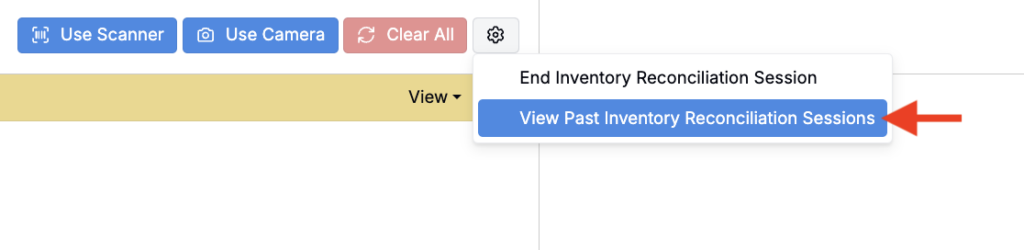
Viewing past sessions
Completed sessions entity are viewable and can be used for audit purposes.
- Navigate to the Barcode Tracking page.
- Click the ⚙️ cog icon (located to the right of “Clear All”) and select View Past Inventory Reconciliation Sessions.