In Structured Listings, we introduced the structured listings system and user-level configuration. At the schema level, admins can also define listing configurations to control how information appears on listing pages and in selection menus.
Listing Configs for Listings
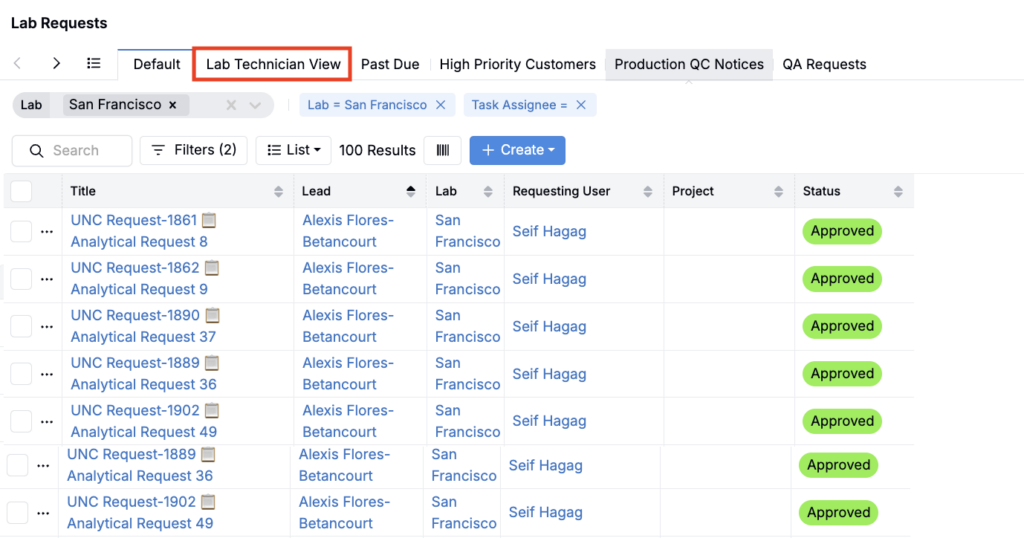
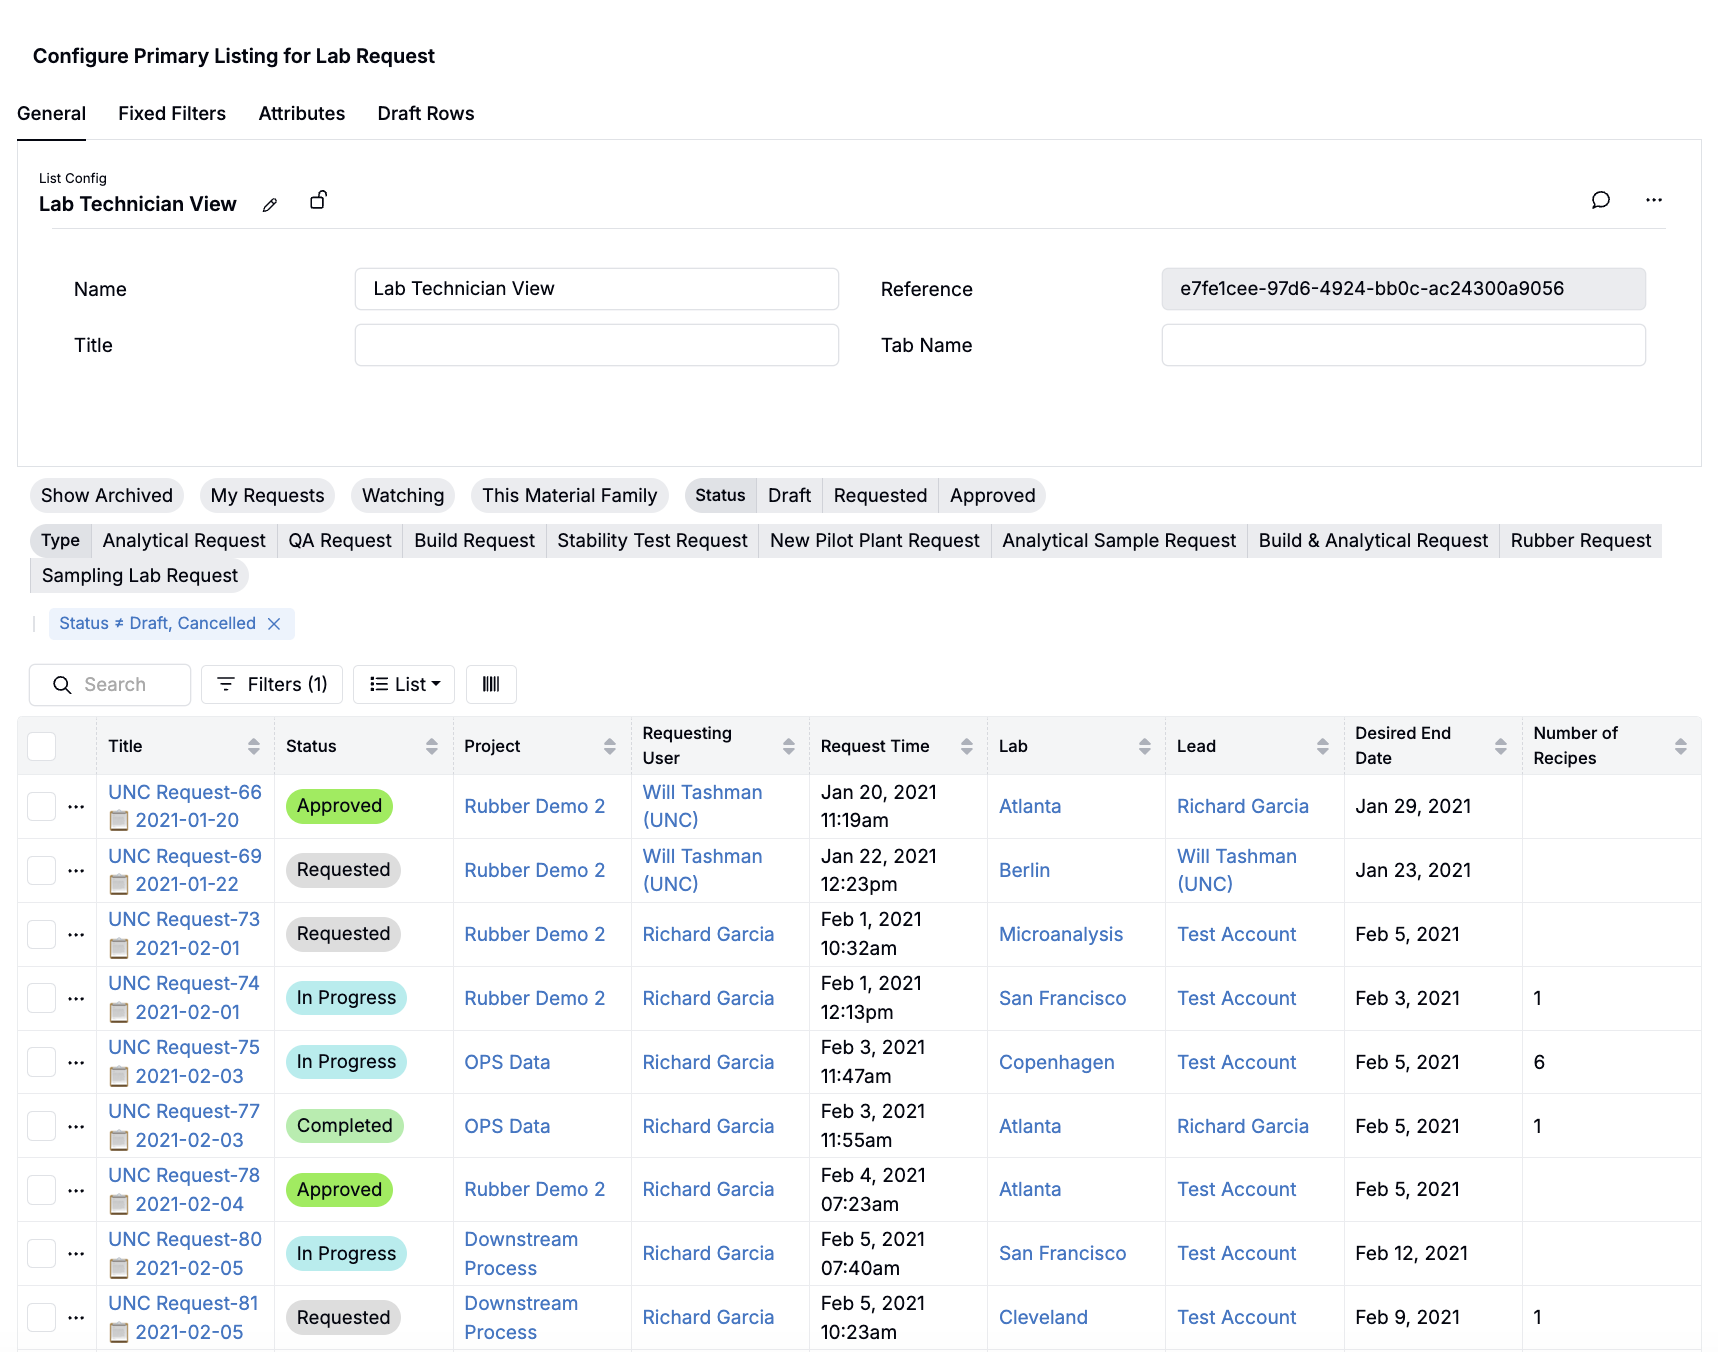
Admins can tailor listing pages to fit different roles. For example, lab technicians might need a different view of the Lab Request listing than scientists.
To view the default configuration for a listing, go to List > Views > (Admin) Configure Defaults.

Listing Config Types
When creating a new listing configuration, you can choose from three types. Each type controls where and how the configuration appears to users on the listing page:
- Default Configurations — Defines the initial view that loads when a user opens the listing page. If assigned to a user group, that view is applied automatically for all members of the group.
- Tab Configurations — Display as additional tabs at the top of the listing page. Each tab provides a distinct, preconfigured view of the data and is visible only to the user groups it is shared with.
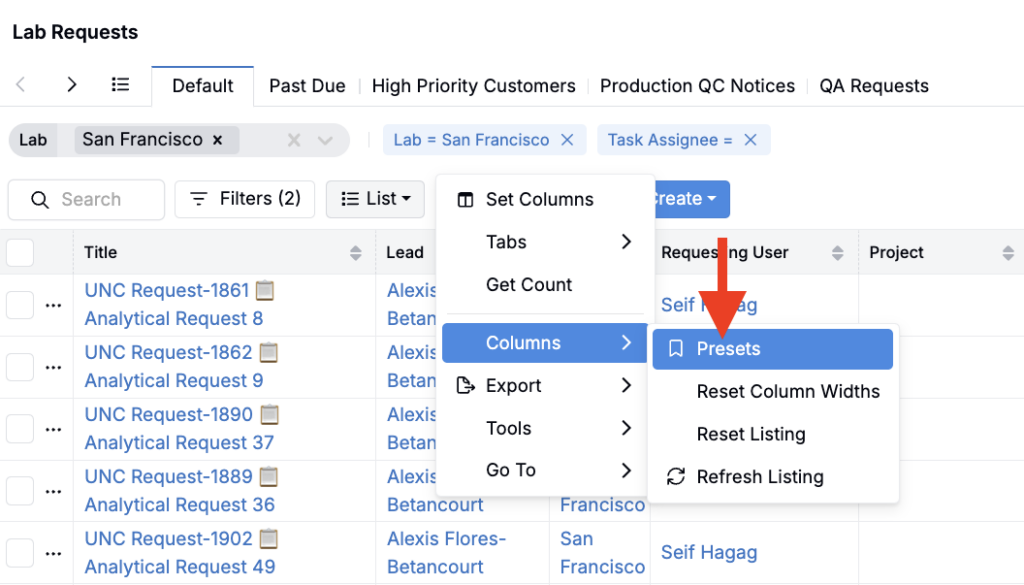
- Preset Configurations — Adds as a preset option. To access, go to List > Columns > Presets and choose from the saved views. Presets must be loaded manually but allow users to switch quickly between alternative views.
Creating a New Listing Config for Listings
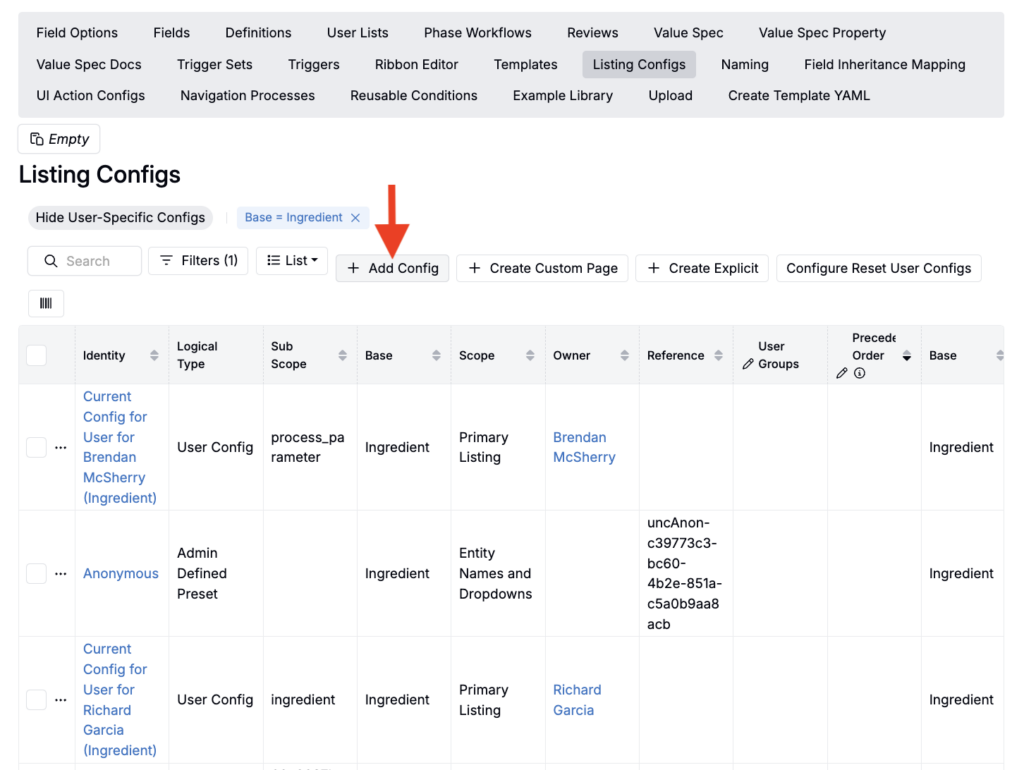
To create or manage configs, open Form Admin and select the Listing Configs tab. On the listing, click Add Config.
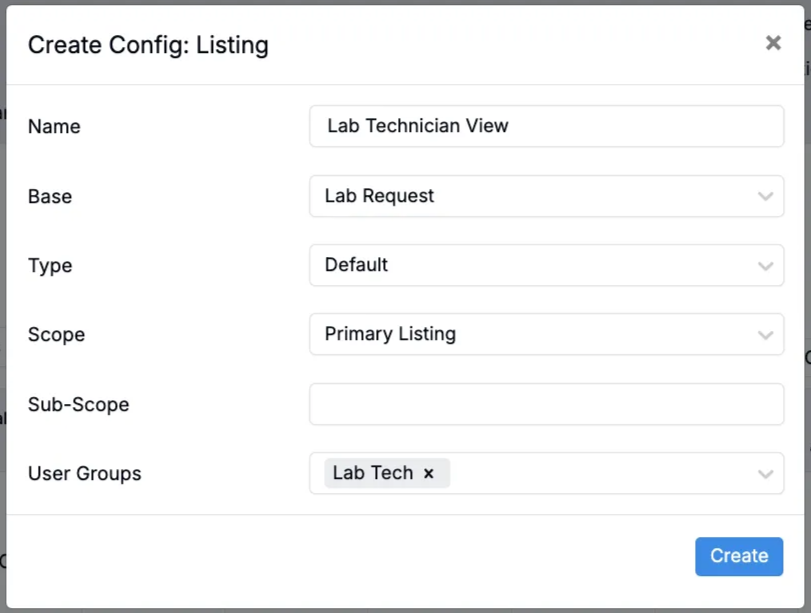
In the modal, provide the following details:
- Name — The configuration name.
- Type — How the configuration is accessed:
- Default: Updates the standard view of the listing.
- Tab: Adds an extra tab at the top of the listing.
- Preset: Makes the view available from the Presets modal.
- Scope — Set to Primary Listing.
- User Groups — Choose which groups share the view (e.g., lab technicians, scientists).
Adding Columns and Filters
After creating a config, you’ll be routed to its configuration page to define columns and filters.
Adding Columns
New configs start with no columns. To add them, select List > Set Columns. Use the fields at the bottom of the modal to add columns.
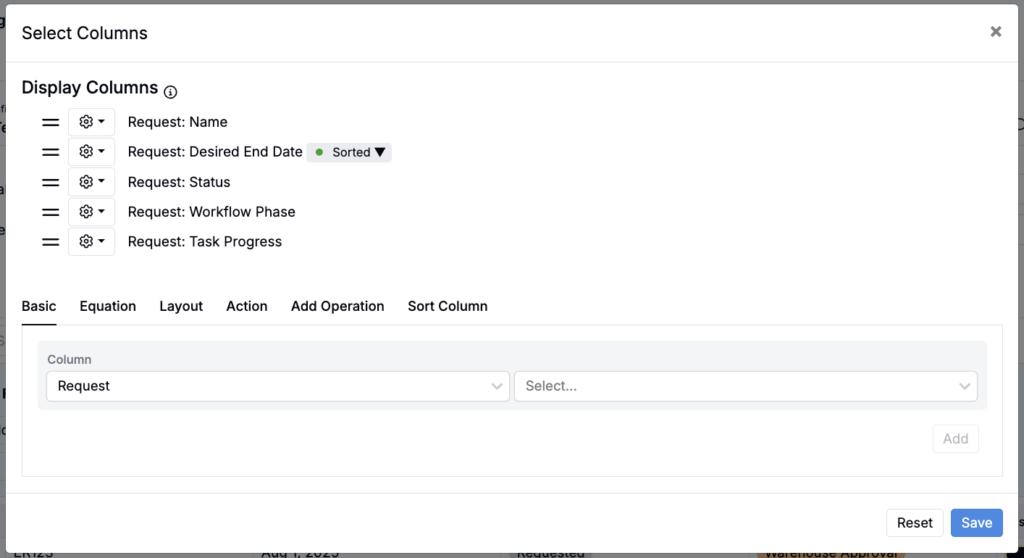
To learn more about using the Select Columns modal to add, remove, rearrange, and rename columns, refer to Structured Listings.
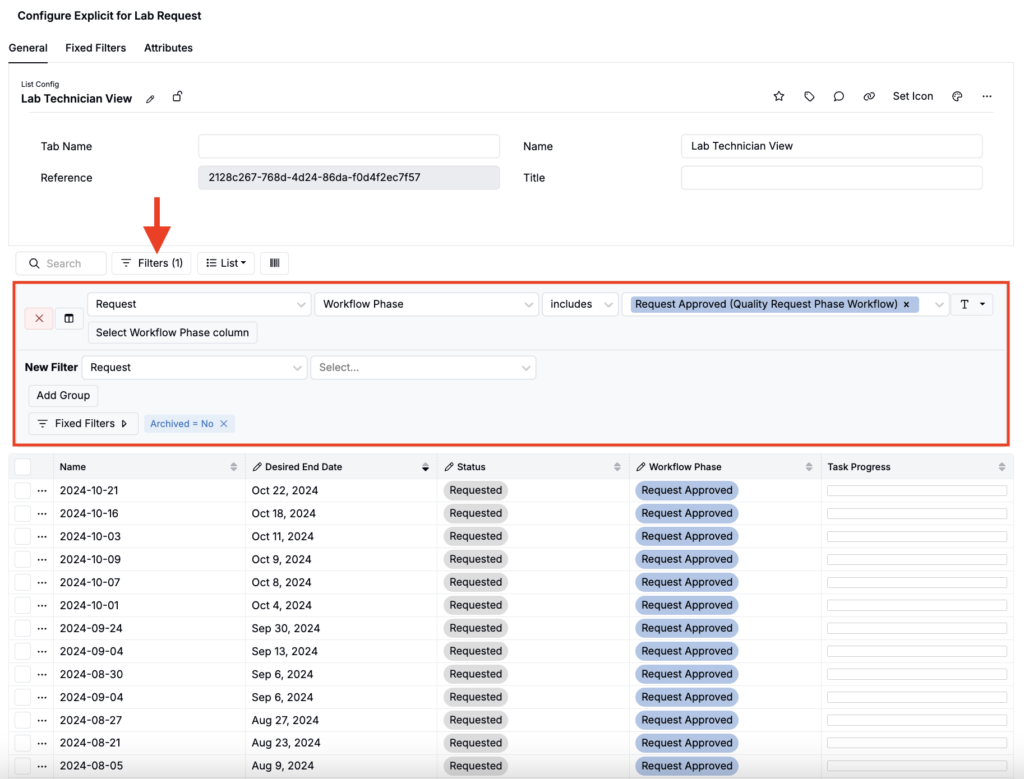
Adding Standard Filters
Click Filters to add standard filters. These load by default but users can remove them.
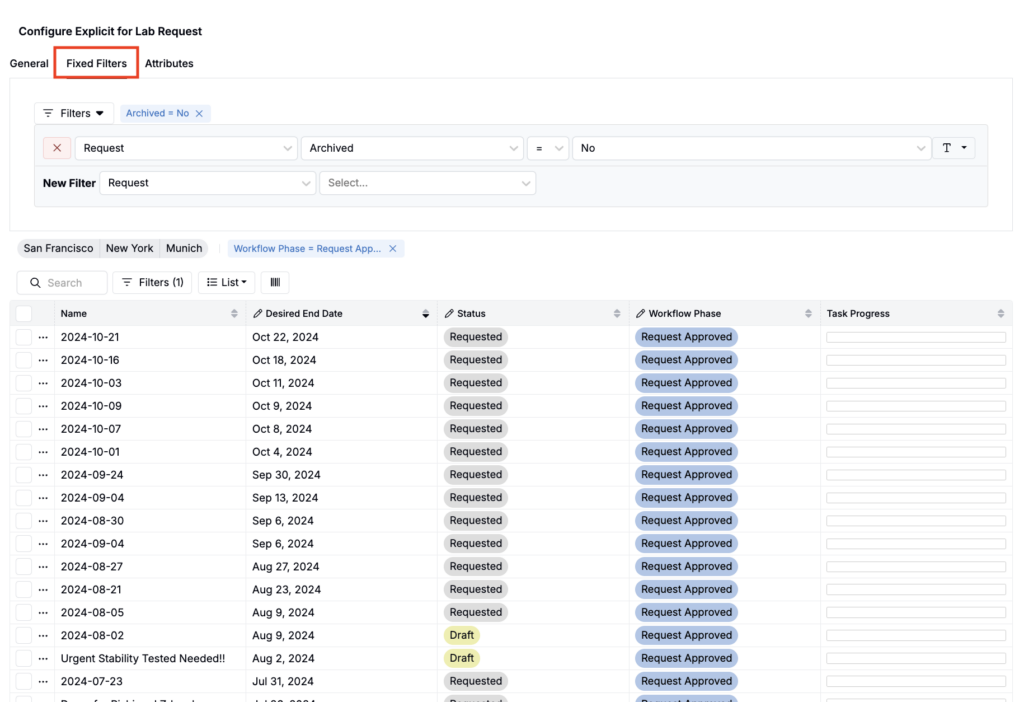
Adding Fixed Filters
Use the Fixed Filters tab to add filters that cannot be removed.
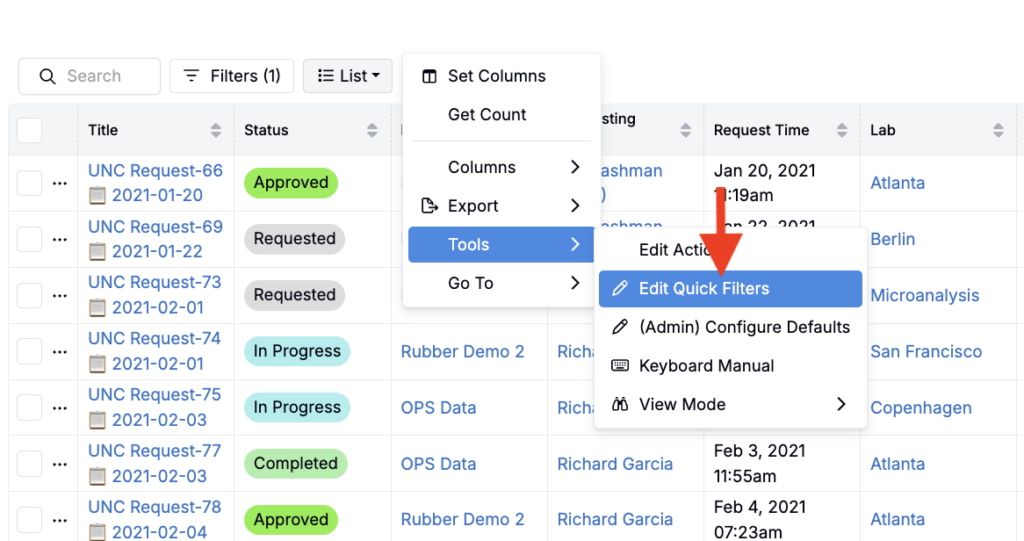
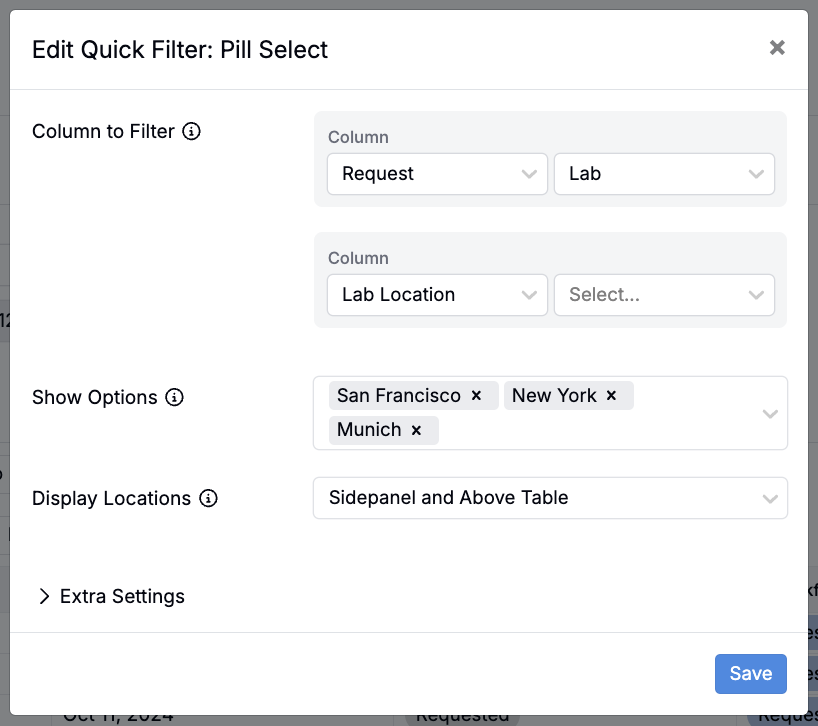
Adding Quick Filters
To add Quick Filters to the page, go to List > Tools > Edit Quick Filters. Select a filter type (Dropdown, Pill, Toggle, or Text Contains) and choose filter options.
Resetting User Listing Configurations
While users can personalize their listing views, admins may need to reset them for consistency across teams. There are two reset options, depending on how much control you need.
Tailored Listing Resets
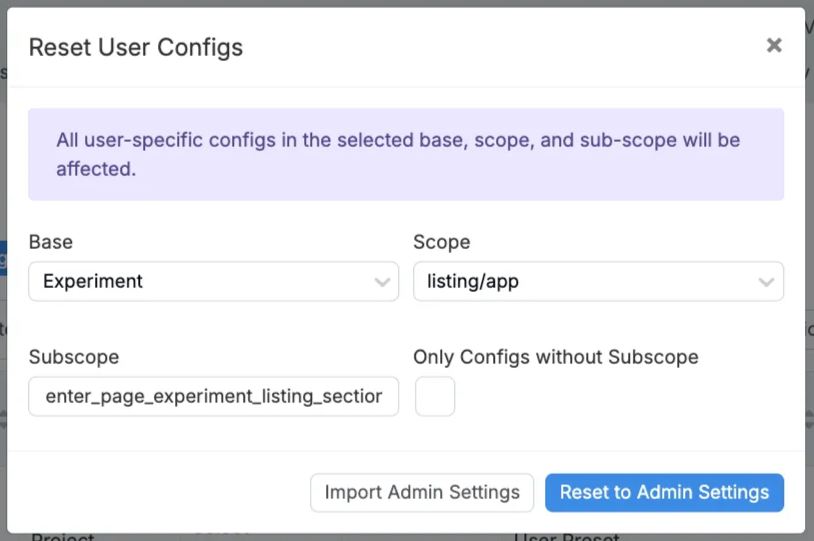
The Configure Reset User Configs option gives admins fine-grained control. You can reset specific bases, scopes, or subscopes, and choose whether to fully overwrite user views or merge selected elements like filters, columns, and tabs.
- On the Listing Configs Form Admin page, click Configure Reset User Config

- In the modal, specify the Base, Scope, and Subscope (if applicable).
- Choose one of the following actions:
- Reset to Admin Settings — Removes all personal configurations and restores the admin-defined view.
- Import Admin Settings — Merges admin-defined quick filters and tab order into the user’s view, while preserving their custom filters and columns.
Legacy Reset
The Legacy Reset option is simpler but less flexible. At the bottom of the Listing Config Form Admin page, select a base category from the dropdown and click Reset User Defaults. This fully clears personal settings for that base and reverts the listing to the admin default view.

Troubleshooting Missing Listing Configurations
If you don’t see the listing configuration you expect, it may be because another configuration for the same base is taking precedence.
To resolve this:
- Go to the Listing Config Form Admin page.
- Locate the Precedence Order column.
- Assign a priority value to the configuration you want to appear. Lower numbers take higher priority (e.g., setting the value to 1 ensures that config is applied first).

Listing Configs for Selection Menus
In addition to configuring listing pages, admins can also use listing configurations to control which options appear in selection menus across the platform. This is done by applying configurations with sub-scopes that target specific menus.
To see a full example of how this works, refer to Sub-scopes: Using Listing Configurations to Customize Dropdown Menus.