Use the Inventory Importer to create or update many inventory records at once, including placing items into the correct lab and the most specific Inventory Location. This is the fastest, most consistent option when you’re standing up a new site, migrating from spreadsheets, or making broad changes after a re‑org.
For small, one‑off adds, you can still add inventory manually, but the importer is the fastest and most consistent path for bulk setup.
Using the Inventory Importer
Step 1 — Access the Importer
- Navigate to any project dashboard.
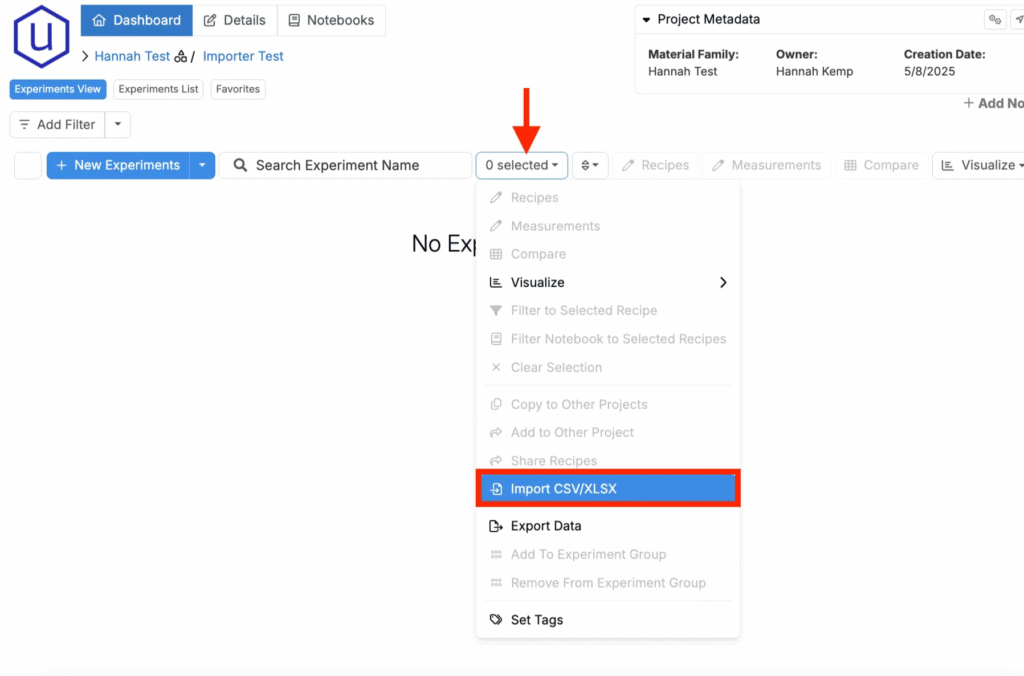
- Access the selection menu and click Import CSV/XLSX.
Step 2 — Select Import Type
- At the top of the page, select Inventory Upload.

Step 3 — Prepare Your Spreadsheet
For Uncountable to import your data, your spreadsheet must follow a specific format. To view a simple template example, you can click the Download Sample File button.
Spreadsheet Structure
When formatting your spreadsheet, it is recommended you begin with a sample template. Then, configure the template accordingly:
Columns
Required
- Ingredient — Must exactly match an existing ingredient.
- Quantity — Numeric value. Make sure it matches the chosen unit.
- Unit — Must exist in your inventory units.
- Location (not case-sensitive) —Must match an existing location. Use the deepest sublocation where the item will reside.
- It is recommended to use unique names per level to avoid misplacement.
- Lab (case-sensitive) — Must exactly match an existing lab.
Optional
- Lot — Must exist. If your lot does not already exist, leave blank.
- Lots can also be imported in bulk via the Ingredient Importer (second tab).
- Additional fields on the Inventory definition — To add or update additional fields, use a secondary import using the Entities Importer.

Rules & Constraints
- Column order doesn’t matter; headers must match exactly.
- Avoid duplicate location/sublocation names when possible, or always specify the most granular child.
Step 4 — Import, Review, and Submit
- Upload the file. Drag and drop the prepared spreadsheet into the importer.
- If no errors are found, you’ll see a message reading success!

After submission, the importer adds all new inventory and lots. To view them, go to Inventory listing page (Lab > Inventory).
