
Custom labels let you tailor information display for inventory, recipes, and more. This guide covers creating and configuring labels by duplicating or building from scratch.
Duplicating an Existing Label
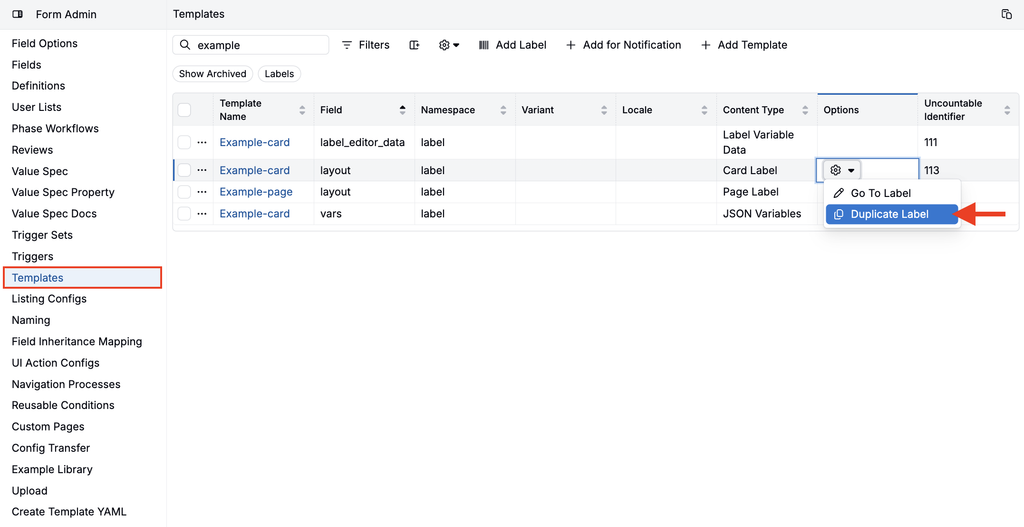
It’s generally easier to copy an existing label. This can be done in one of two ways:
Within the Templates tab of Form Admin, click the ⚙️ icon within the Options column of an existing label and selecting Duplicate Label.
Alternatively:
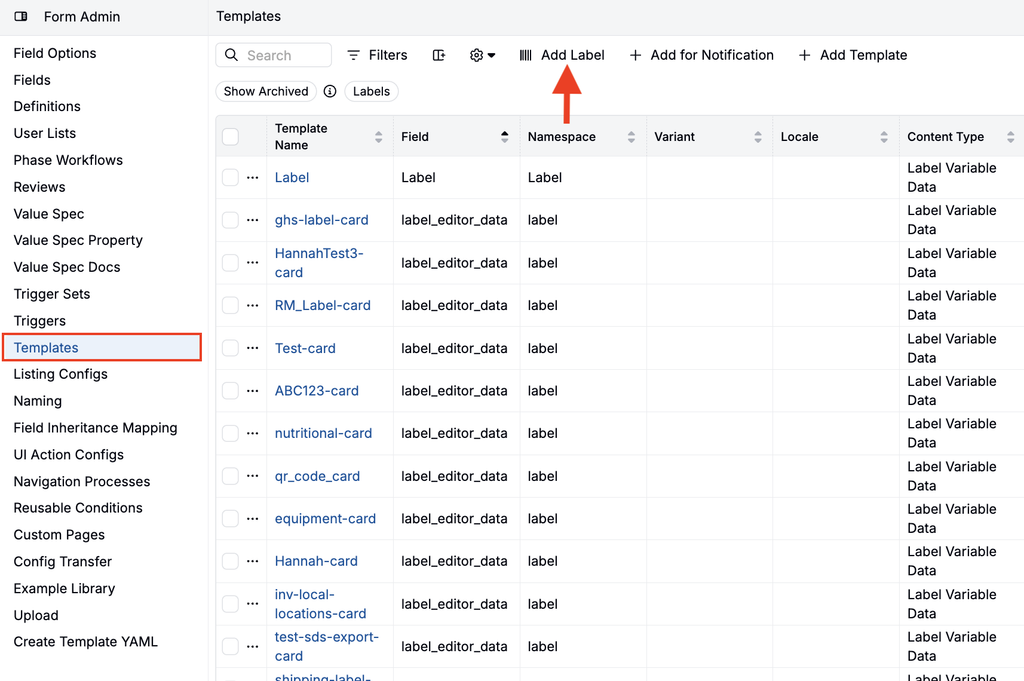
- Create a new label by clicking Add Label.
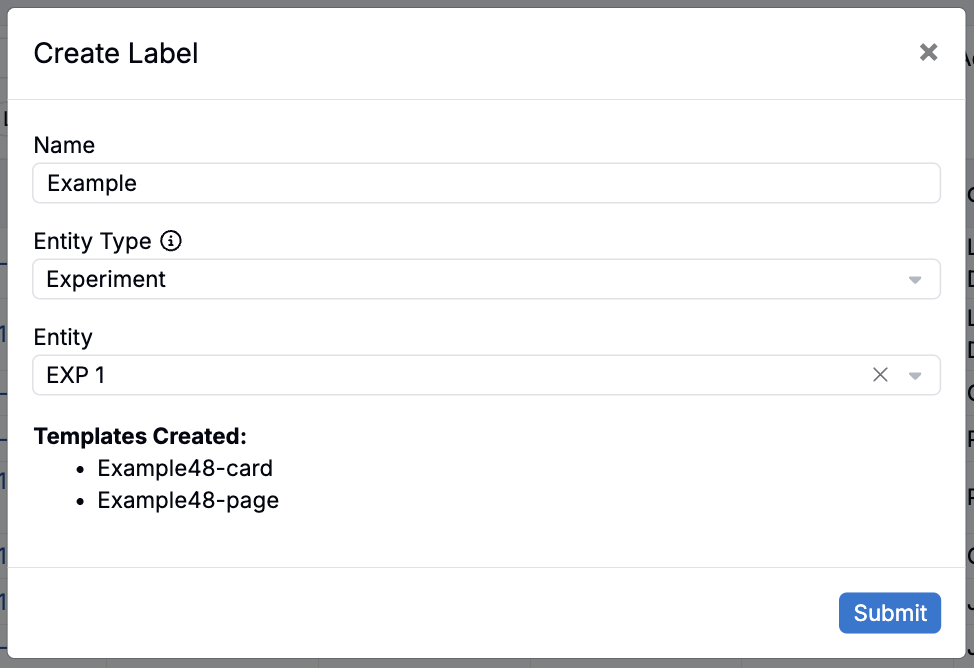
- Add a name and select an entity type and entity for that label. Note that the entity you select is just a preview example — the label isn’t limited to it.
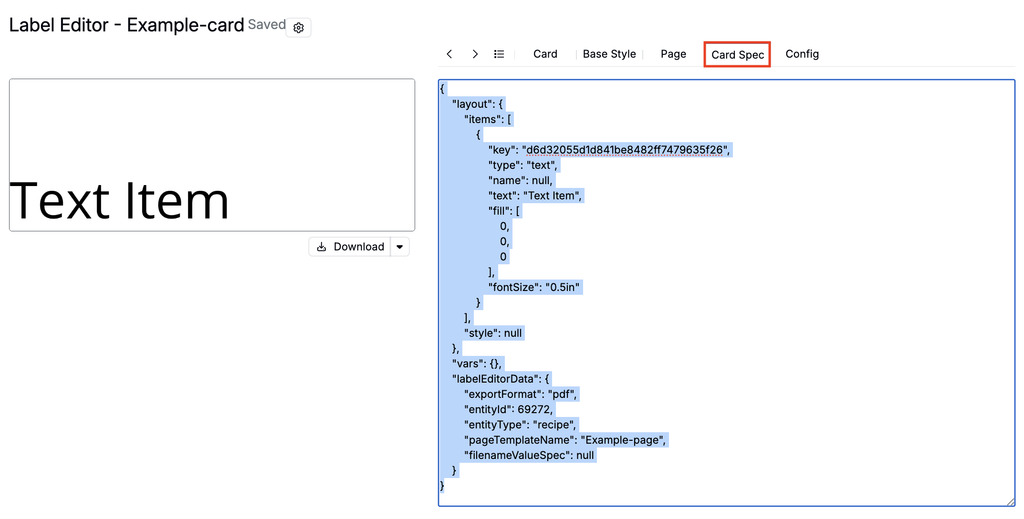
- Within the Card Spec tab of the new label, use the field to paste in the json code from an existing label.
Creating a Label from Scratch
- Click Add Label.
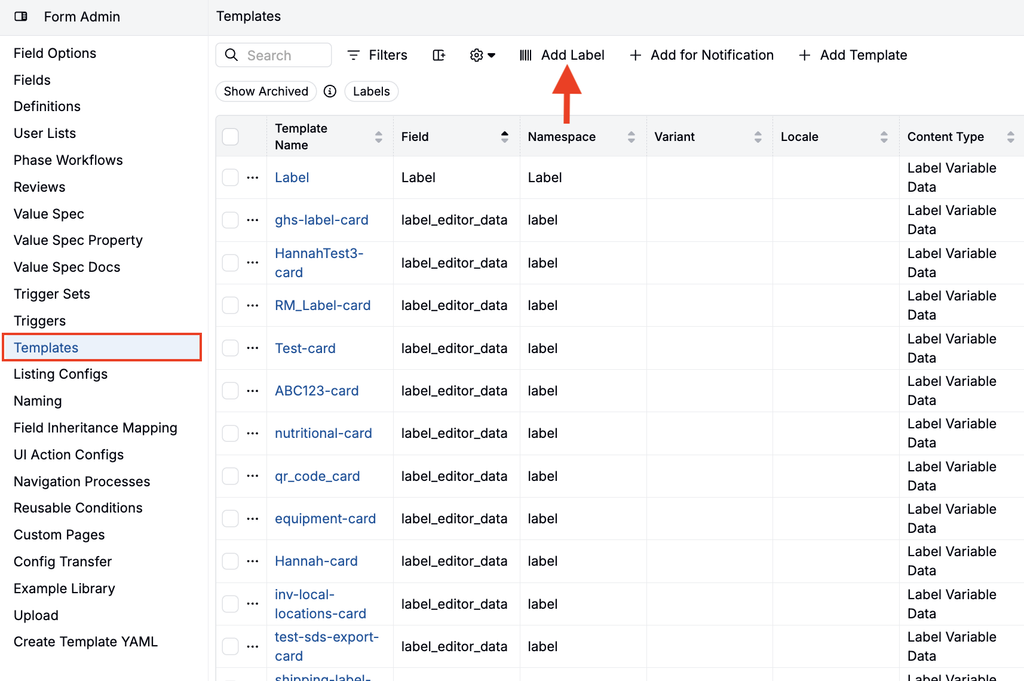
- Add a name and select an entity type and entity for that label. Note that the entity you select is just a preview example — the label isn’t limited to it.
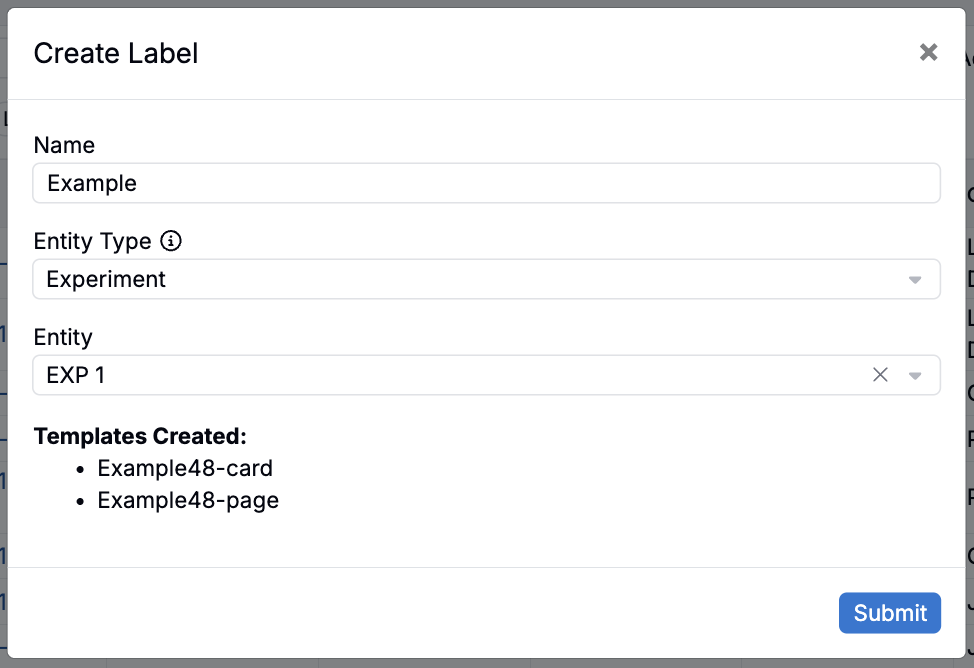
Card
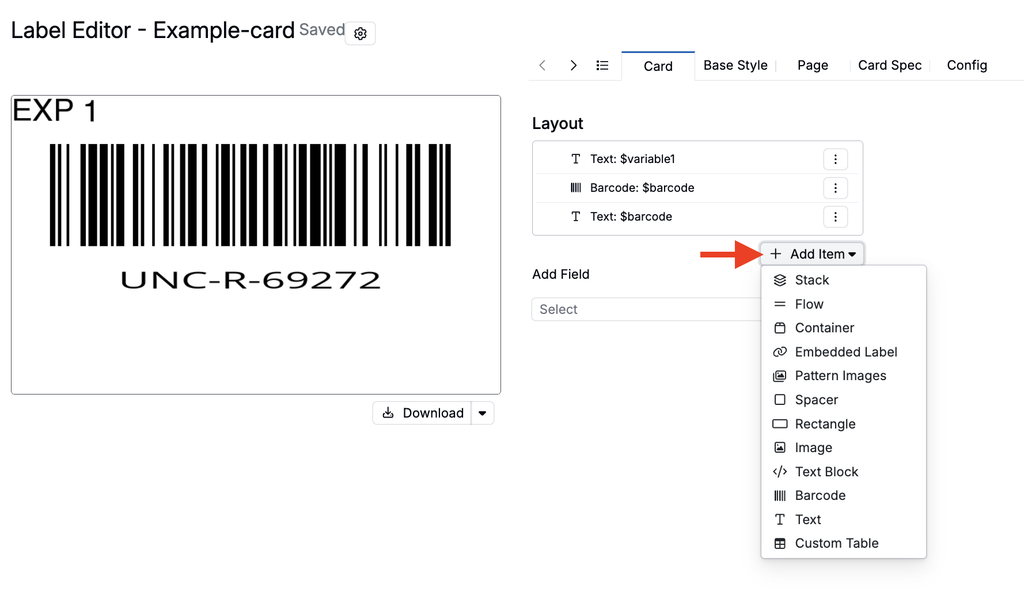
Within the Card tab:
- Click Add Item to add and remove label elements (text, barcodes, images, text, spacers, flows/stacks).
- Select an individual item to adjust it’s size, position, style, etc.
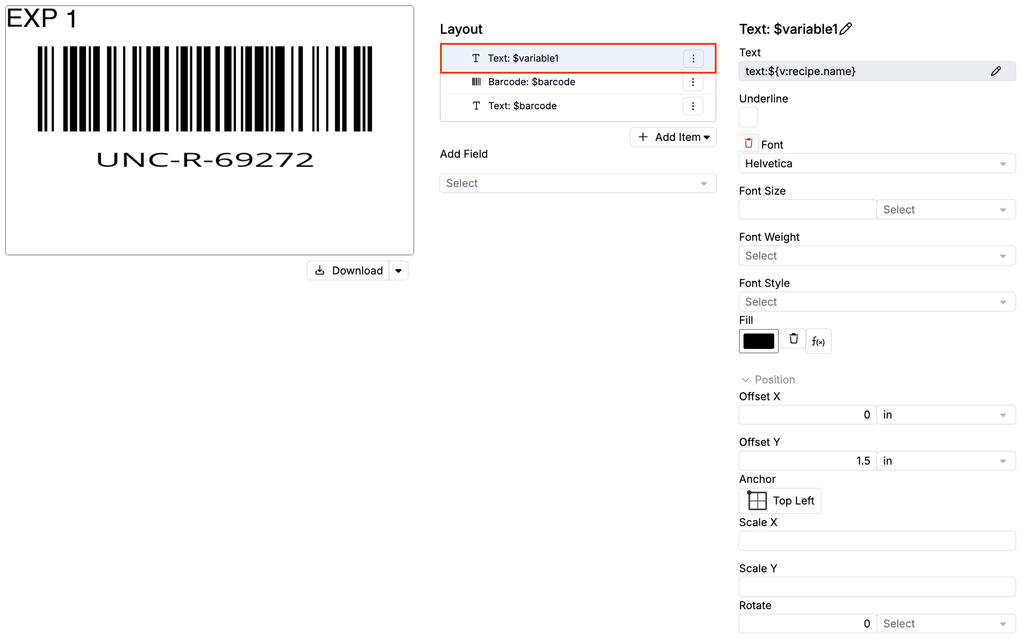
- Selecting an item in the layout list highlights its position in the label preview, and clicking an item in the preview selects it in the layout list. This makes it easier to find the item to edit in labels with many sections, such as SDS and COA templates.
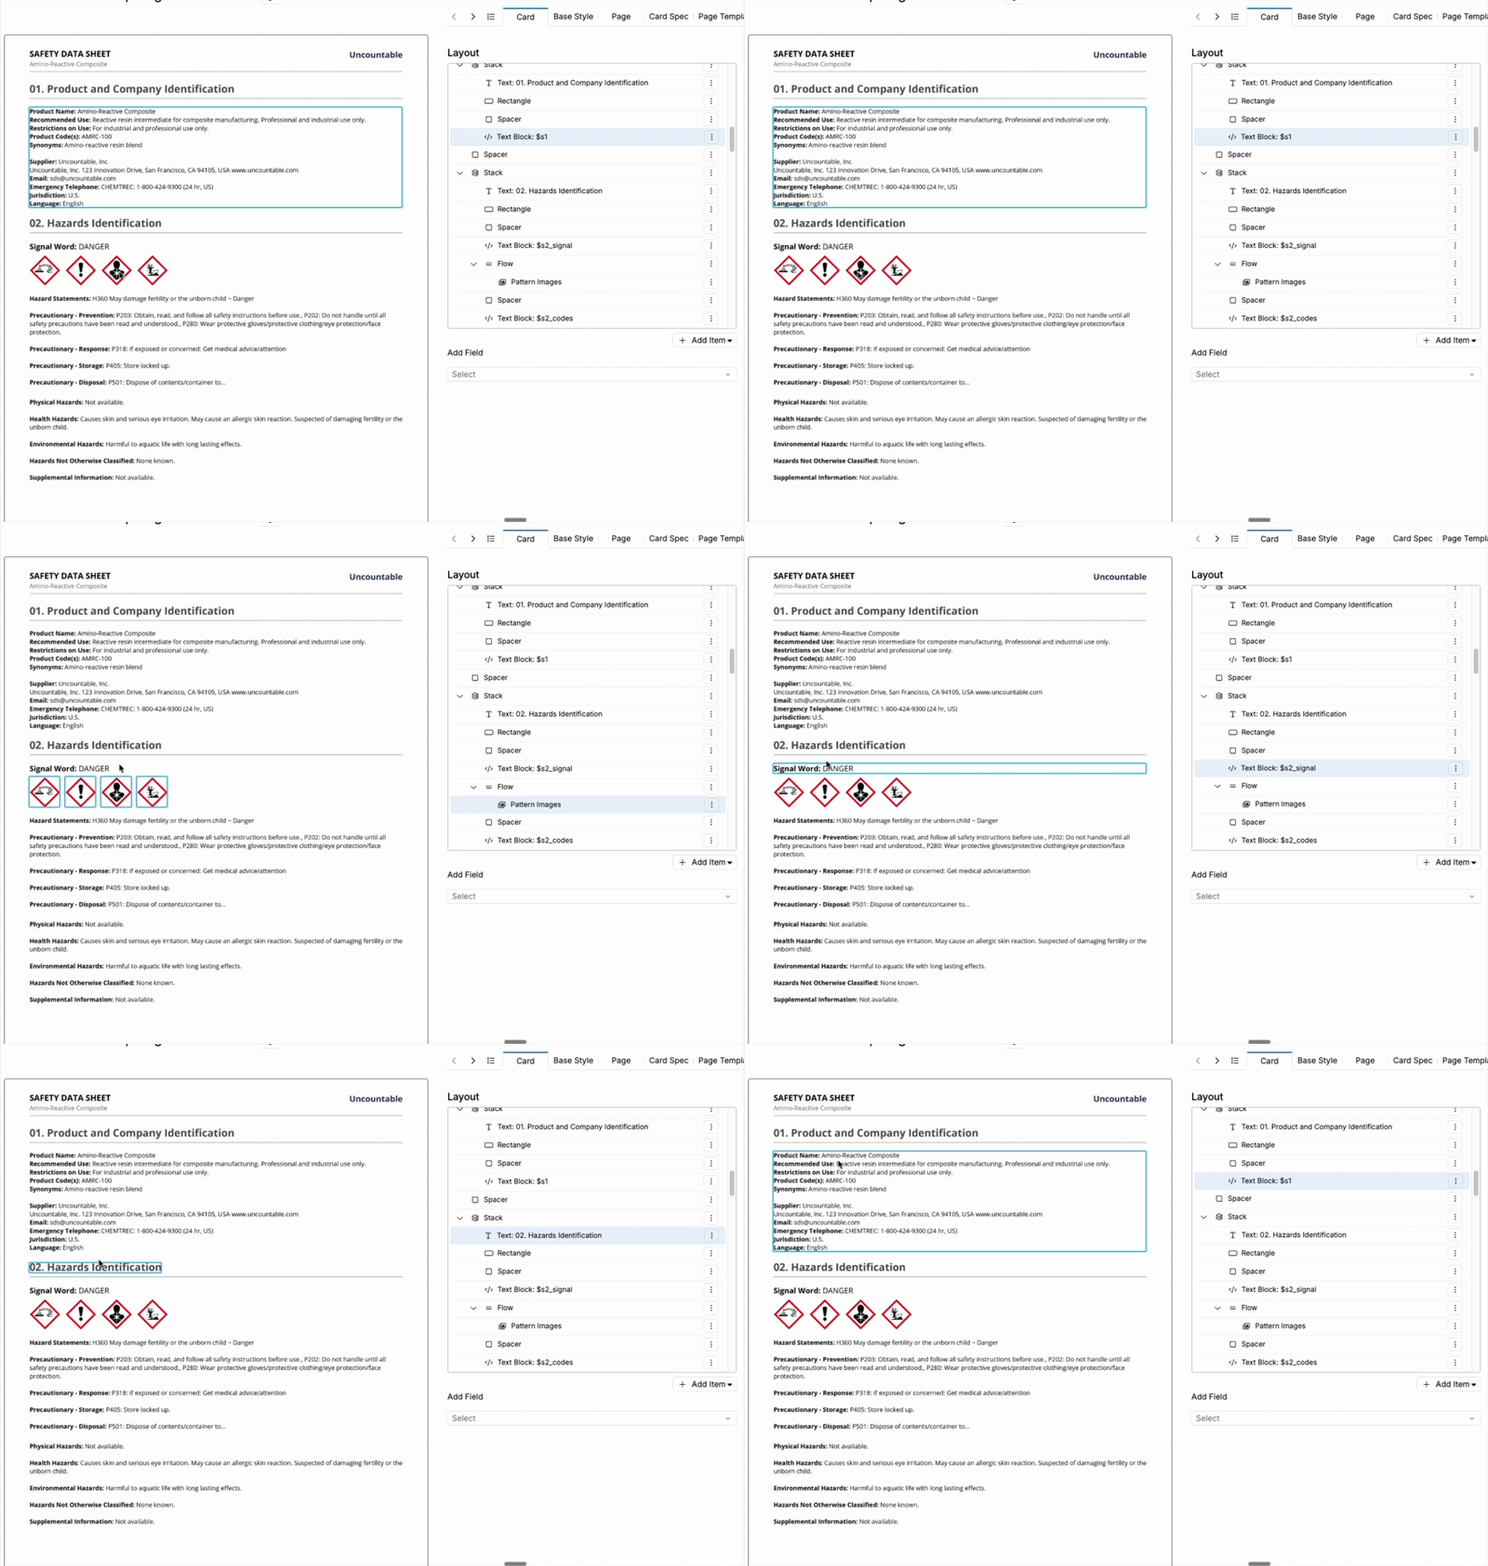
Selecting label items from the layout list and the preview
- You can also use value spec to bring in platform data. Learn more.
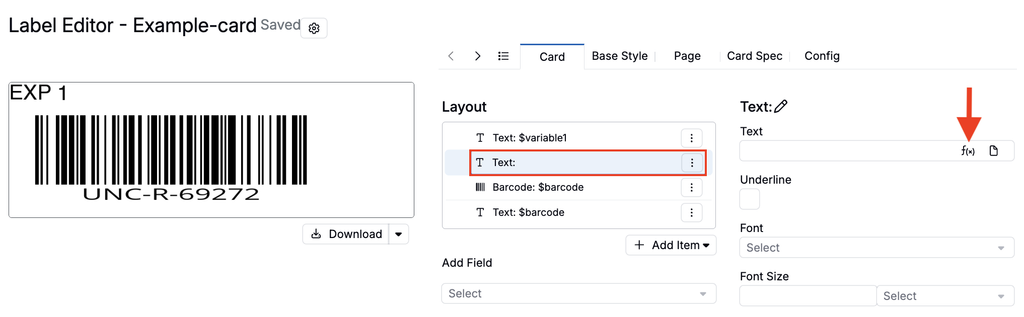
- To show or hide elements based on a set condition, select the item and use the Visible field. This lets one label adapt to different scenarios without creating separate labels.
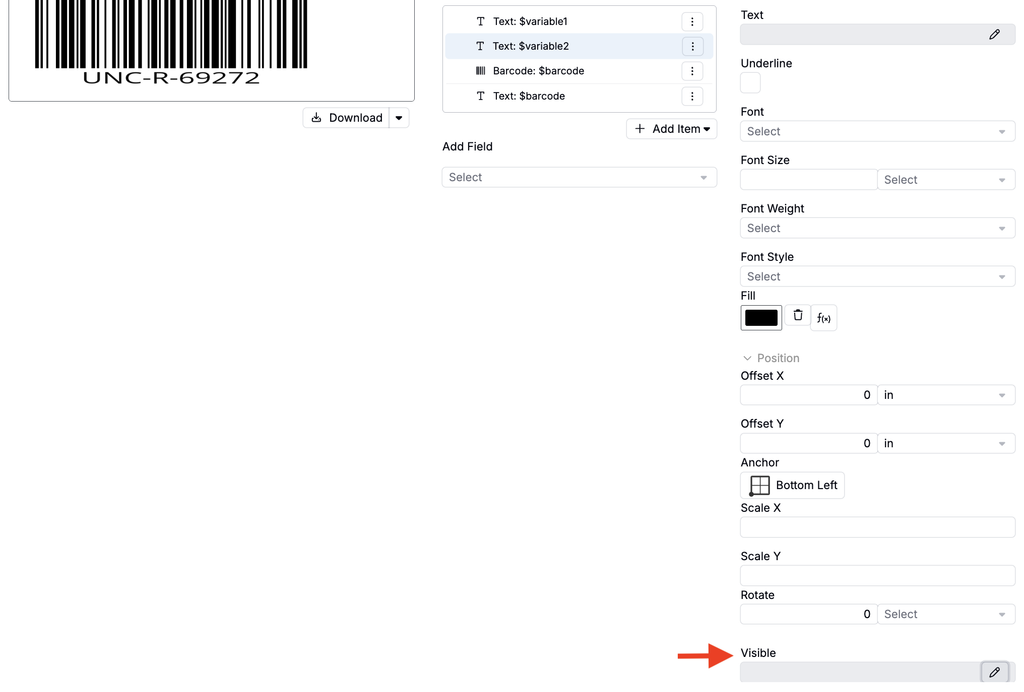
- To embed one label inside another (e.g., a nutritional label inside a larger product label), add an Embed item in the Card tab and select the template to embed. The embedded label is edited in its own source template.
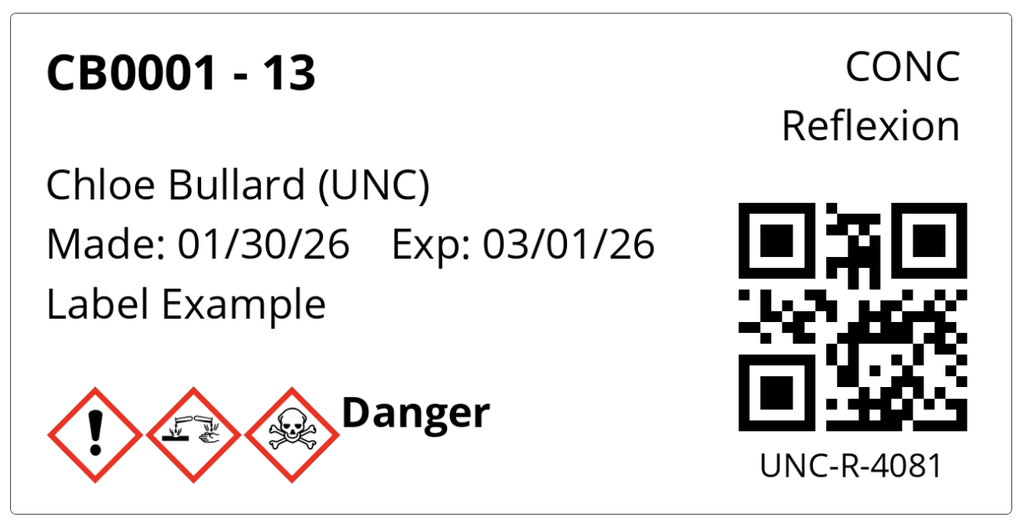
- To learn how to add GHS symbols to a label, refer to Adding GHS Symbols to a Custom Label.
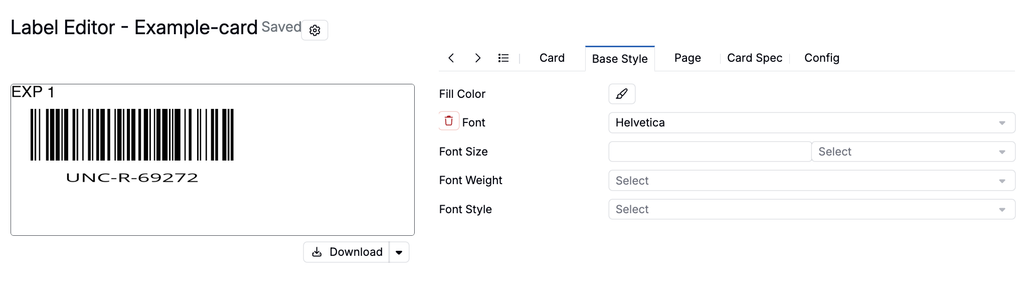
Base Style
Within the Base Style tab, change font style, size, weight, and color.
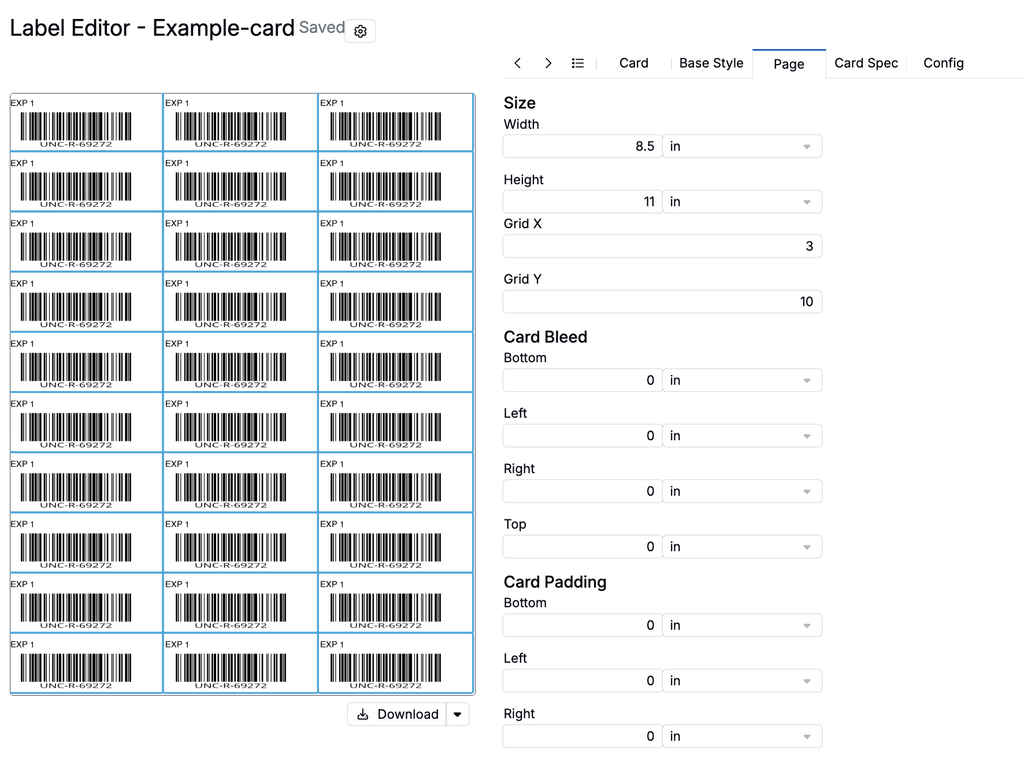
Page
Within the Page tab, configure print layout:
- Set page size (width/height)
- Set labels per page (Grid X/Y).
- Adjust card bleed (extends background past the border) and padding.
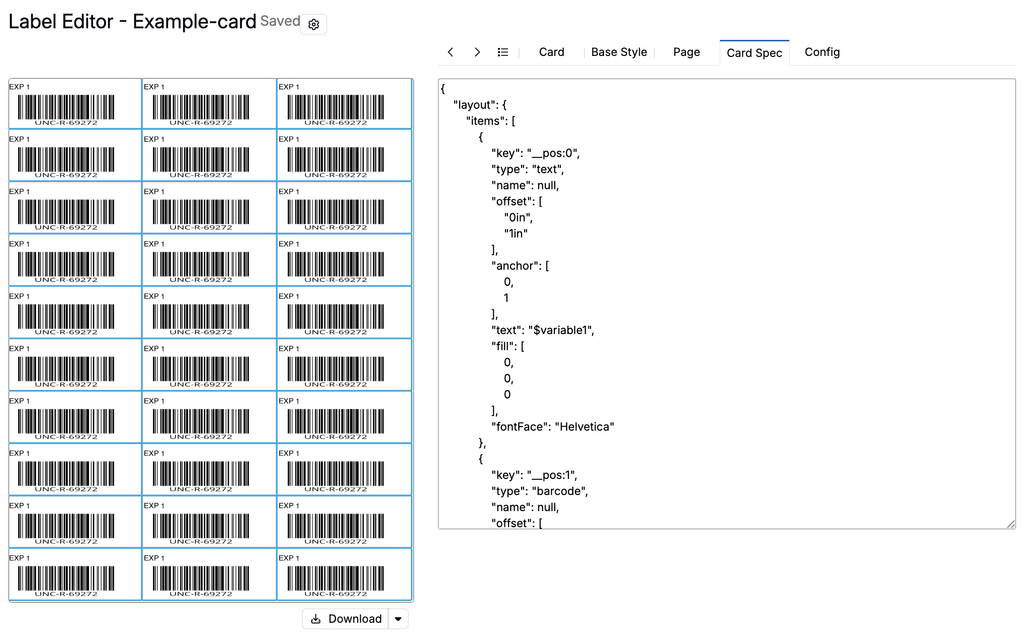
Card Spec
Within the Card Spec tab, edit the label’s full JSON configuration directly.
Config
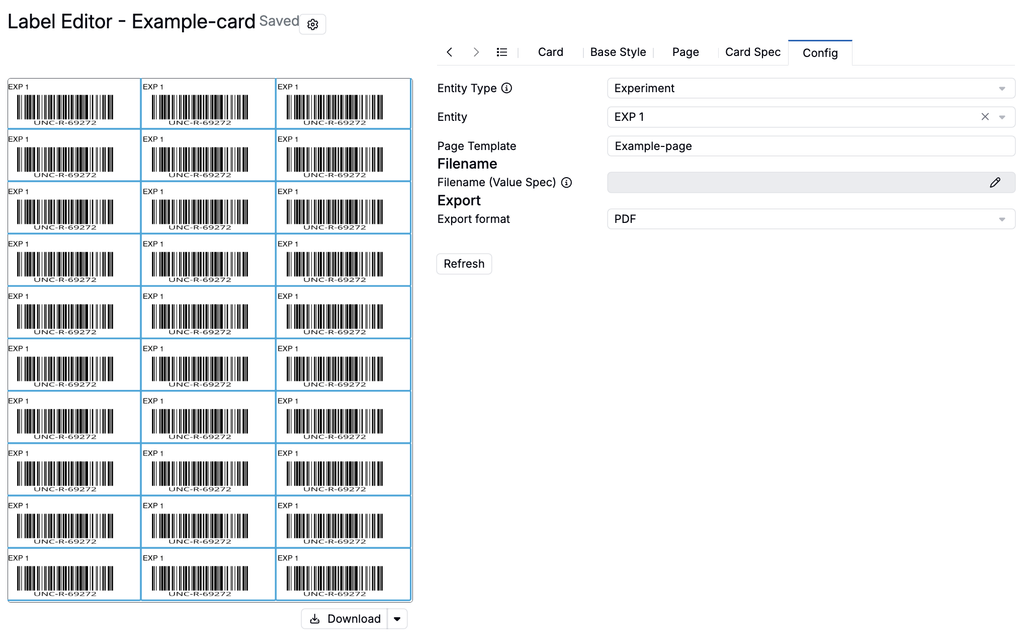
In the Config tab, preview the label for different entities by selecting different entity types/entities. You can also change the export format and use value spec to override the default label name in the Filename field.
Associating a Label with a Definition
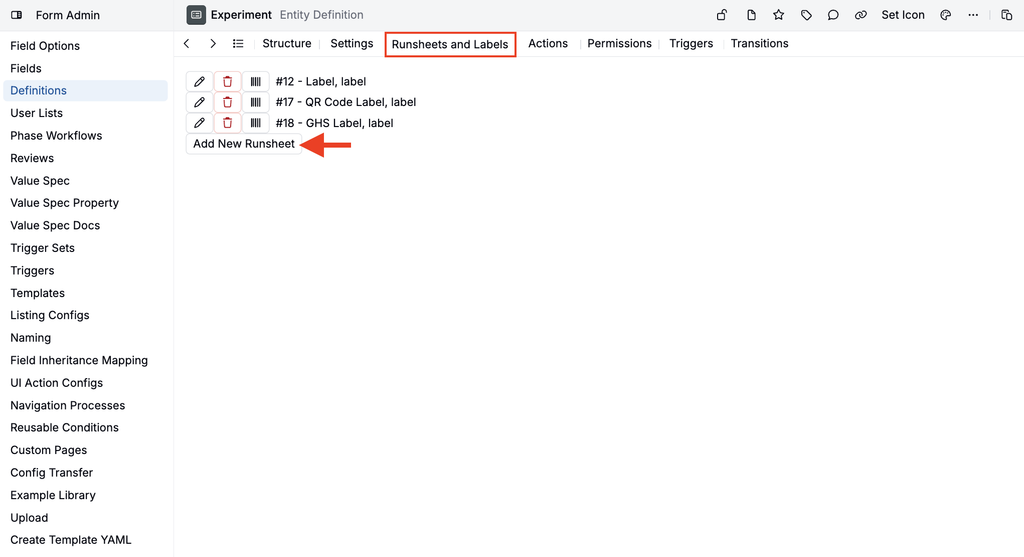
Once you have created a label template, it can be linked to a definition.
- Create a new definition or access an existing on.
- Within the definition’s Runsheets and Labels tab and click Add New Runsheet.
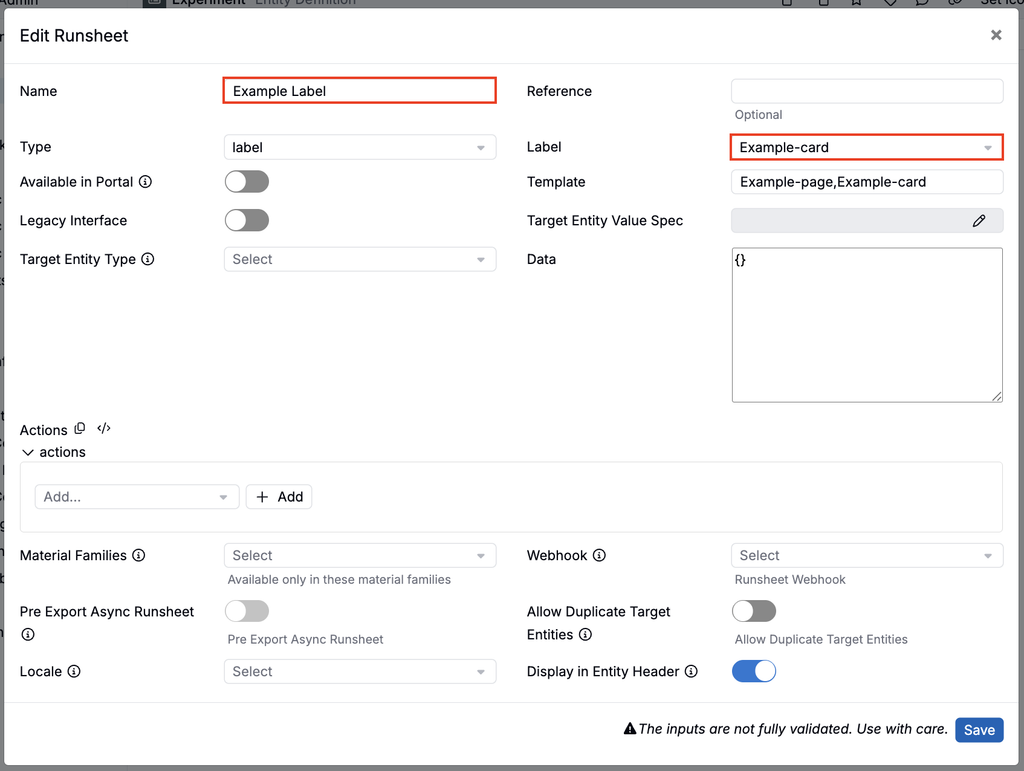
- In the modal, add a name and use the Label field to select your custom label.
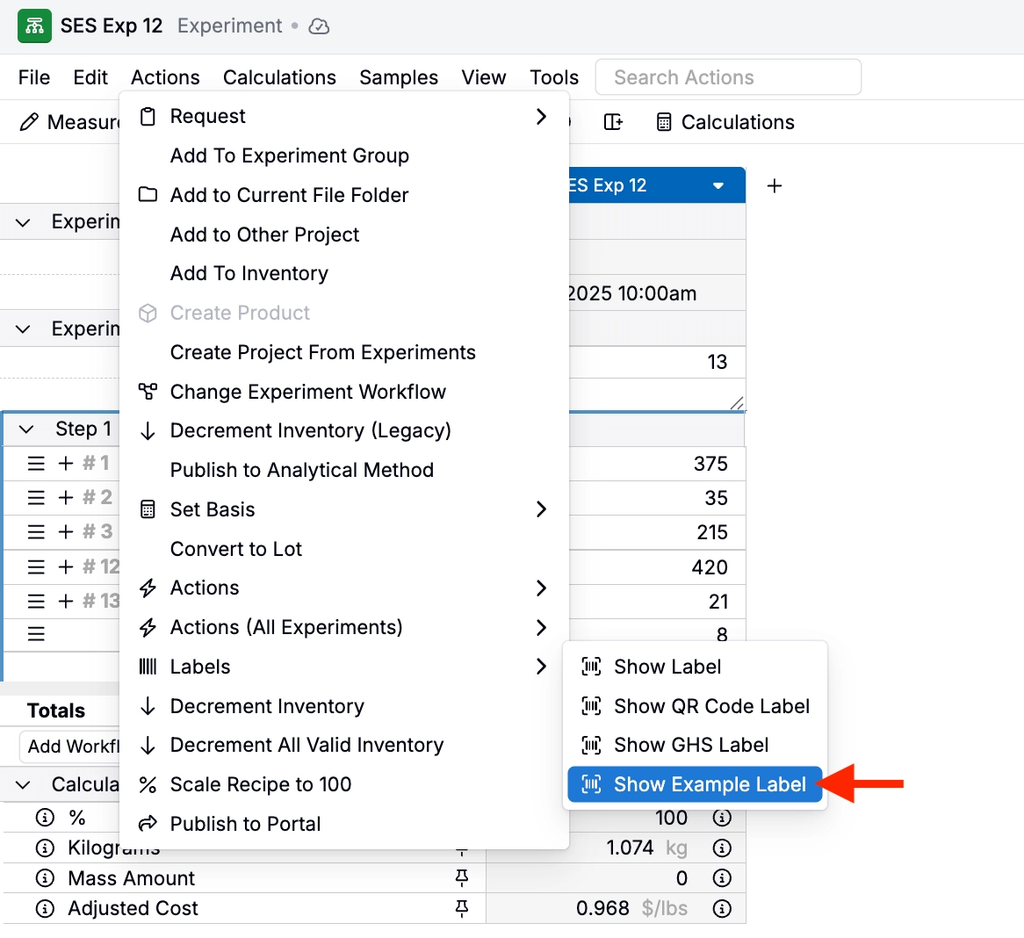
Once associated, you can open the label from any entity page for any entity created using that definition.
For example, if you associate the label to an experiment definition, you can select Actions > Labels > [Label name] to view and print the label for all experiments in view.
Labels can also be exported automatically using triggers. For more information, refer to Exporting Labels via Trigger.
Adding Items using Value Spec
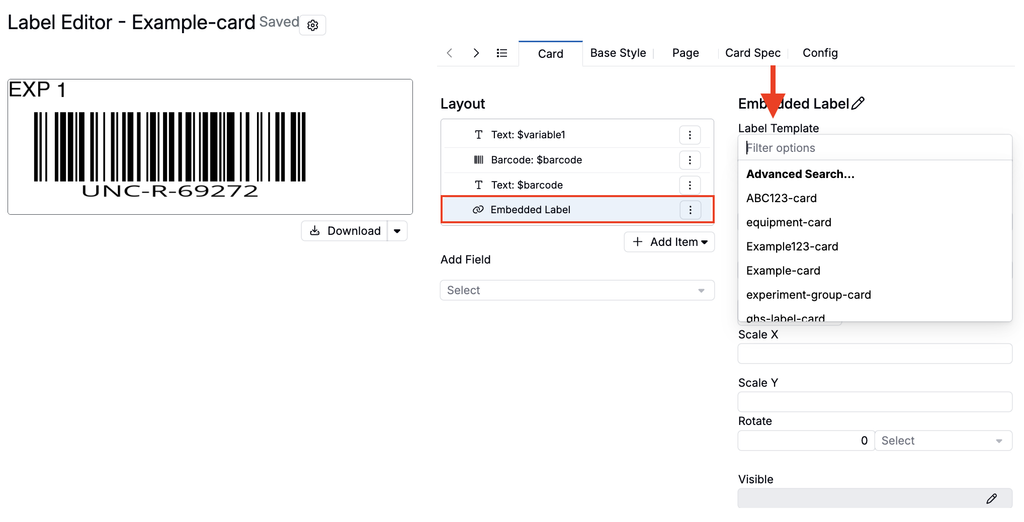
To use value specs to pull platform data into label items, select the label item and click f(x).
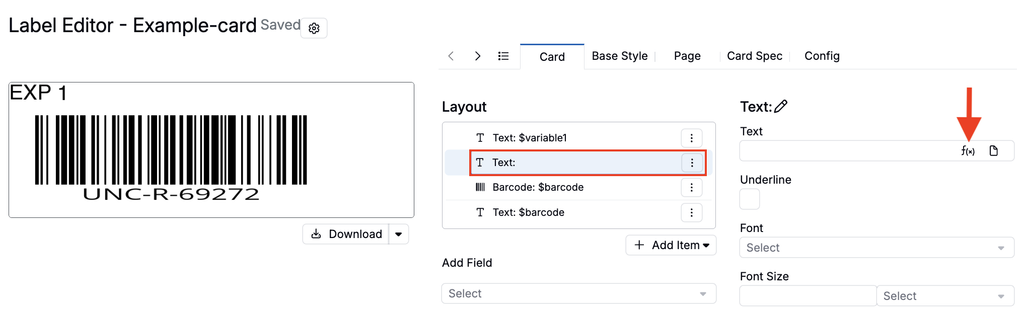
Common Value Specs
This section contains some common value specs you may want to copy-paste:
For recipes
recipe_name: text:${ref:recipe.name} or text:${ref:recipe.editable_name}
recipe_id: text:${ref:recipe.id}
recipe_metadata: text:${ref:recipe.metadata.metadata_name}
recipe barcode: text:${v:recipe.barcode}
recipe Lot ID: text:${ref:recipe.metadata.lot_id}
Ingredient within a recipe: text:${(id_source_map "entity/ingredient" ref:recipe.lotIngredientId)}
ingredient attribute within a recipe: text:${(id_source_map "fieldOptions:fieldoptionsRefName" (with_entity "ingredient" ref:recipe.lotIngredientId ref:ingredient.attributes.attributeRefName))}
For inventory amount
General lookup for all info: v:invAmount or ref:invAmount
title: text:${ref:invAmount.name}
barcode: text:${ref:invAmount.barcode}
lot: text:${expr:(coalesce ref:invAmount.ingredientLot.name json:"No Lot")}
category: text:${expr:(coalesce ref:invAmount.ingredient.category.name json:"Uncategorized")}
Lab: (ref:invAmount.lab.name)
Location type: text:${v:invLocalLocation.type.name}
Location within the lab: text:${expr:(join ref:invLocalLocation.path_names text:>)}
Metadata from the inventory's lot: text:${expr:(coalesce ref:recipe.metadata.MetadataRefName json:"")}
For inventory location
General lookup: v:invLocalLocation or ref:invLocalLocation
For ingredients/inventory
name: text:${ref:ingredient.name}
attribute_value: text:${ref:ingredient.attributes.attribute_name}
List attribute: (join ref:ingredient.attributes.hazard_id ", ")
For fields
i.e. Lab Requests, Custom entities, etc.
field_name: text:${ref:fields.field_ref}
For user context
i.e. Current project, Material Family, user data when exporting, etc.