
Note that based on your license type, you may not have access to these features. Please contact your account manager to learn more.
Ternary plots let you visualize the relationship between three variables at once, which makes them well suited to composition and mixture data.
Uncountable’s Model Surface Plotting tool allows you to visualize model predictions across two or three input features. Once a model has been trained on the platform, you can leverage this tool to explore relationships between inputs and outputs.
You can also plot actual experimental data directly as a ternary plot inside a notebook or dashboard notebook, with no model required.
Model Surface Plotting
You can access the Model Surface tool from navigation bar by selecting Calculate > View Model Surface. You can also access it as an extension of the Analyze Experiments page.
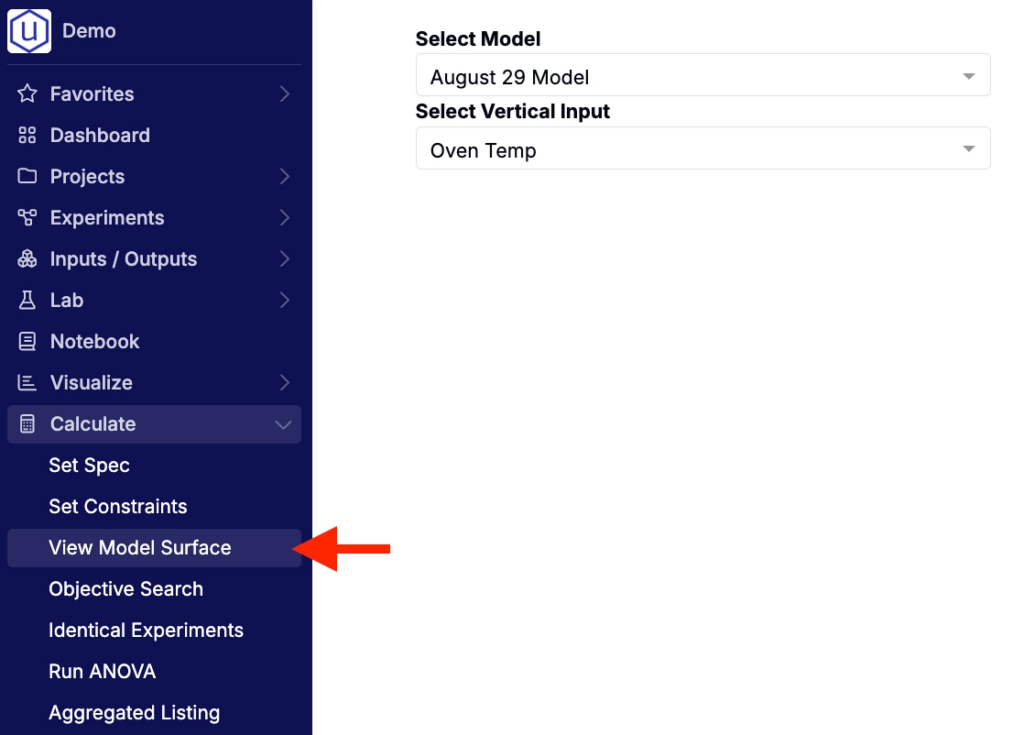
Accessing the Model Surface tool
Plot Settings
At the top of the page, there are four dropdown menus:
- Select Model — Choose which model to visualize. Any model saved from the Analyze Experiments page will be available to all project members.
- Select Output — Select the output of interest. Only outputs included in the model are available for selection. The output will appear as a multicolor surface on the plot.
- Lighter colors = higher predicted values.
- Darker colors = lower predicted values.
- Select Vertical Input — Choose the input feature to display on the Y-axis (e.g., ingredients, process parameters, or calculations).
- Select Horizontal Input — Choose the input feature to display on the X-axis (e.g., ingredients, process parameters, or calculations).

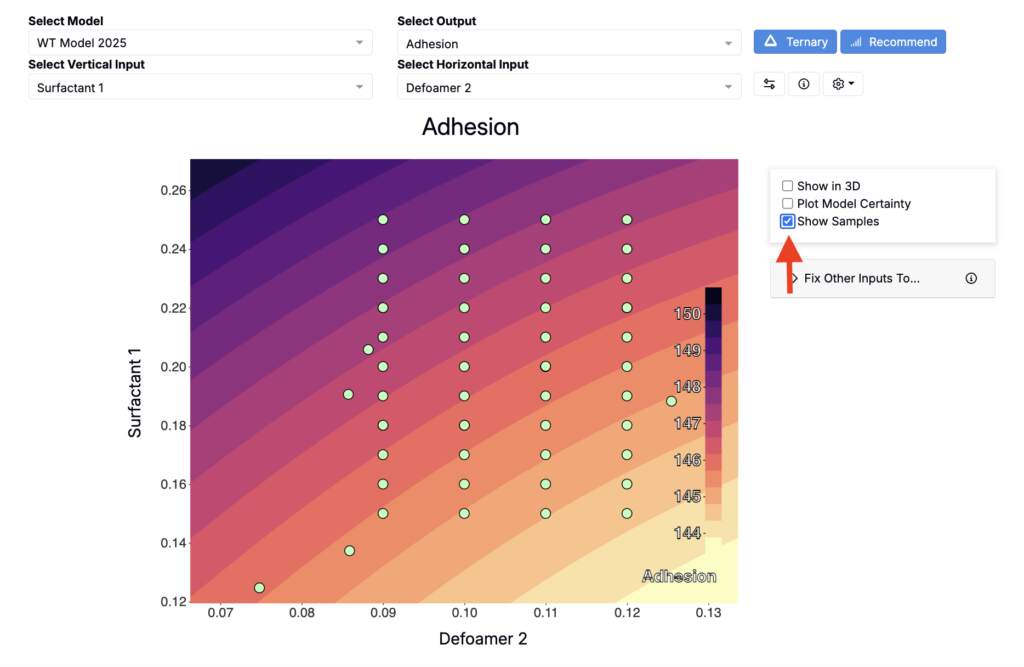
For example, consider the output Adhesion with inputs Surfactant 1 and Defoamer 2:
- Increasing Surfactant 1 → higher predicted adhesion values.
- Increasing Defoamer 2 → lower predicted adhesion values.
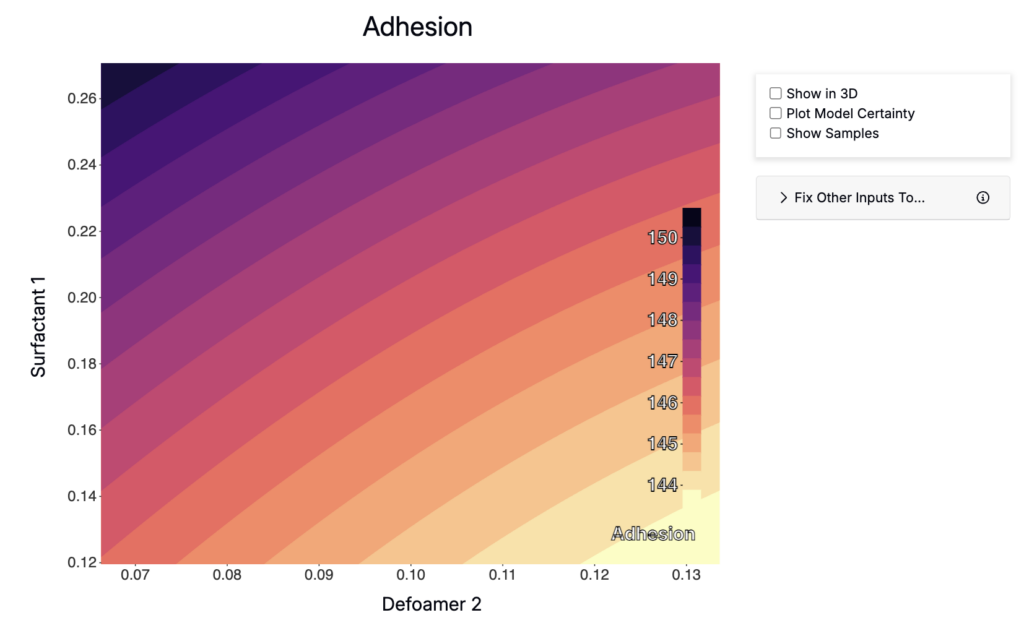
Customizing the Plot
The plot can be customized to change the display or add detail:
- Show in 3D Toggle the 3D mode to rotate and interact with the surface plot using your cursor.
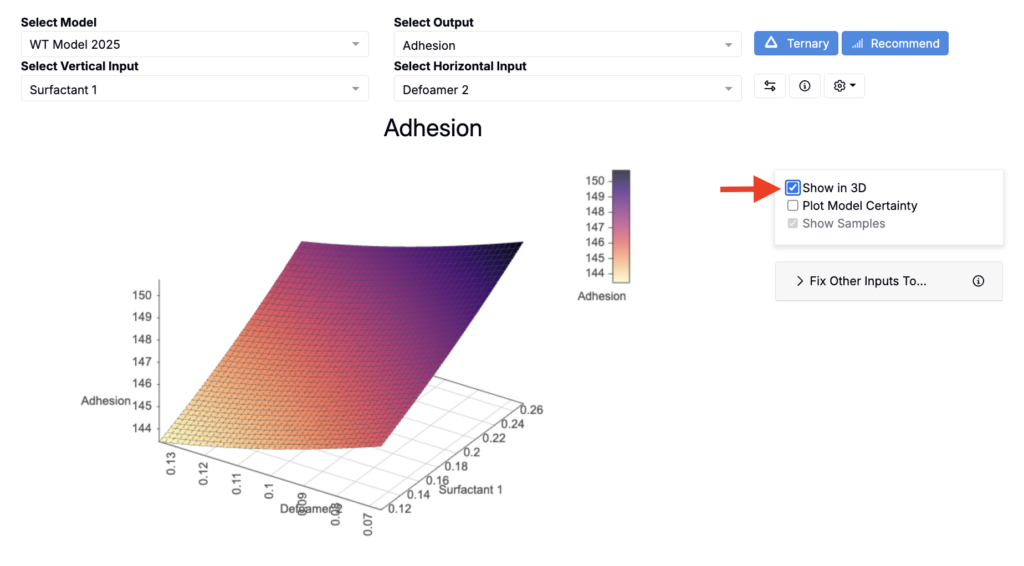
- Plot Model Certainty Switch the color scheme to display model certainty instead of predicted output values.
- Lighter colors = higher certainty.
- Darker colors = lower certainty (often in regions with sparse training data).
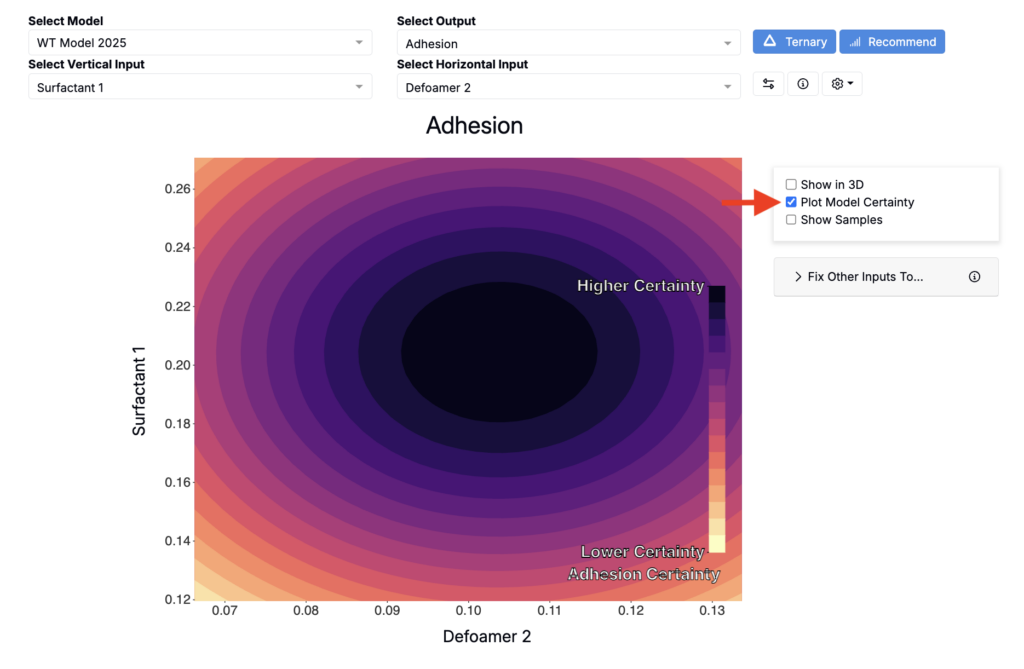
- Show Samples Overlay the data points used to build the model surface. Overlaps may occur if two experiments share the same input feature levels.
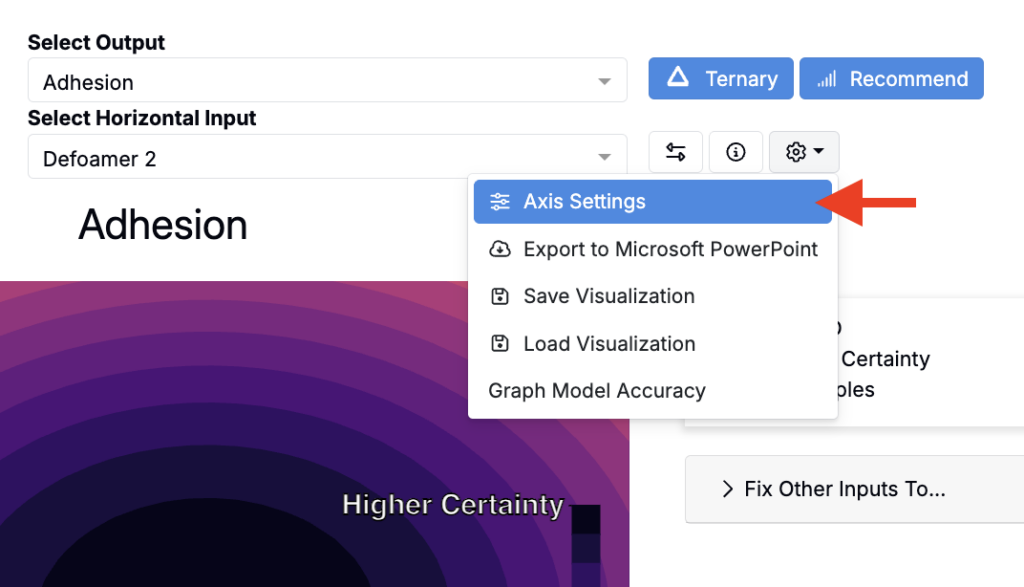
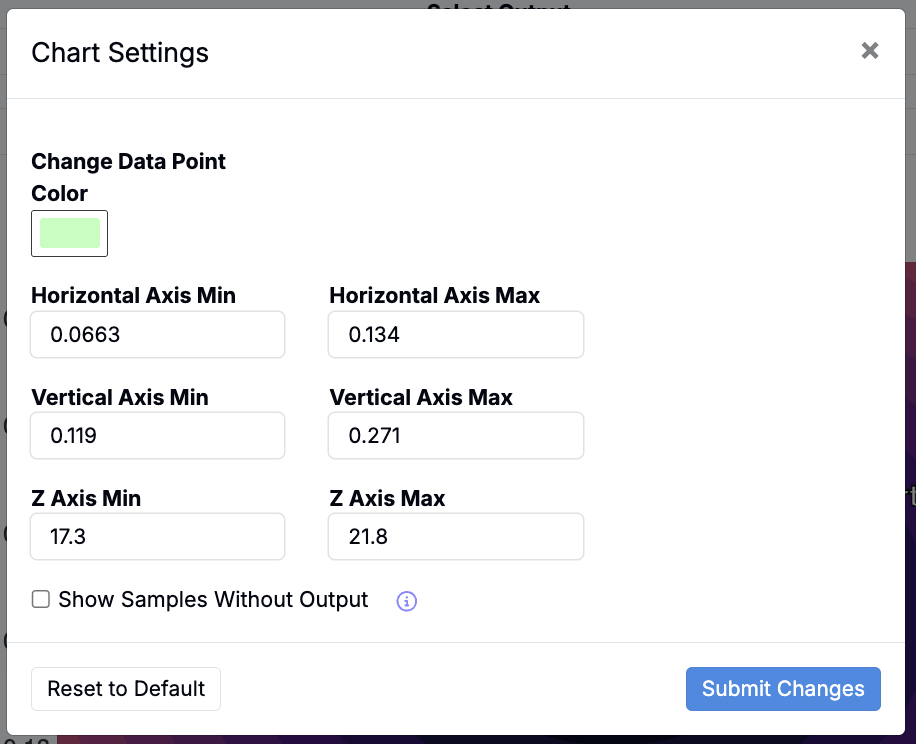
- Axis Settings Click the ⚙️ icon > Axis Settings to adjust axis ranges, change data point colors, or apply a different surface color scheme.
Fixing Inputs
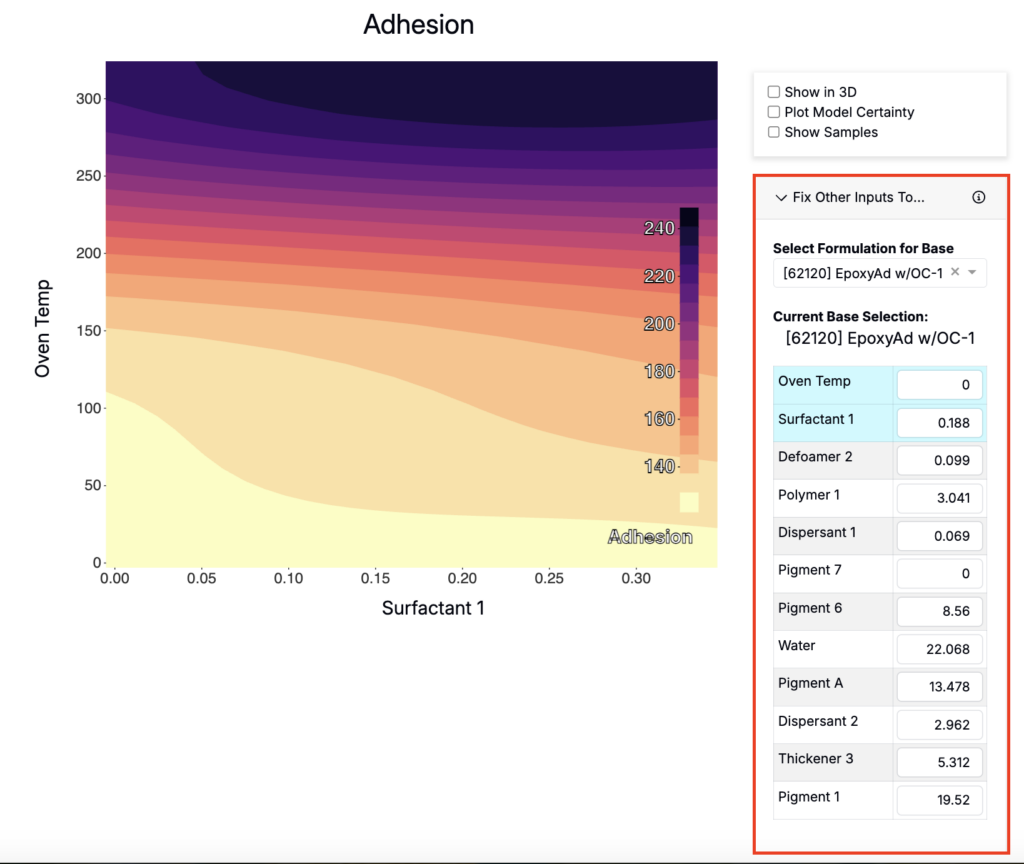
The Fix Other Inputs To… setting lets you lock all non-selected inputs to a selected base formulation. The surface plot then shows model predictions for the selected output as only the chosen inputs vary. All other input values remain constant, based on the base formulation you select.
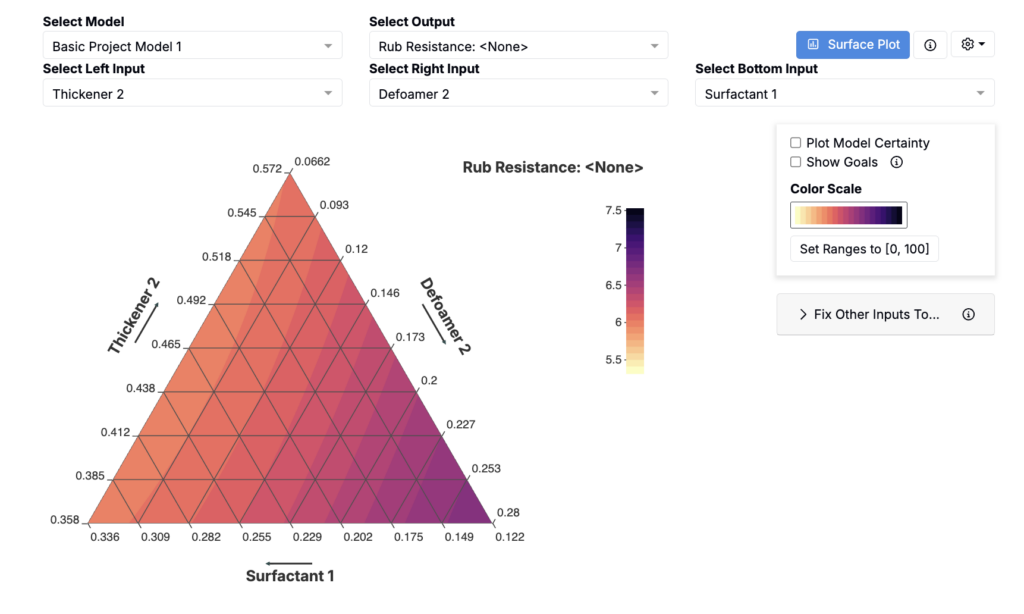
Ternary Plots from a Model Surface
To visualize three input features simultaneously, you can switch to a Ternary Plot by clicking the button at the top of the page.

Ternary plot interpretation works the same way as 2D plots, but with three axes available for feature selection.
Saving Plots
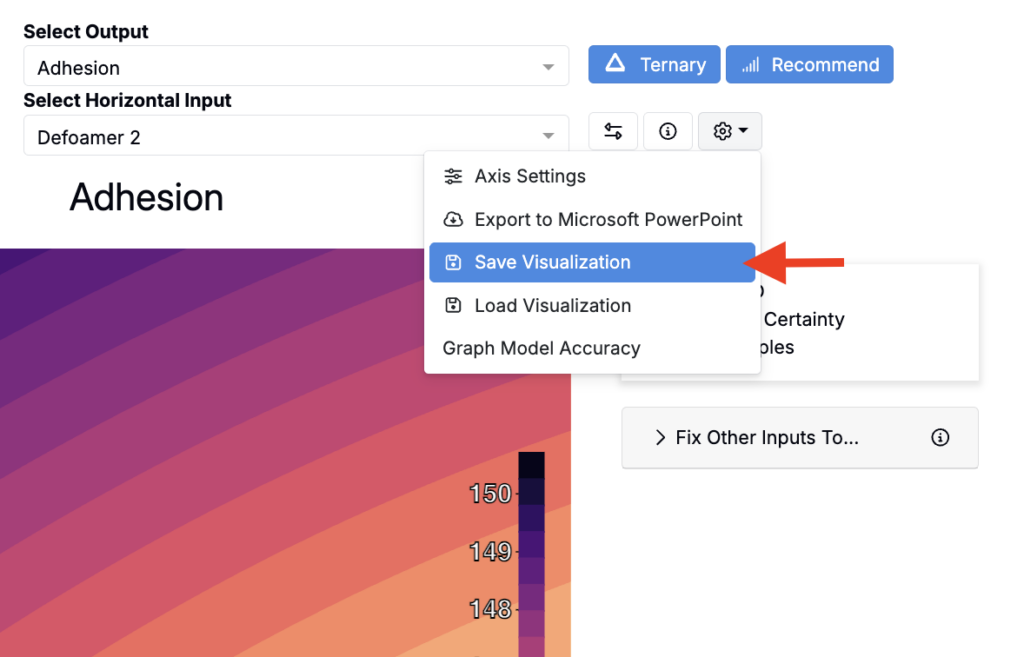
Both 2D Surface Plots and Ternary Plots can be saved directly to a notebook by clicking the ⚙️ icon > Save Visualization. Entity chart ternary plots are already embedded directly in your notebook, so no separate save step is needed.
Note that based on your license type, you may not have access to these features. Please contact your account manager to learn more.
Creating a Ternary Plot from Entity Charts
If you want to plot actual experimental data rather than model predictions, you can create a ternary plot directly from an entity chart, without needing a trained model first. This is the right choice when you’re plotting real output measurements, ingredient levels, or other listing columns for a set of entities (experiments, lab requests, and so on).
You can create entity chart ternary plots in our visualization suite (Visualize > View Ternary Plot) or directly in notebooks. They’re most often added to dashboard notebooks so the chart stays live as you adjust filters.
To create a ternary plot from an entity chart within a notebook or dashboard:
- Click Add Item > Listing Chart.
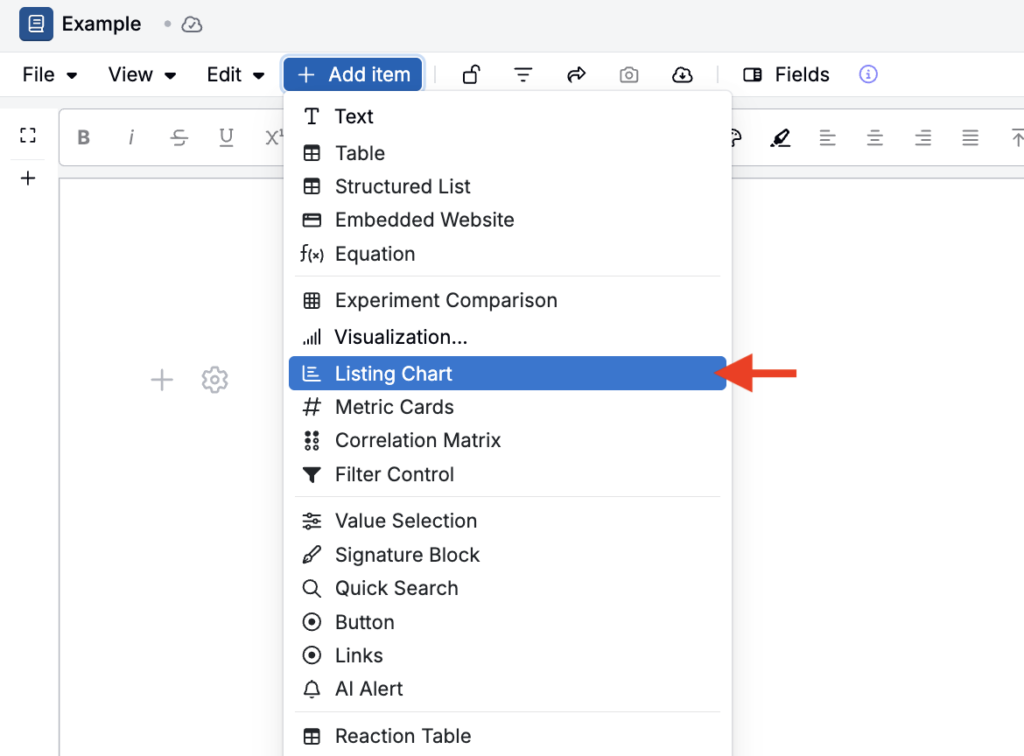
- Click Edit Chart Configuration.
- Choose the Entity Type you want to chart.
- For Chart Type, select Ternary Plot.
- Assign your Left Axis, Right Axis, and Bottom Axis (e.g., three outputs or other experimental values).
- Add optional constraints to filter which points are plotted.
- Add Point Labels so you can identify individual data points.
- Add an optional Color component to group points — for example, coloring by ingredient so all points containing that ingredient share a color.
- Optionally assign a Series — this draws a tie line between sequential points that share the same series value, useful for connecting coexisting phases at equilibrium.
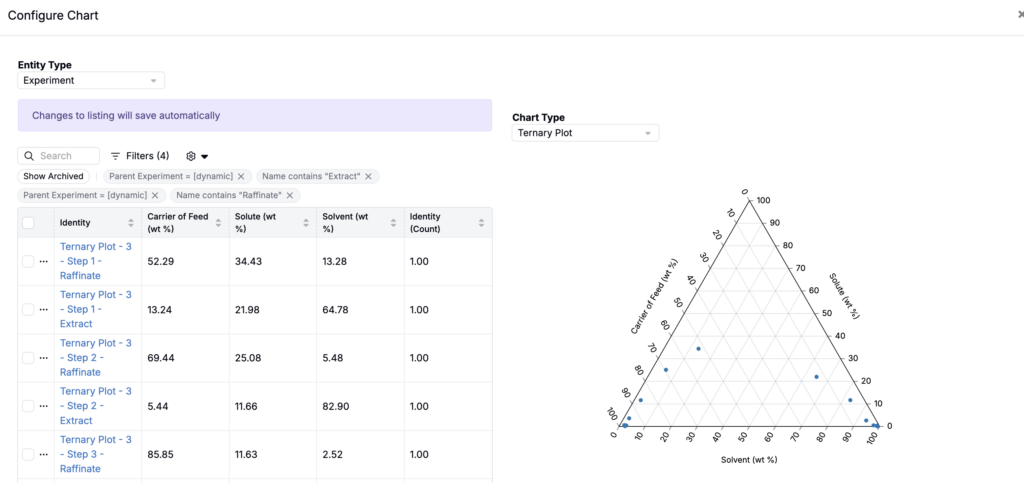
Unlike Model Surface ternary plots, entity chart ternary plots update live as the underlying listing changes, and you can place multiple ternary plots side by side in the same notebook for comparison.