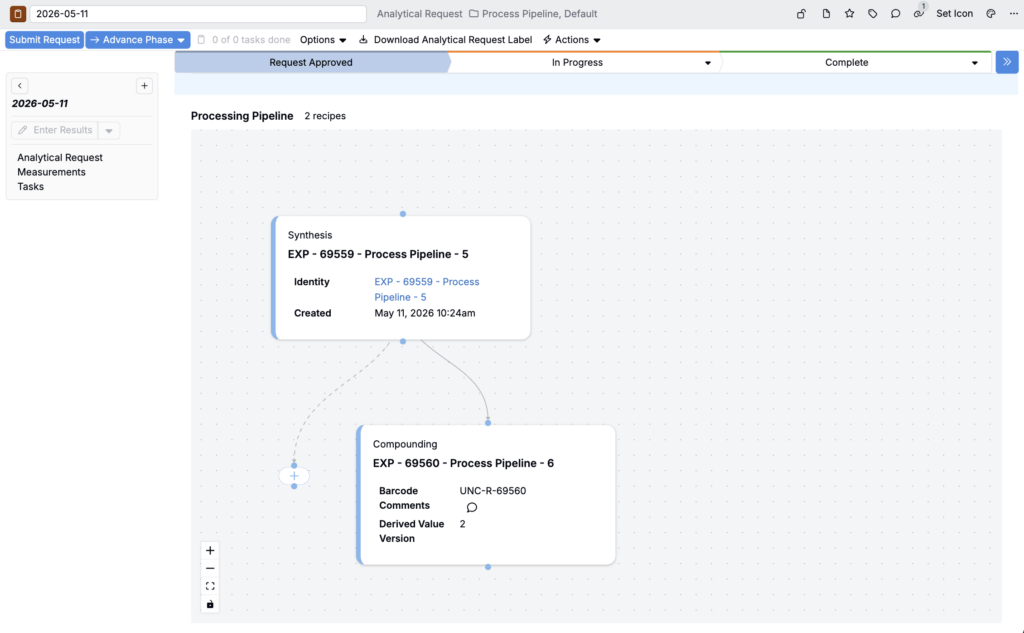
Pipelines are a visual, step-based way to model an experiment workflow and then create/link experiments to those steps. Using pipelines, teams can more easily:
- Define the steps in a process up front
- Build a downstream chain of experiments from a base experiment, including multi-step and nested pipelines
- Control which workflow variants and fields are used at each step
- Create child experiments from a parent step while preserving traceability (the parent is automatically added as an ingredient)
Pipelines vs product relationships
Pipelines are an alternative to product relationships. Use the option that best matches what your team is trying to do:
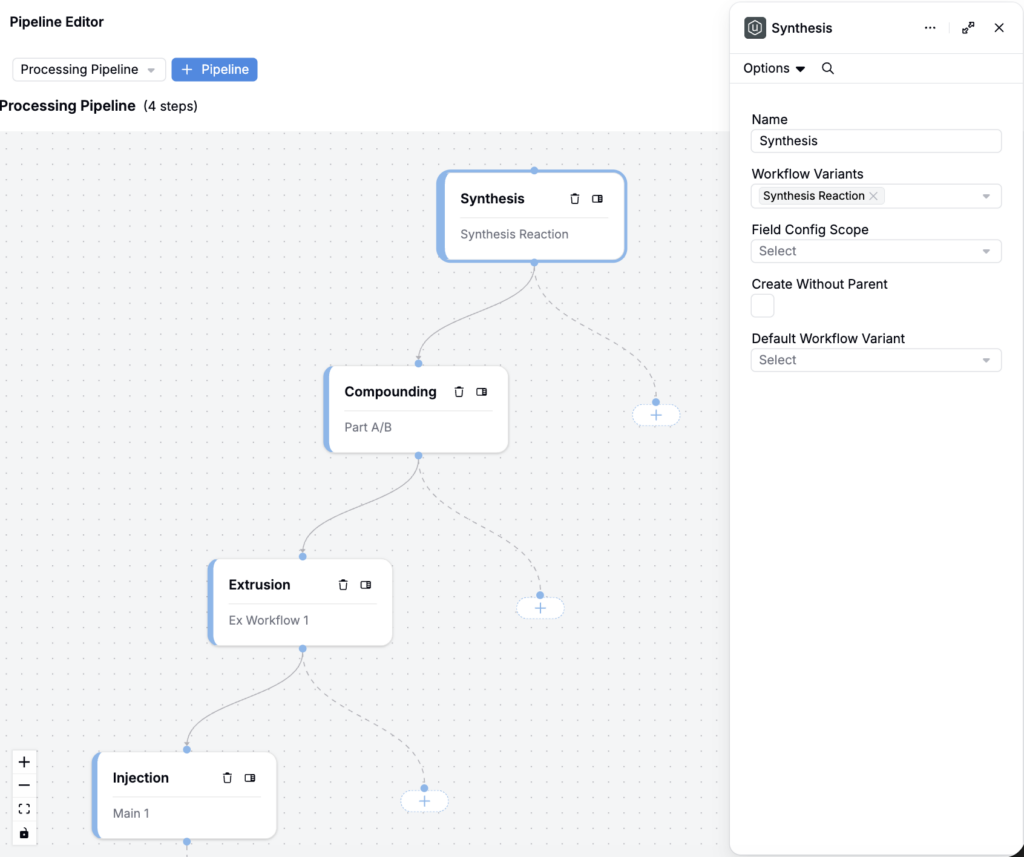
- Use pipelines if your team wants a step-by-step workflow (e.g., synthesis → compounding → extrusion → injection) that guides experiment creation and keeps parent/child traceability.
- Use product relationships if your team wants to relate experiments without enforcing a step-based workflow.
Creating a pipeline
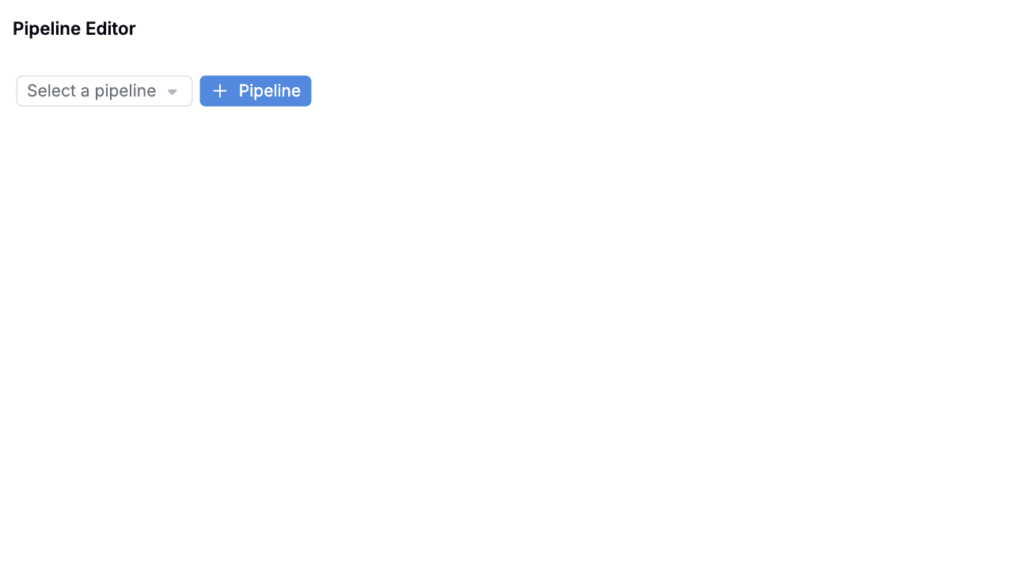
- Access the Pipeline Editor (via Quick Actions).
- Click the blue + Pipeline button to create a new pipeline.
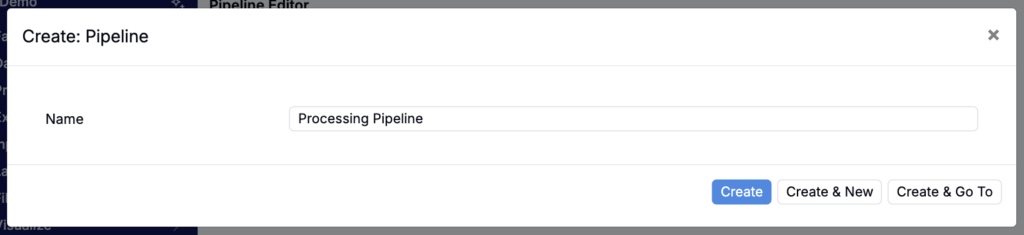
- Assign a name.
- Add your first step node to represent the first workflow stage.
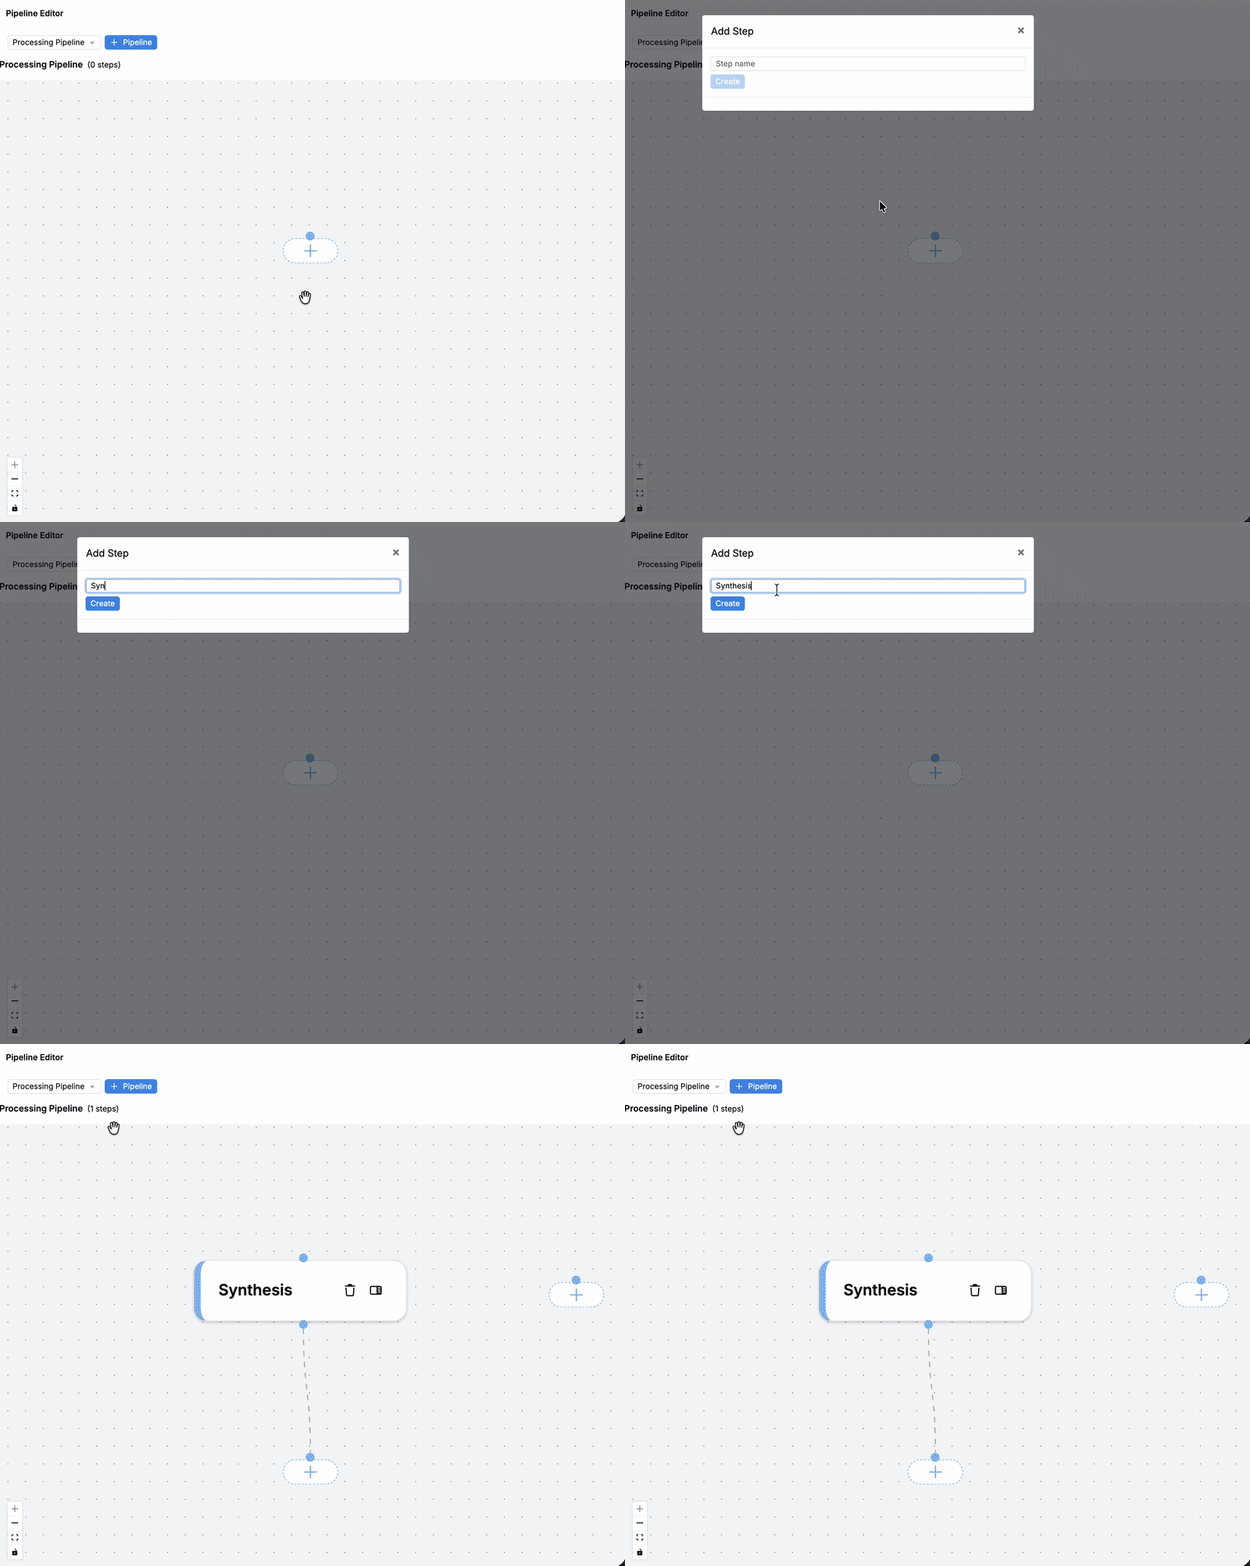
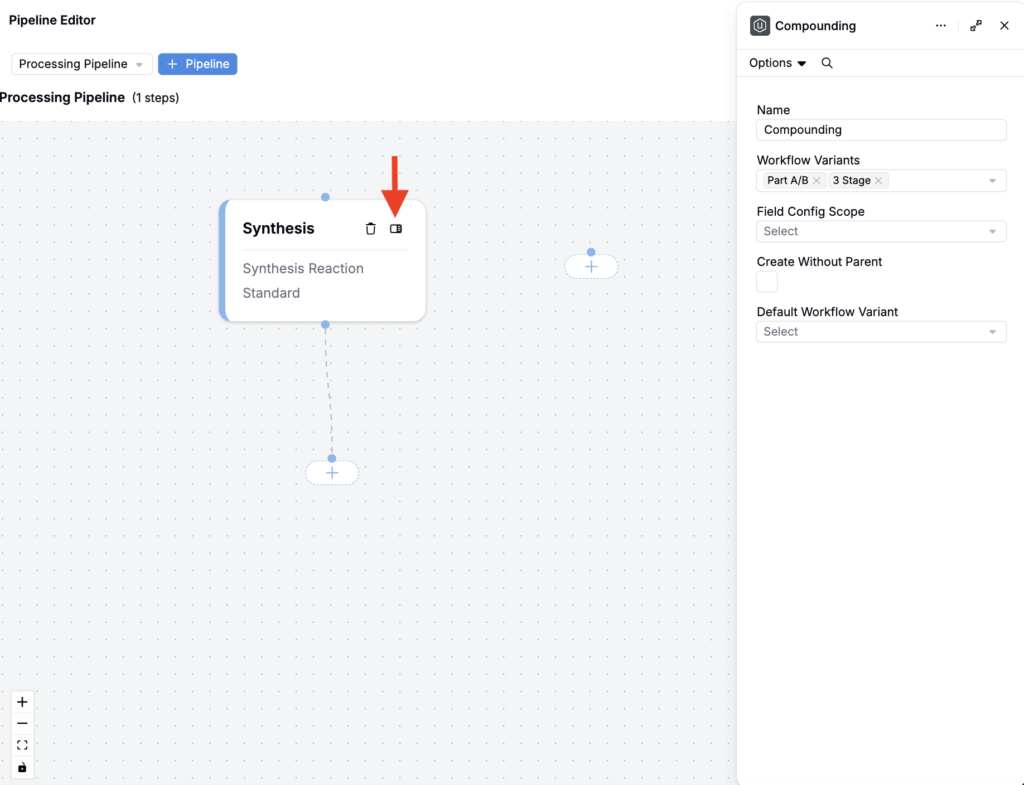
- For each step node, click the sidepanel icon and:
- Workflow Variants: select one or more workflow variants used when creating experiments for this step.
- Field Config Scope: choose which fields appear for experiments created at this step.
- Create Without Parent: allow starting a new pipeline at this step (without an upstream parent).
- Default Workflow Variant: the workflow variant that’s preselected when creating experiments for this step.
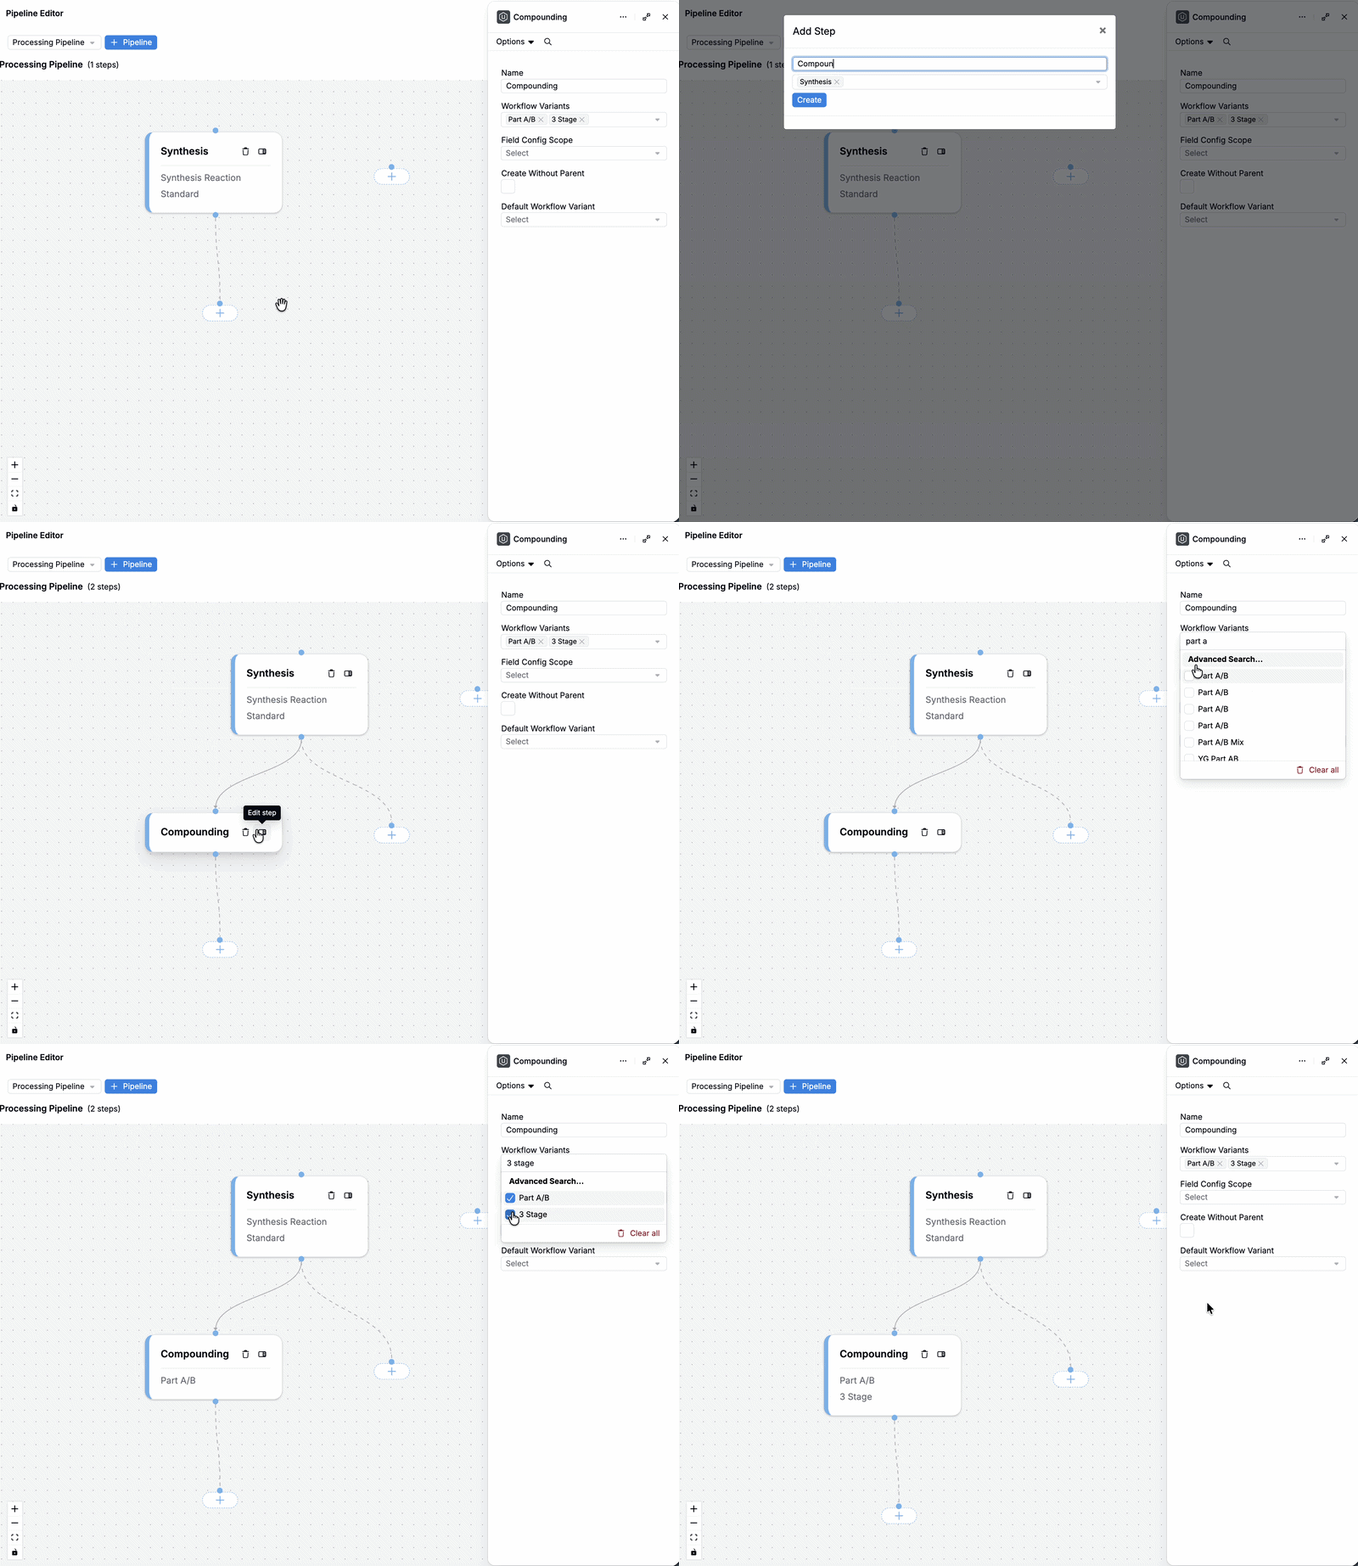
- Add additional nodes to build out the sequence of steps in your pipeline. Each new node is attached to a parent step, so you can extend the chain downstream, or create multiple child nodes (siblings) from the same parent when a step can branch.
Linking an existing experiment to a pipeline
Once you have a pipeline set, you can begin by linking an existing experiment to that pipeline.
- Open the experiment.
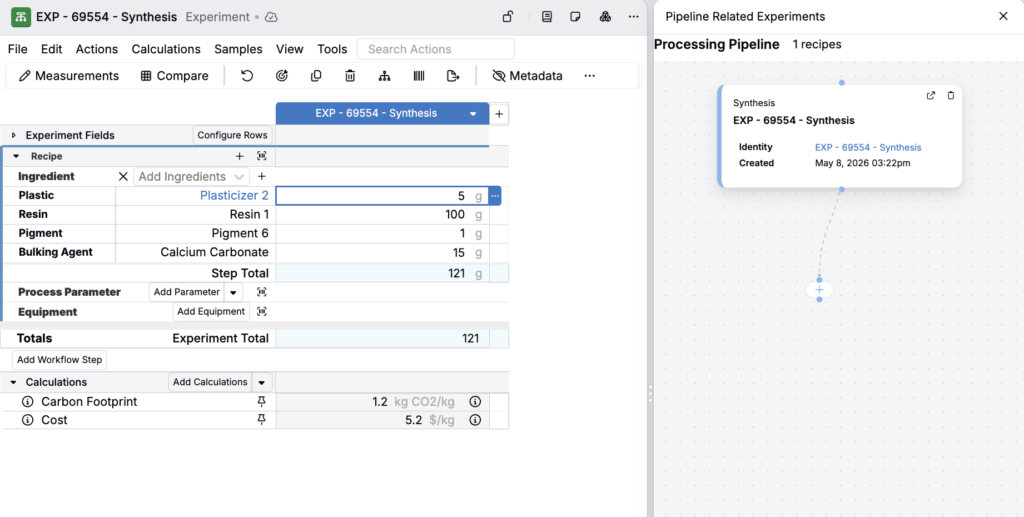
- Use Search Actions to open the Process Pipeline Sidepanel.
- Select the pipeline you want to use.
This will automatically link the active experiment to the first step in the process pipeline and you can begin creating downstream experiments step-by-step.
Create child experiments from a step
From the Process Pipeline sidepanel, you can then create new downstream experiments from a given step by clicking the + node.
When you create a child experiment:
- The Workflow Variant field of the new experiment modal is automatically filtered down to only variants defined on that step of the process pipeline.
- The parent experiment is automatically added as an ingredient in the child experiment, preserving provenance across the workflow.
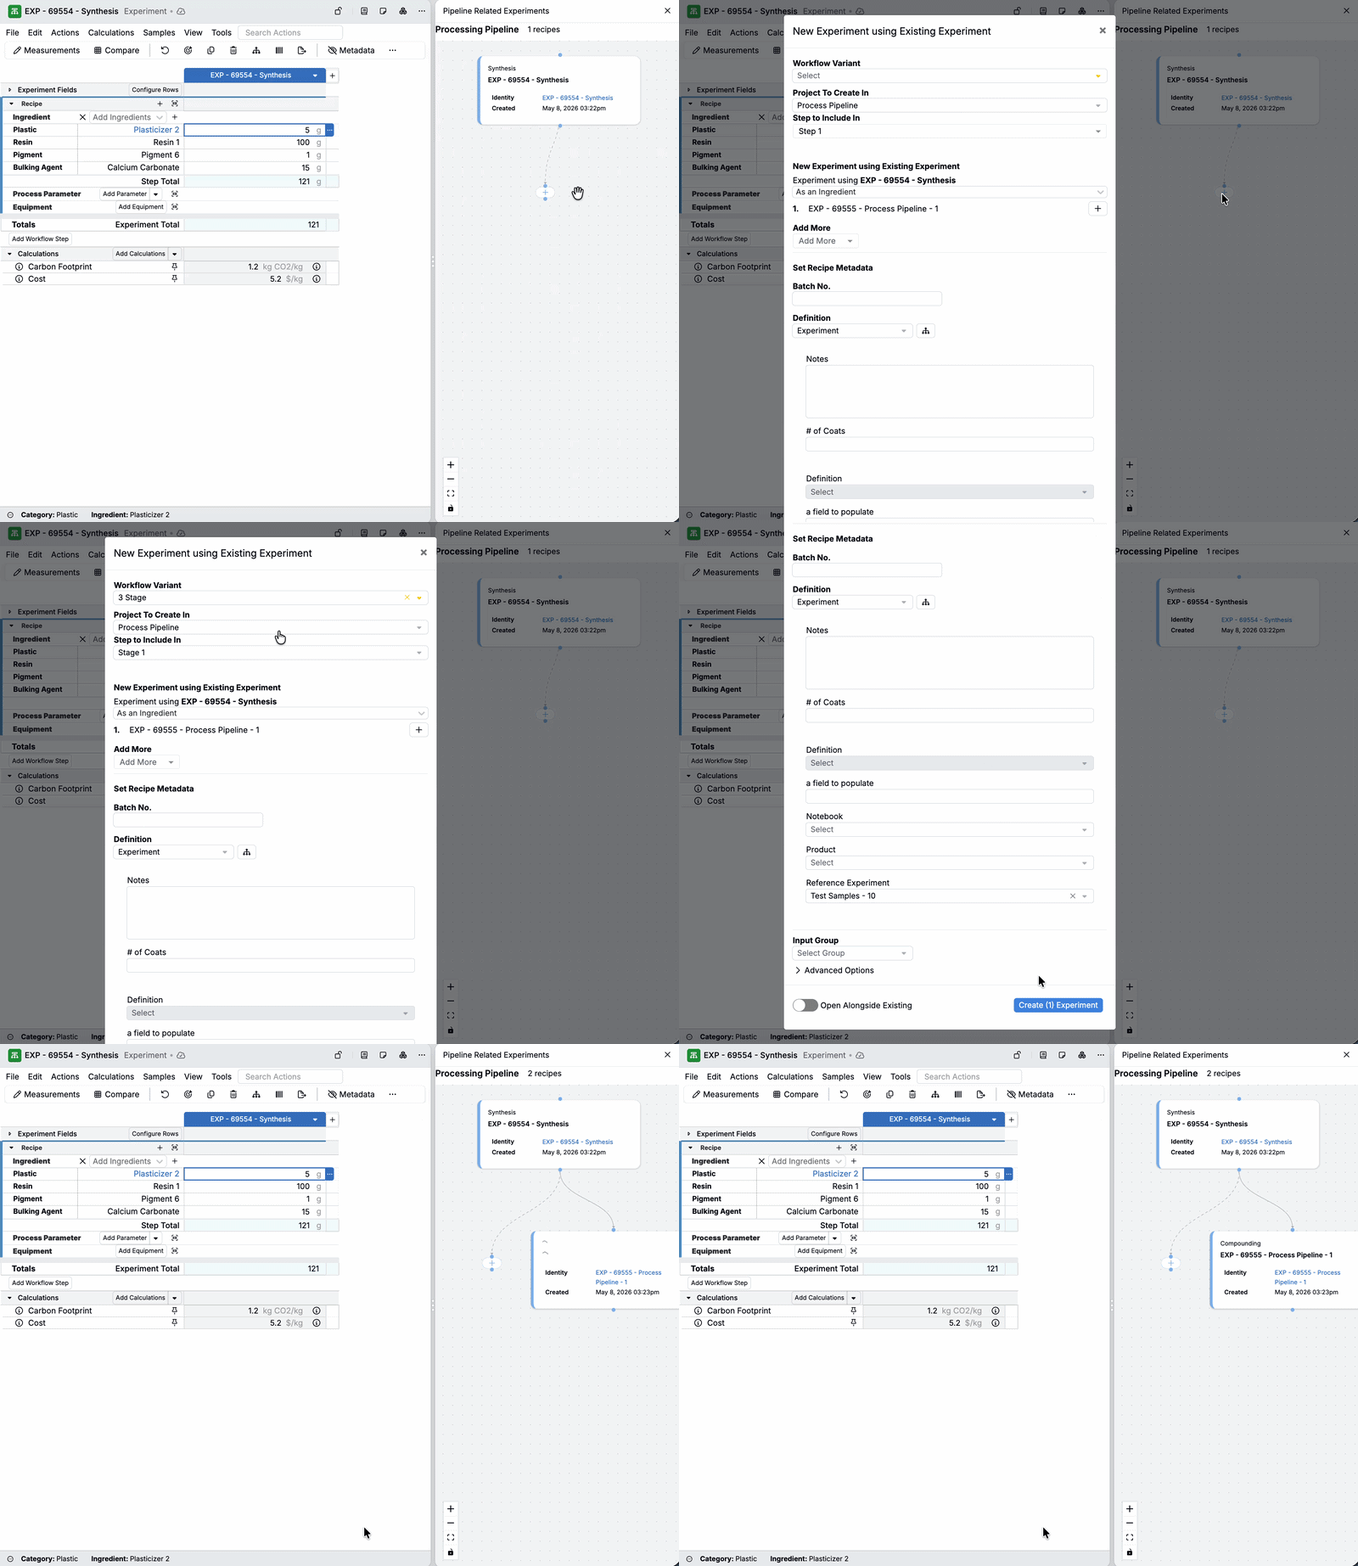
You can also create sibling experiments (multiple child experiments off the same parent/step).
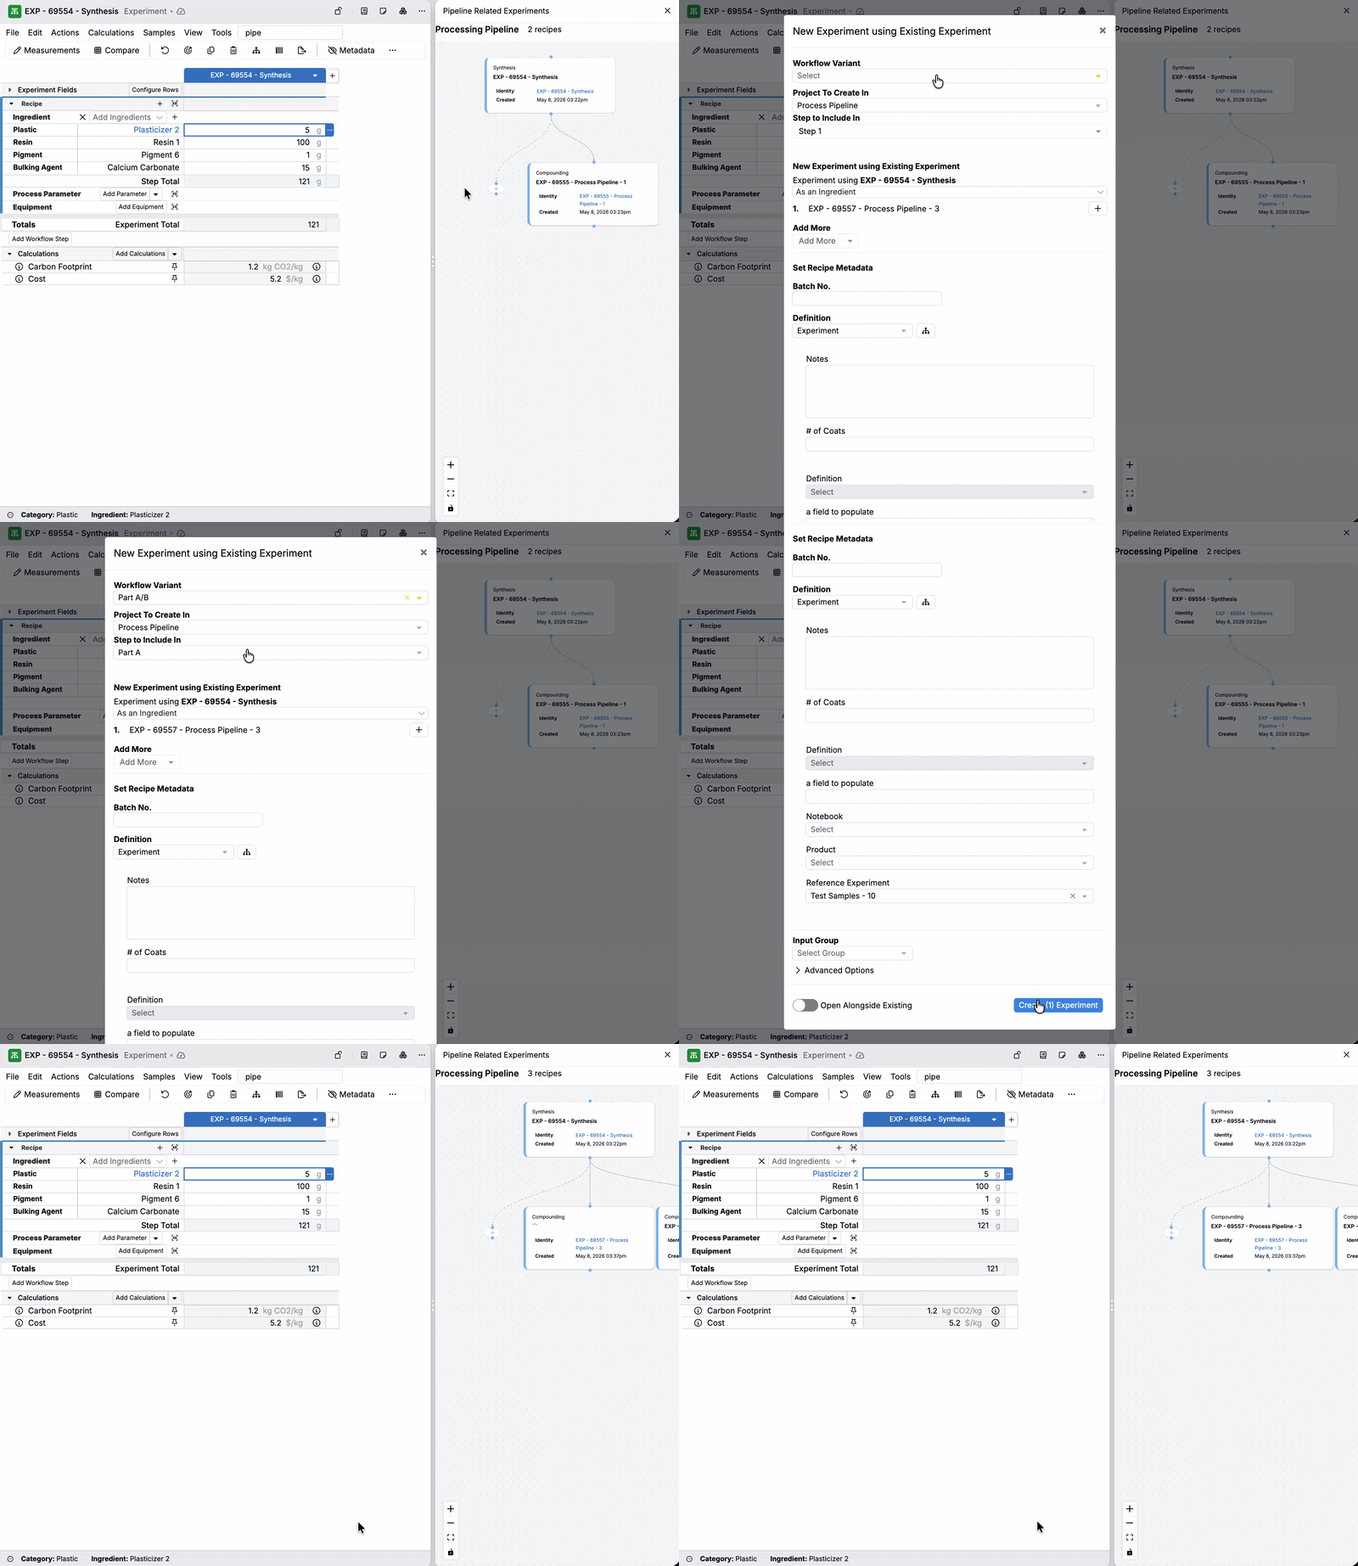
Continue creating experiments through all steps until you reach the final step in the pipeline.
Pipeline diagrams in field groups
Pipelines can be displayed as a field group diagram on an entity to provide a quick visual of related experiments. For example, you could add a pipeline diagram to a lab request definition.
To add a pipeline diagram to a definition:
- On your definition, add a new group.
- Set the group type to Related Entities.
- Set the source field to Recipes.
- Set the graph type to Pipeline Related Recipes.
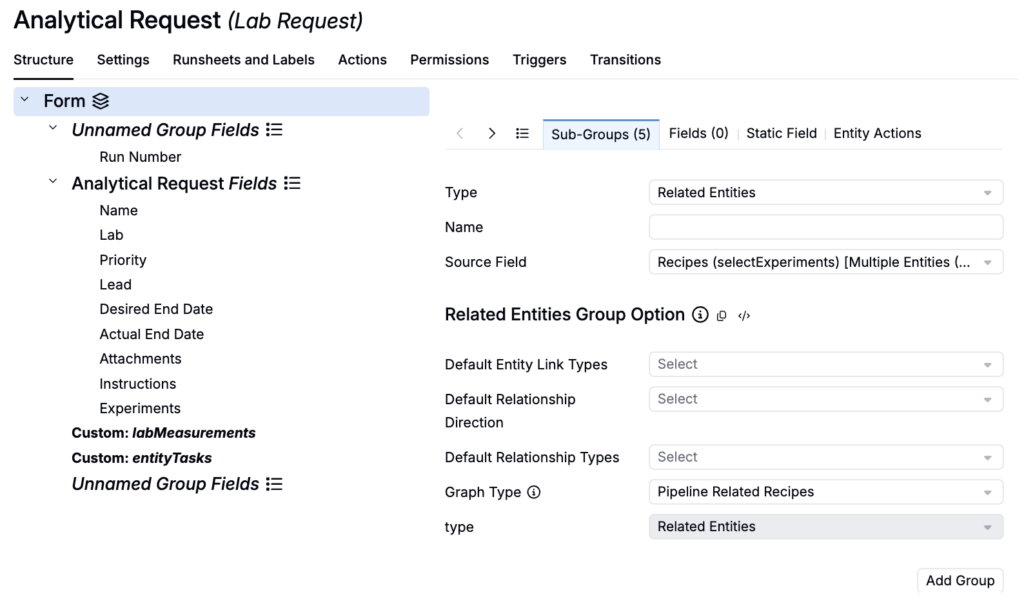
Once added to the definition, any request created using that definition will contain the field group can show a pipeline related recipes graph.