The fields displayed when adding inventory (Add Inventory modal), are configurable. What gets displayed in this modal is dictated on three levels:
- Hardcoded Fields: These fields that are essential to the inventory process. They cannot be added or removed, ensuring that key information is always captured.
- Fields on the Inventory Definition: These fields can be added or removed on the Inventory defintion on the Form Admin page.
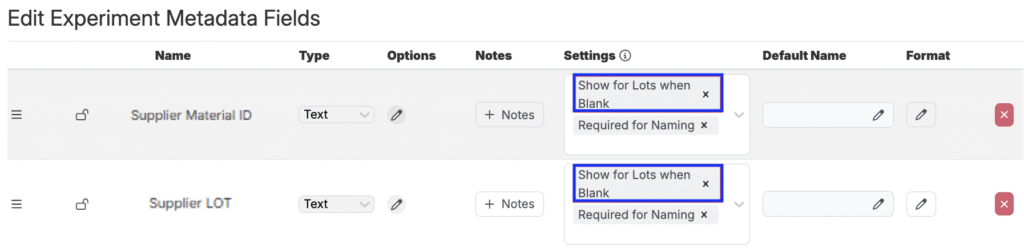
- Experiment Metadata with “Show on Lots when Blank” Enabled: Experiment metadata fields can also be added or removed from the Edit Experiment Metadata page. Fields with the setting “Show on Lots when Blank” enabled will appear in the modal when adding inventory.
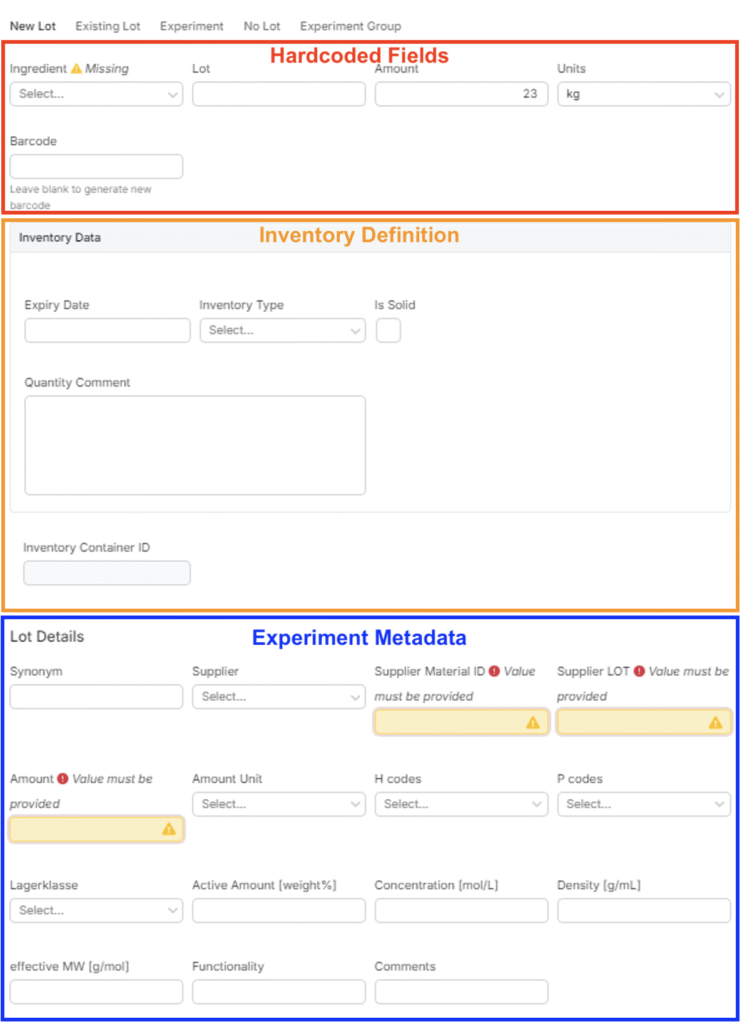
Hardcoded Fields
In the modal, the following fields are hardcoded:
- Ingredient (or Experiment/Experiment Group, depending on the tab)
- Lot
- Amount
- Units
- Barcode
Inventory Definition
Fields can also be added directly to the Inventory definition. To configure these fields, navigate to the Form Admin page and select the Definitions tab. Locate the Inventory definition and create a new group to organize your fields.
Within this new group, you can add either new or existing ones. Once added, these fields will appear in the Add Inventory modal as a separate group positioned below the hardcoded fields.
Note: Fields must be added in a new, separate group in order to show up in the Add Inventory modal.

Experiment Metadata
Experiment metadata fields can also be configured to appear within the Add Inventory modal. To configure visibility of these fields, navigate to the Experiment Metadata page (Inputs/Outputs → Experiment Metadata). Fields with the “Show for Lots when Blank” setting enabled will automatically appear within the Lot Details section of the Add Inventory modal.
For more information, refer to Experiment Metadata.