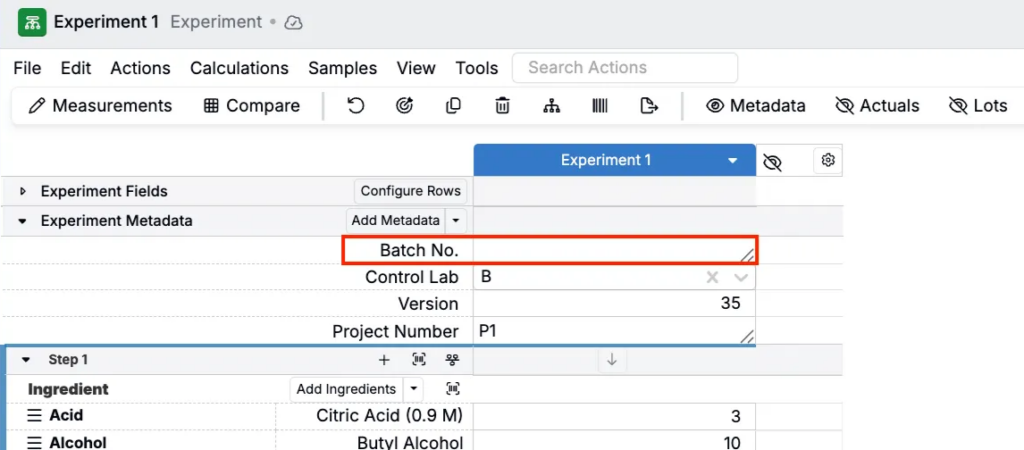
Experiment metadata captures supplementary information about experiments beyond recipe or process parameters. Metadata fields can store details such as:
- Plant location – where the experiment was run
- Recipe creation date – when the recipe was defined
Metadata makes it easier to filter, organize, and track experiments across projects.
Editing Experiment Metadata Fields
Experiment metadata fields are defined at the material family level. To create or edit them, go to Inputs/Outputs > Experiment Metadata in the navigation bar.
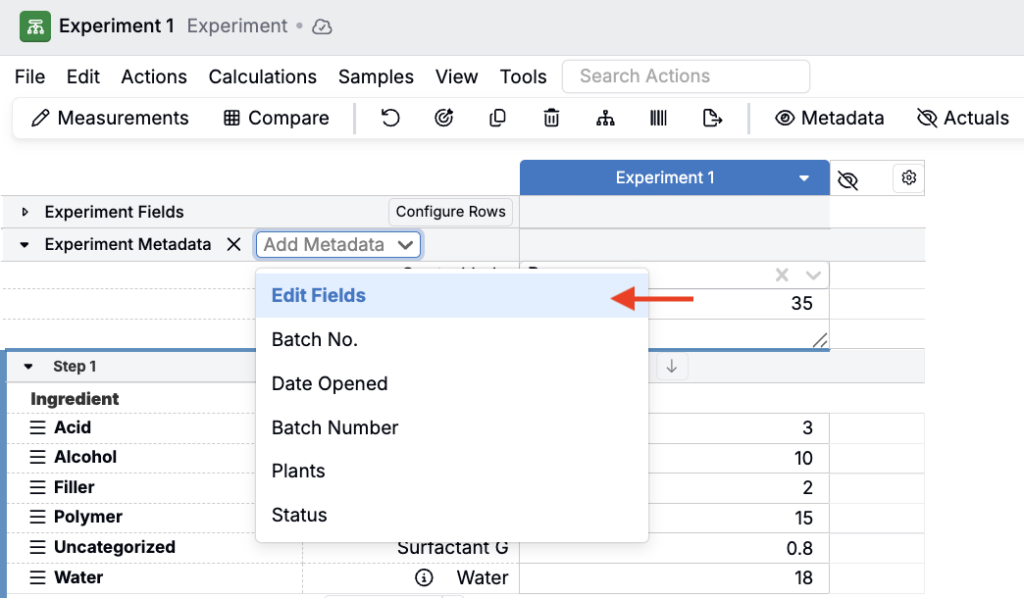
You can also access this page from the Recipe or Measurement view. When experiment metadata is displayed on a recipe, click Add Metadata and select Edit Fields from the dropdown menu.
Adding Metadata Fields
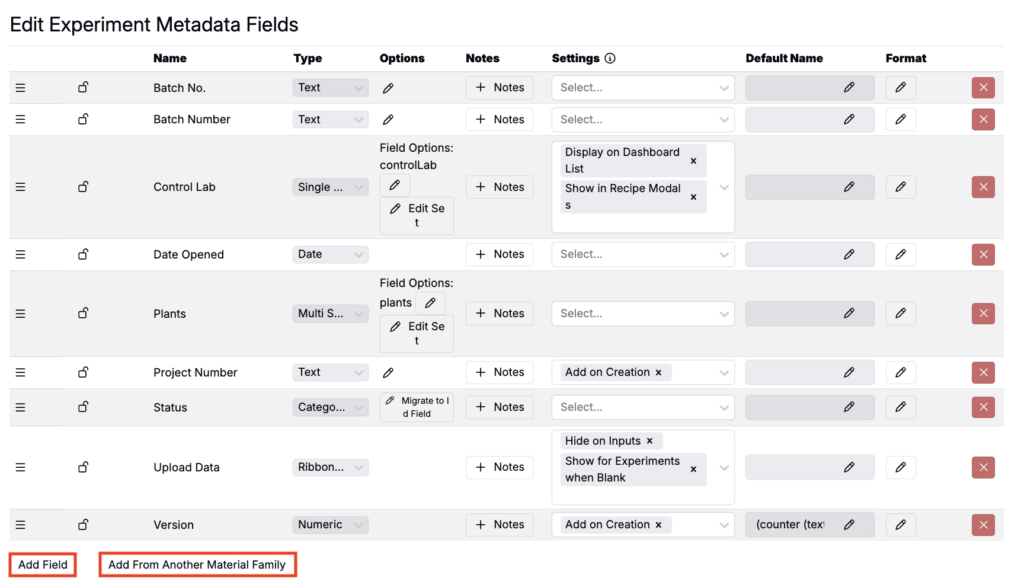
At the bottom of the page, click Add Field to create a new metadata field, or Add From Another Family to import existing fields.
Managing Metadata Fields
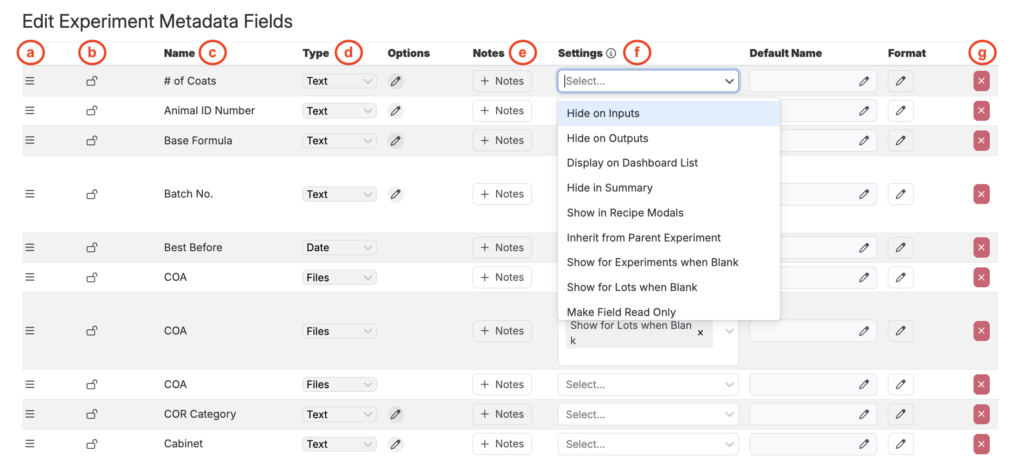
From the Edit Experiment Metadata Fields page, you can:
- Reorder fields (a)
- Lock or unlock fields (b)
- Rename fields (c)
- Convert metadata to ID fields (d)
- Add notes (e)
- Edit settings (f)
- Remove fields (g)
Metadata Field Settings
Each field supports settings such as:
- Visibility – Hide on recipe/measurement entry, hide in summary, show in recipe modals
- Dashboard display – Show values on the dashboard list
- Inheritance – Copy values from parent to child experiments
- Blank display – Always show fields, even when no value is entered (can also apply to ingredient lots)
- Access control – Make field read-only or lock it
- Experiment naming – Require value for recipe names
- Copying behavior – Prevent values from carrying over when experiments are copied
- Defaults – Automatically add field when new experiments are created
Displaying Metadata on a Recipe
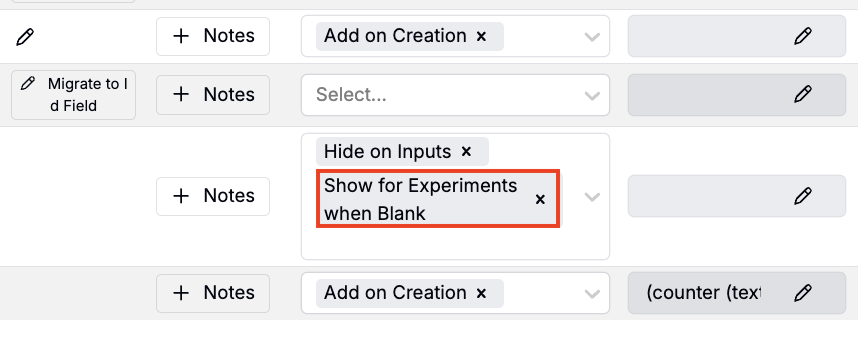
To show a metadata field in the Recipe view:
- Select the field.
- Enable Show for Experiments When Blank in its settings.
The field will now appear in the Recipe or Measurement view, ready for use.
Metadata Files Rendering Behavior
The “files” option for experiment metadata has special rendering options based on the file type uploaded. These include:
- Plasmid Visualizer (for .dna files):
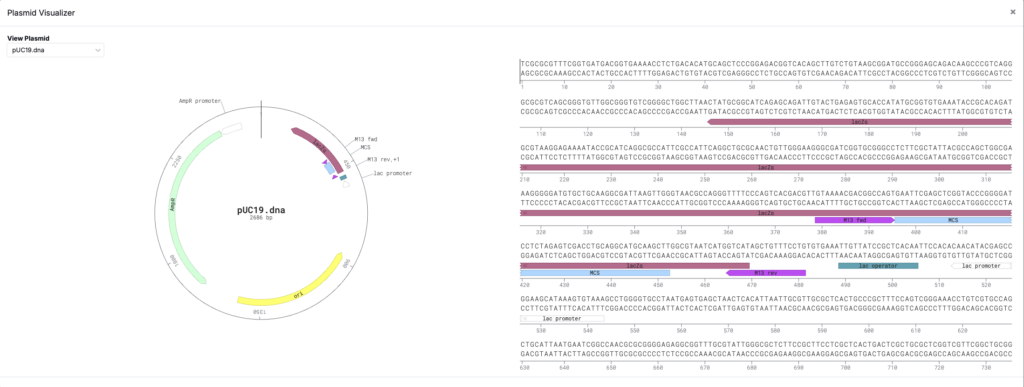
- SnapGene is a good source of .dna files for building and demos: https://www.snapgene.com/plasmids
- CAD File Viewer (for .stl files):
- The .stl file is rendered in 3D and can be rotated by clicking and dragging with the mouse.
