
When configuring a definition on the Form Admin page, users can add the following group types:
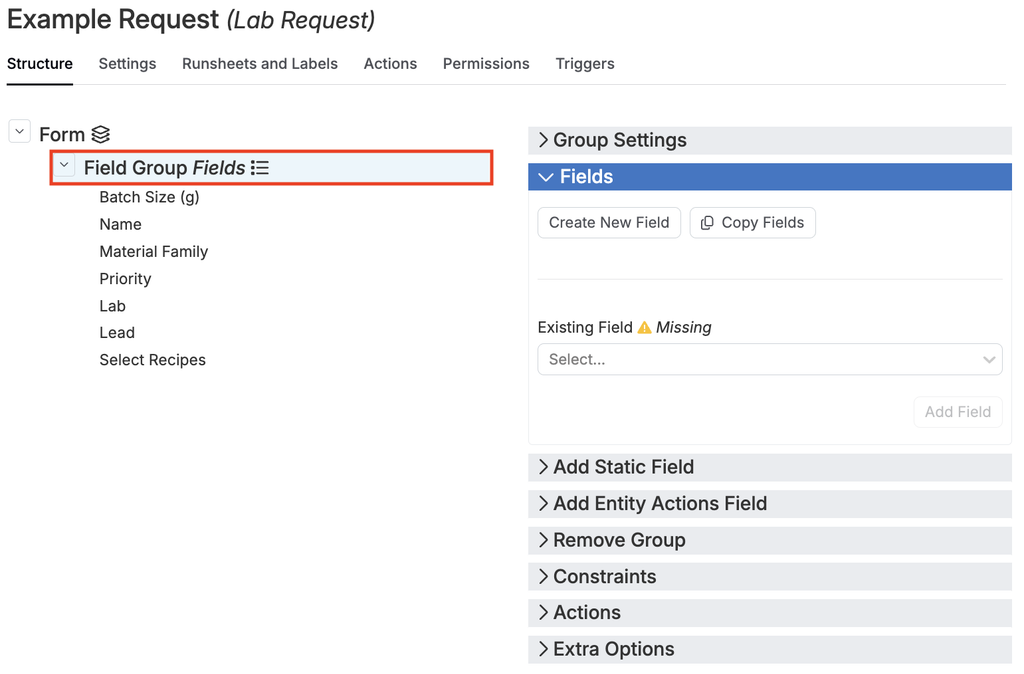
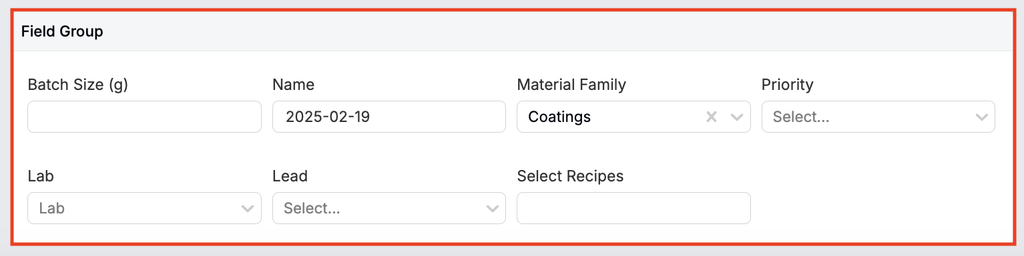
Fields
Adding a “Field” group inserts a simple, unstructured block into the definition separated by a spacer, where users can add fields.
Inline
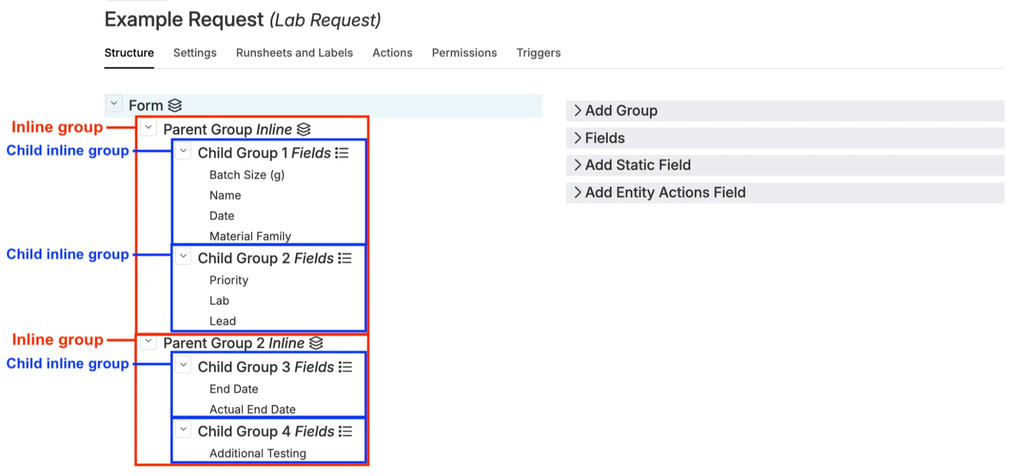
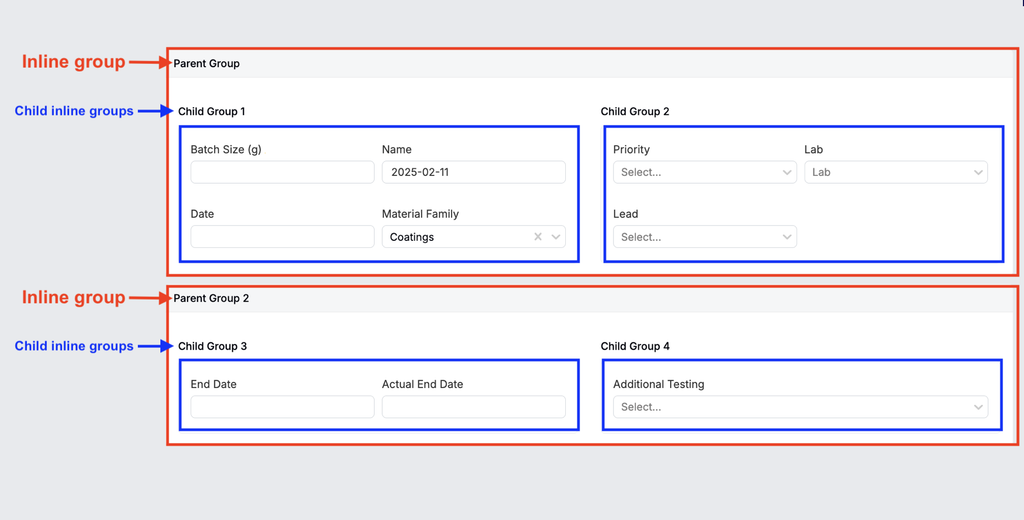
Inline groups allow for more organization compared to standard field groups. When fields are added to an inline group, they automatically create inline child groups. These child groups will appear grouped together on the entity. In the example below, two inline groups, each containing two inline child groups, have been added to the definition.
Tab
Instead of scrolling down a long entity page with lots of information, we can also add Tab groups to separate related sections into distinct pages. Constraints can also be applied to tabs to control visibility, ensuring that the right users or user groups see only the relevant information.
Adding Tabs to a Definition
- Within the Add Group tab, select “Tab” for the group type.
- Add a group name.
- Select the new Tab group.
- Add additional groups.
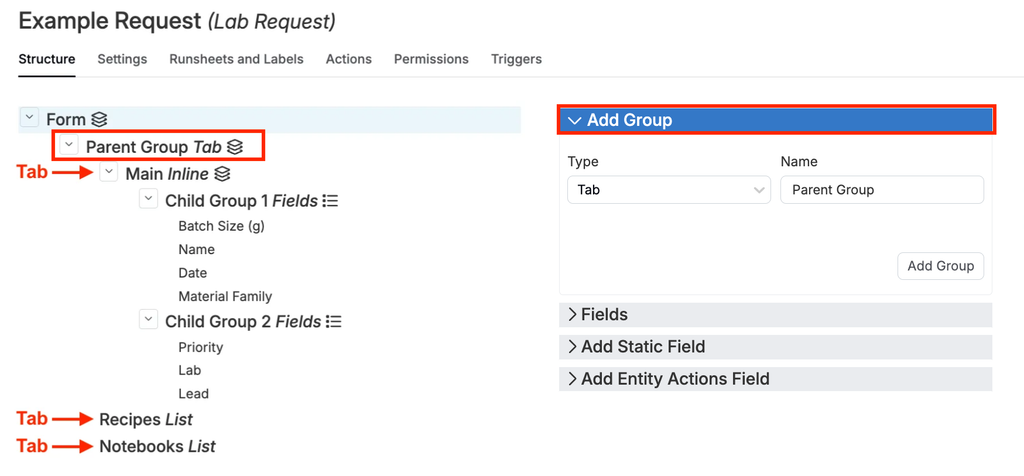
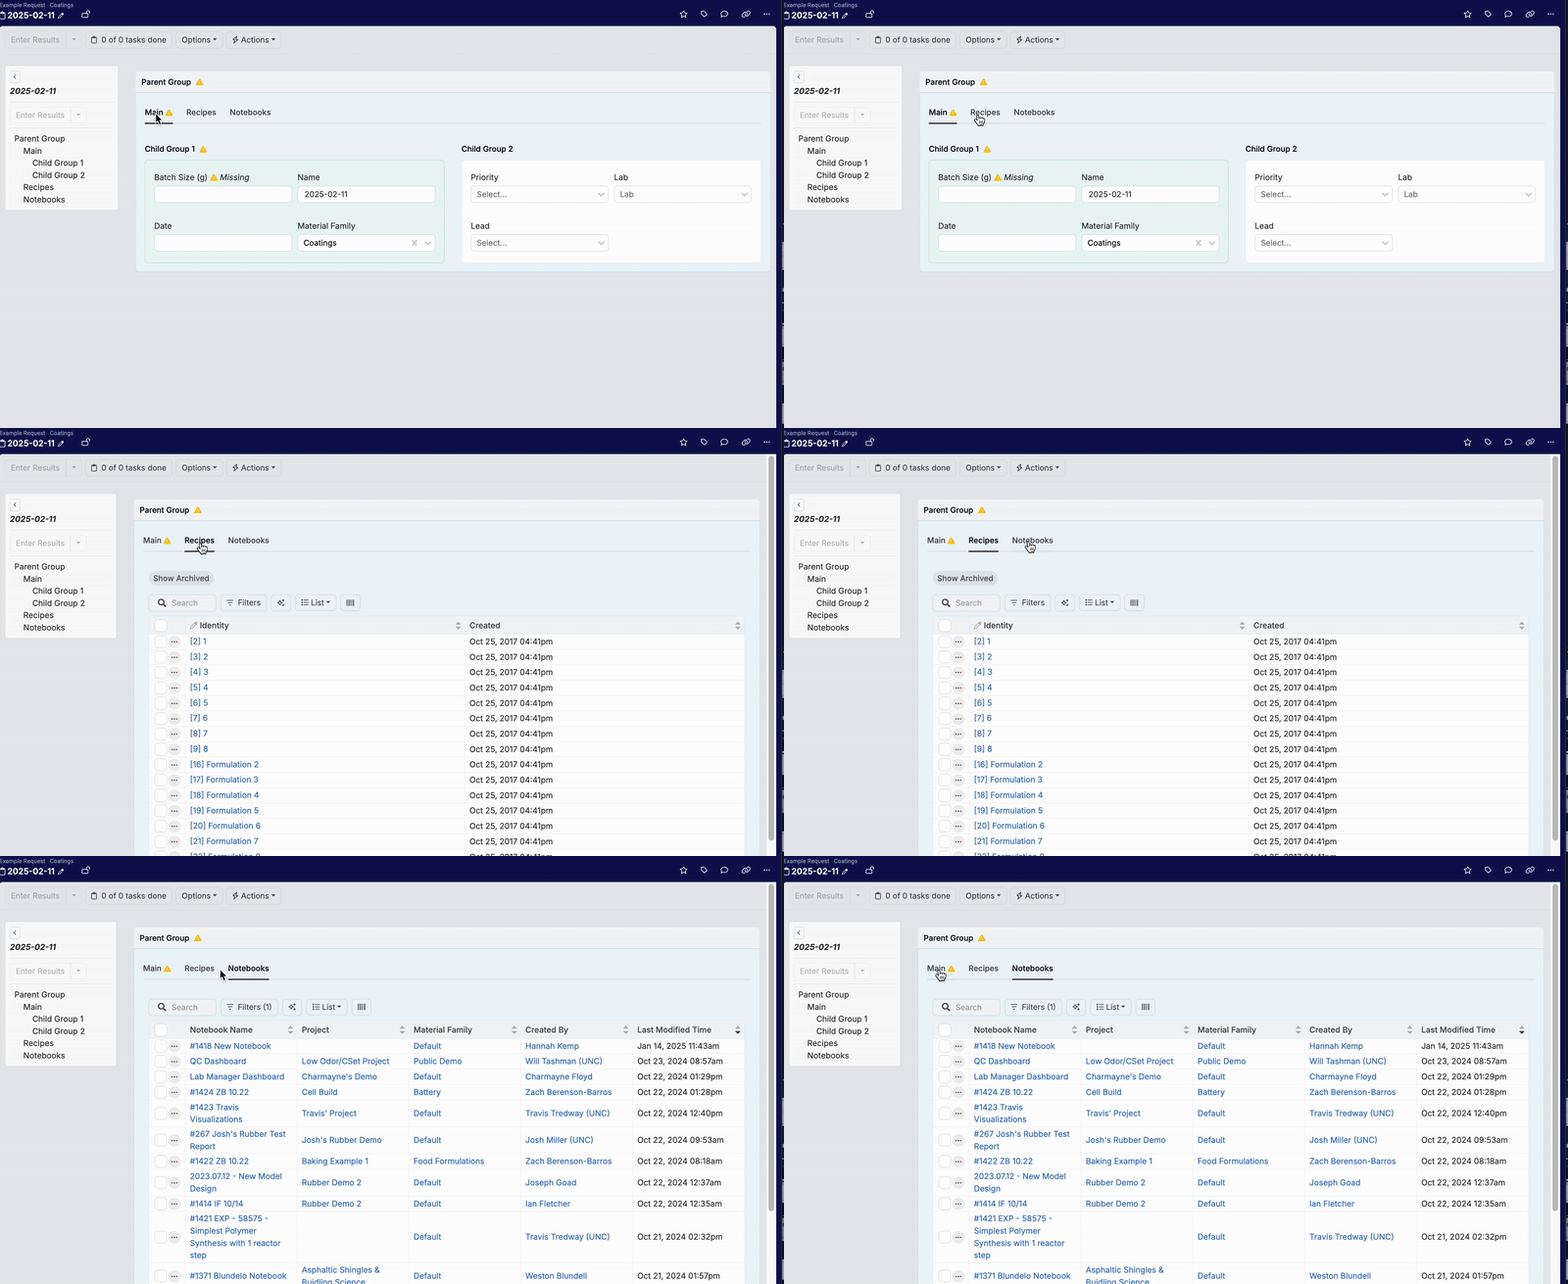
Once a Tab group has been added, any additional groups (i.e. fields, inlines, lists) added directly to the Tab group will become an individual tab. In the example below, three tabs—Main, Recipes, and Notebooks—are created within the “Parent Group” Tab group.
List
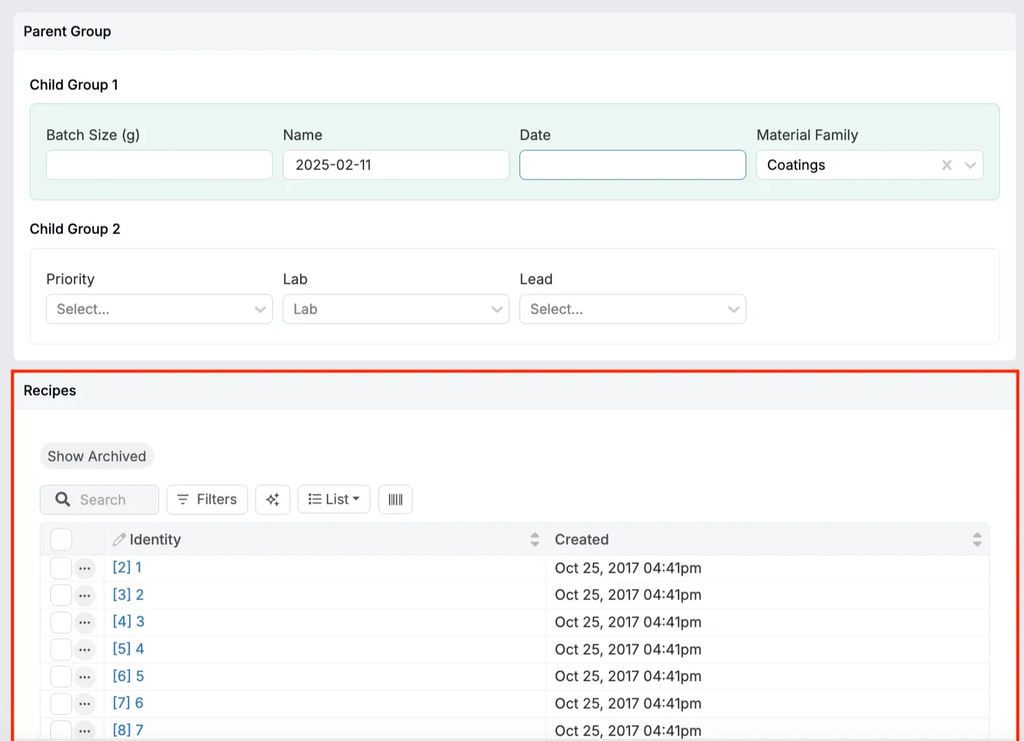
A List group embeds a listing into the entity form, allowing users to pull in related entities—like tasks, recipes, or lab requests. List groups can also be filtered dynamically based on selections made elsewhere in the form using attributes. Learn more.
List groups can contain subscopes, which are listing configurations that defines the layout, filters, and columns for the embedded list. To set one up:
- Go to the Listing Configs tab in Form Admin.
- Click Create Custom to build a new config.
- Choose a base type (e.g., recipe), set a reference field if needed, and customize the filters, fields, and groupings.
- Use this config as the subscope when setting up your List group.
Adding a Listing to a Definition
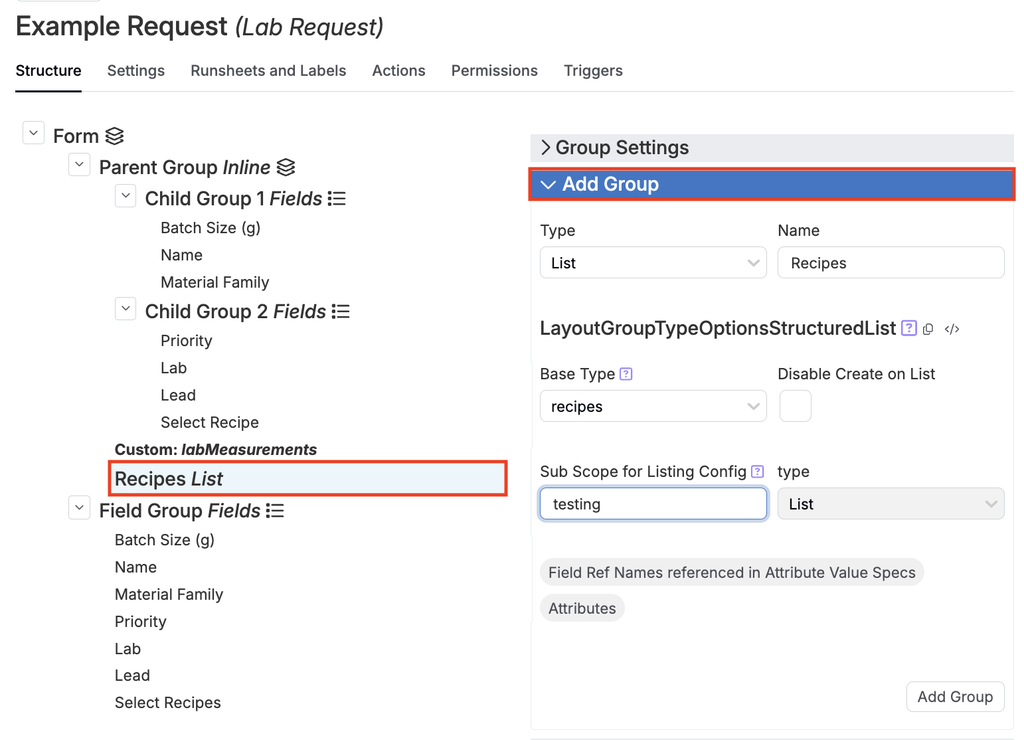
- In the Add Group menu, select “List” as the group type.
- Add a group name.
- Select the “Base Type”, or entity type to display in the listing.
- Choose a subscope (listing config) to define how the list behaves.
- Checking the “Disable Create on List” box to prevent users from adding new entities directly from the form.
Kanban boards
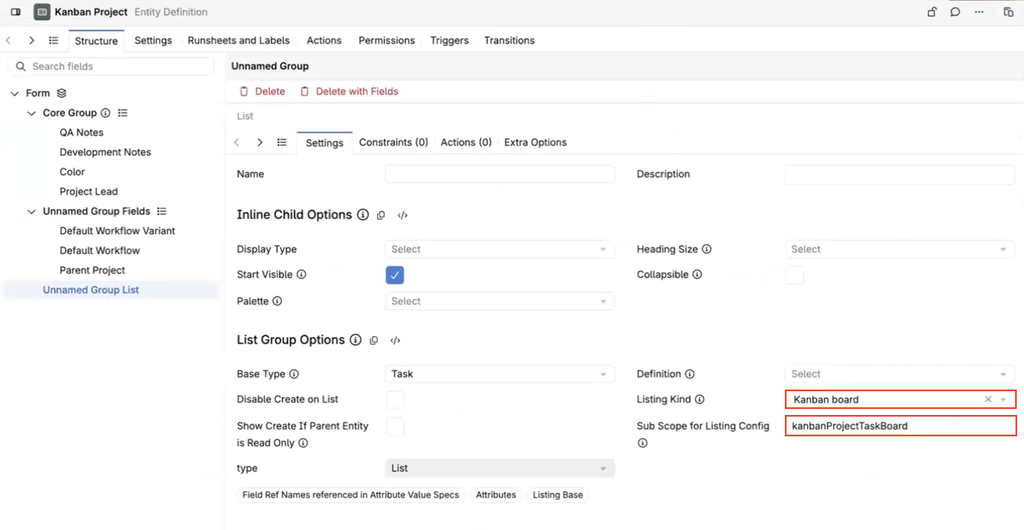
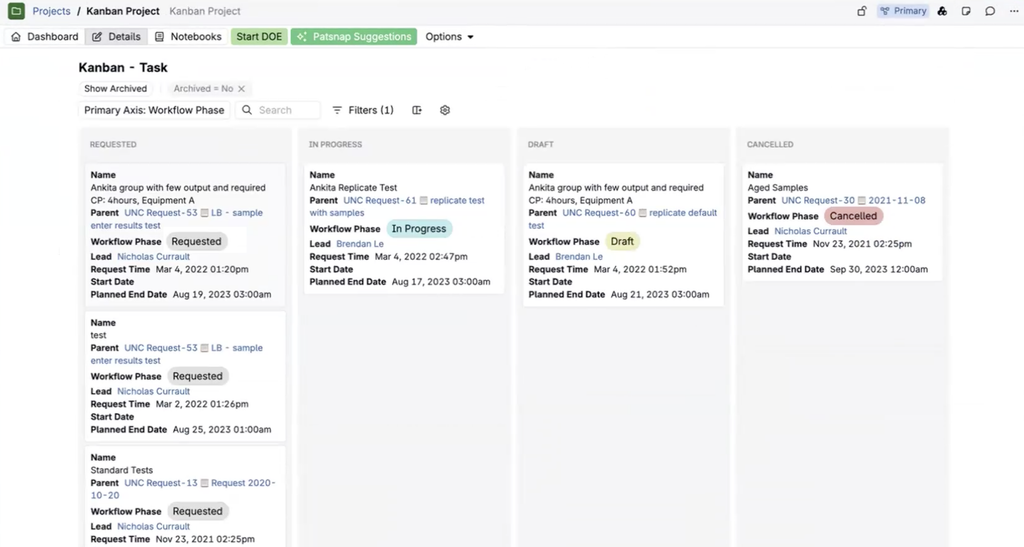
A listing group can also be displayed as a Kanban board on entity pages. For example, a project page can show all of its associated requests or tasks as cards grouped by status, without leaving the project.
The embedded board supports the same listing configuration as other listings, so columns, filters, and card content can be tailored to the page. The workflow phase bar stays pinned at the top of the page while scrolling through the board. To learn more about listing configuration, refer to Structured Listings.
How to add a Kanban board:
- Open the entity’s definition and add or select a listing group.
- Set the Listing Kind to Kanban Board.
- Configure the board through its Listing Config, including the columns and the entities it displays.
- Save the definition and open an entity page to view the board.
Aggregated listings
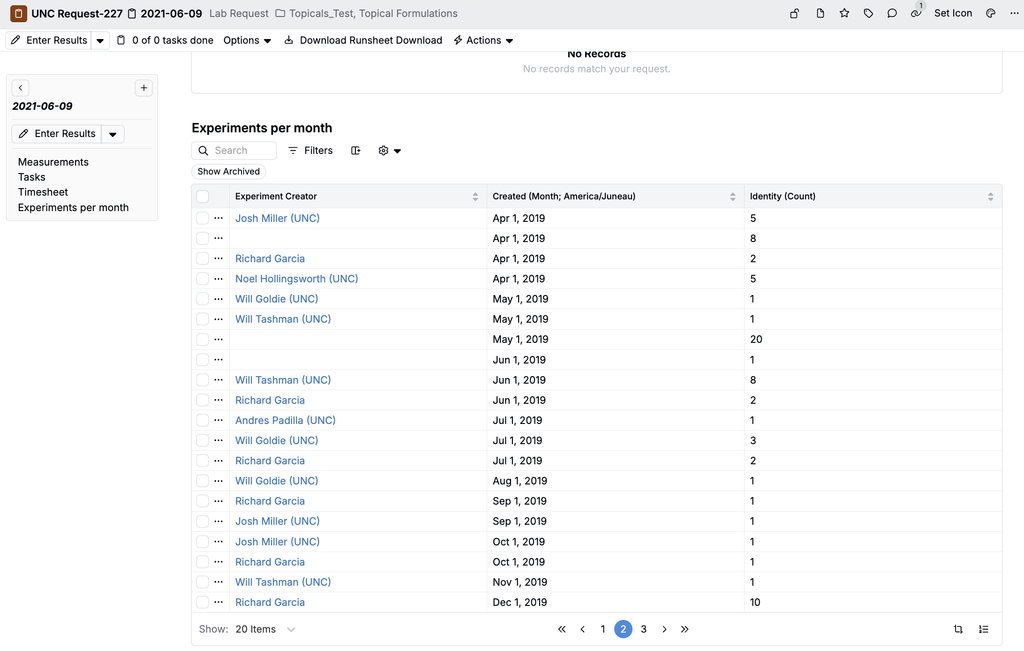
A List group can also display a custom aggregated listing, so grouped data such as totals and rollups appears directly on the entity page.
How to add an aggregated listing:
- In the Listing Configs tab of Form Admin, create a new listing config with a name, a base (e.g. Experiment), Type set to Default, Scope set to Custom Aggregated Listing, and a custom sub-scope (e.g. “exp-per-month”).
- Click ⚙️ > Select Columns and add your aggregate and grouping columns, plus any filters.
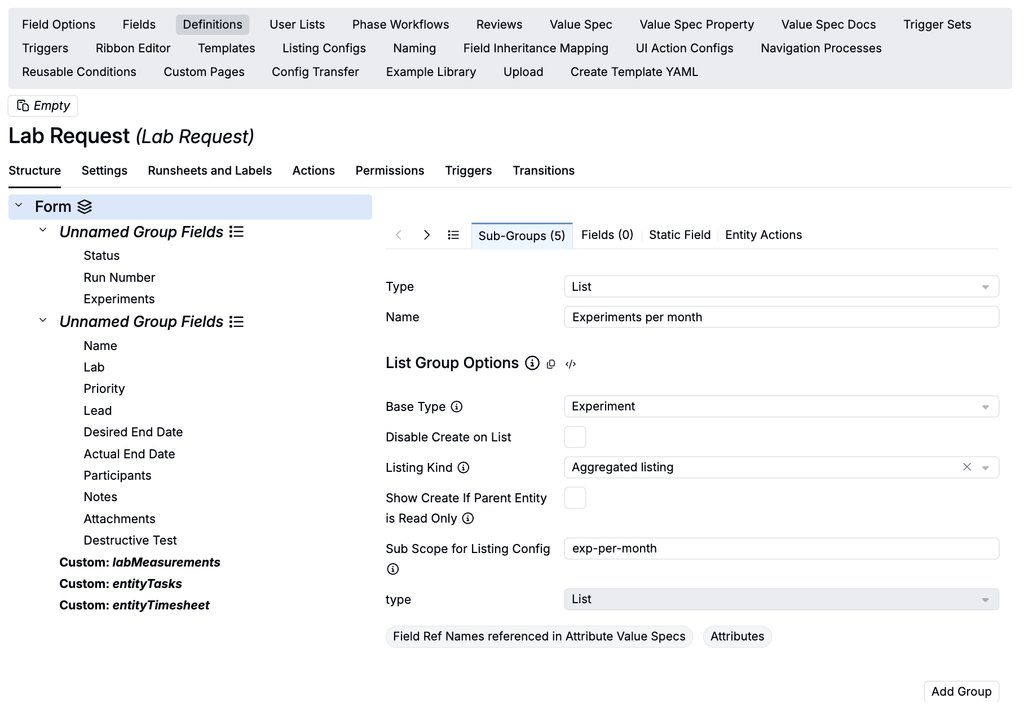
- Open the definition you want to add the listing to and add a List group:
- Set the Base Type to the same base entity type as the listing config.
- Set Listing Kind to Aggregated Listing.
- Enter the listing config’s sub-scope in the Sub Scope for Listing Config field.
New and existing entities created from the definition display the aggregated listing.
Showing columns based on entity fields
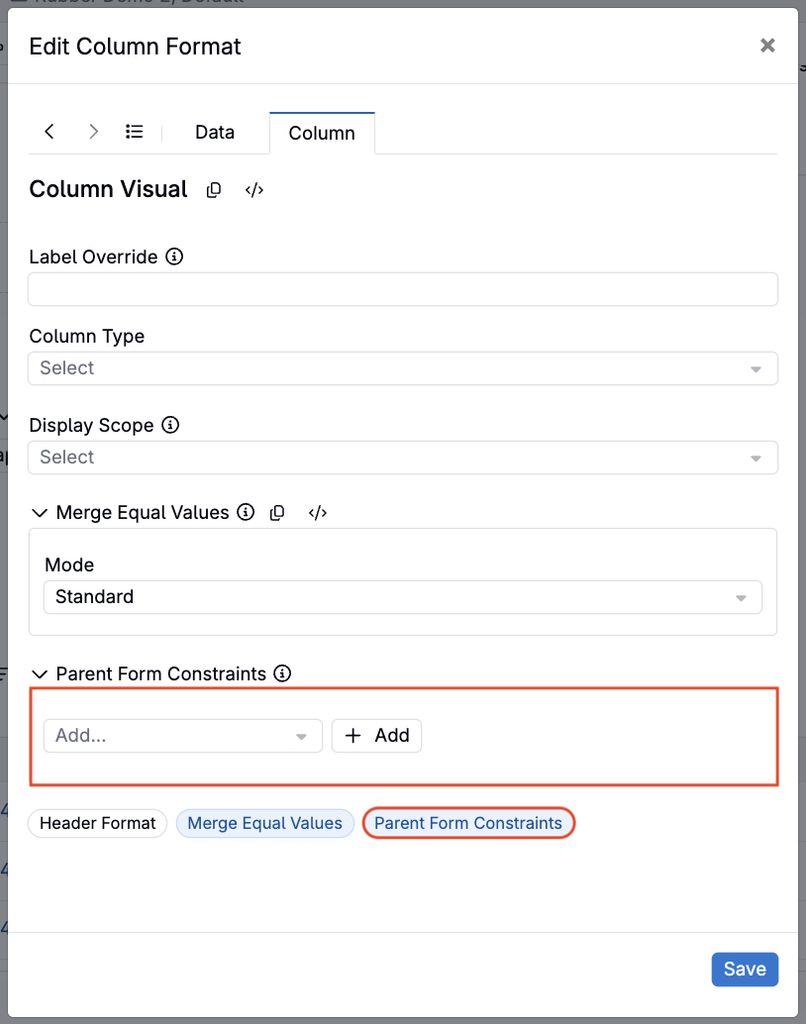
Columns in a List group can be shown or hidden based on the value of a field on the parent entity, using a Parent Form Constraint. For example, Approver columns can appear only when a project’s Requires Approval field is set to Yes.
- On the listing within the parent entity, select the column header and choose Format.
- Under Column, add a Parent Form Constraint.
- Configure the constraint and save.
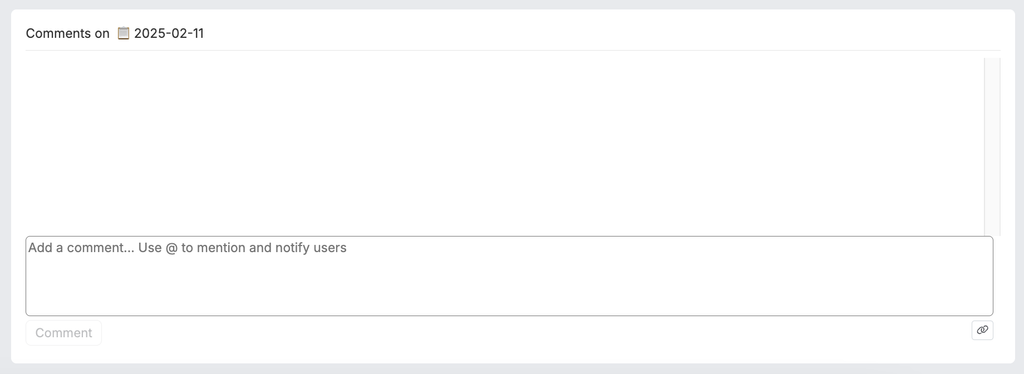
Comment Thread
Adds a Comment Thread entity inline on the definition. Comments can be added and will appear directly on the entity.
Custom
Select from a list of Custom group types, built-in on the backend. Options include:
- labMeasurements: Adds buttons to adds results, measurements, test samples, output groups, and upload data,
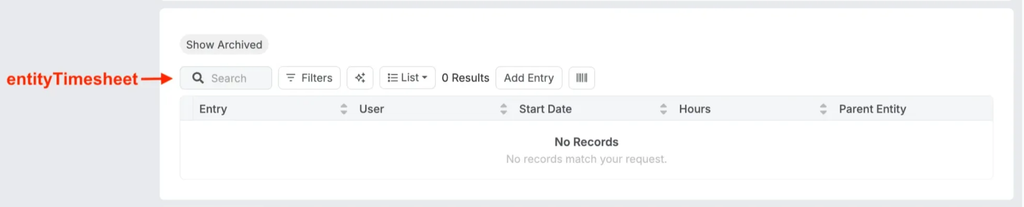
- entityTimesheet: Adds a timesheet, useful for recording lab technician hours.
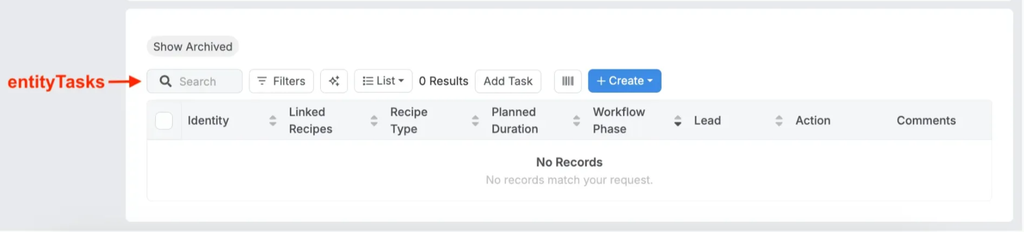
- entityTasks: Adds a Tasks listing.
- Inventory Controls: Adds buttons to add, dispose, move, and split inventory.
- Listing Filters: Adds standard listing filters.

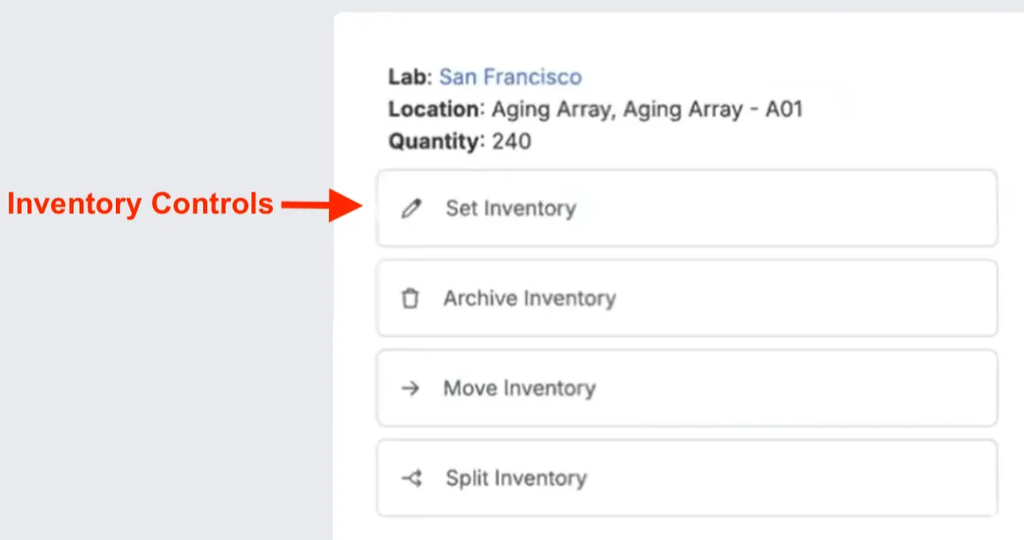
When creating a standard lab request template, it is generally recommended to include the labMeasurements Custom group type as it enables users to add and upload data directly from the request.
Embedded Entities
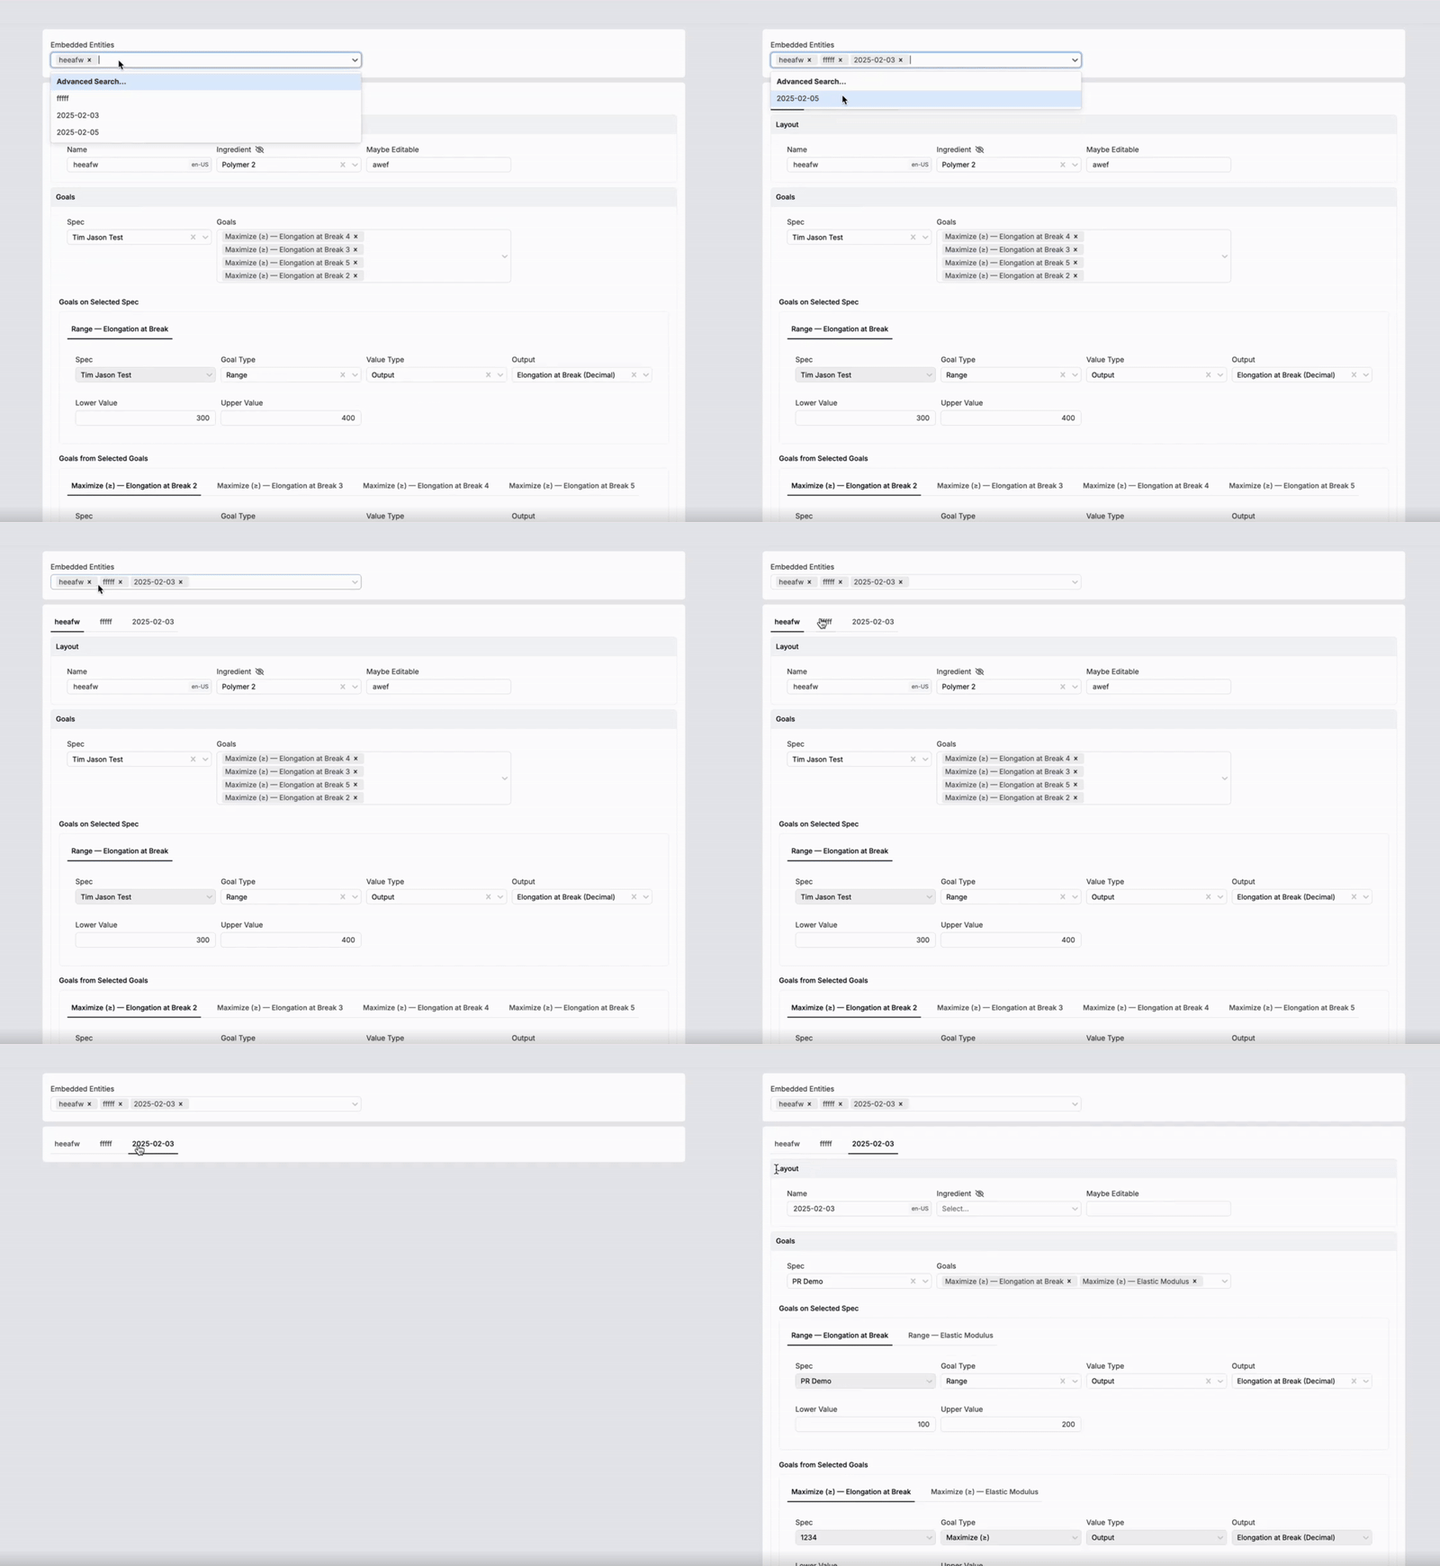
Embedded Entities enable you to integrate entity forms directly into your entity defintion instead of linking them. Individual embedded entities are displayed as tabs and information displayed is configurable.
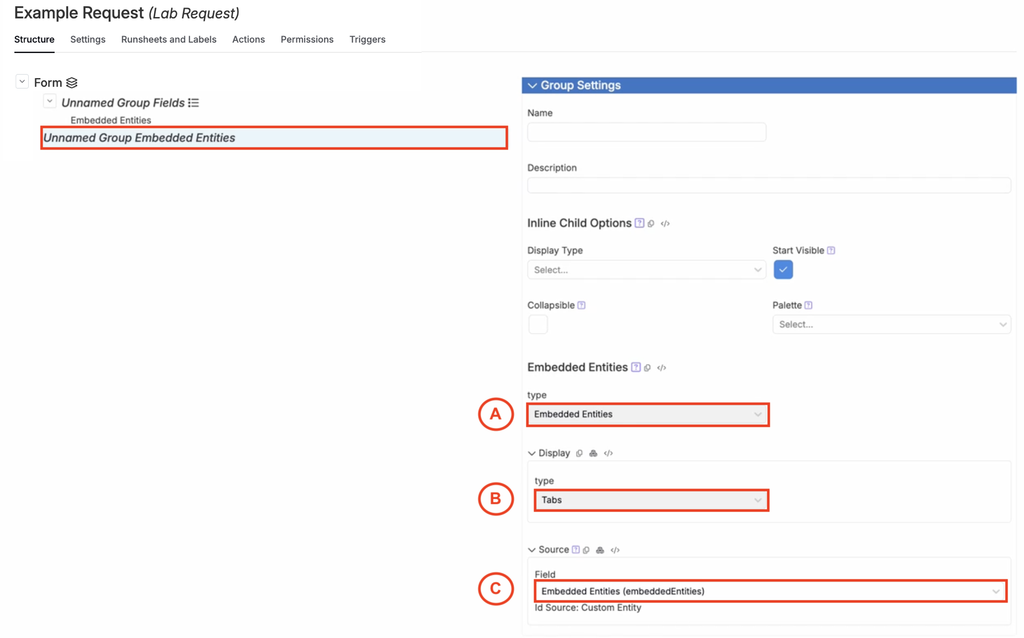
To add an embedded entities group type, take the following steps:
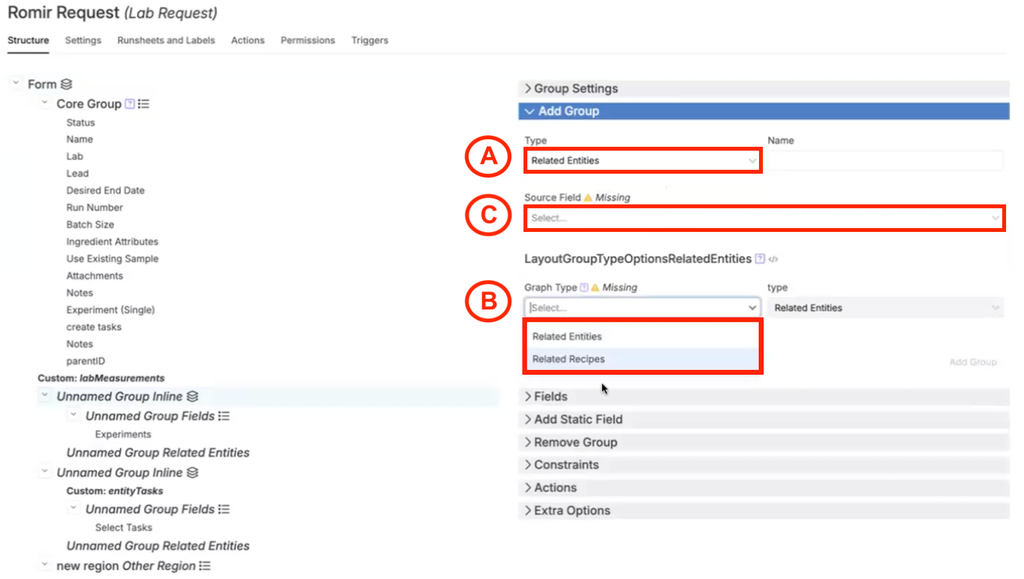
- Within the Add Group tab, select “Embedded Entities” for the group type (A).
- Add a group name.
- Set the Display to “Tabs” (B).
- For source, select either:
- EmbeddedEntitiesSourceField: Select entices using an id fields.
- EmbeddedEntitiesSourceIdSource: Select entities using id sources, allowing for more complex configurations with attributes.
- Select entities to embed (C).
Accepted child phases
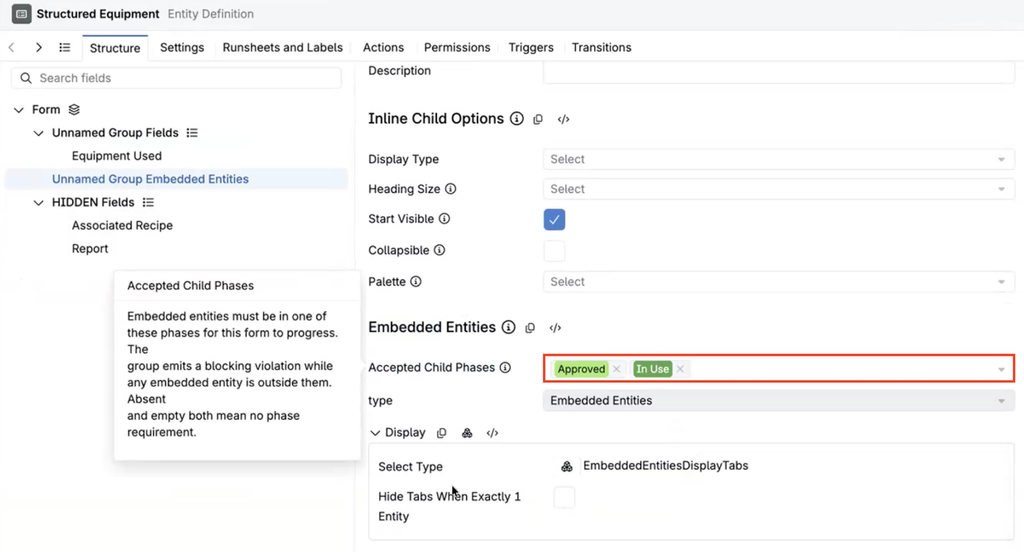
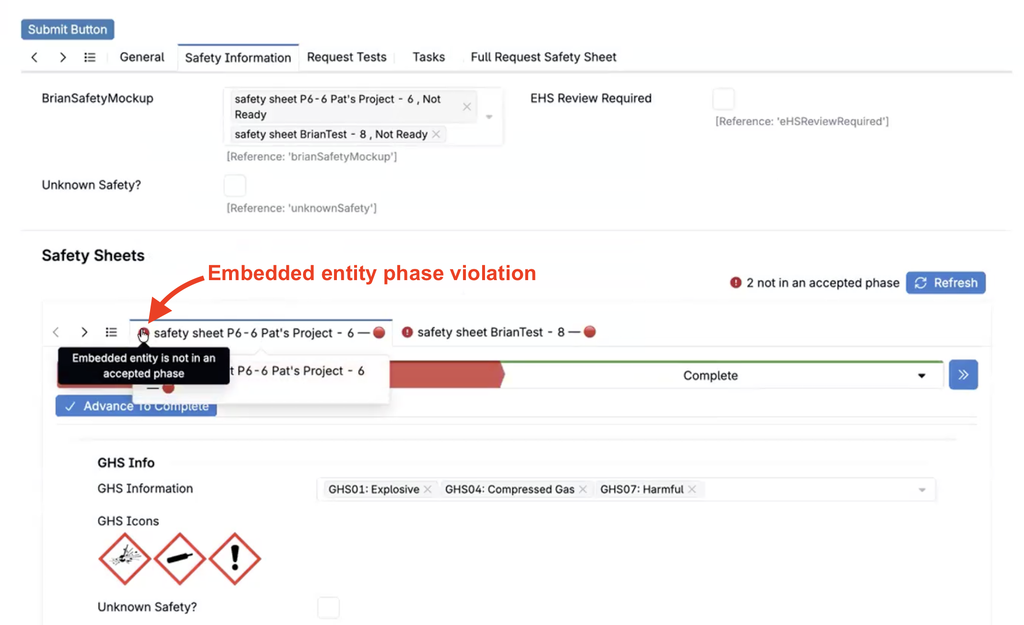
An Embedded Entities group can require each embedded child to reach an accepted phase before the parent advances. For example, a lab request can remain blocked until every attached safety form is Complete; missing required fields prevent a child from reaching that phase.
The parent form identifies noncompliant entities with field violations and tab warnings. The check also applies recursively to nested entities. Because nested entities can be edited by other users at the same time, a Refresh control re-runs the check and updates the violations. To learn more about phases, refer to Managing Phase Workflows.
How to require accepted child phases:
- Open the definition for the parent entity and select the Embedded Entities group.
- Use the Accepted Child Phases field to select the phases that embedded entities must be in. The dropdown lists the phases of the embedded entity’s workflow.
- Save the definition.
- On the parent form, review any field violations and tab warnings for embedded entities outside an accepted phase.
- If nested entities are edited elsewhere, select Refresh to update the violations.
Related Entities
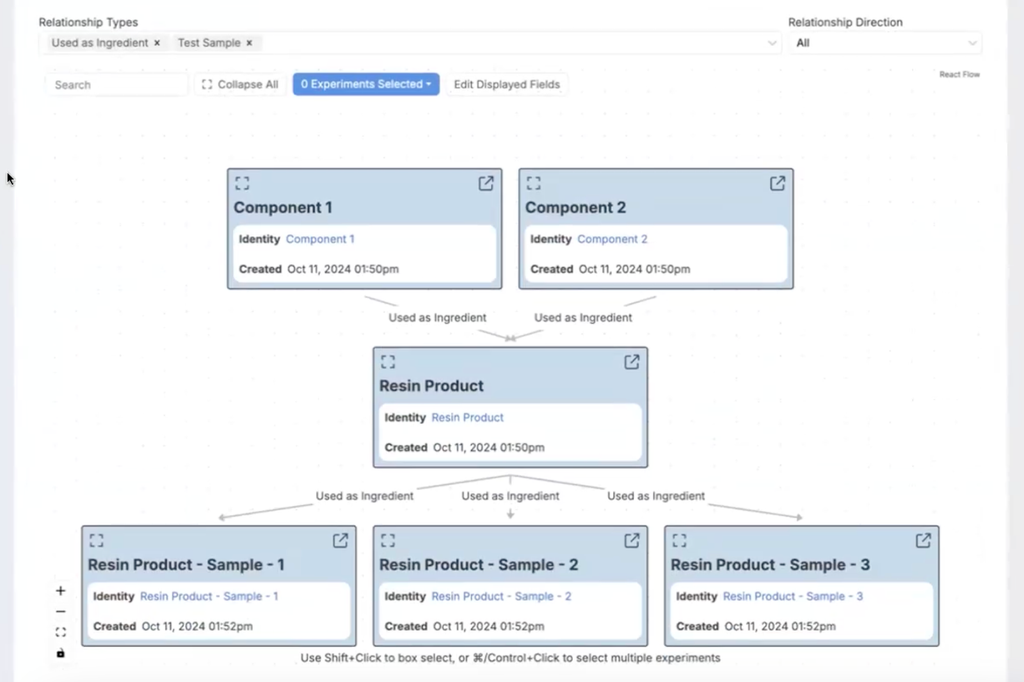
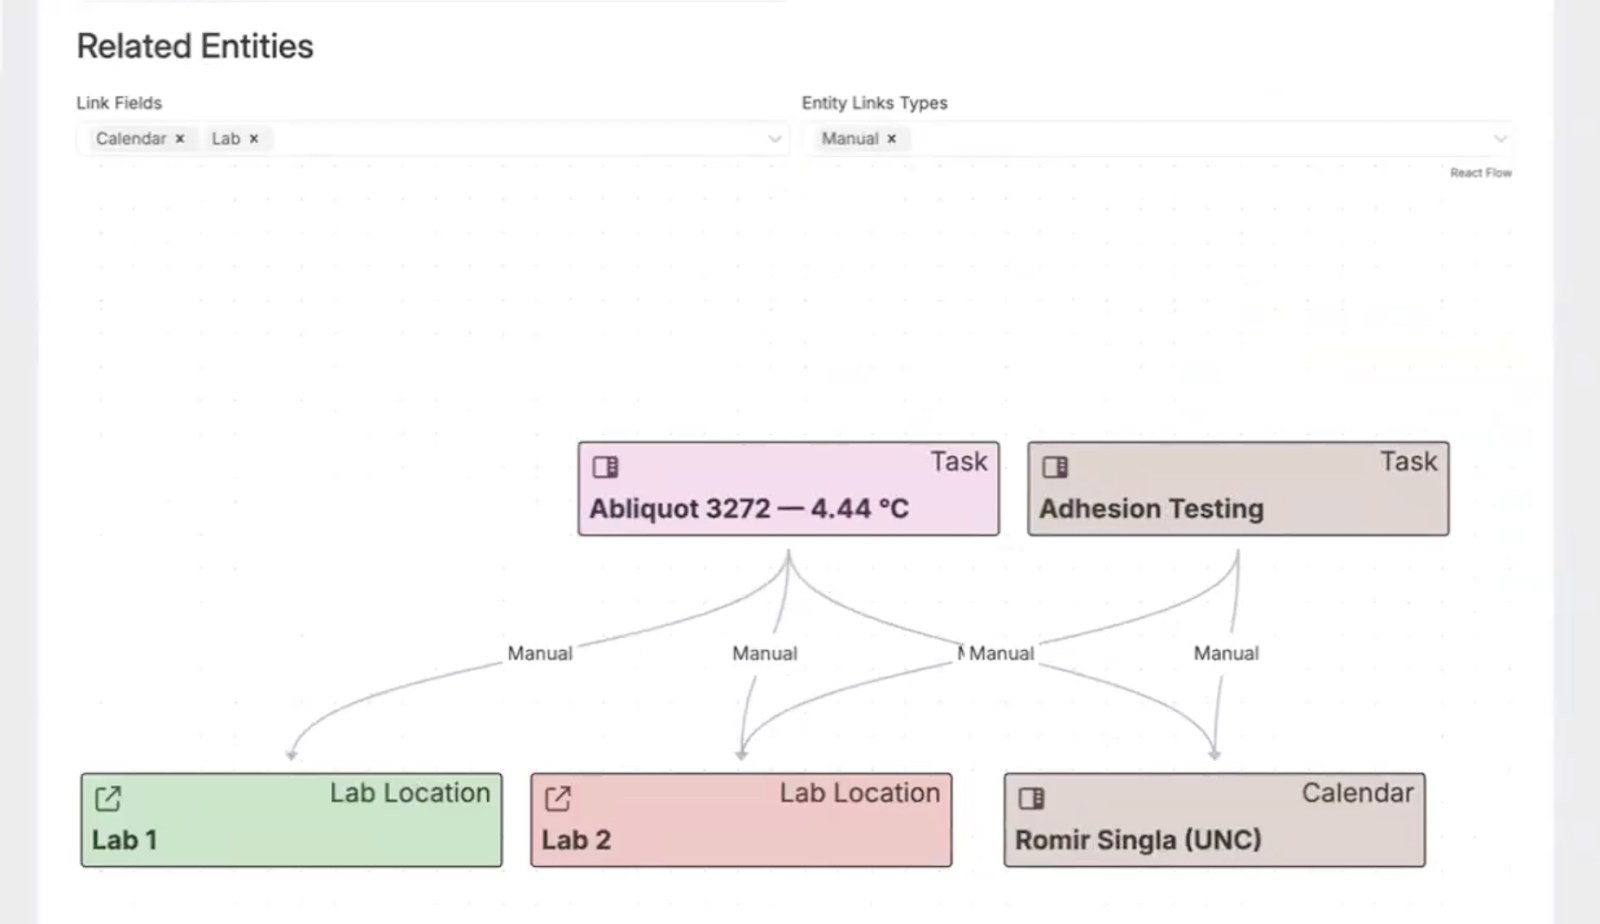
Adding a Related Entities group allows users to add previews of related recipes or entities as graphs directly on their request forms. To add a Related Entities group to a definition, take the following steps.
- Within the Add Group tab, select “Embedded Entities” for the group type (A).
- Select either “Related Recipes” or “Related Entities” (B).
- Choose the corresponding source field (C). Note that source fields must be a fixed list multiple.
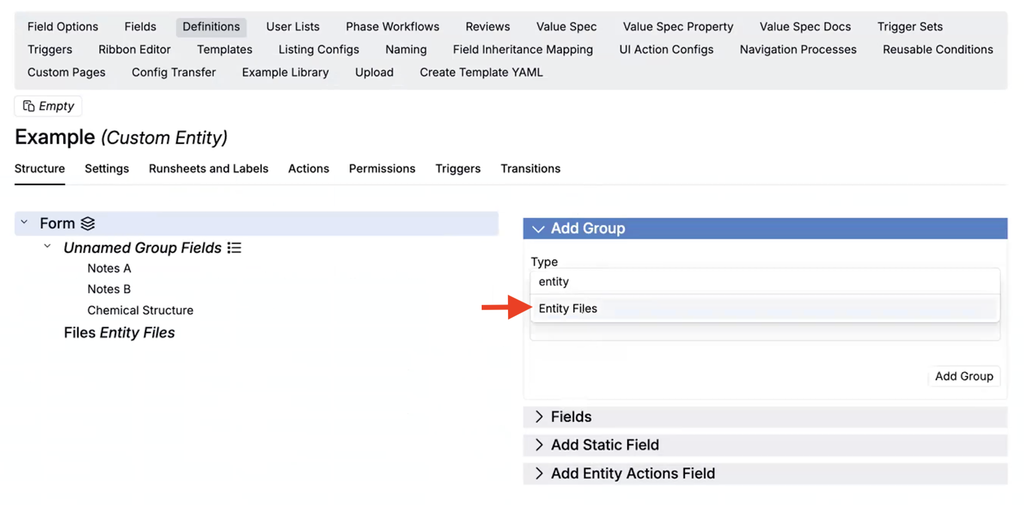
Entity Files
An Entity Files group gives each entity created from the definition its own file folder. On an entity, click Add Files to create the folder, then add files to it. If the folder already exists, the group shows a View Files button instead. Permissions follow the entity. To learn more, refer to The File Folder System.
Sub-Entities
A Sub-Entities group allows you to use custom entities to add sub-entity within a parent entity. An in-depth article covering sub-entities is coming soon.