Use the Condition Parameters Importer to create or update condition parameters stored within your schema’s condition parameters listing in bulk. This importer allows you to add or edit CP details such as type, units, notes, etc. It does not update condition parameters on outputs measured on experiments. To do this, you will need to use the Formulation Importer.
For small, one‑off adds, you can still add or update condition parameters manually, but the importer is the fastest and most consistent path for bulk setup.
Using the Condition Parameter Importer
Step 1 — Access the Importer
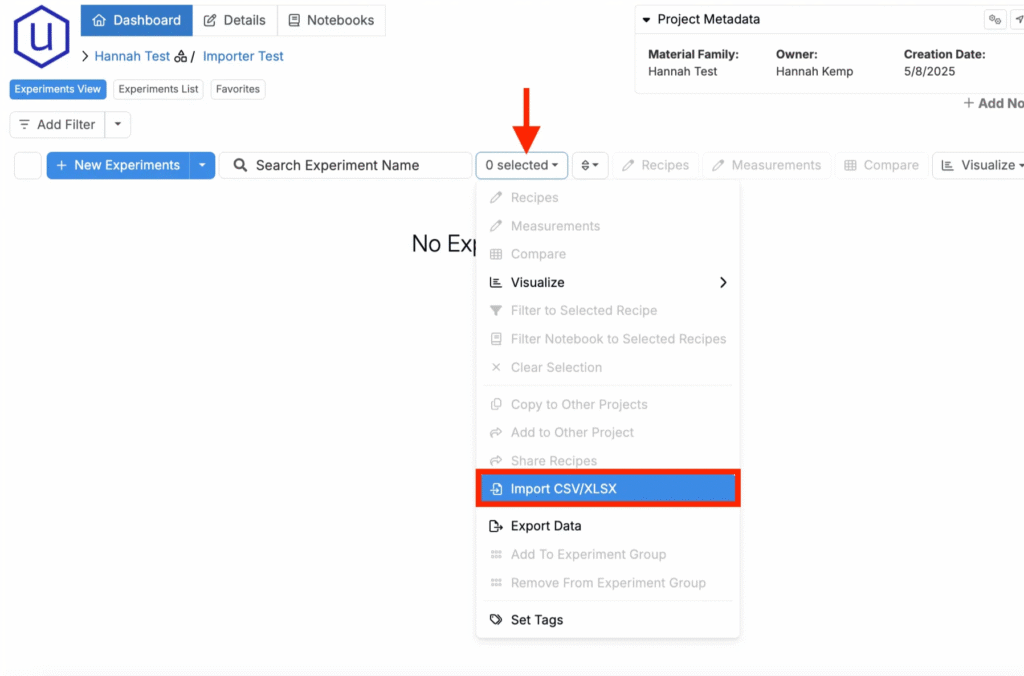
- Navigate to any project dashboard.
- Access the selection menu and click Import CSV/XLSX.
Step 2 — Select Import Type
- At the top of the page, select Condition Parameters Uploader.

Step 3 — Prepare Your Spreadsheet
For Uncountable to process your upload, your spreadsheet must follow a specific template. Start from the sample, then add rows for your condition parameters and configure columns as needed.
- Download the template: Condition Parameters Importer Template
Required Columns
- Name — Case sensitive.
- Type — Allowed values: Numeric or Text. Not case sensitive.
- Units — Required only for Numeric condition parameters. If a unit is not yet in the platform, it will be created on upload.
When updating an existing condition parameter, the Name, Type, and Units must match exactly (if relevant).
Optional Columns
- Option: 1, Option: 2, Option: 3, … — Only for Text CPs. Add as many “Option: #” columns as needed, one option per cell.
- Global — YES or NO. Makes this condition parameter available broadly by default.
- Display By Default — YES or NO. Shows this condition parameter by default in relevant entry views.
- Dropdown Selector — YES or NO. For Text parameters, renders as a dropdown when entering values.
- Notes — Free‑text guidance for admins and end users.

Tips
- Keep Names consistent to avoid duplicates.
- Do not include Option columns for Numeric condition parameters.
- Use YES/NO only for optional flags.
Step 4 — Upload, Review, and Submit
- Upload the file. Drag and drop the prepared spreadsheet into the Condition Parameters Uploader.
- Review the preview table.
- Missing Name or unrecognized Type will be flagged.
- Numeric condition parameters without units will be flagged.
- Duplicate Names in the same file will be highlighted.
- Resolve any errors. Re-upload, if needed.
- Submit the import. Click Import to apply the changes.

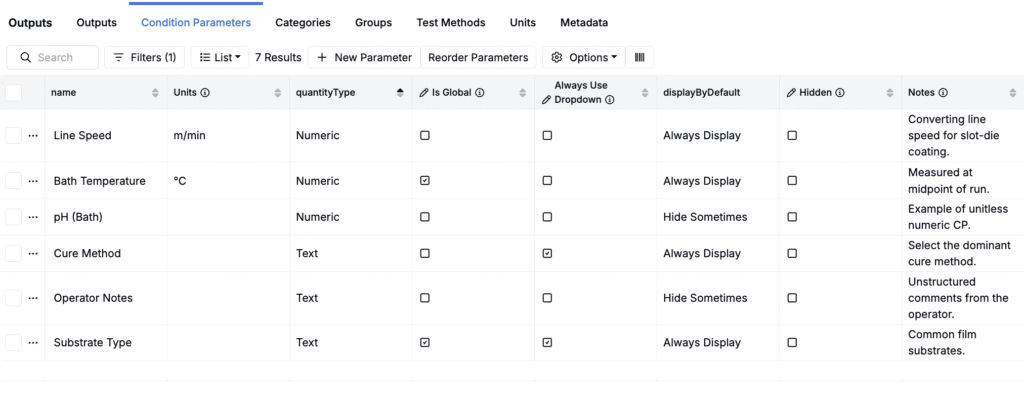
After submission, the importer will create new condition parameters or update existing ones in your outputs library (Inputs/Outputs > Outputs > Condition Parameters). Condition parameters on measurements in experiments are not modified by this importer.