The Formulation Importer is Uncountable’s tool for bulk importing or updating entire recipes, including both inputs and outputs, through a structured spreadsheet.
Use the Formulation Importer to:
- Create or update multiple recipes or lots at once
- Add inputs and outputs in a single upload
- Define or modify experimental metadata
- Upload replicates, condition parameters, or ingredient lots
- Perform data migrations or integrate with external systems
Tip: To upload measurement data alone, use the Upload Data modal on the measurements view of experiments instead. Learn more.
Using the Formulation Importer
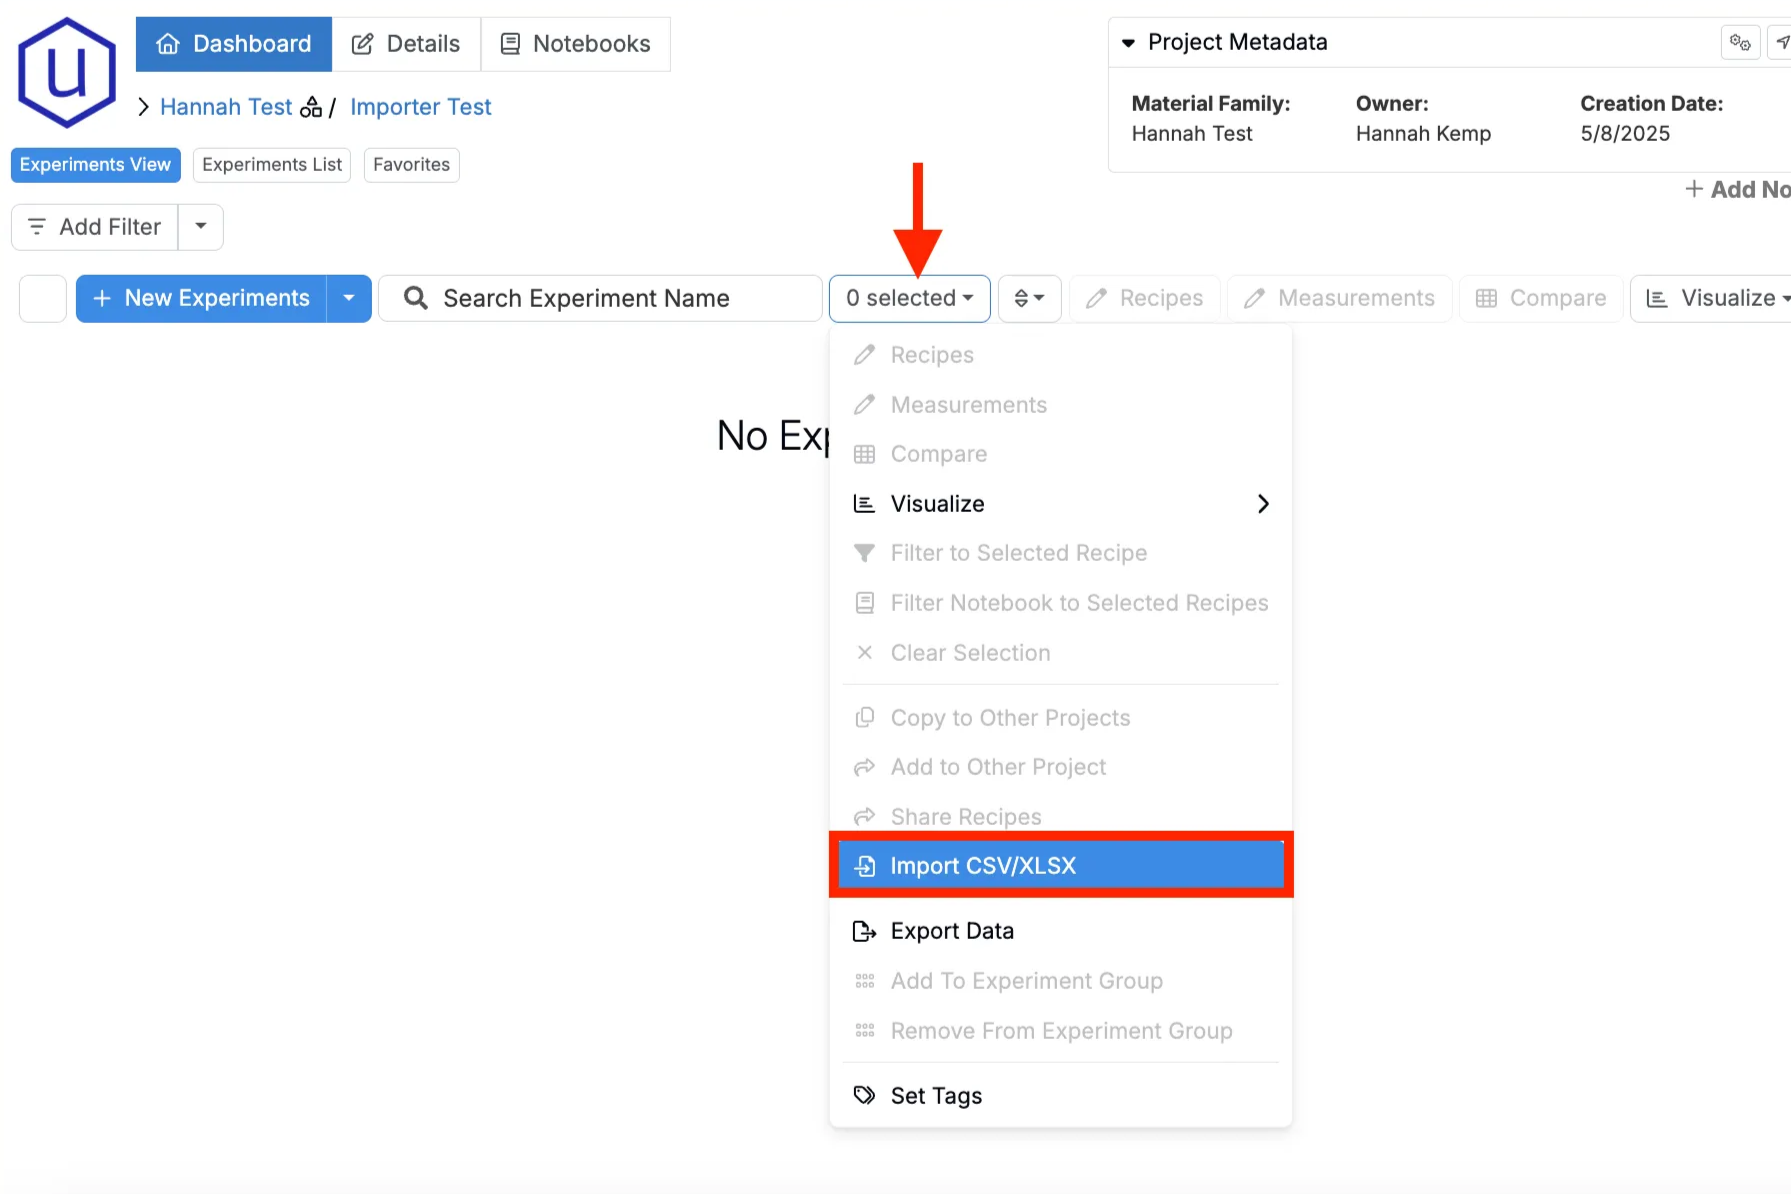
Step 1 — Access the Importer
- Navigate to the project dashboard of the project you want to import data into.
- Access the selection menu and click Import CSV/XLSX.
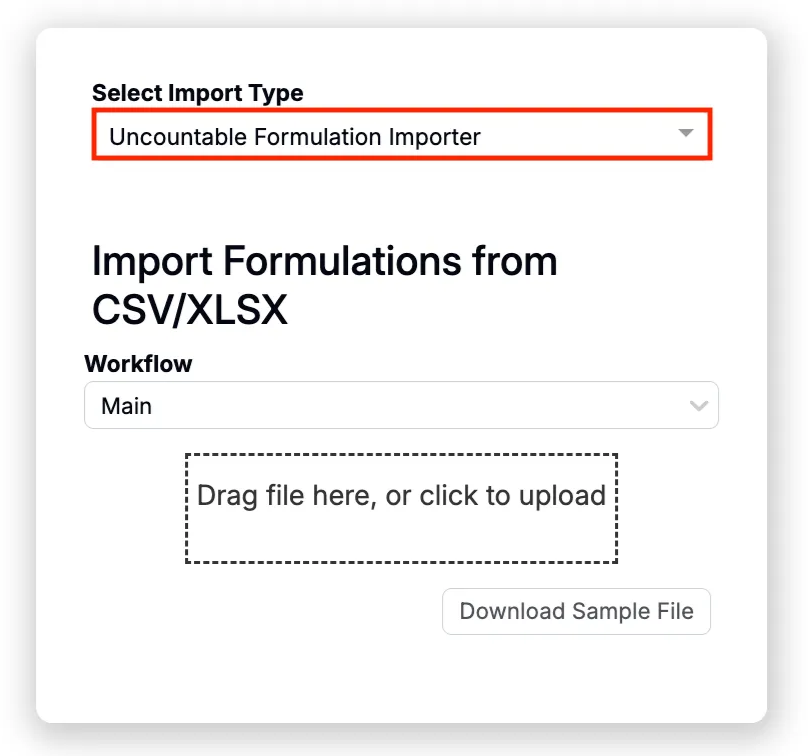
Step 2 — Select Import Type
At the top of the page, select the Uncountable Formulation Importer.
Other options are also available. However, these importers are used to import fields (e.g. ingredients, outputs, condition parameters) not experiments/formulas.
Step 3 — Prepare Your Spreadsheet
For Uncountable to import your data, your spreadsheet must follow a specific format. To view a simple template example, click the Download Sample File button.
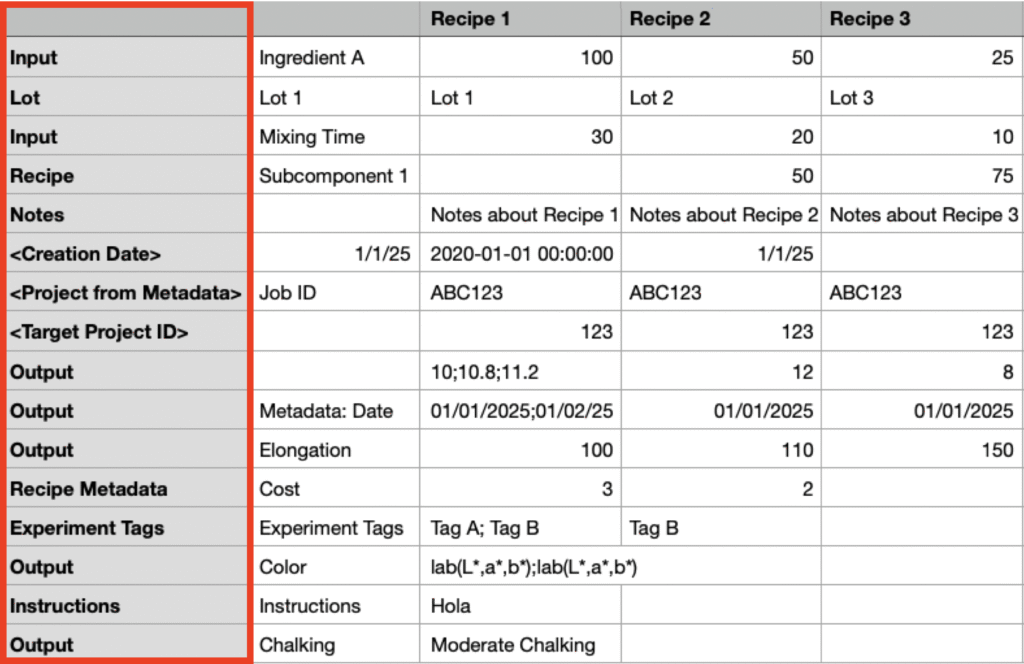
Spreadsheet Structure
When formatting your spreadsheet, use rows to represent recipe fields (e.g. inputs, outputs, metadata, notes, steps) and columns to represent individual recipes.
Optionally, you can use the first column to specify row type (A). Values in this column must match one of the options below (case insensitive):
- Input
- Lot
- Recipe
- Notes
- <Creation Date>
- <Project from Metadata>
- Output
- Recipe Metadata
- Experiment Tags
- Instructions
The field labels column (B) should be either the first or second column, depending on whether or not you include a row types column. This column will include the actual field labels. Note that inputs and outputs must already exist in the platform.
Recipe columns (C) are specified with a column header, which is interpreted by the formulation importer as the recipe name. All information in that column relates to the single recipe.

Row Types
- Input — All values in a row labeled “input” are interpreted as ingredients or process parameters (e.g. Ingredient A or Mixing Time).
- Lot — All values in a row labeled “lot” are interpreted as the ingredient lot for the ingredient in the row above. A lot row allows you to specify lots on a per-recipe basis. Lots can also be specified on a per-ingredient basis using a lot column. Learn more.
- Recipe — Any values in a row labeled “recipe” are interpreted as recipes as ingredients. These recipes must already exist within the platform.
- Notes — All values in a row labeled “notes” are interpreted as experiment-level notes for the recipe.
- <Creation Date> — If the first column is “<creation date>” all values in the row are interpreted as the date the recipe was created.
- <Project from Metadata> —If the first column is “<project from metadata>”, all values in the row are interpreted as project metadata field values which inform what project each experiment should be imported into. This allows you to import different recipes in one spreadsheet to different projects.
- <Target Project ID> — Alternatively, you could use “<target project ID>” to map to a desired project. This would involve adding the backend ID associated with a project, which is the third number in the URL when viewing the dashboard. This also allows you to import different recipes in one spreadsheet to different projects.
- Output — All values in a row labeled “output” are interpreted as outputs or output metadata.
- If adding a row for output metadata, you will use the second column to specify the specific output metadata field, using the format “metadata: [metadata field]” (e.g. Metadata: Date).
- Recipe Metadata — All values in a row labeled “recipe metadata” are interpreted as experiment-level metadata. Use the second column to specify the specific output metadata field (e.g. Cost).
- Experiment Tags — All values in a row labeled “experiment tags” are interpreted as tags for the recipe.
- Instructions — All values in a row labeled “instructions” are interpreted as mix order instructions.
Column Types
- recipe_step — A “recipe_step” column can be added to specify which recipe step each row pertains to. Values in the column must correspond to step names in the default workflow of the project the import is added to.
- mix_order — A “mix_order” column can be added to specify the mix order step number.
- lot name — A “lot name” can column be also be used to specify ingredient lots.
- Condition: [Aging Time] — Condition parameters can be applied to outputs via columns. Use the format “Condition: [condition parameter name, without units]”. Note that this column will not work if there are two condition parameters with the same name and different units.
- Metadata: [Date] — Recipe output metadata can be specified by columns to apply to an entire row. Use the format “Metadata:[metadata field name]”.
- Annotations (All) — Add an “Annotations (All)” column to specify annotation symbols for inputs and outputs that will apply to all recipes in a row.

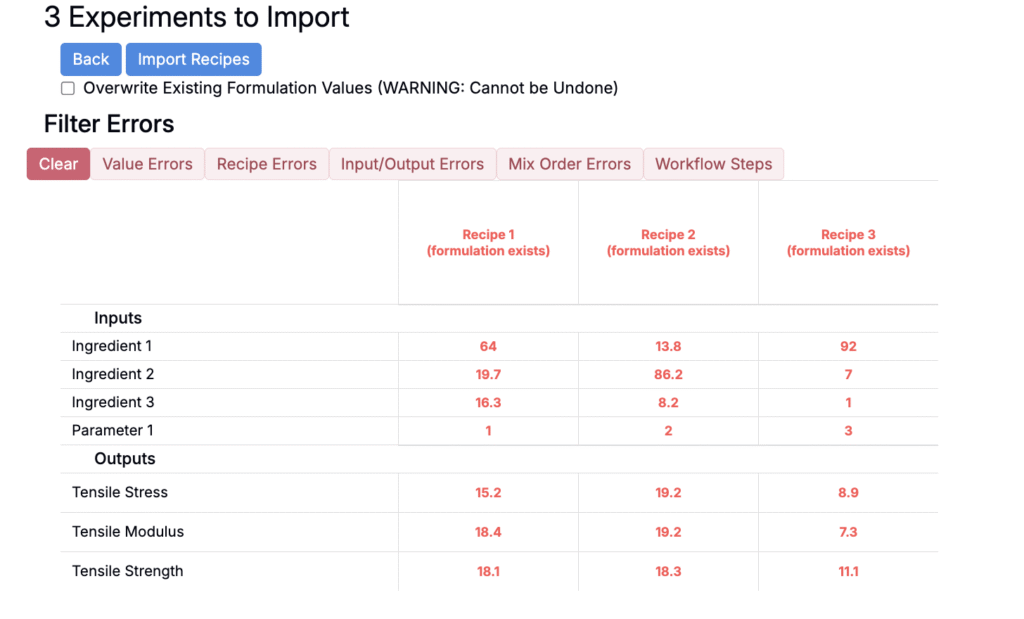
Step 5 — Upload, Review, and Submit
Once the spreadsheet has been prepared, upload it to the formulation importer.
If there are any errors, the importer will highlight them for review. If experiment with the same name already exist within the project, click the Overwrite Existing Formulation Values checkbox to update them. Note that blank cells in the spreadsheet will not overwrite.
Once reviewed, click the Import Recipes button to import the recipes into your project.
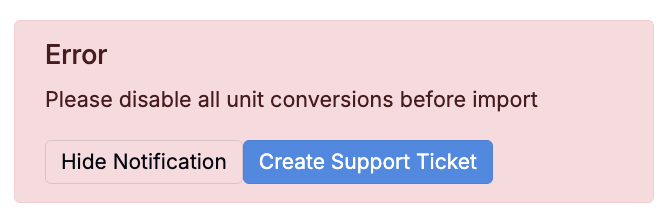
Unit Conversion Error
If you receive the error “Please disable all unit conversions before import,” unit conversions are likely enabled. You must disable unit conversions before uploading data.
Unit conversions may be enabled in either of these locations:
- User Unit Conversions — On the measurements view of an experiment, search for “Unit Conversion Settings”. On the User Unit Conversion Settings page, remove any User Unit Settings.
- Basis Unit Conversion — On the Manage Material Families page (Company-Wide Settings > Manage Material Families), use the Basis Unit Conversions column to disable any conversions for the current material family.
Tips & Reminders
- Inputs/outputs must already be defined in the system.
- Use the Upload Data modal for simpler workflows where only outputs need to be imported.
- Ensure replicates are separated by
;within the same cell. - All uploads are tied to the project you’re uploading into.