Use the Inventory Location Importer to create or update many inventory locations at once. This importer is useful when setting up a new site or restructuring storage.
For small, one-off additions you can still add locations manually from Inventory Locations listing page, but the importer is the fastest and most consistent path for bulk setup.
Using the Inventory Location Importer
Step 1 — Access the Importer
- Navigate to any project dashboard.
- Access the selection menu and click Import CSV/XLSX.
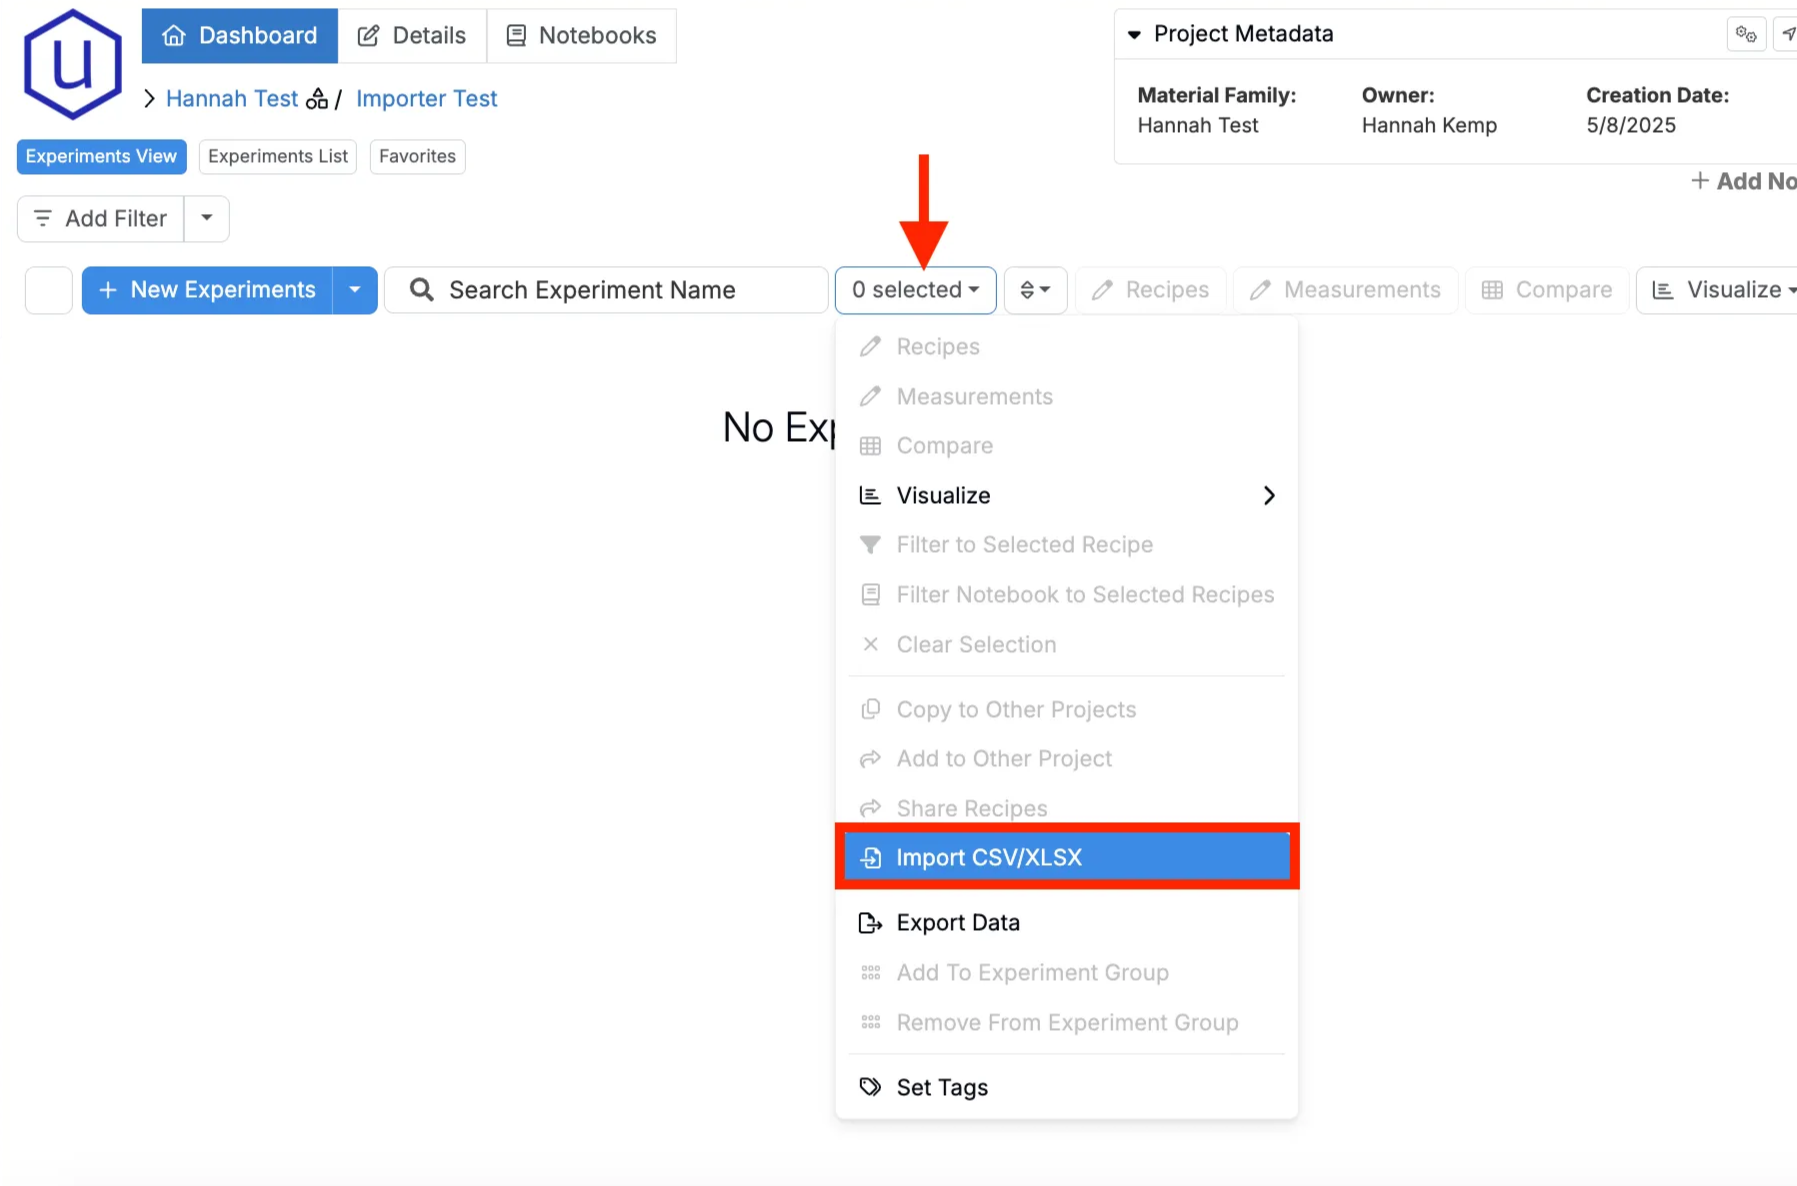
Step 2 — Select Import Type
At the top of the page, select Inventory Location Uploader.

Step 3 — Prepare Your Spreadsheet
For Uncountable to import your data, your spreadsheet must follow a specific format. To view a simple template example, you can click the Download Sample File button.
Spreadsheet Structure
When formatting your spreadsheet, it is recommended you begin with a sample template. Then, configure the template accordingly:
Columns
Required
- Name — The location’s display name (e.g., Room A, Cabinet C).
- Lab Name — Exact lab name. Case-sensitive and must already exist.
- Location Type — Must also already exist (e.g., Room, Cabinet, Shelf). “Generic” is available by default.
Optional
- ID — Leave blank to create a new location; include only when updating an existing one.
- Notes — Saved to the location’s Location Description.
- Parent Name — The immediate parent’s Name to build hierarchy (e.g., child “Shelf 301” with parent “Cabinet C”). Note that the parent and child inventory location must be in the same Lab.
- Parent ID — Use instead of Parent Name if you prefer ID-based linking.
Tip: Use either Parent Name or Parent ID for a given row, don’t mix both on the same row.

Rules & Constraints
- Column order doesn’t matter; headers must match exactly.
- Types and Labs must already exist.
- If you’re adding new children, include the parent row in the same file (or ensure it already exists) to avoid loader errors.
- Avoid hidden sheets, merged cells, formulas, and trailing/leading spaces.
Step 4 — Import, Review, and Submit
- Upload the file. Drag and drop the prepared spreadsheet into the importer.
- Resolve any errors.
- Rows with problems (for example, unknown labs or location types) are highlighted in red and must be fixed before you can submit.
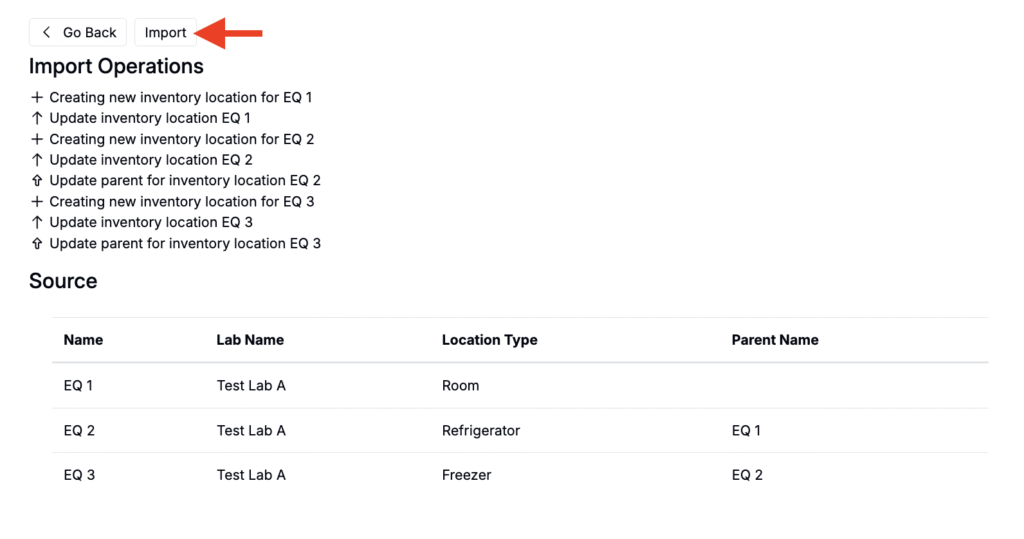
- Review the changes. If no errors are found, you’ll be directed to a review page that lists all import operations.
- Submit the import. Click Import to apply the changes.
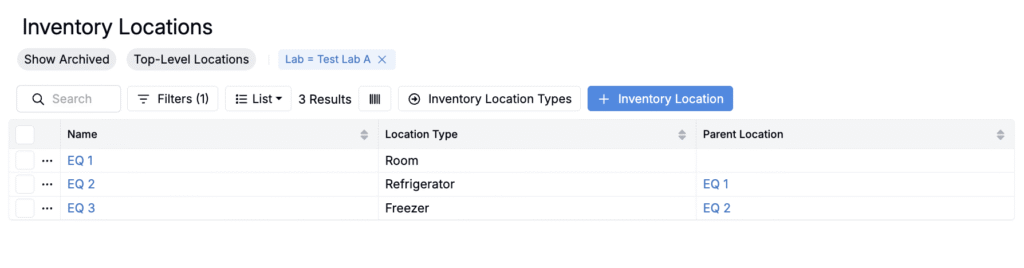
After submission, the importer processes all operations and adds the inventory locations. To view them, go to Inventory Locations (Lab > Inventory > Options > Edit Locations).