If a field needs a very large set of options (around 1,000+), avoid storing them in a Field Option Set. While Fixed List fields can linked to options sets created in Form Admin, these lists option sets have limits for big lists:
- Only ~1,000 options are visible on the Field Options page
- Loading and search can slow down
- Options can’t carry extra fields (metadata)
Instead, you should use a Custom Entity and reference it as the field’s ID Source. Custom Entities scale to any size, support bulk import, and let you attach additional fields (e.g., description, codes, categories).
Using a Custom Entity
To manage large option lists, create a Custom Entity, bulk import its records, then reference that entity as the field’s ID Source.
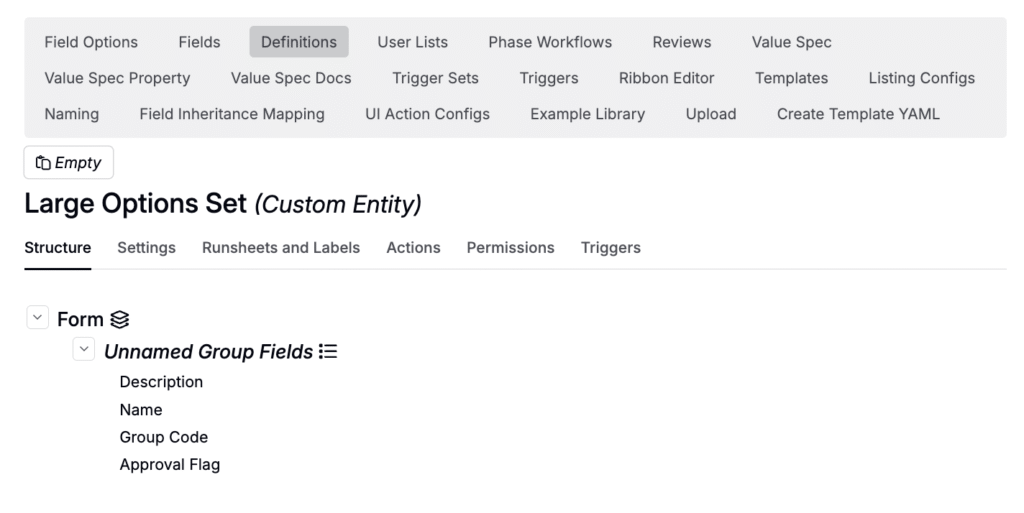
Step 1 — Create the Custom Entity definition
- Go to Form Admin → Definitions.
- Click New Definition and choose Custom Entity.
- Add the fields you want (e.g., Name, Description, internal codes, categories).
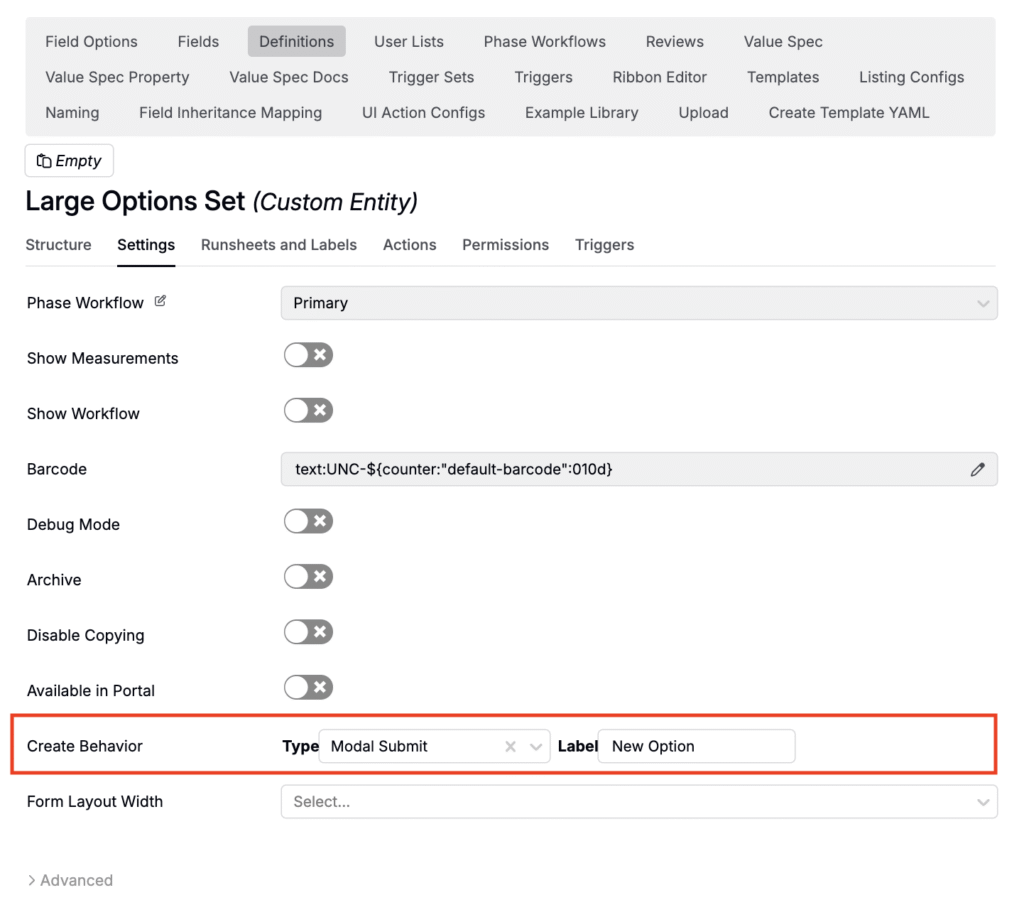
- Open the Settings tab and configure:
- Create Behavior
- Create Open: Creates the record and takes you to its page to fill fields.
- Modal Submit: Prompts for all fields in a modal before saving.
- Label: The text shown for the “create new” button on listings (e.g., “+ New Option”).
- Create Behavior
- Save the definition.
Tip: Use clear, consistent reference names for fields—these become column headers when importing or updating.
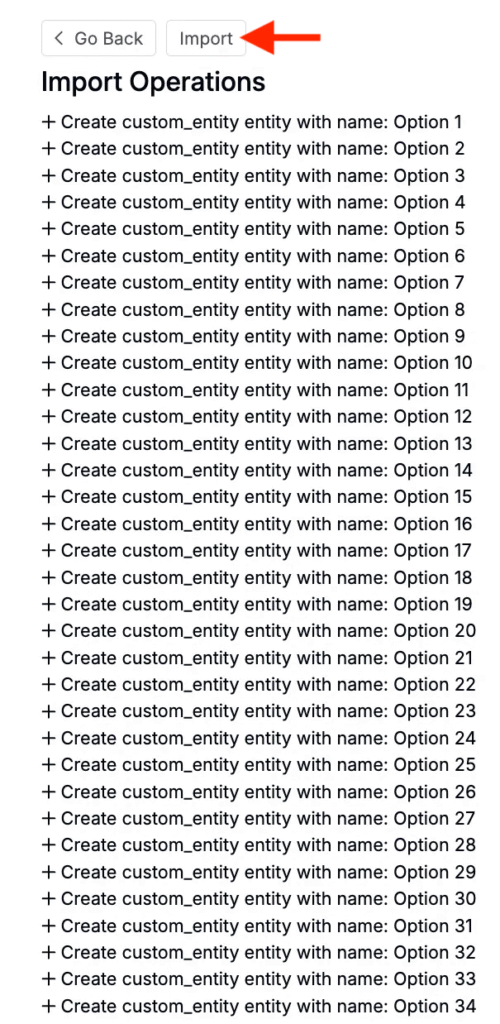
Step 2 — Bulk import the Custom Entity records
Use the Entities Importer for fast, repeatable loads.
Prepare the file
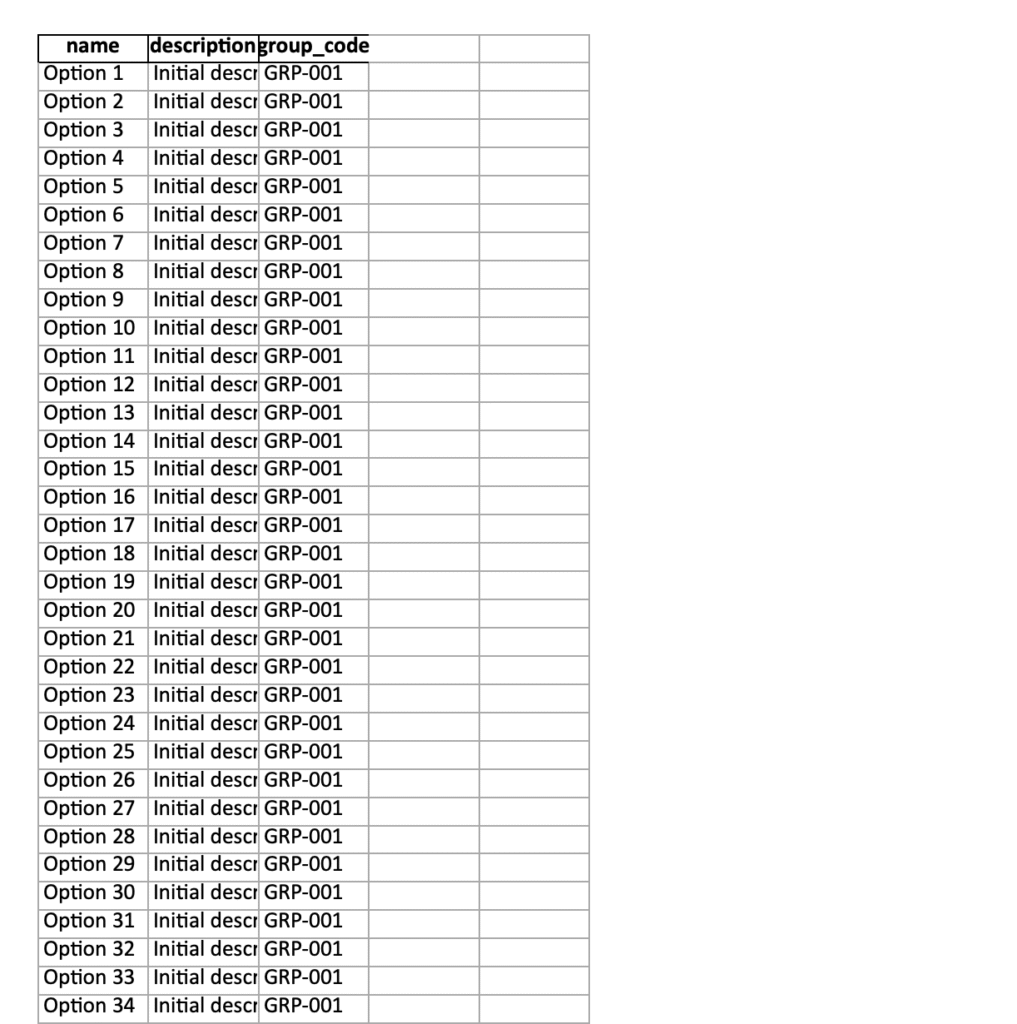
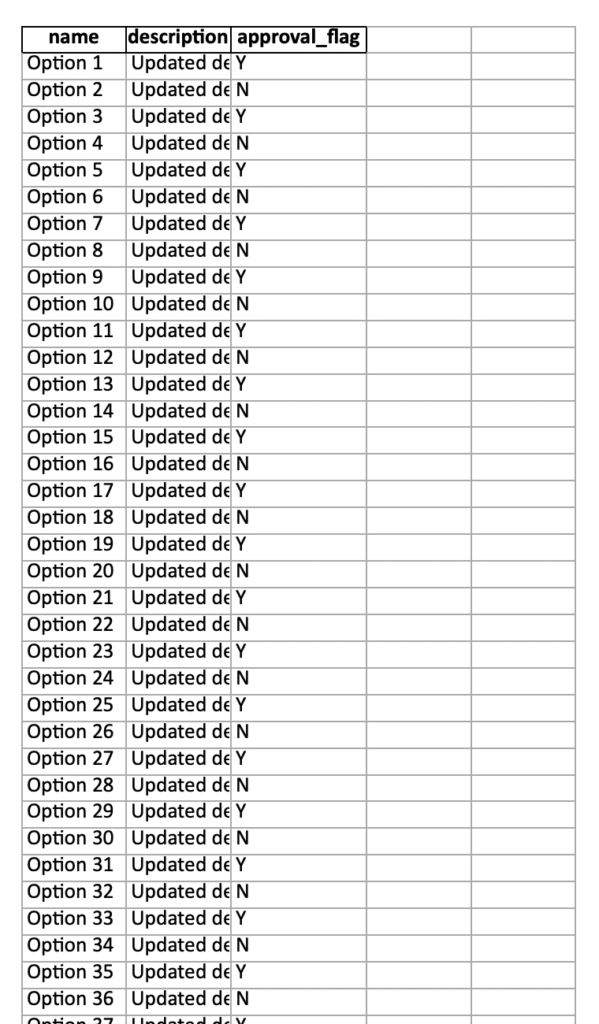
Create an Excel file (.xlsx) with:
- name — required (maps to the entity’s Name)
- Additional columns for any other fields in your definition (use reference names as headers)
Import limit: You can upload up to 1,000 rows per file. For larger lists, split into batches and run multiple imports.
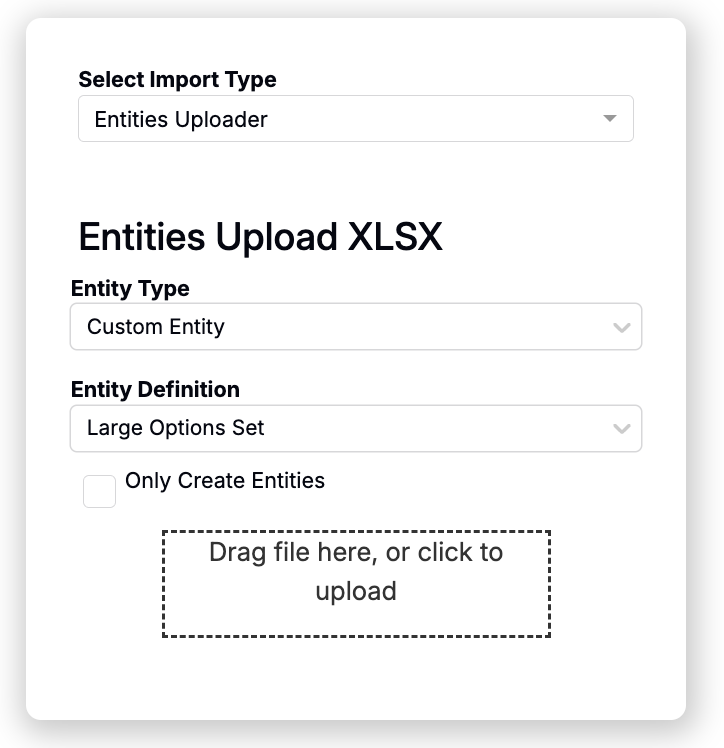
Run the import
- Open the Project Dashboard.
- From the selection menu, choose Import/Export.
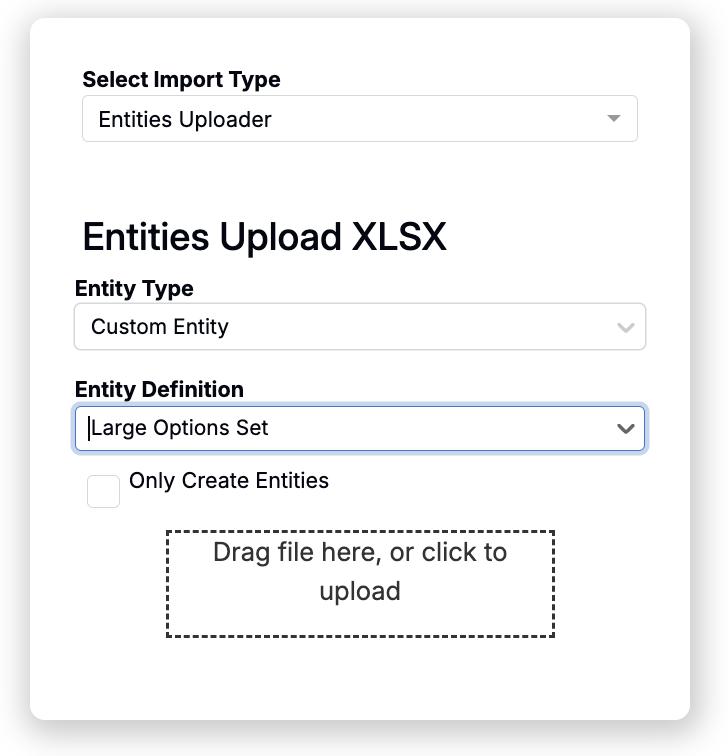
- On Importer:
- Select Import Type: Entities Uploader
- Entity Type: Custom Entity
- Entity Definition: Choose your definition
- Drag-and-drop your Excel file.
- Review the preview for column mapping and row count.
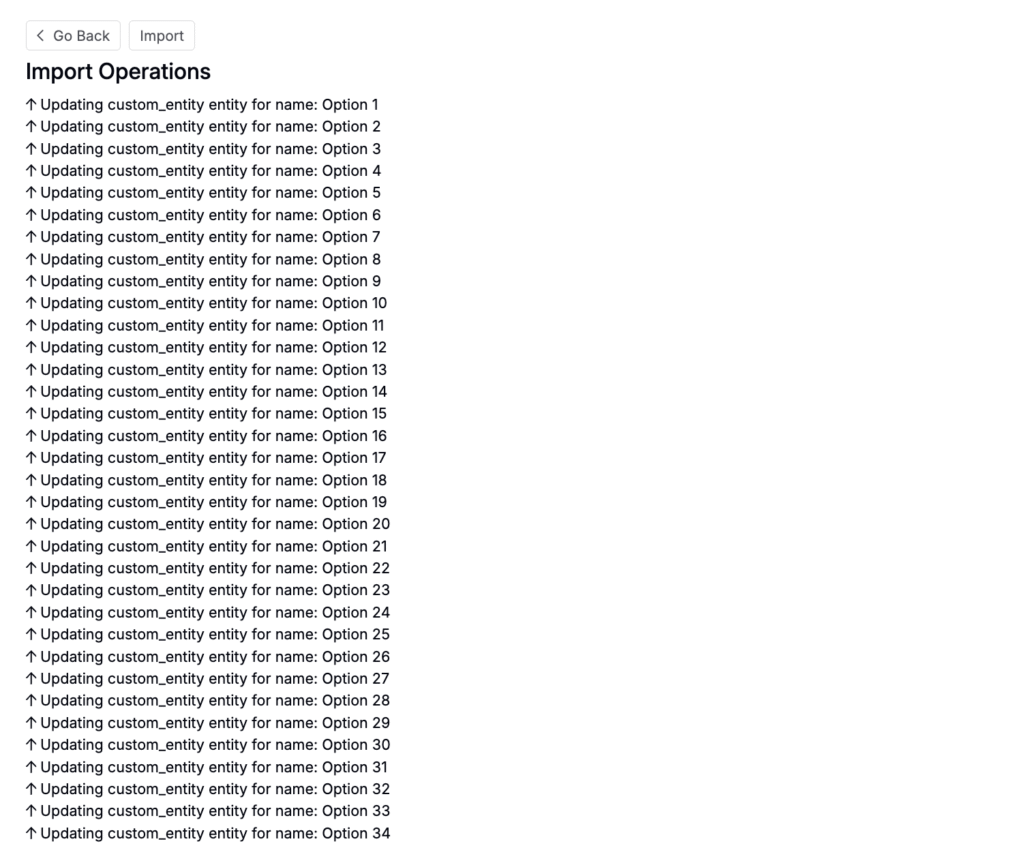
- Click Import.
- Repeat for additional batches if needed.
Step 2— Importing Custom Entities
- Access the Project Dashboard.
- From the selection menu, select Import/Export.
- On the Importer page:
- Select Entities Importer from the Select Import Type menu.
- In Entity Type, select Custom Entity.
- In Entity Definition, select your Custom Entity definition.
- Drag and drop your prepared Excel file.
- Review the data.
- Click Import.
- Repeat this process as needed to import your full list.
Note: You can also always create new entities one at a time directly on Custom Entity listing by clicking the + New Option button (label determined by the “Label” field in your definition settings). This just takes longer.
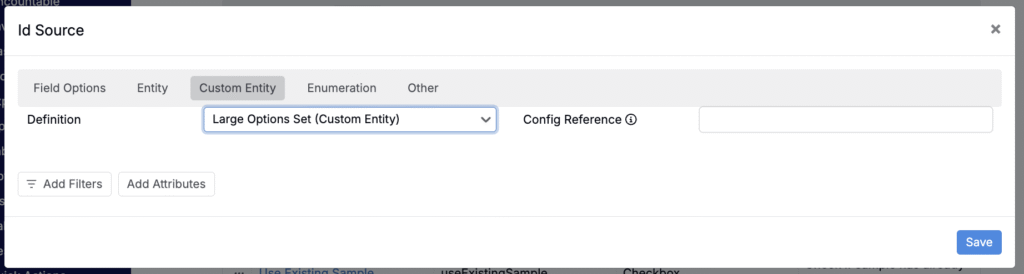
3) Reference the Custom Entity in a field
- Go to Form Admin → Fields.
- Create a field of type Fixed List – Single or Fixed List – Multiple.
- In the field configuration, open ID Source.
- Select the Custom Entity tab, pick your definition, then Submit and Save.
Your field now reads options from the Custom Entity—scaling to any number of records and supporting richer metadata.

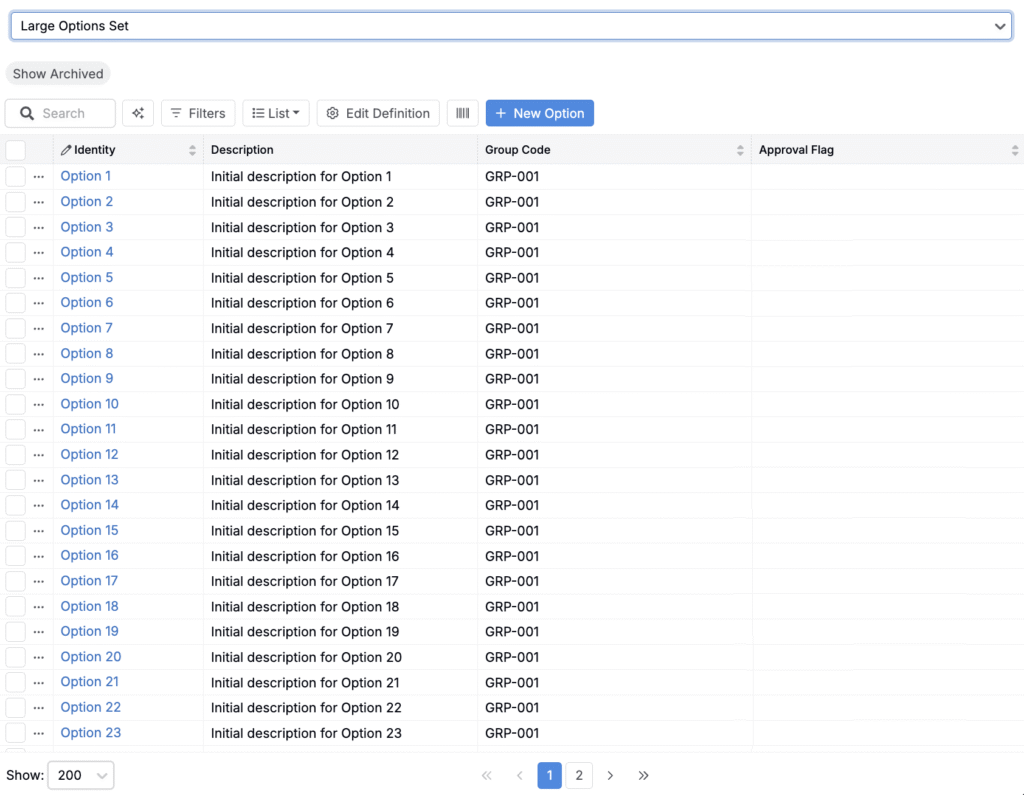
Managing or updating the options
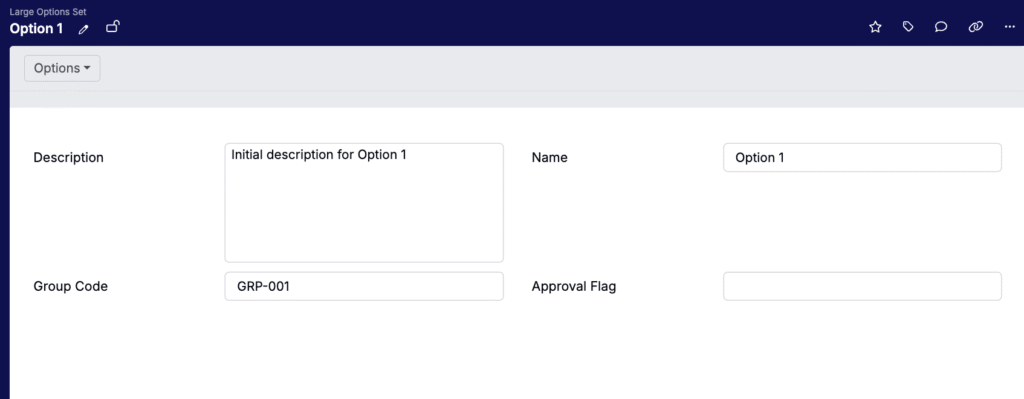
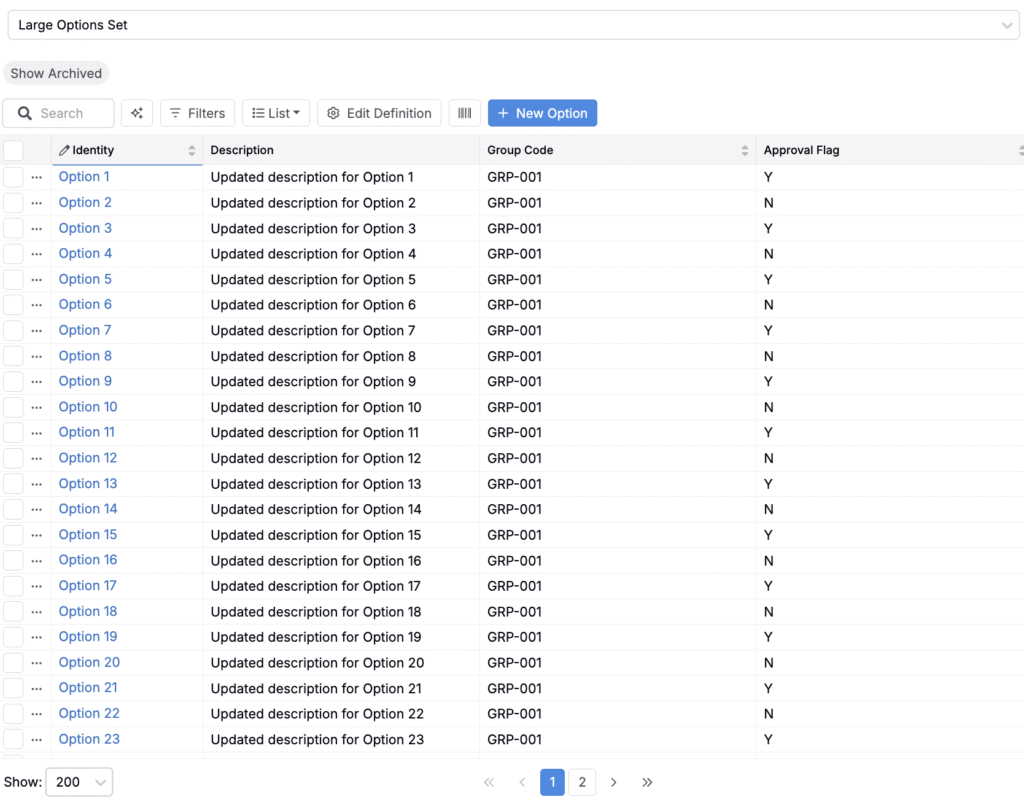
Edit individual records
- Go to Lab → Lists (SDS List).
- Choose your Custom Entity type.
- Search, filter, and click any record to edit its fields inline or on the detail page.
Bulk update existing records
You can update many records at once via the Entities Importer.
Prepare the file
- Include a name column that exactly matches existing records.
- Add columns for fields you want to update (headers must be the field reference names).
- Include new columns if you added new fields in the definition—those will be populated on import.
Run the update
- Open Import/Export → Entities Importer.
- Entity Type: Custom Entity → select the same definition used by your field.
- Upload the file, review the preview (Uncountable will match on
name). - Click Import.
Tip: If record names might change, add a separate, non-editable External ID field and use that as the stable key (recommended for ongoing syncs).
Summary
Using a Custom Entity for large lists gives you:
- Scalable performance and search
- Bulk import and bulk update
- Extra fields (metadata) for each option
- No page-display limit when used as an ID Source
For small, static lists, a Field Option Set still works. For anything large or metadata-rich, prefer Custom Entity.