In Uncountable, you can use the Field Options tab in Form Admin to create, edit, organize, and manage the option sets used by Fixed List fields.
Field Options sets are generally recommended for lists under 1,000 items. For larger lists, you can use Custom Entities and reference them from fields. Learn more.
Creating New Options Sets
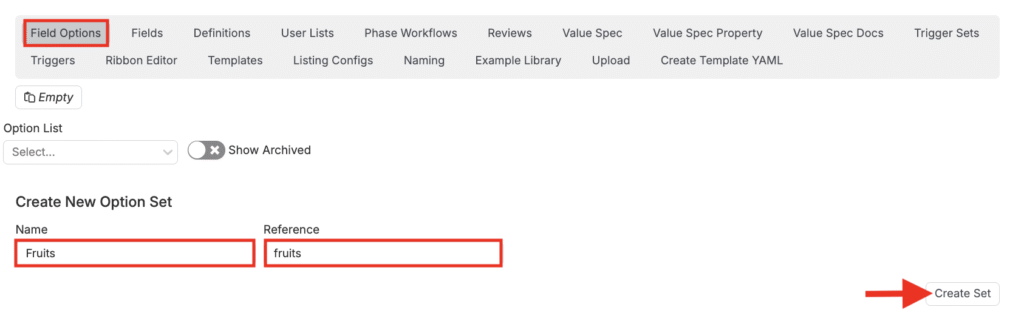
- Go to Form Admin → Field Options.
- Click Create Set.
- Enter a Name (displayed to users) and a Reference Name (used internally), then click Create.
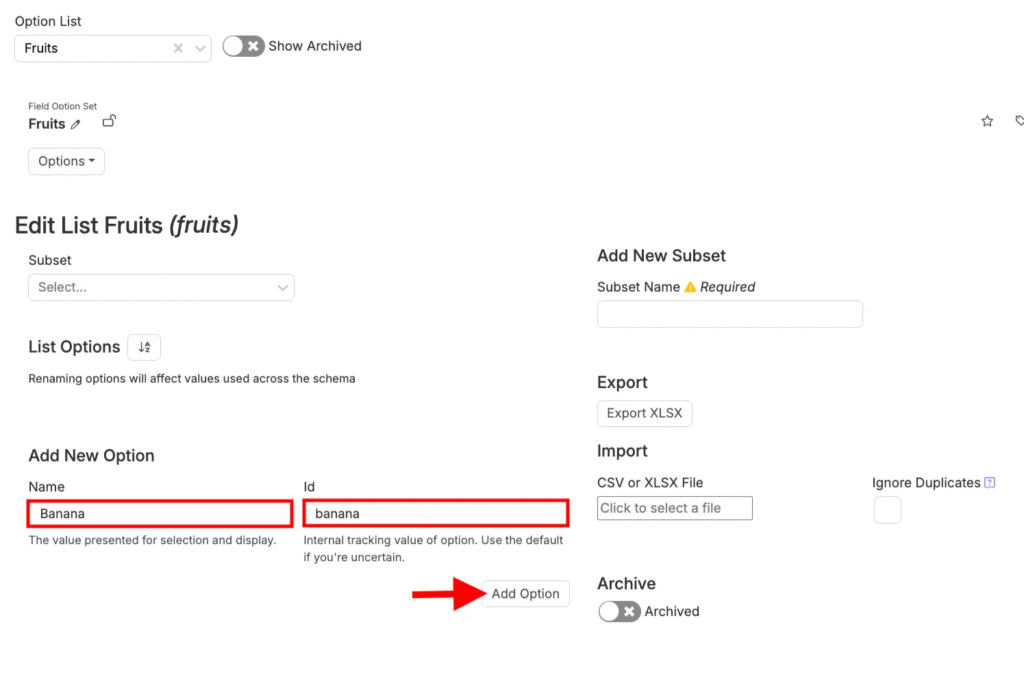
Add options to the set manually
- In Add New Options, provide:
- Name – how the option appears in dropdowns.
- ID – a concise, unique identifier for the option.
- Click Add Option.
- Repeat until all options are added.
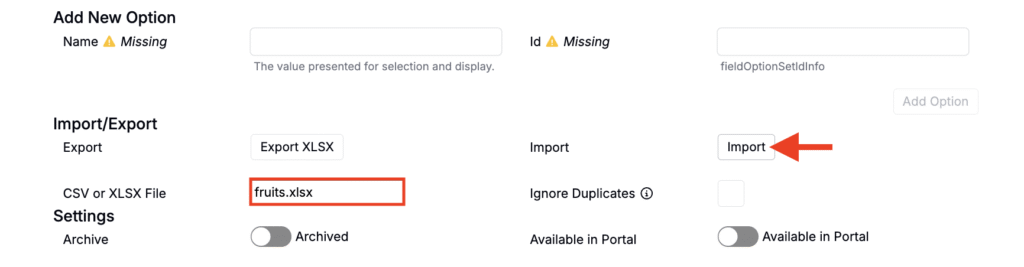
Importing an option set
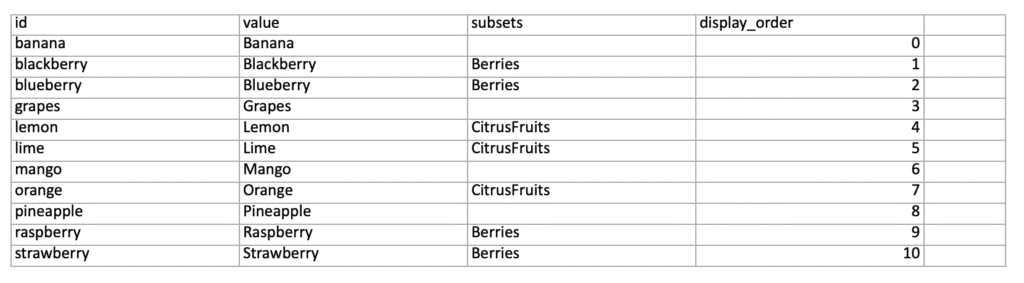
If you already have options in a spreadsheet, you can import them instead of adding each one manually. In order to use the importer, your spreadsheet must use a specific format.
- Download sample template: Options Set Importer Template
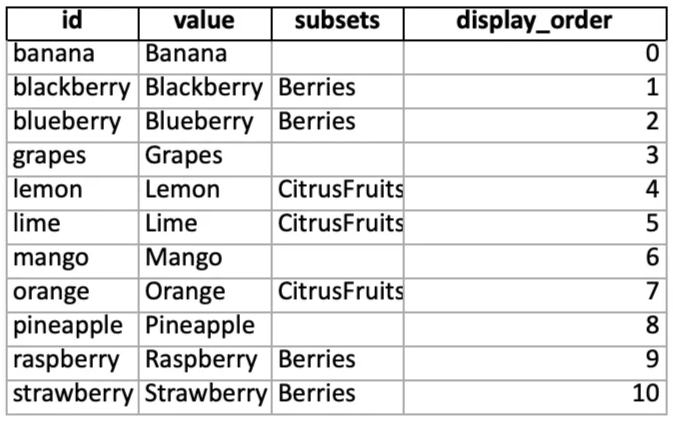
Prepare a spreadsheet (CSV or Excel) with these columns:
- id — Unique identifier used internally.
- value — Display label shown to users.
- subsets (Optional)— Grouping label (e.g.,
Berries,CitrusFruits). - display_order (Optional)— Numeric position in the list (0 = first). You can also reorder after import.
When your file is ready:
- Drag the file into the Import area.
- Click Import.
- All rows in the file will be added as options to the current set.

Managing Existing Options Sets
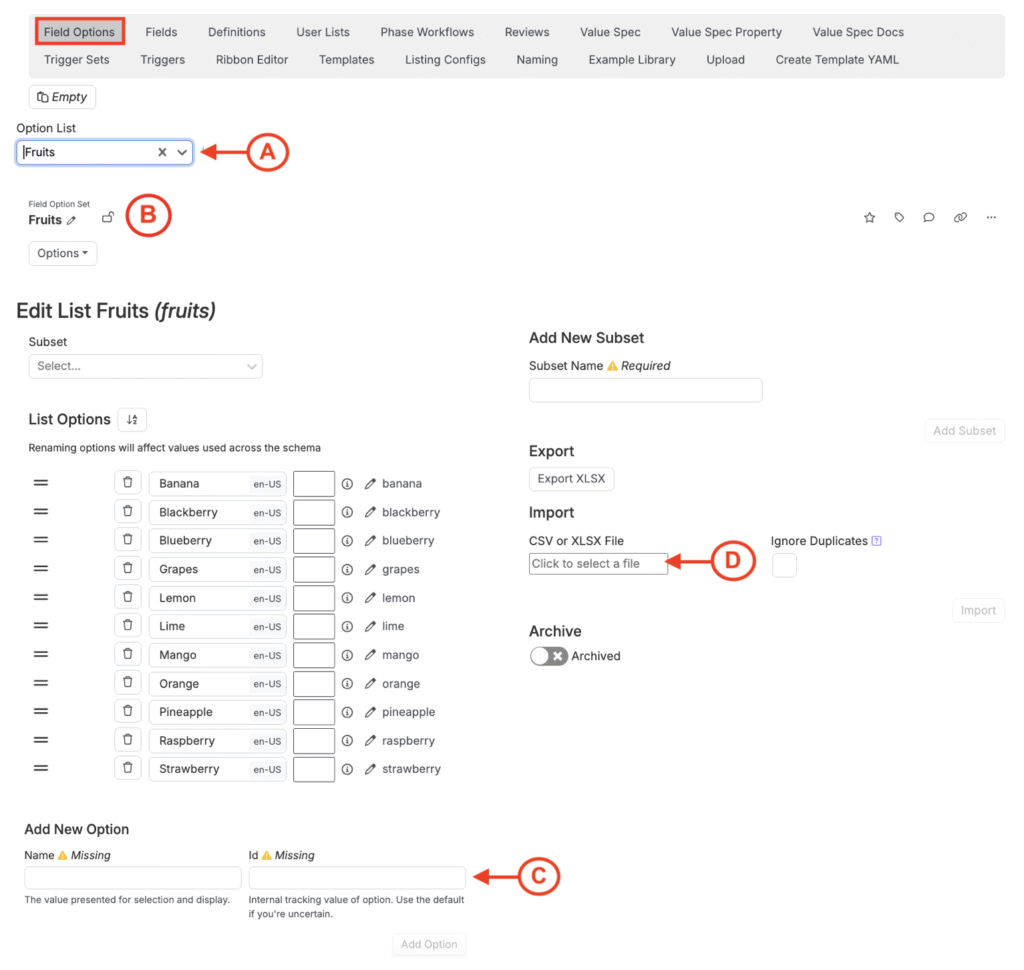
To manage an existing options set, select it from the Options List dropdown (A). Once selected, the set’s contents will appear below. You can rename the set or lock it to prevent further editing by clicking the pencil or lock icons (B).
Adding New Options
New options can be added in two ways:
- Manually: Enter a name and ID in the Add New Options fields (C).
- Bulk Import: Upload a CSV or XLSX file using the Import button (D)
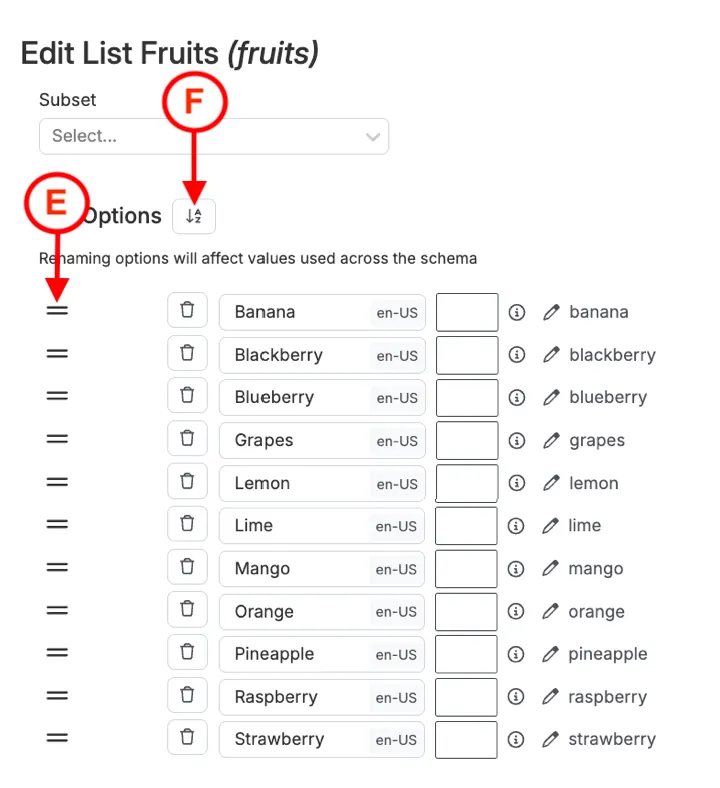
Configuring Option Set Order
To adjust the order in which options appear in a dropdown, use the stacked lines icon (E) to drag and drop options to the desired order. To reset options to alphabetical order, use the button next to List Options (F).
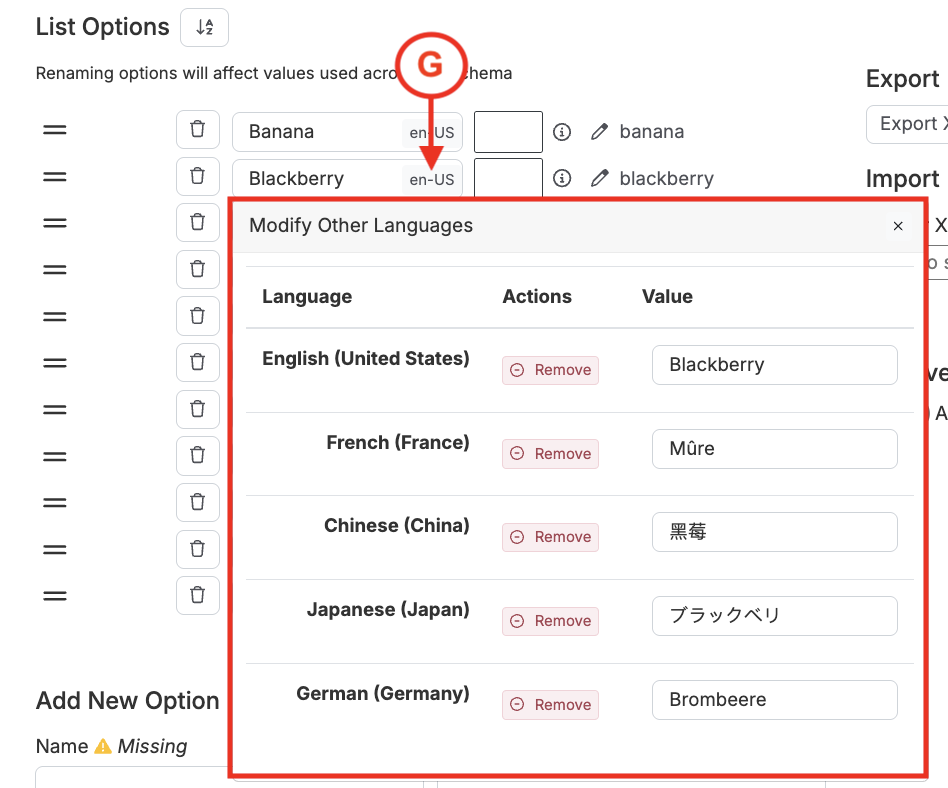
Adding Language Overrides for Options
To add a language override for options, click the “en-US” icon associated (G). From here, admins can manually add translations. When an option has a translation added in this way, it will properly translate when using the platform in another language.
For more on language preference, refer to Language Preferences.
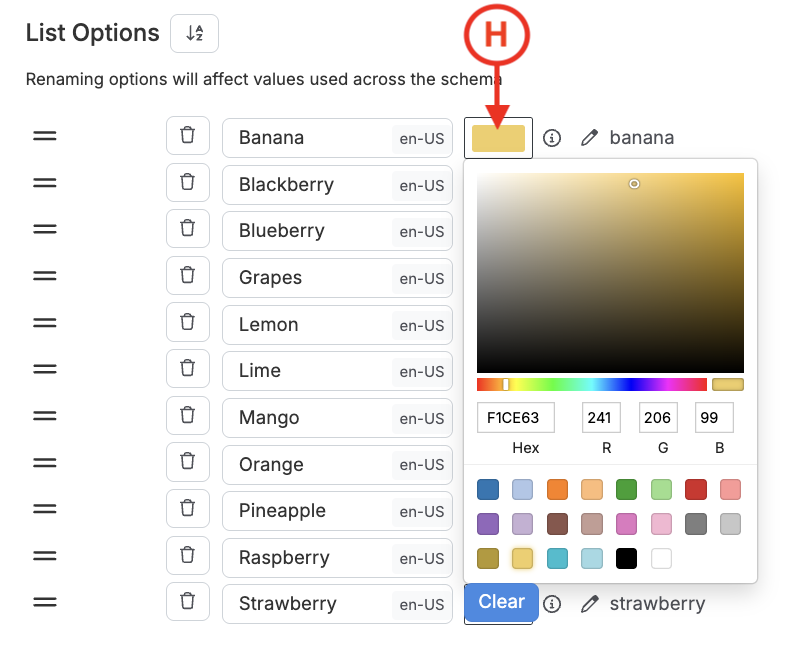
Adding Colors to Options
Admins can also add a color to options set options to group or to distinguish them. To do so, select the box associated with an option (H) and choose from the color wheel.
Once associated, the option will appear highlighted in the selected color both in the dropdown and on the form using the Fixed List field.
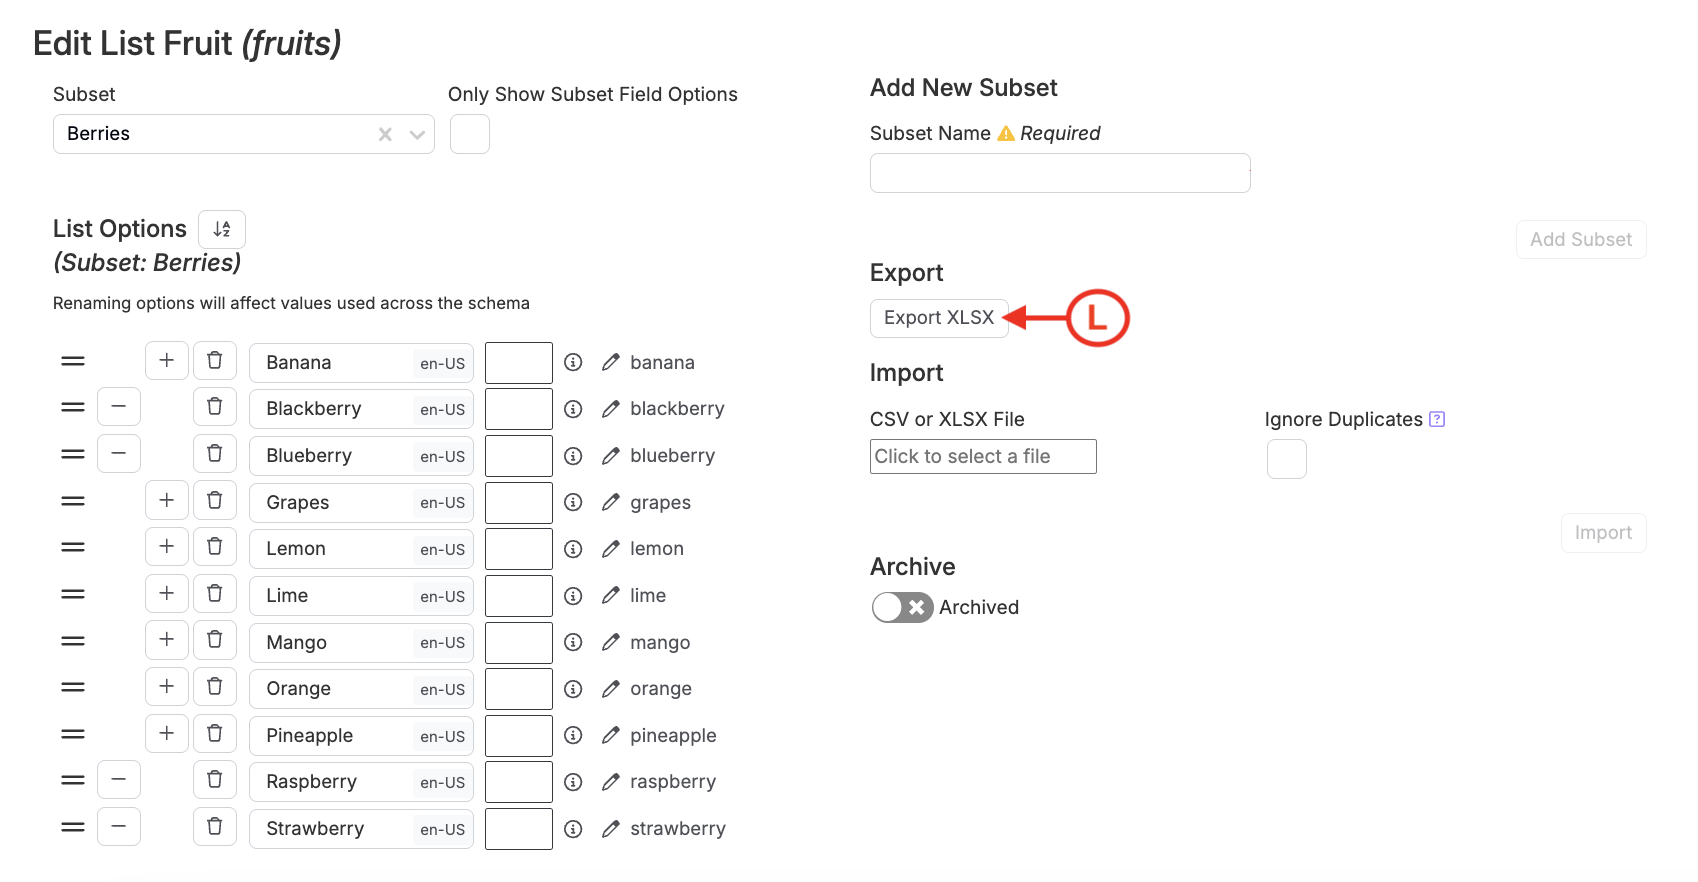
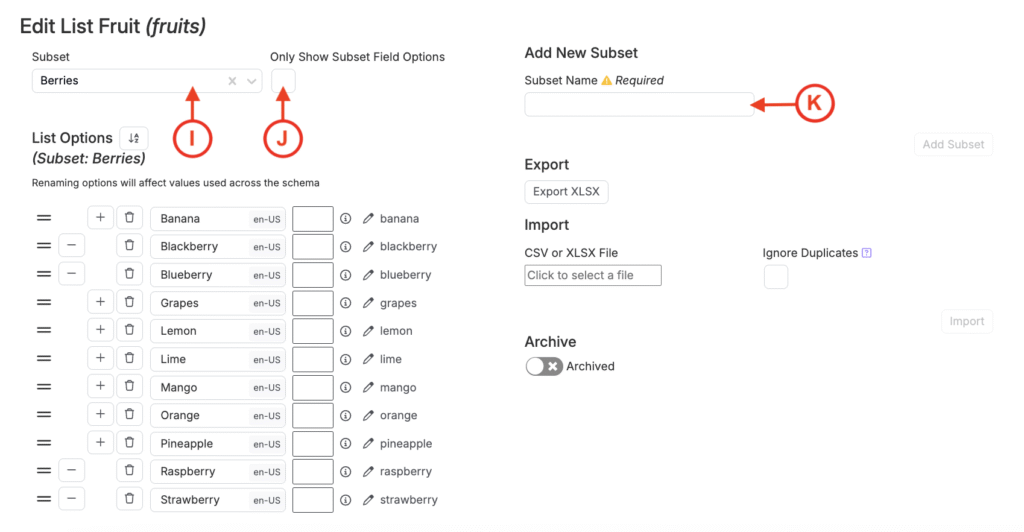
Creating and Managing Subsets
Subsets let you define smaller, more focused lists within a larger option set. For example, within a “Fruits” option set, you might create subsets like “Citrus Fruits” or “Berries”. When creating a new field using an options set, users will have the option to select a subset. Doing so will make it so that only that subset of options will appear in the dropdown for selection.
To manage subsets:
- Select a subset from the dropdown (I).
- Check “Only Show Subset Options” (J) to filter the view.
- Use the “+” and “–” buttons to add or remove options from the subset.
- Create a new subset by entering a name into the field (K) and clicking Add Subset.

Exporting an Options Set
To share or back up an options set, use the Export button (L) to download it as an Excel file.