Use the Outputs Importer to create or update outputs stored within your schema’s outputs listing in bulk. This importer allows you to add or edit output details such as category, units, quantity type, and notes. It does not update outputs measured on experiments. To do this, you will need to use the Formulation Importer.
For small, one‑off changes, you can still add outputs manually, but the importer is the fastest and most consistent path for updating your outputs library in bulk.
Using the Outputs Importer
Step 1 — Access the Importer
- Navigate to any project dashboard.
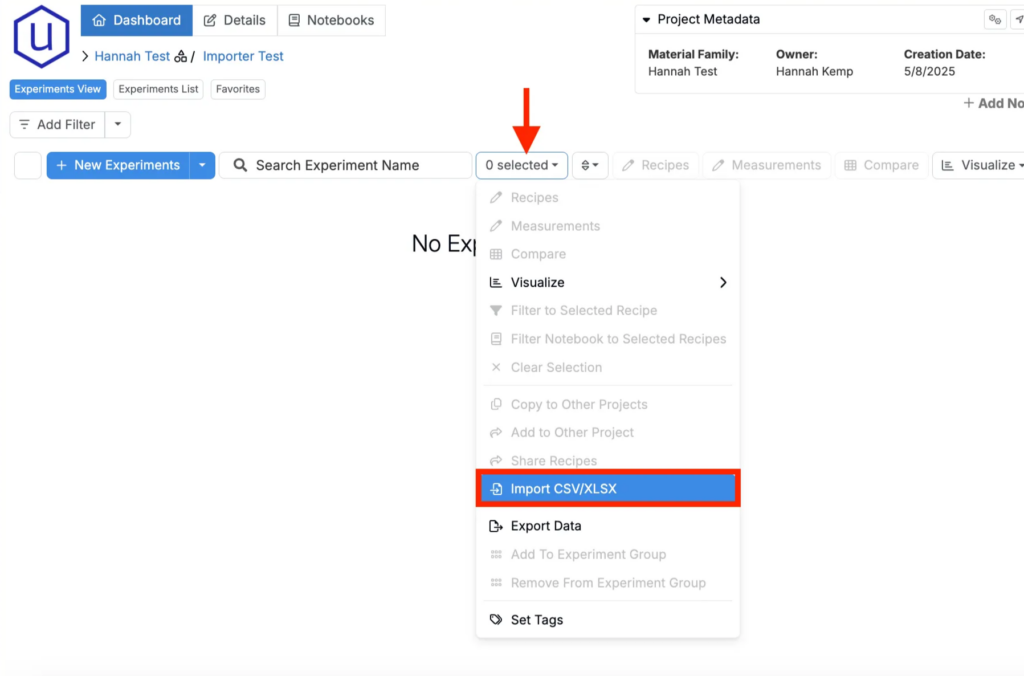
- Access the selection menu and click Import CSV/XLSX.
Step 2 — Select Import Type
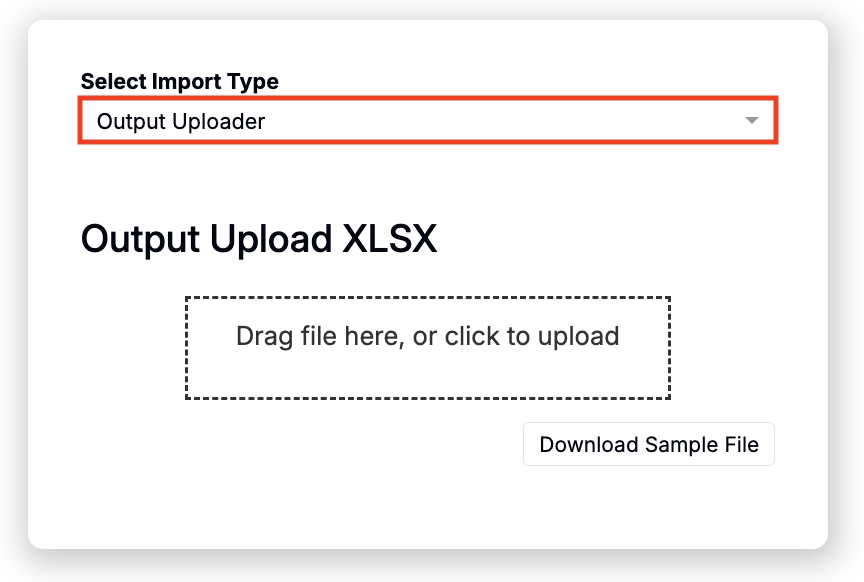
- At the top of the page, select Outputs Uploader.
Step 3 — Prepare Your Spreadsheet
For Uncountable to process your upload, your spreadsheet must follow a specific format. You can click Download Sample File on the upload page to view an example.
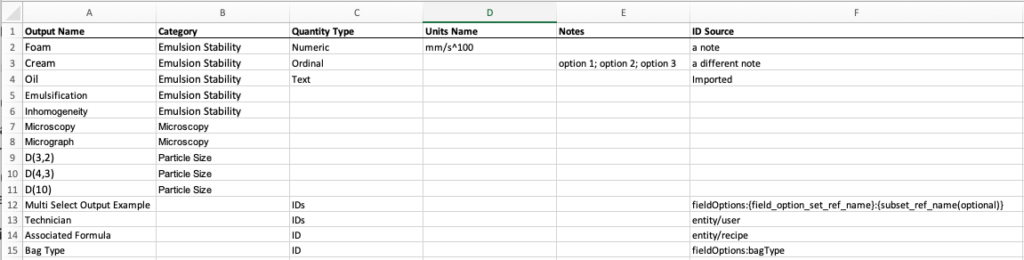
Spreadsheet Structure
When formatting your spreadsheet, it’s best to start from a sample template, then configure the columns as needed for your outputs.
Columns
Required
- Output Name — The display name of the output.
- Category — The output category. Case-sensitive. If a category does not exist yet, it will be created during import.
- Quantity Type — Enter either Numeric, Text, Image, Datetime, Date, Calculation, ID (single-select), IDs (multi-select), or File. Not case-sensitive.
Conditional
- Units Name — Provide only when Quantity Type is numeric.
- ID Source Options — Provide only when Quantity Type is ID or IDs. The format for this is entity/[entity type]. For example: entity/recipe. To create an output with a field options list as the ID source, format as fieldOptions:{field_option_set_ref_name}:{subset_ref_name(optional)}. For example: fieldOptions:referenceName.
Optional
- Notes — Free text for internal context.
Rules & Constraints
- Column order does not matter, but headers must match exactly as shown above.
- Output names in the file must be unique. Avoid duplicate rows for the same output within a single upload.
- If you are updating an existing output, do not change its Category, Quantity Type, Units, or ID Source in the spreadsheet. Those structural attributes must be unchanged for updates to succeed.
Step 4 — Import, Review, and Submit
- Upload the file. Drag and drop the prepared spreadsheet into the Outputs Uploader.
- Resolve any errors. Rows with problems are highlighted in red and must be fixed before submission.
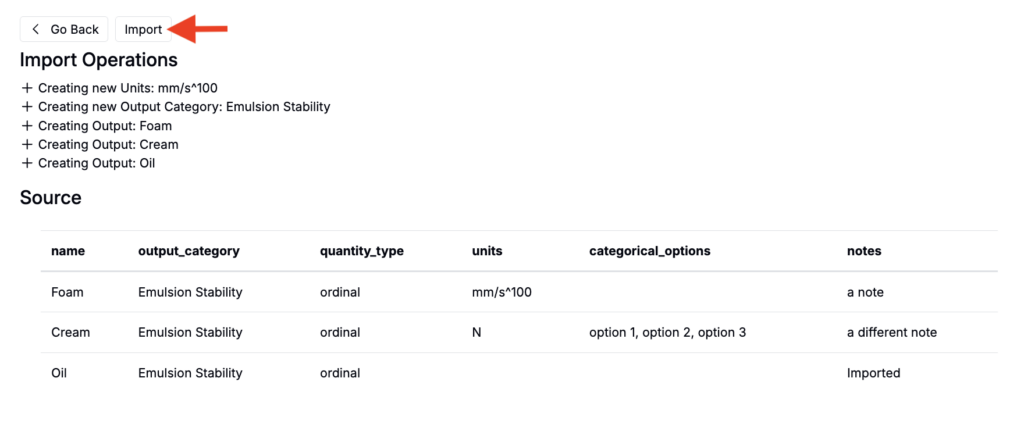
- Review the changes. If no errors are found, you will be directed to a review screen listing all Import Operations to be applied.
- Submit the import. Click Import to apply the changes.
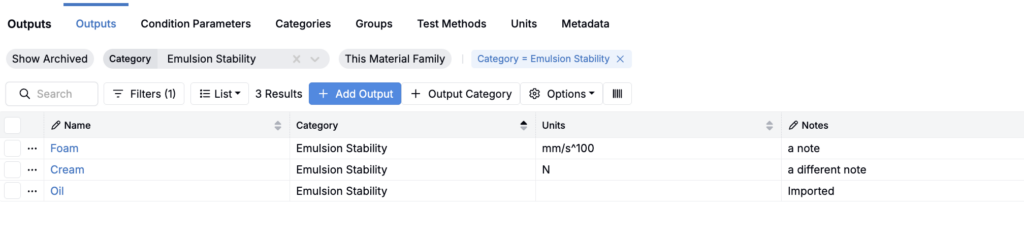
After submission, the importer will create new outputs or update existing ones in your outputs library (Inputs/Outputs > Outputs). Measurements on experiments are not modified by this importer.
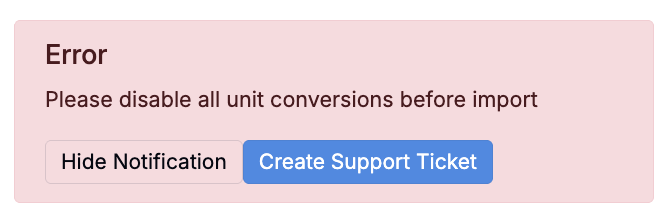
Unit Conversion Error
If you receive the error “Please disable all unit conversions before import,” unit conversions are likely enabled. You must disable unit conversions before uploading data.
Unit conversions may be enabled in either of these locations:
- User Unit Conversions — On the measurements view of an experiment, search for “Unit Conversion Settings”. On the User Unit Conversion Settings page, remove any User Unit Settings.
- Basis Unit Conversion — On the Manage Material Families page (Company-Wide Settings > Manage Material Families), use the Basis Unit Conversions column to disable any conversions for the current material family.