Use the Output Groups Importer to create or update output groups stored within your schema’s output groups listing. This importer allows you to add or edit output group names, stored outputs, and associated conditions.
For small, one‑off changes, you can still add or edit output groups manually, but the importer is the fastest and most consistent path for updating your output groups library in bulk.
Using the Output Groups Importer
Step 1 — Access the Importer
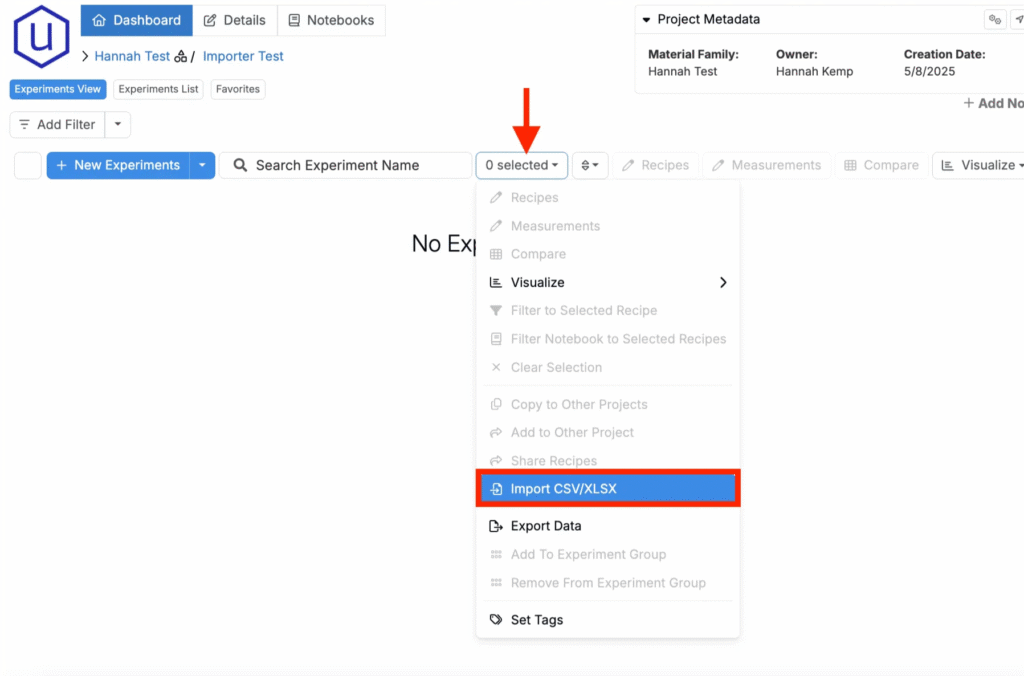
- Navigate to any project dashboard.
- Access the selection menu and click Import CSV/XLSX.
Step 2 — Select Import Type
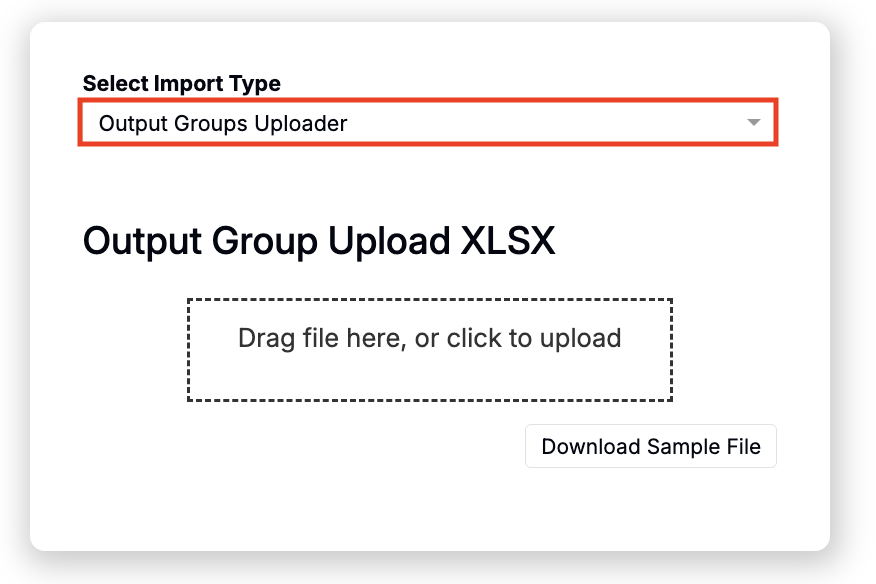
- At the top of the page, select Output Groups Uploader.
Step 3 — Prepare Your Spreadsheet
For Uncountable to process your upload, your spreadsheet must follow a specific template. Start from the sample and then add rows for your groups and conditions.
- Download the template: Output Groups Importer Template
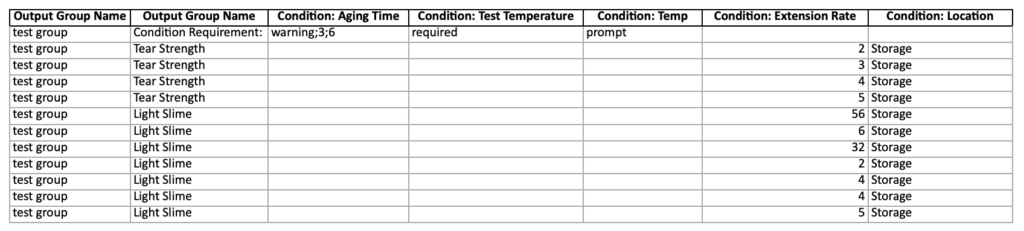
Spreadsheet structure
Each row represents either an output assignment to a group or a “Condition Requirement” instruction for that group.
- You may upload multiple output groups in one file.
- Use front‑end names for outputs and condition parameters. These are case‑sensitive.
- From column C onward, add one column per condition parameter you want to set on the group.
Columns
- Column A — Output Group Name
- Name of the group you are creating or updating.
- Repeat the group name on each row that applies to that group.
- Column B — Output Name or Condition Requirement:
- To assign an output to the group, put the output’s front‑end name here.
- To define condition requirements for the group, put the text
Condition Requirement:in column B for that row.
- Columns C+ — Condition: [front end name]
- One column per condition parameter you want to associate with the outputs in this group.
- Values are case‑sensitive and should match front‑end option values where applicable.
Condition Parameter Requirements
You can require, warn, or prompt users to fill certain condition parameters when they choose the group. Enter these on a dedicated row for the group where Column B is Condition Requirement: and Columns C+ contain the rule for each CP.
- Allowed rule keywords:
required,warning,prompt - Optional value restrictions: append a semicolon‑separated list of allowed options after the keyword
- Examples for a single CP cell value:
required→ CP must be filled. Any option allowed.warning;3;6→ Show a warning, and limit selectable options to 3 and 6.prompt→ Gently prompt, not required.
Add a separate Condition Requirement: row for each output group that needs rules.
Rules & Constraints
- Column order does not matter, but headers must exactly match.
- Use front‑end names. Names and option values are case‑sensitive.
- Include one
Condition Requirement:row per group when defining rules. </aside>
Step 4 — Import, Review, and Submit
- Upload your file. Drag and drop the prepared spreadsheet into the Output Groups Uploader.
- Resolve errors. Rows with problems are highlighted in red. Fix issues in your file and re‑upload as needed.
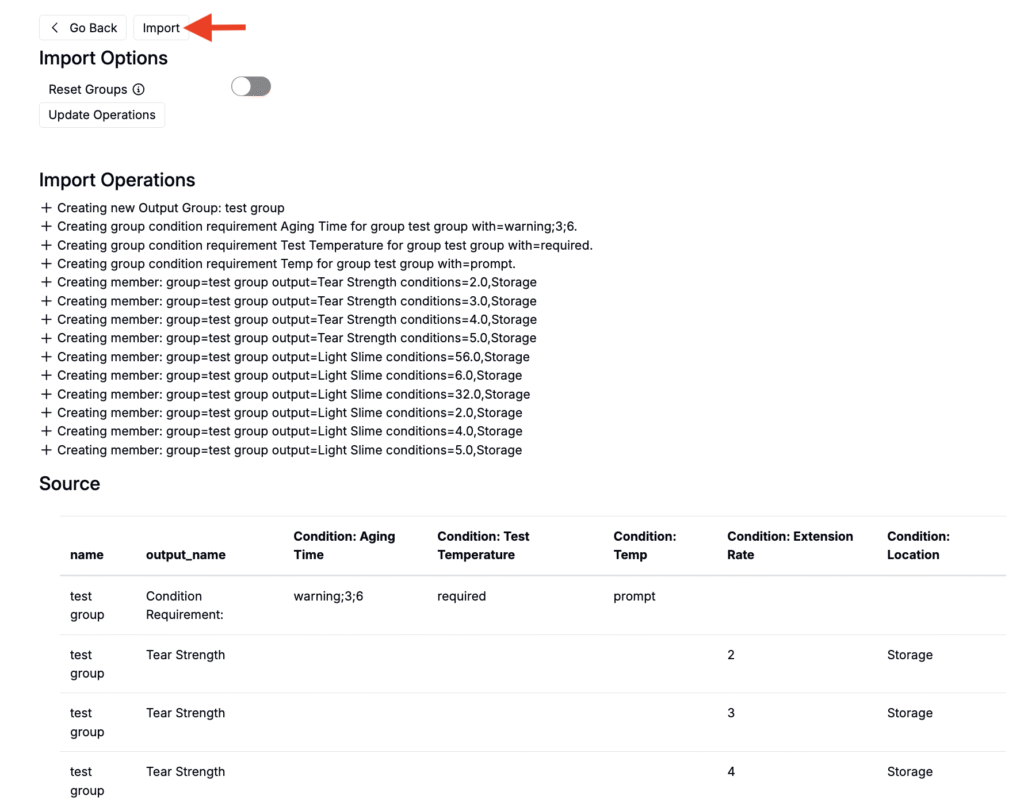
- Review changes. Confirm the groups to be created or updated, outputs added, and any condition rules to be applied.
- Click Import to apply the changes.
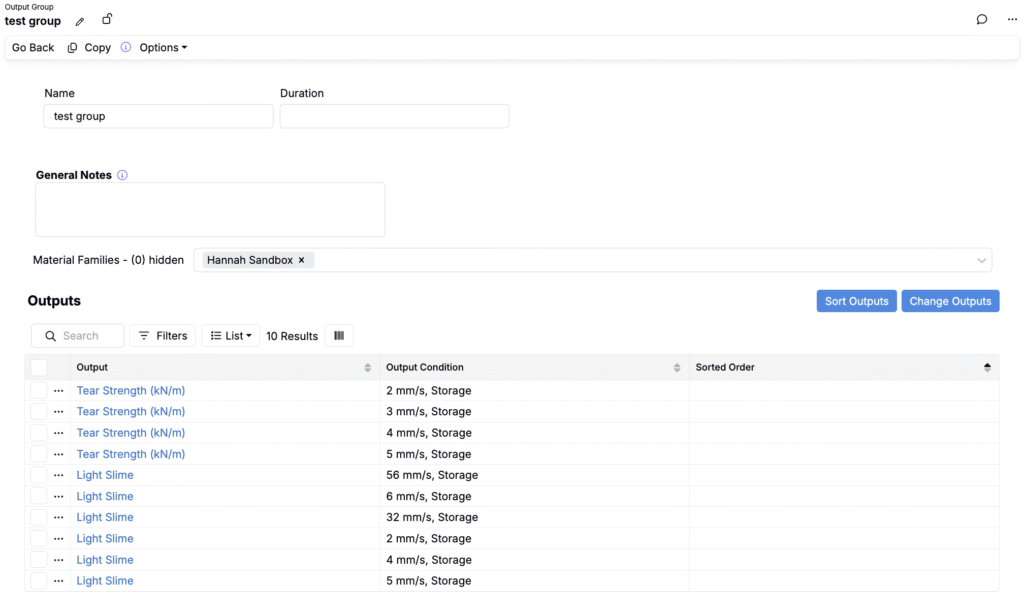
After submission, the importer will create new output groups or update existing ones in your output groups library (Inputs/Outputs > Outputs > Groups).
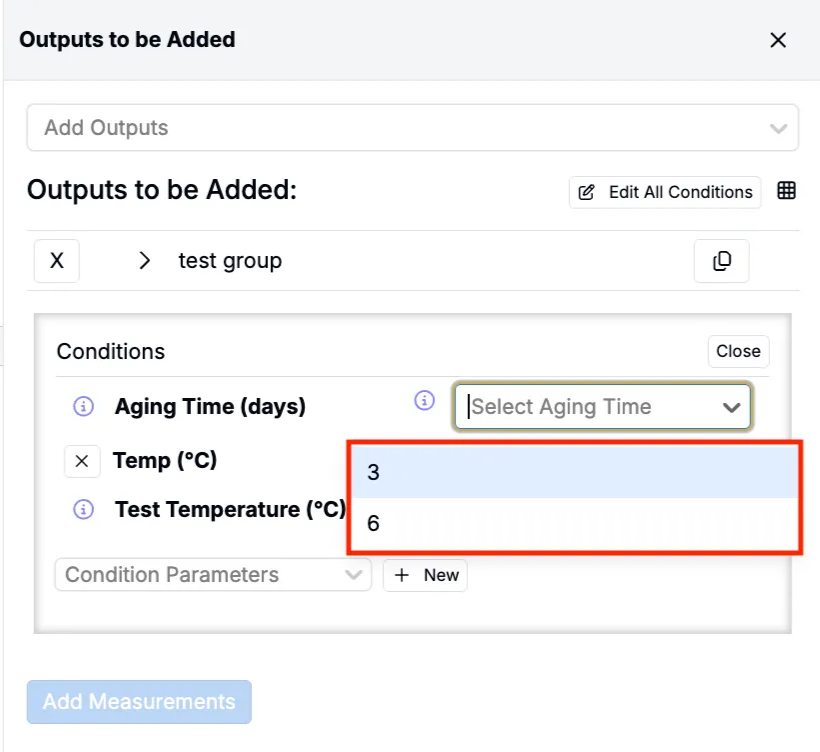
Condition requirements added on output group outputs will also be reflected when adding the group to an experiment. In this example, Aging Time was set to be warned for, Temp was set to be prompted for, and Test Temperature was set to be required.
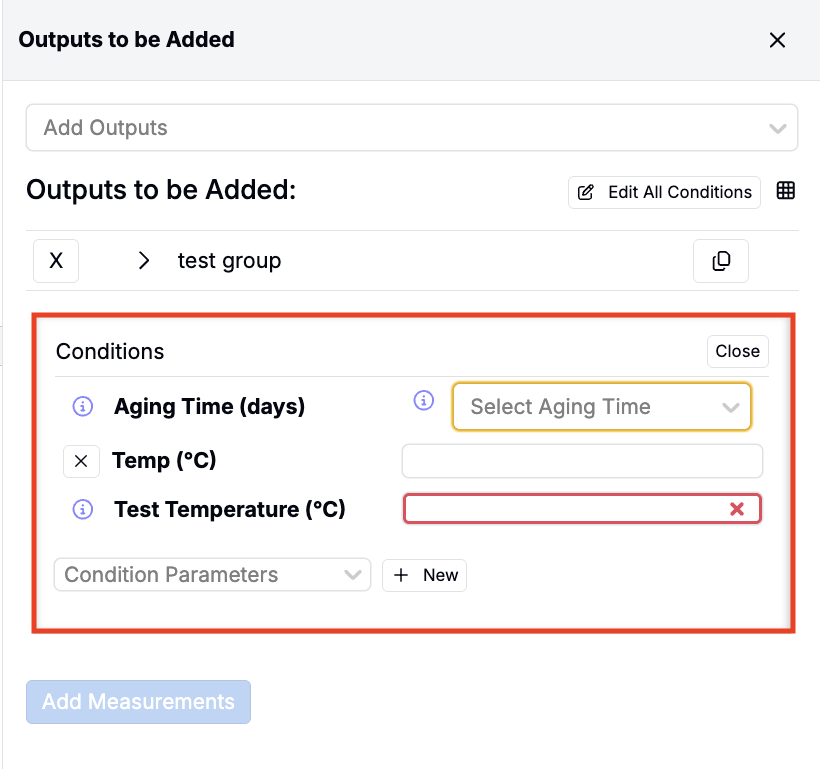
Any output with value restrictions will also have their selection menu pre-filtered to only the defined options. In this example, Aging Time had value defined restrictions of 3 and 6.