
This guide walks you through generating OAuth credentials on the Uncountable platform and connecting them to popular AI and automation vendors.
Section A – Generate OAuth Credentials
Follow these steps inside the Uncountable platform to create an OAuth client that will be used for third-party connections.
Note: An OAuth client is scoped to a single schema/account. Repeat the steps in this section for each account you want to connect.
Step 1 – Navigate to the OAuth Tab
- Log in to the Uncountable platform.
- Navigate to the User Administration page.
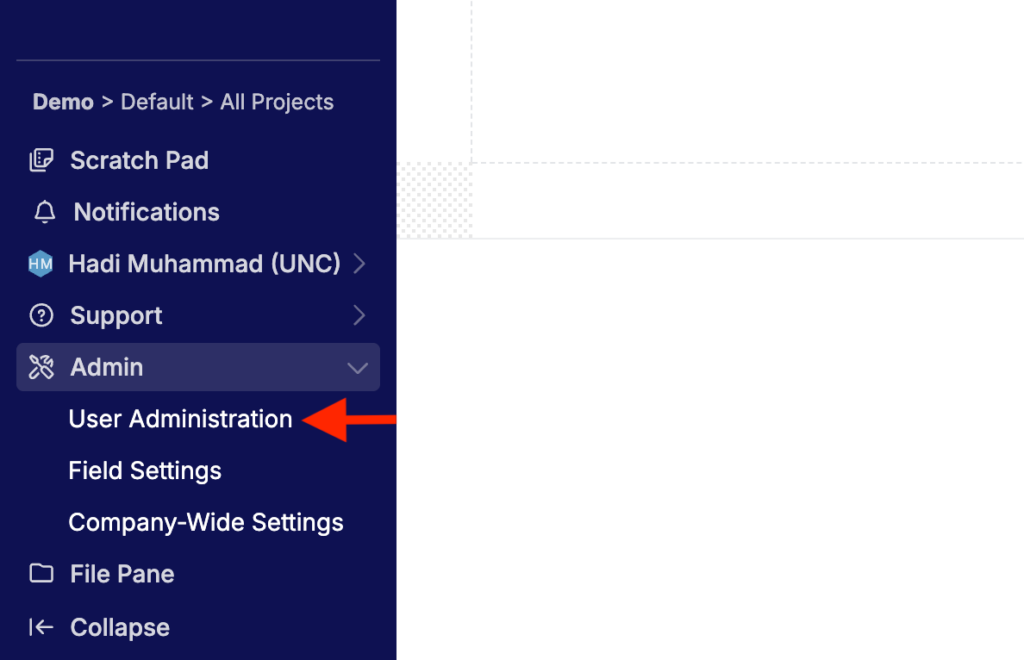
- Select the OAuth tab.
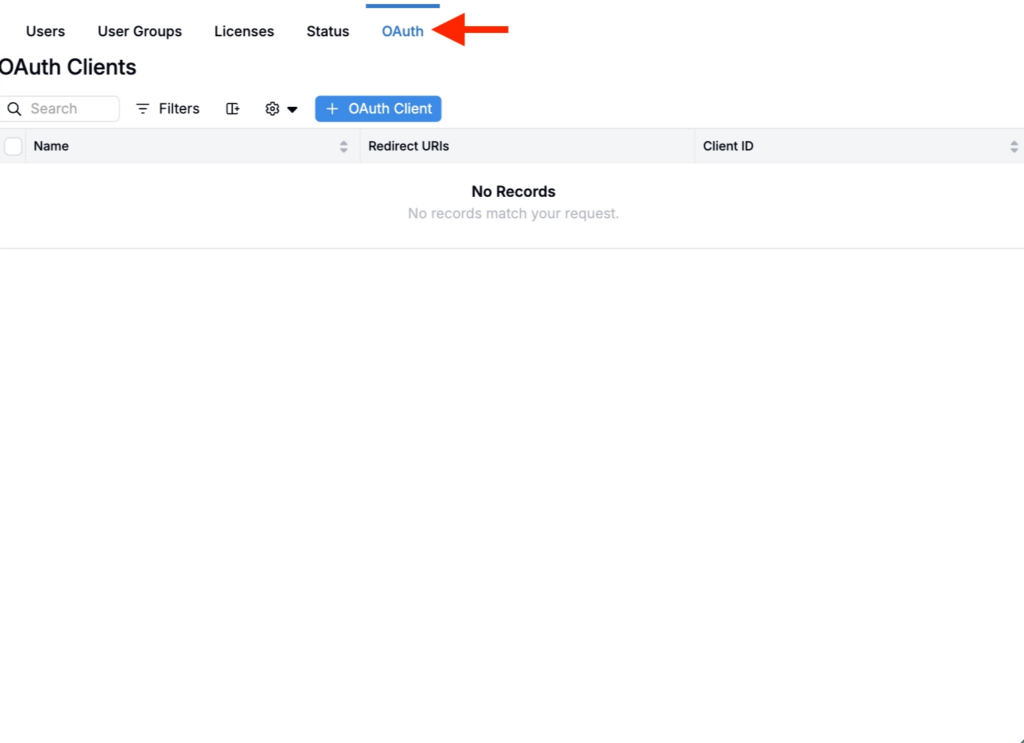
Step 2 – Create a New OAuth Client
- Click the Create OAuth Client button.
- A dialog box will appear with two fields:
- Name: Anything descriptive, e.g. “Claude Connector” or “Zapier Integration”.
- Redirect URIs: Add the redirect URI(s) for the vendor(s) you plan to connect. See the table below for common URIs.
Redirect URIs by Vendor
| Vendor | Redirect URI |
|---|---|
| Claude.ai | https://claude.ai/api/mcp/auth_callback https://claude.com/api/mcp/auth_callback Add both URIs for Claude. |
| ChatGPT (OpenAI) | https://chatgpt.com/connector_platform_oauth_redirect This format will be deprecated soon – see Section B2 for the new flow. |
| Copilot Studio (Microsoft) | Copilot Studio generates a custom redirect URI per connection. Go to Section B3 first to create the connector, then use the redirect URI provided. |
⚠️ Heads up: Some vendors generate a custom redirect URI per connection. For these vendors, go to the relevant Section B first, create the connector, and then use the redirect URI they provide here in Step 2.
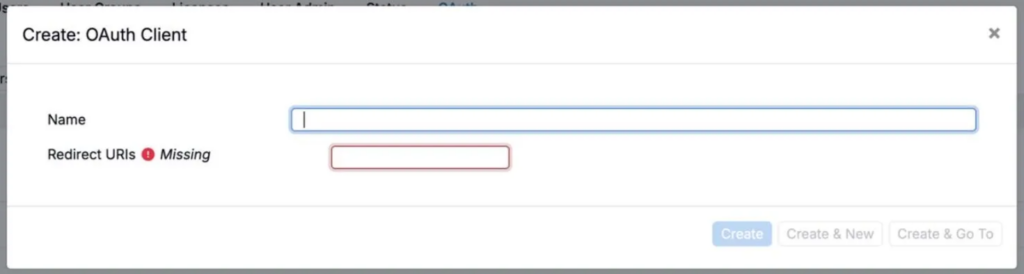
Step 3 – Save and Copy the Client ID
- Click Create to finalize the OAuth client.
- The platform will display a generated Client ID.
- Copy this Client ID – you will need it when configuring each vendor connector.

Section B – Connect to Vendors
Use the Client ID generated in Section A to connect Uncountable to each vendor below. Each vendor will ask you to provide a URL to the MCP/connector. This is whichever environment you are in with “/mcp” appended.
Example: For https://app.uncountable.com, the MCP URL is https://app.uncountable.com/mcp.
B1. Claude.ai
Official guidance for Claude: Get started with custom connectors using remote MCP
Permissions: Only Owners can add connectors to Team and Enterprise plans. Once added, users individually connect to and authenticate the connector – ensuring Claude only accesses data that each user is authorized to see.
- Open Claude.ai and navigate to Settings → Connectors.
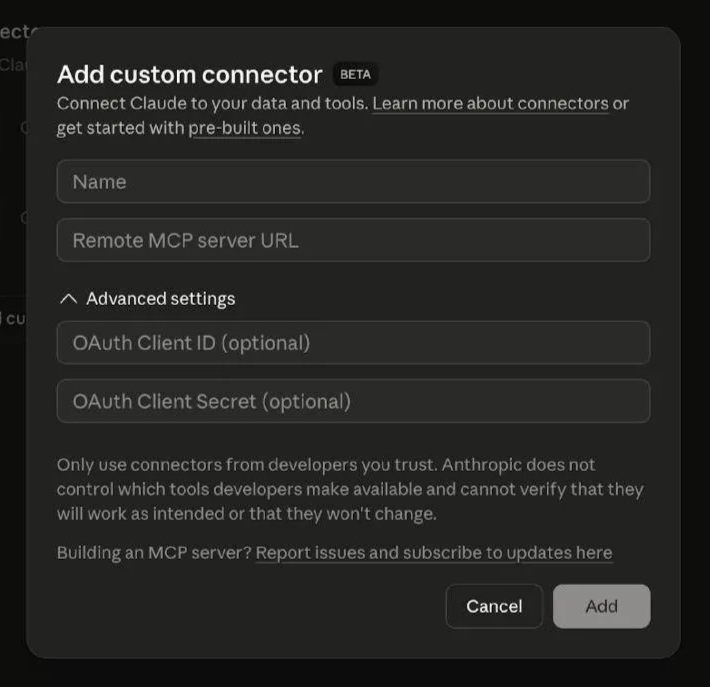
- Click Add custom connector.
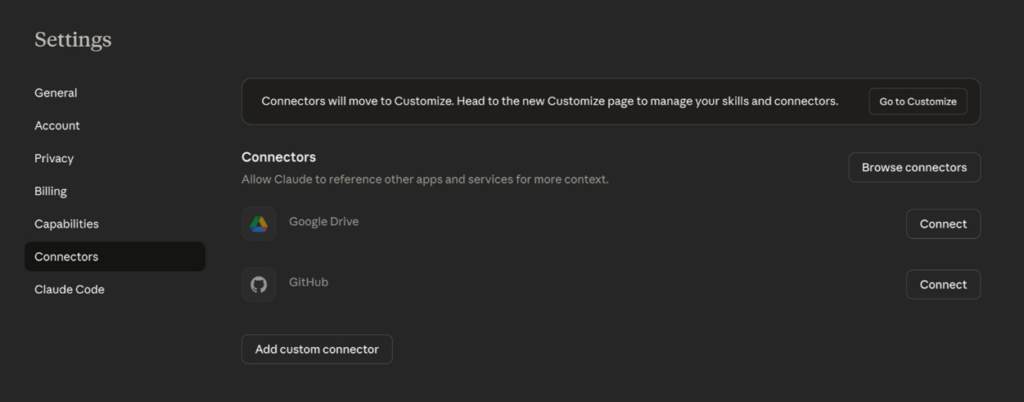
- Enter a name for the connector and the MCP URL.
- Open Advanced Settings and enter your Client ID, then press Add.

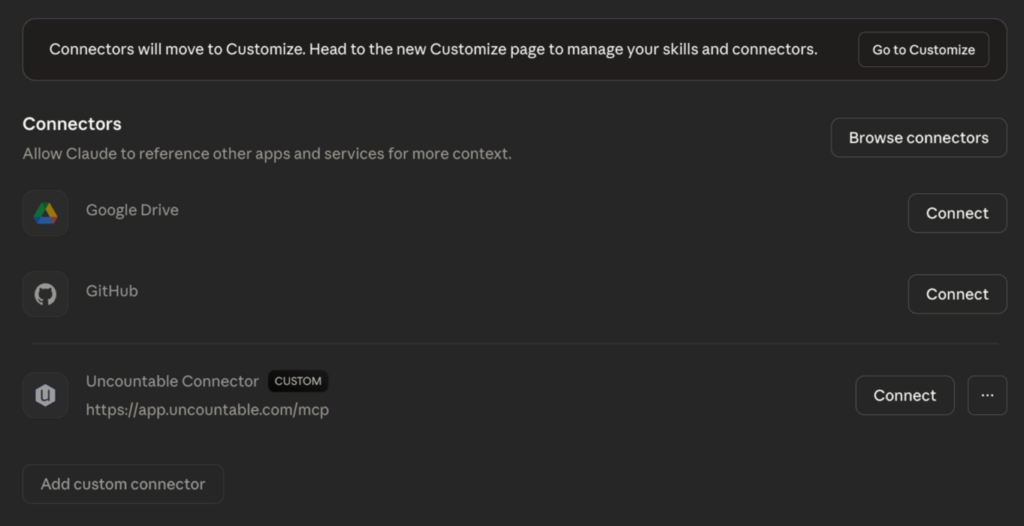
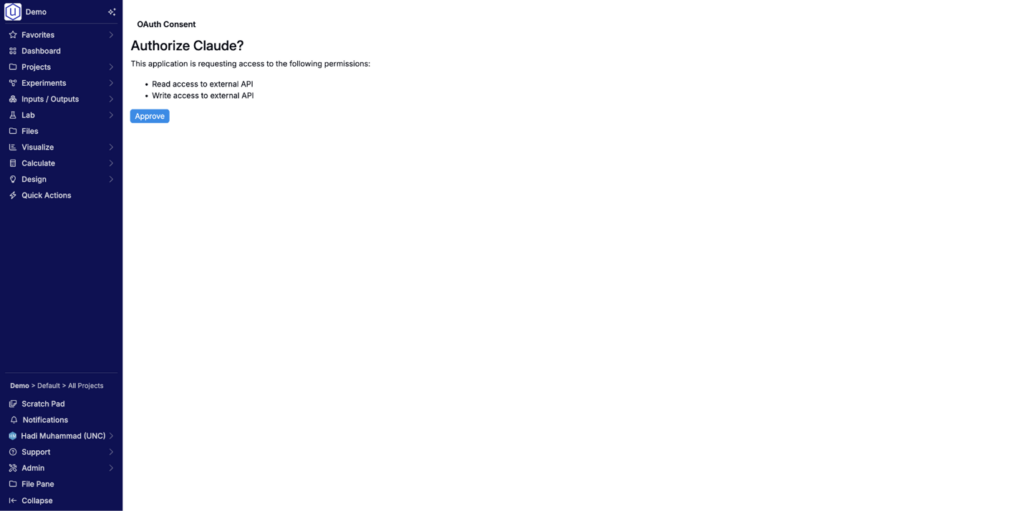
- The connector will be created – press Connect. You will be redirected to the Uncountable platform for authorization.
- Approve the connection. You will be redirected back to Claude and see a success message.
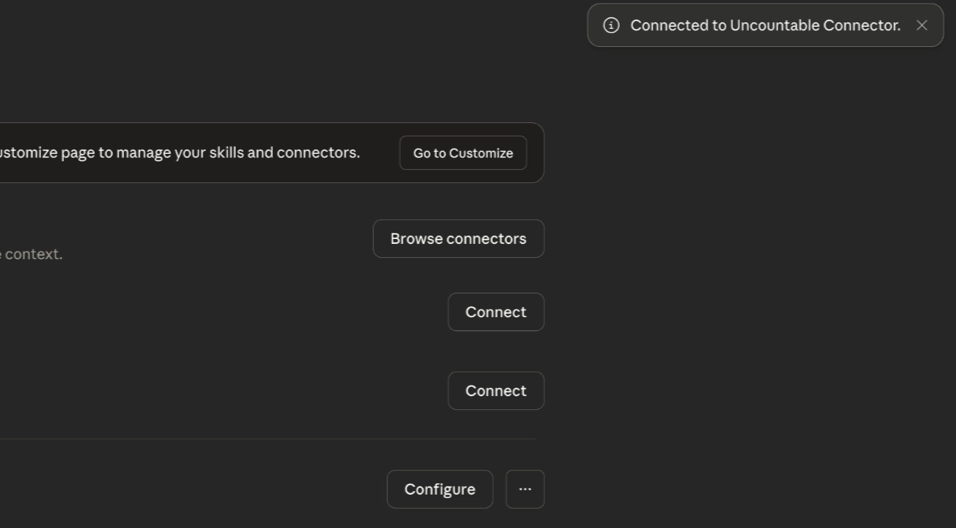
- You can then create a new chat with Claude and select this connector from the chat options.
B2. ChatGPT (OpenAI)
Official guidance: Developer Mode and MCP Apps in ChatGPT (beta)
Permissions: Only admins/owners can enable Developer Mode and deploy an app.
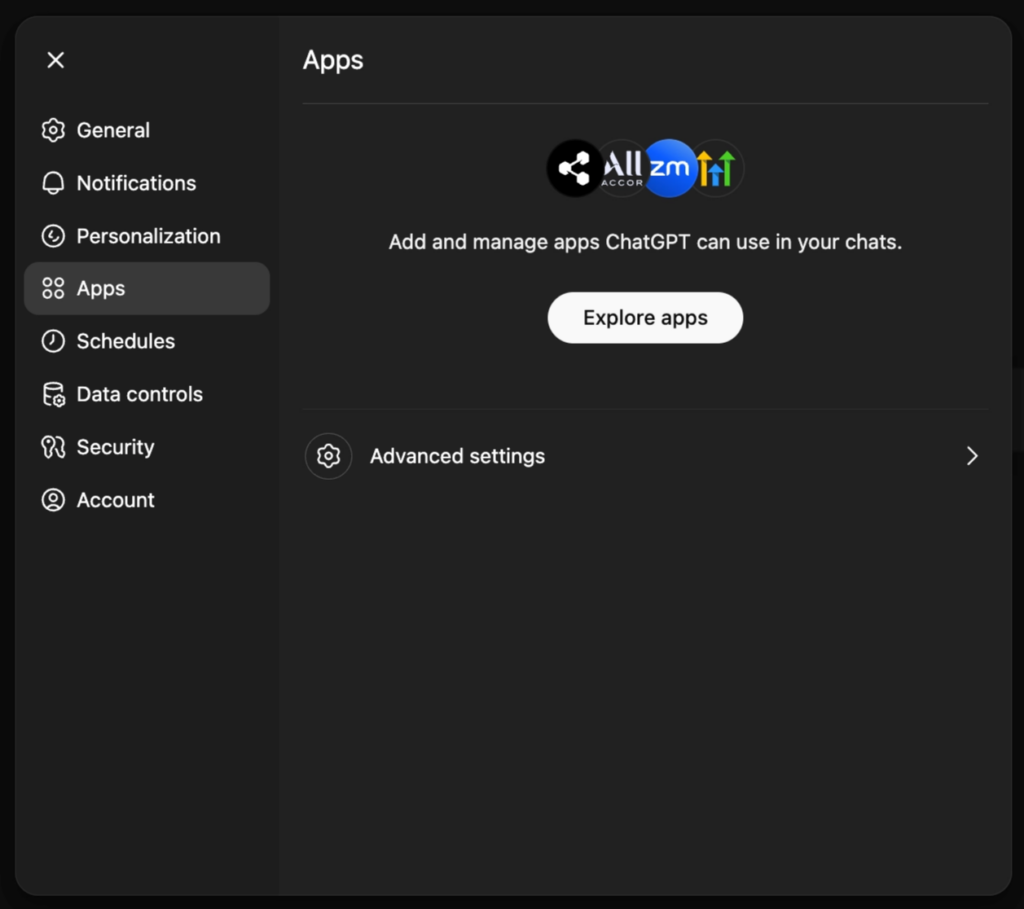
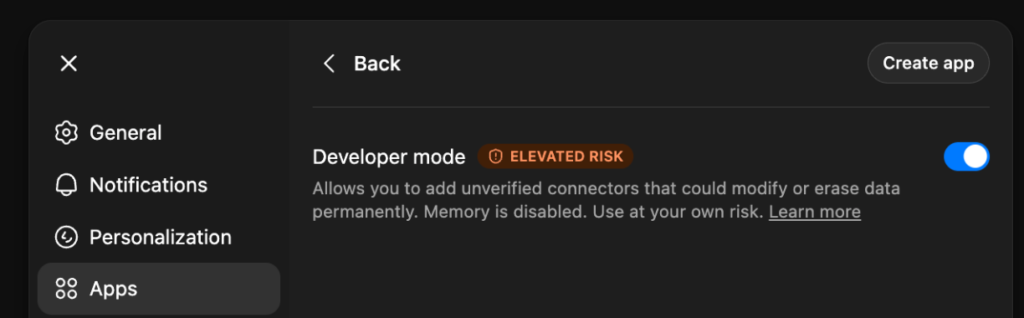
- Go to Settings → Apps → Advanced Settings and enable Developer Mode.
- Click Create app in the same modal.
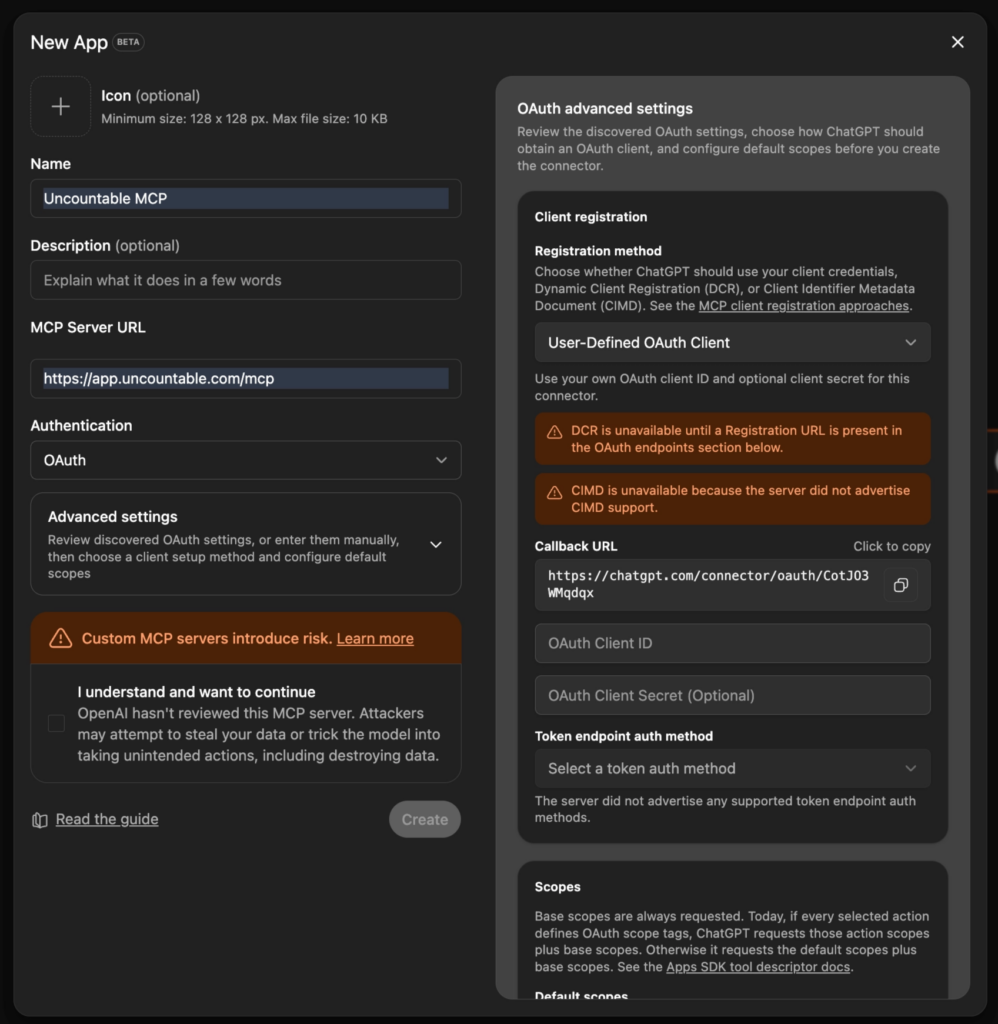
- Fill in the app name and MCP URL.
- Ensure OAuth is selected under Authentication.
- Click Advanced Settings.
- Copy the Callback URL shown here – use this as the Redirect URI back in Section A, Step 2.
- Press Create. You will be redirected to the Uncountable platform to approve the connection.
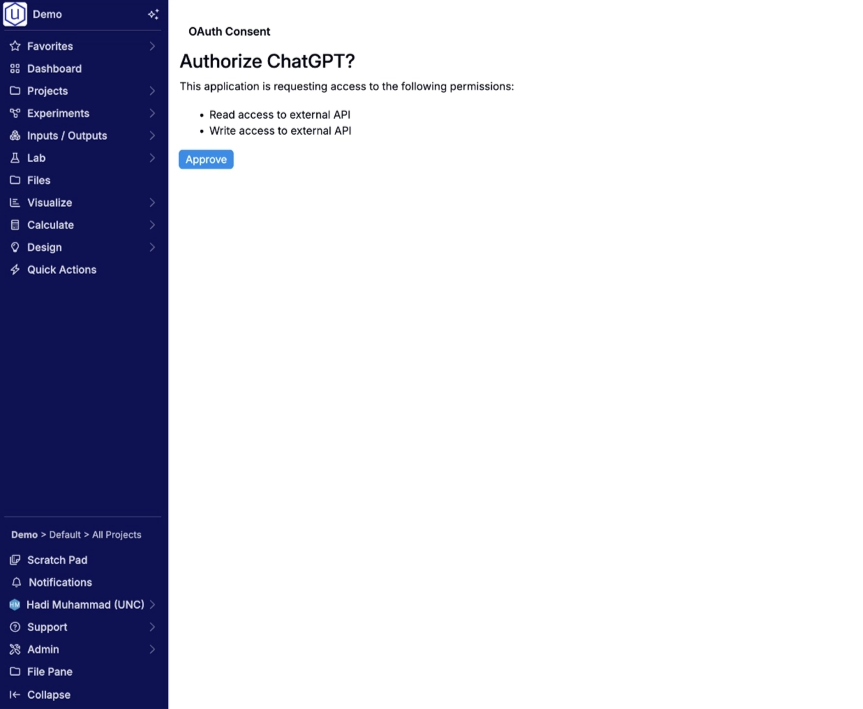
- Once approved, you will be redirected back to ChatGPT and see the connector listed under Draft Apps.
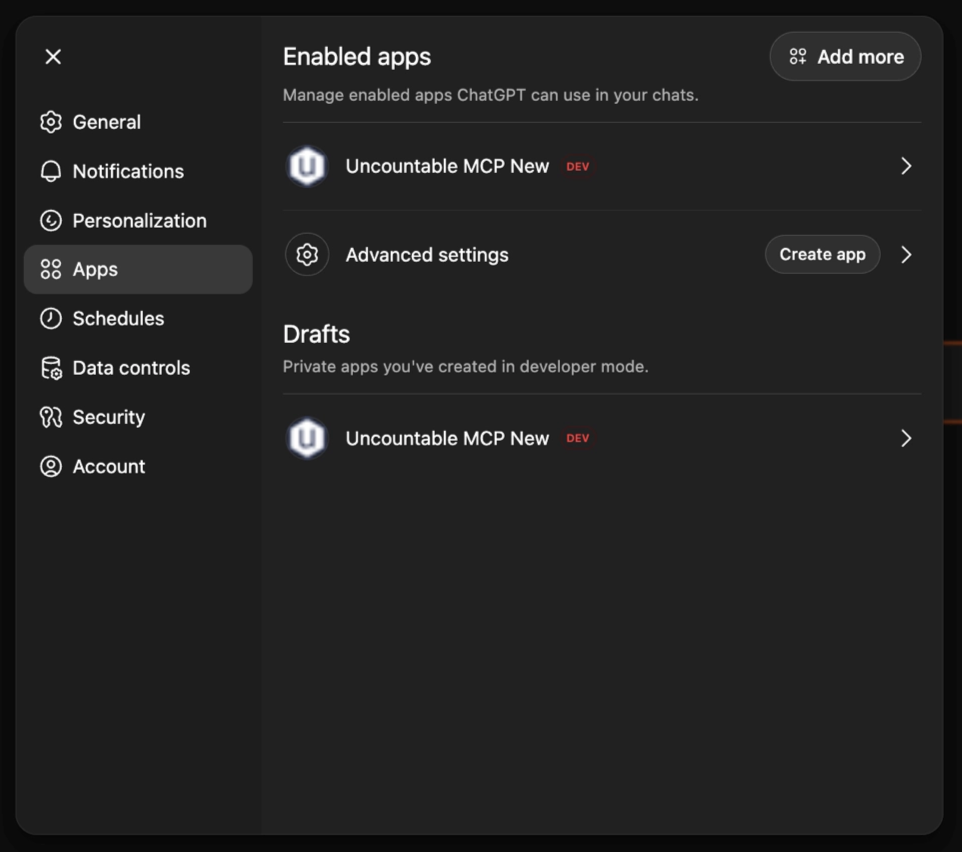
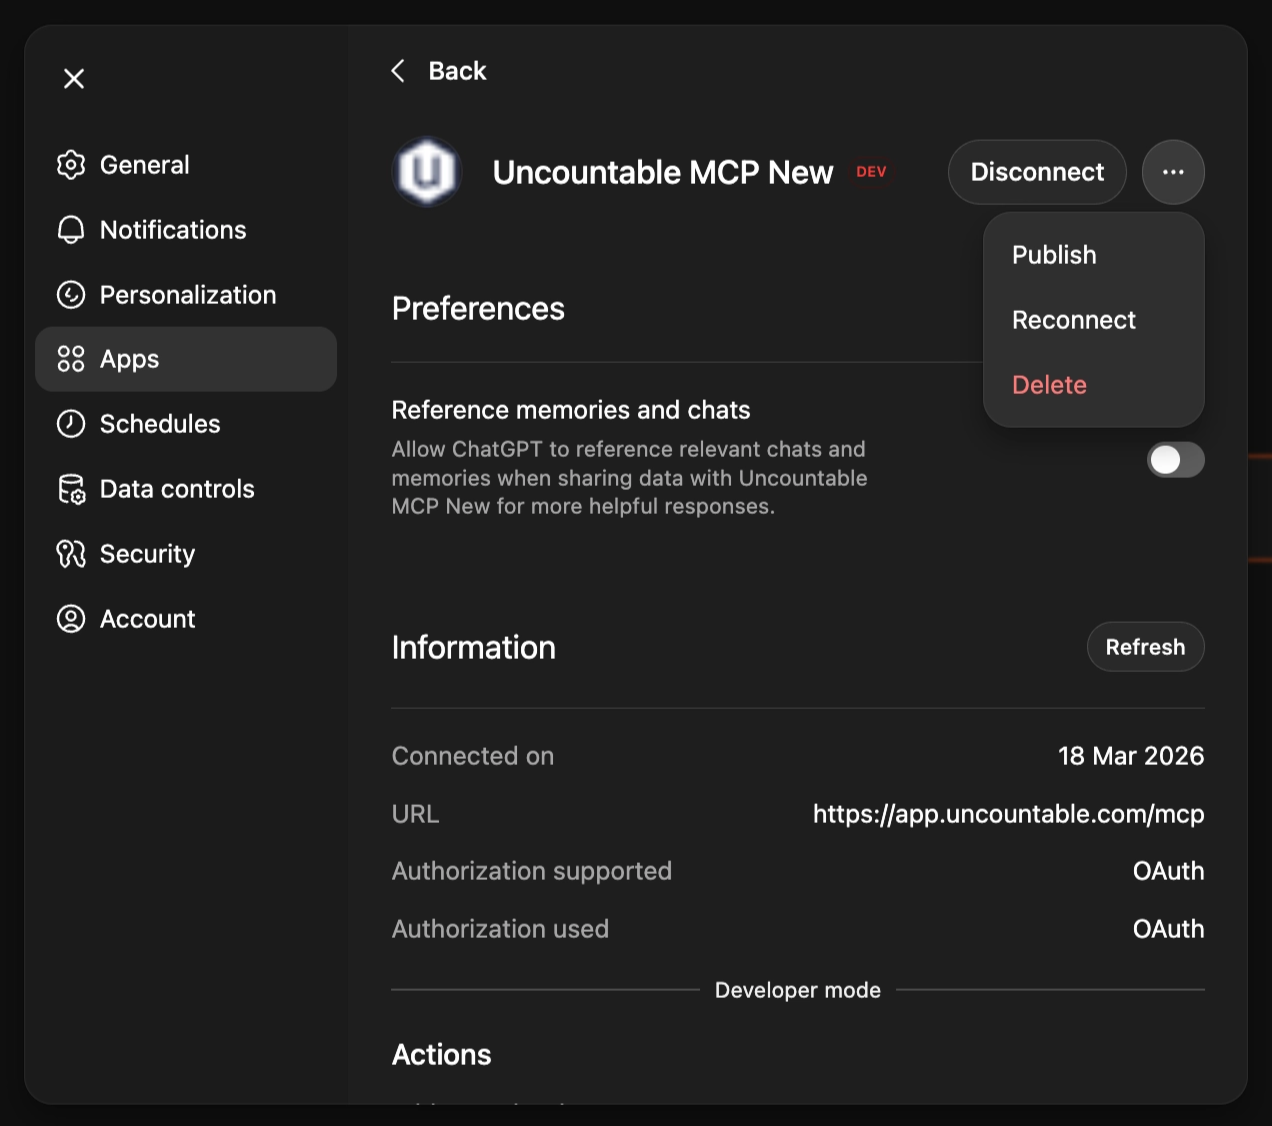
- Open the draft app and press Publish so all users in your workspace can access it. Each user will need to authenticate individually.
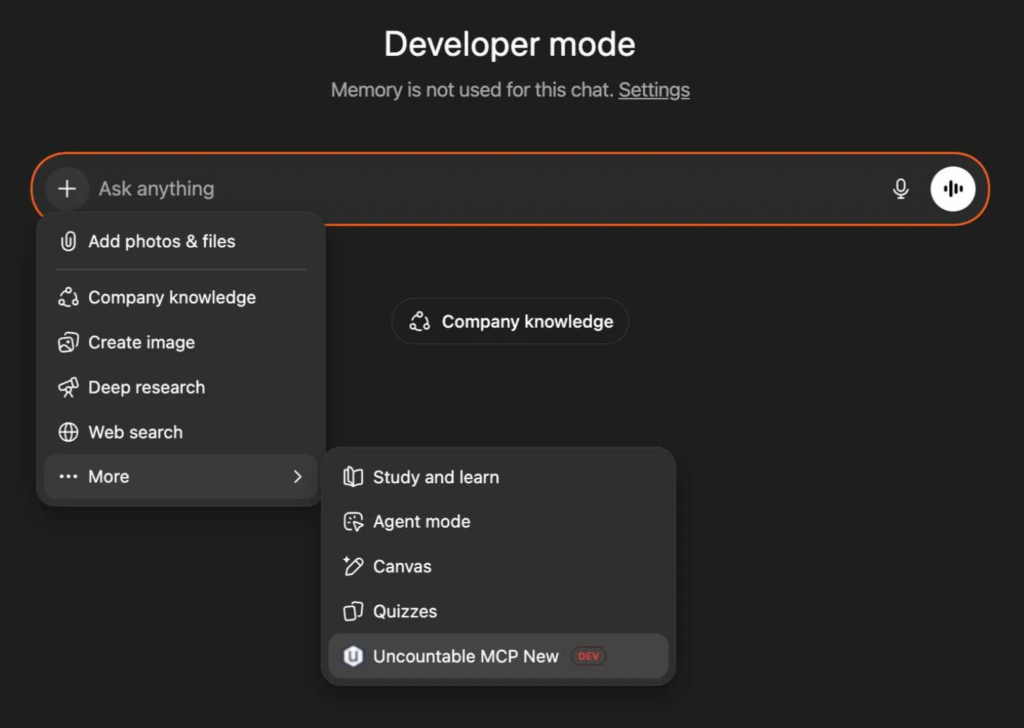
- You should then be able to access the connector within a chat.
B3. Copilot Studio (Microsoft)
Official guidance: https://learn.microsoft.com/en-us/microsoft-copilot-studio/mcp-add-existing-server-to-agent
Permissions: Heads up: Copilot Studio generates a custom redirect URI per connection. Complete the steps below first to obtain the redirect URI, then return to Section A, Step 2 to enter it.
- Sign into Microsoft Copilot Studio and navigate to the agent you want to connect.
- Go to the tools page for your agent and add an MCP tool.
- For authentication, select OAuth 2.0 – under this you should select Manual for the type of configuration.
- Fill in the following fields:
- Client ID – copy client ID from client you created.
- Client secret – leave this blank
- Authorization URL – the environment you are using + “/oauth2/authorize” – for example, https://app.uncountable.com/oauth2/authorize
- Token URL – Same as above except + “/oauth2/token”
- Refresh URL – Same as token URL
- Scopes – EXTERNAL_API_READ & EXTERNAL_API_WRITE
- Select Create to add the server. A callback URL appears. Copy this into the client you originally created on the platform.
- Click next to continue, On Add tool, select Create a new connection for your MCP server or use an existing one.
- Select Add to agent to finish adding the MCP server to your agent.
Section C — Alternative: CIMD Setup for Claude
Client ID Metadata Document (CIMD) is an OAuth extension in which the Client ID is itself an HTTPS URL that hosts the client’s metadata as JSON.
In practice this means a shorter setup for Claude: you do not need to add redirect URIs on the Uncountable side, and you do not need to copy a generated Client ID into Claude. Use this section instead of Section A and Section B1 when connecting Claude.ai.
Note: Section C replaces Sections A and B1 — do not create a standard OAuth client as well. As with any OAuth client, a CIMD client is scoped to a single schema/account, so repeat Step C1 for each account you want to connect.
Permissions: Only Owners can add connectors to Team and Enterprise plans. Once added, users individually connect to and authenticate the connector — ensuring Claude only accesses data that each user is authorised to see.
Official guidance for Claude: Get started with custom connectors using remote MCP
Step 1 — Create a CIMD OAuth Client in Uncountable
- Log in to the Uncountable platform.
- Open Admin → User Administration from the bottom of the navbar.
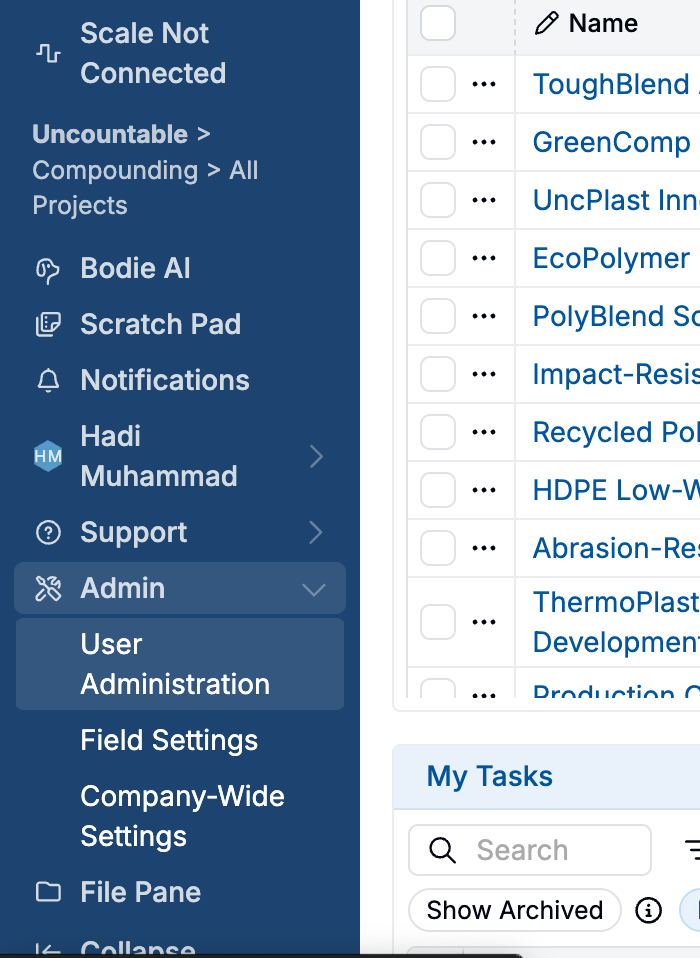
- Select the OAuth tab, then click “+ OAuth Client”.
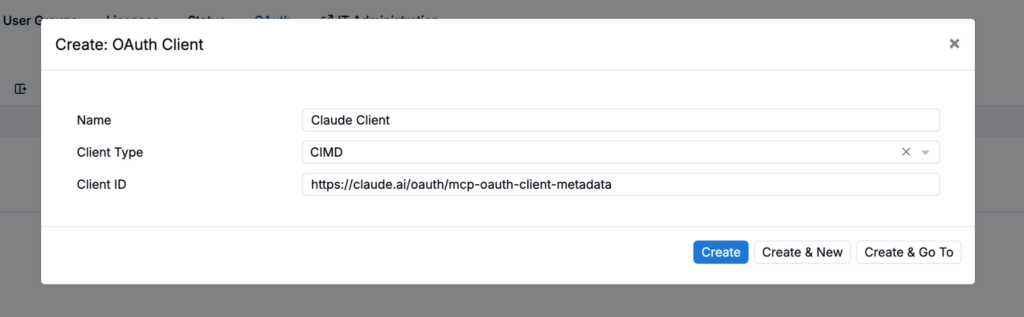
- Complete the dialog:
- Name: anything descriptive, e.g. “Claude Client”.
- Client Type: CIMD.
- Client ID: https://claude.ai/oauth/mcp-oauth-client-metadata.
- Click Create.
Step 2 — Add the Custom Connector in Claude
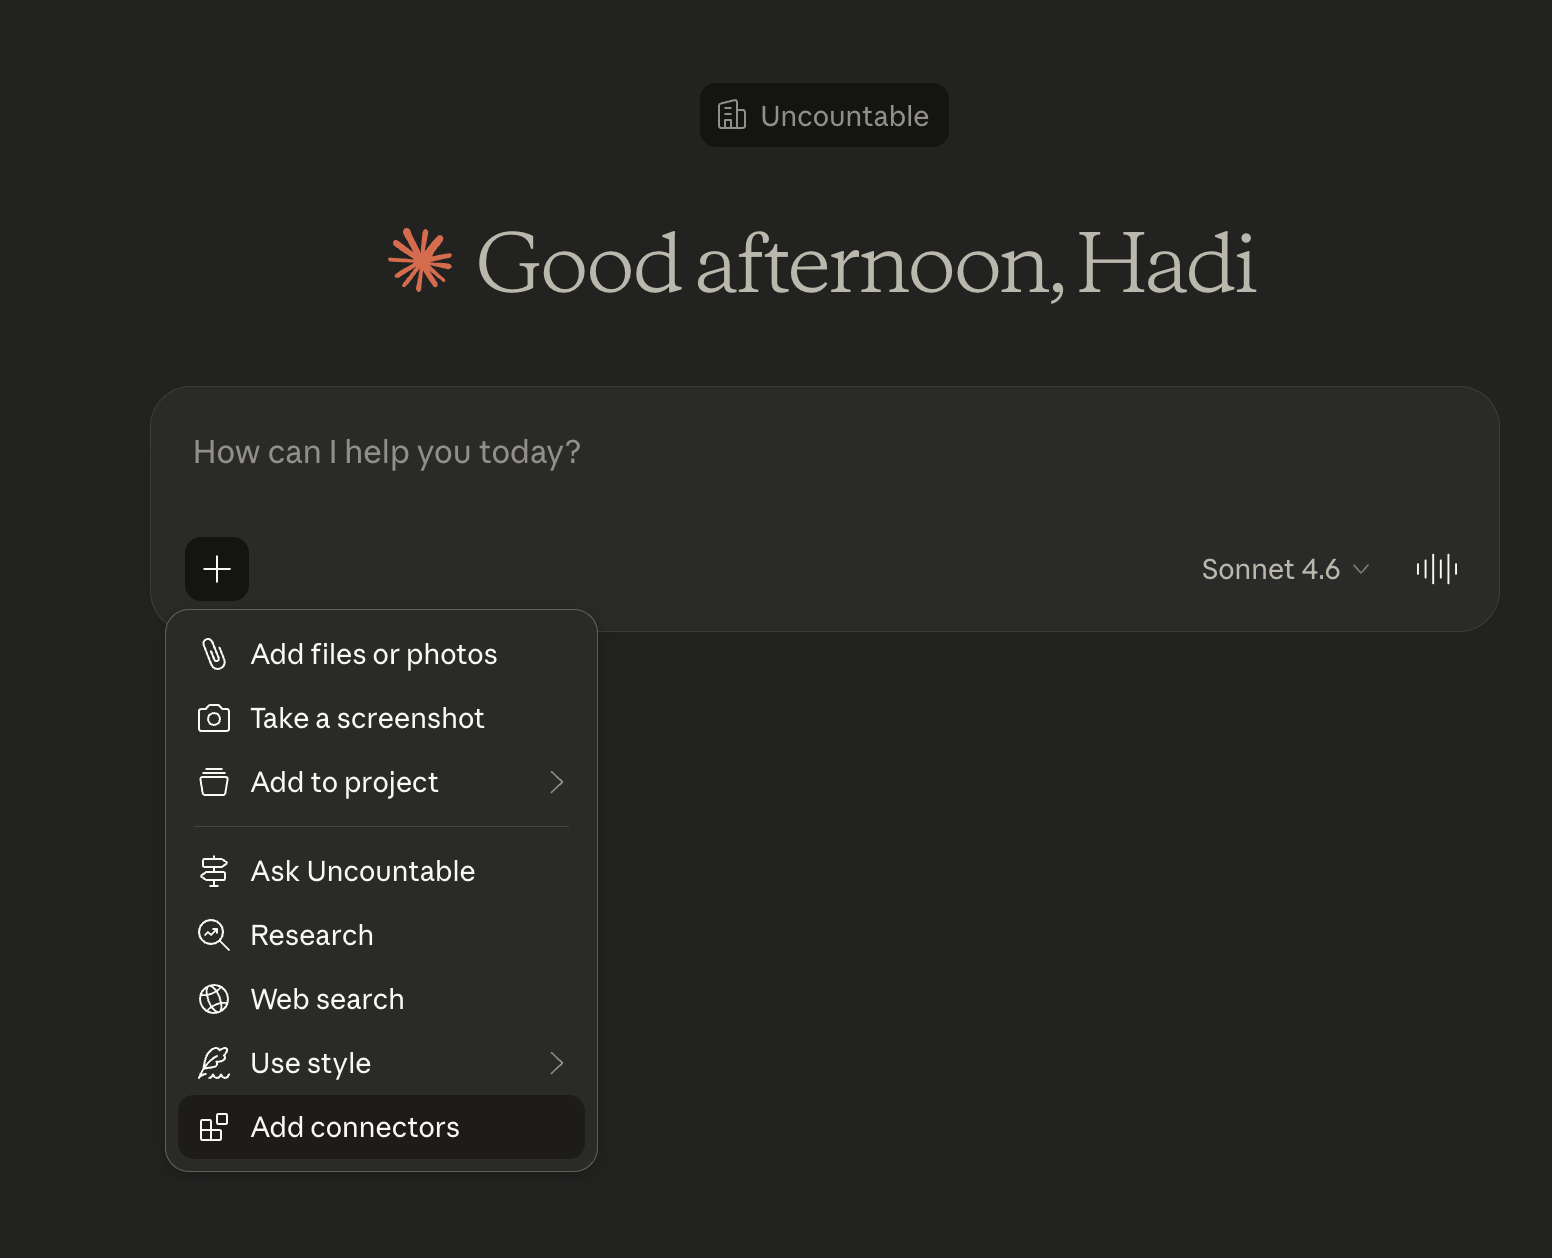
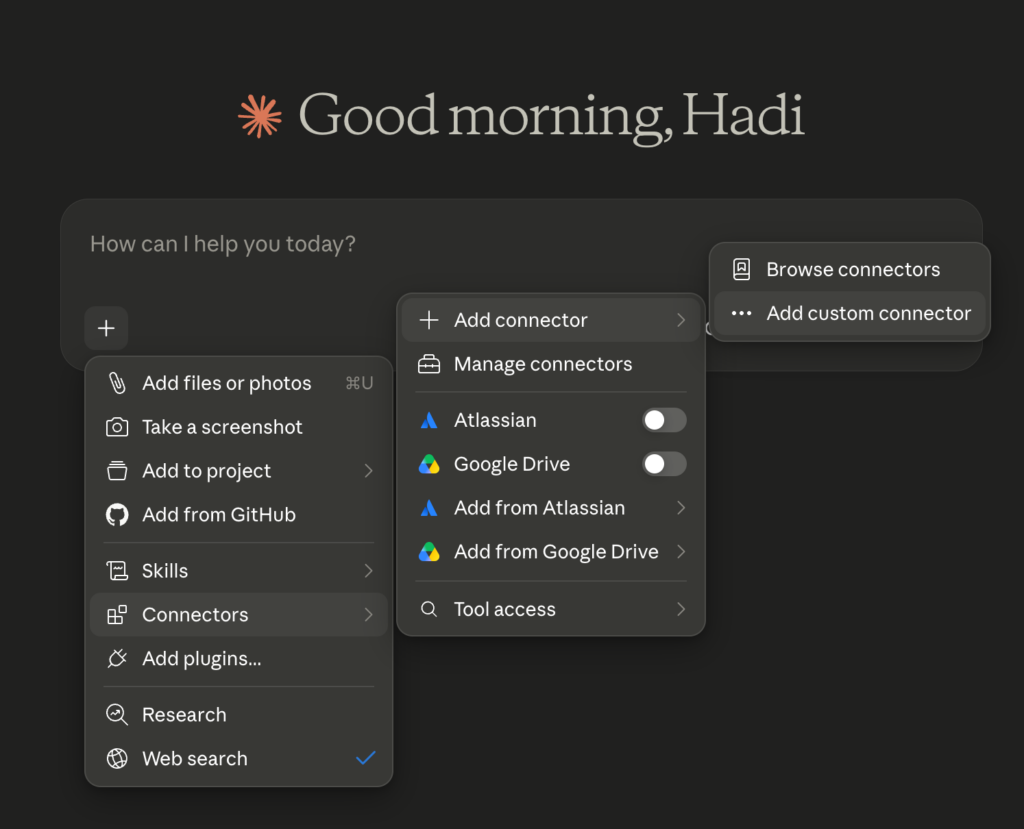
- In Claude, open the + menu in the chat composer and go to Connectors → Add connector → Add custom connector. (You can also reach this from Settings → Connectors.)
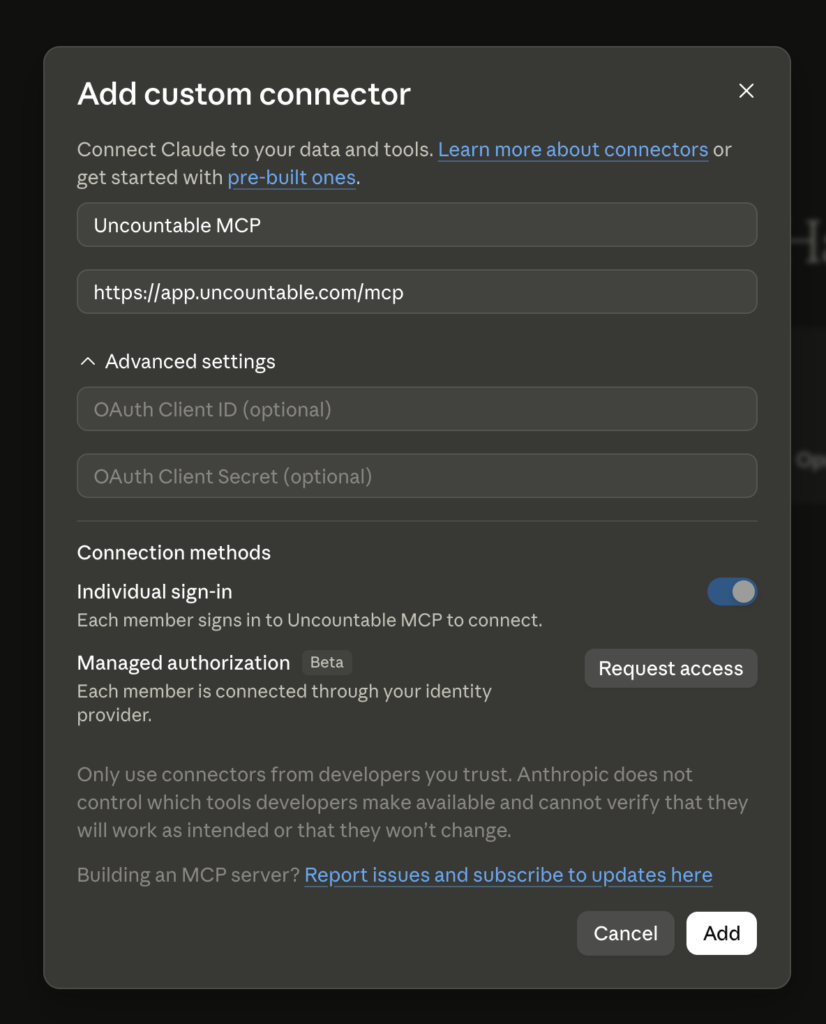
- Enter a name for the connector, e.g. “Uncountable MCP”.
- For the URL, use whichever environment you are on with /mcp appended — for example https://app.uncountable.com/mcp.
- Leave the OAuth Client ID and OAuth Client Secret fields under Advanced settings empty.
- Click Add.
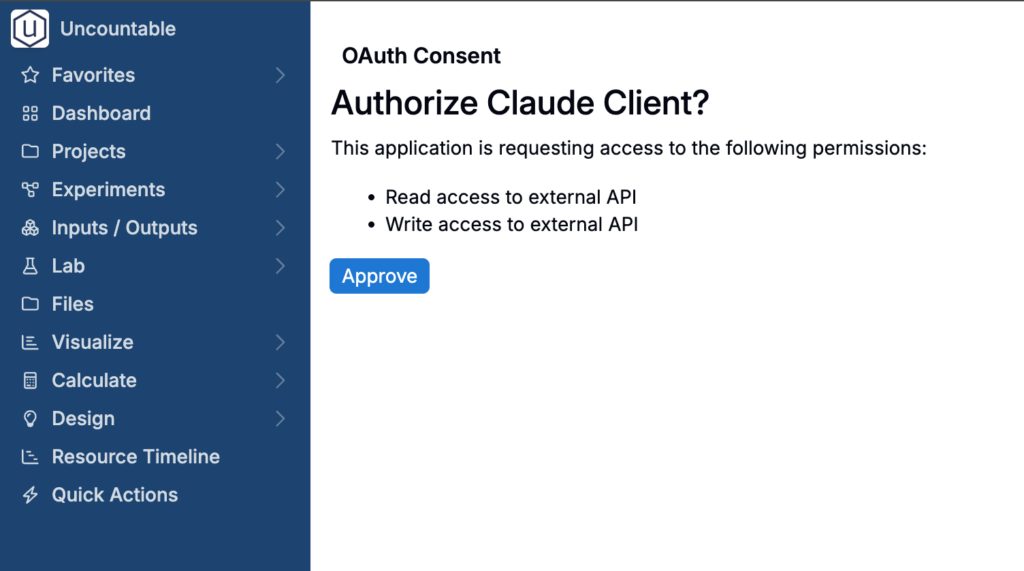
Step 3 — Authorize the Connection
You will be redirected to the Uncountable platform to log in, and then shown an OAuth consent screen.
- Confirm the request is for the client you created in Step C1, then click Approve.
- You will be redirected back to Claude.
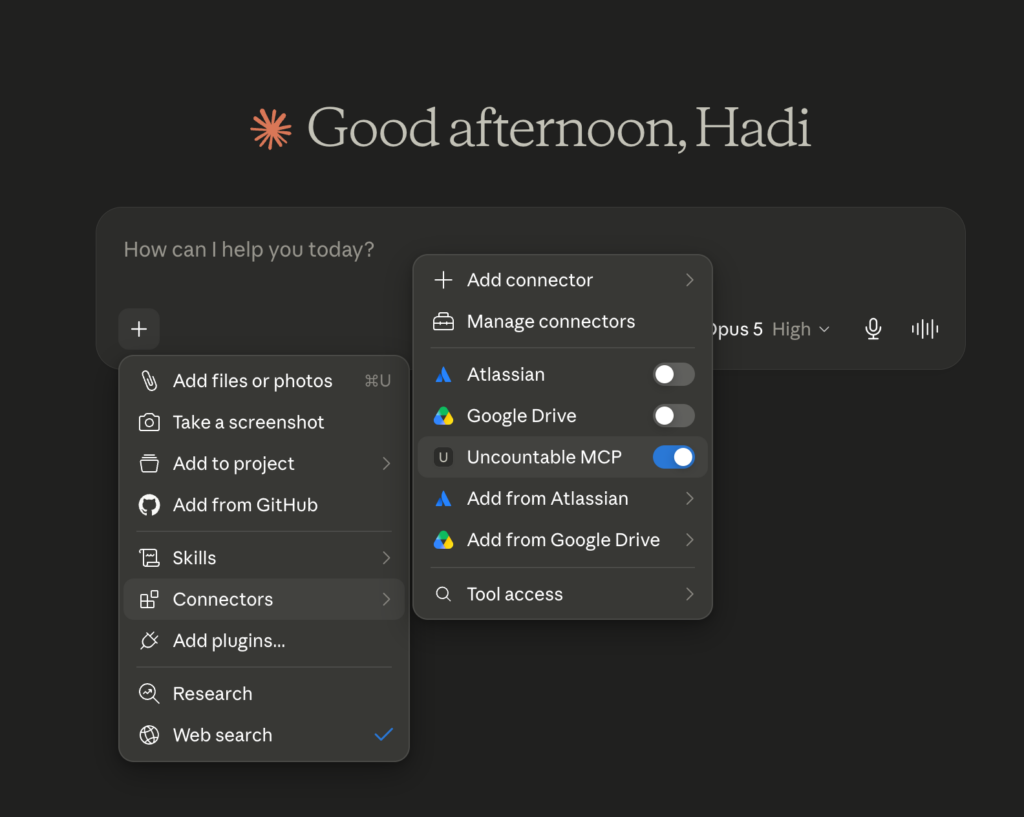
Step 4 — Confirm and Test
- Reopen the Connectors menu and confirm the connector is listed and toggled on.
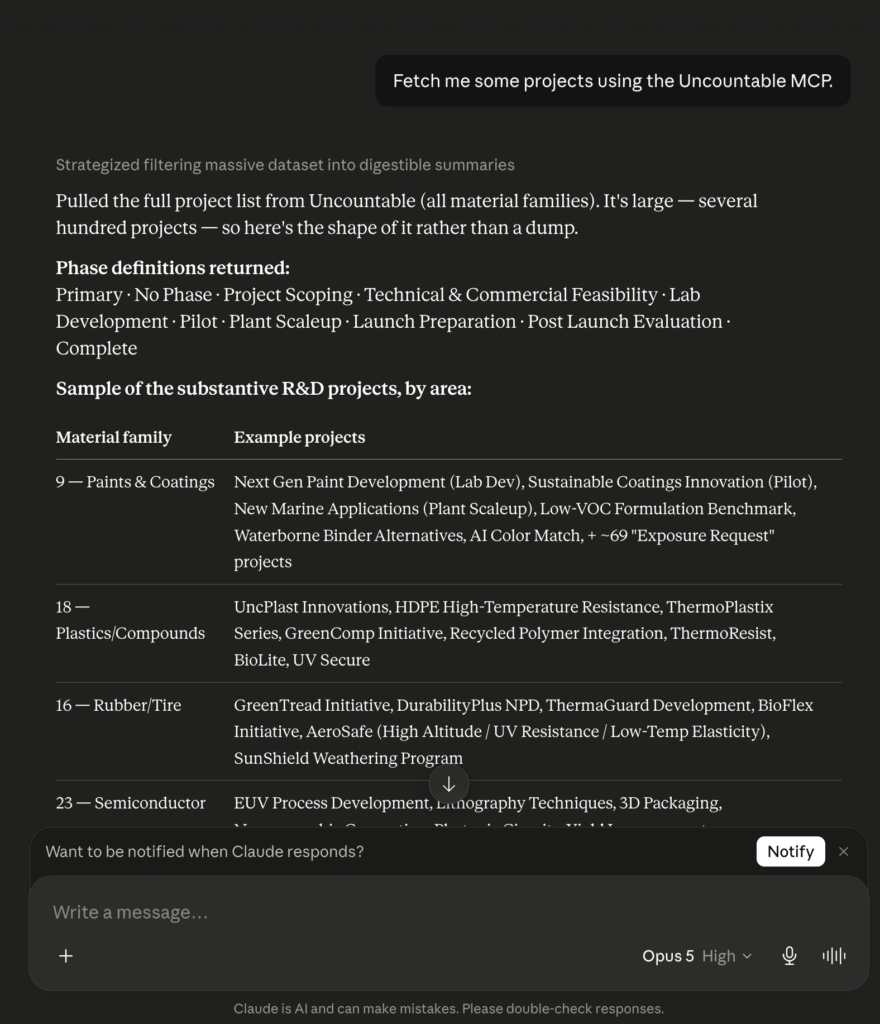
- Run a sample query in a new chat to confirm the tools are reachable — for example, “Fetch me some projects using the Uncountable MCP.”
For further assistance, contact Uncountable support or consult the platform documentation.
FAQ
- How does the MCP know which schema to interact with?
The OAuth client you create in Uncountable is scoped to a single schema/account. That means any MCP connection using that Client ID will interact with that same schema/account. - Can I enable an MCP on the front end?
Yes. You can set up the connector in the vendor UI (Claude/ChatGPT/Copilot), but each user still has to authenticate by logging into Uncountable and authorizing the connection. The MCP can only access what the authenticating user can access in that schema. - How do I prevent customers from changing data?
Create the OAuth client in the schema you want them to use, and make sure the customer user account you use for authorization has the appropriate permissions (for example, read-only / restricted access). The MCP cannot exceed the permissions of the Uncountable user who authorized it.
For further assistance, contact Uncountable support or consult the platform documentation.