Also known as “Bring Your Own Key” (BYOK).
This guide walks through connecting Uncountable to your own OpenAI, Anthropic, Google Gemini, or other supported AI backend using your API key or custom model endpoint. This gives your team full control over usage, billing, and access.
Connector setup now happens from the dedicated Generative AI module page. From there, admins can add connectors, reorder connector priority, and test each connector before relying on it.
You will need: Platform administrator access in Uncountable (your user group must have “Admin Rights” enabled in User Admin > Groups), and the API key or endpoint details for the provider you want to connect.
Step 1: Get Your API Key
OpenAI
- Sign in at platform.openai.com.
- Click your organization name in the top-left, then go to API keys.
- Click Create new secret key, give it a name (e.g., “Uncountable”), and copy it immediately. The key starts with
sk-and is shown only once.
Anthropic
- Sign in at console.anthropic.com.
- Go to Settings > API Keys.
- Click Create Key, give it a name (e.g., “Uncountable”), and copy it immediately. The key starts with
sk-ant-and is shown only once.
Step 2: Open the Generative AI Module
Uncountable stores API keys in a secure secrets store. You will not be able to view the key again after saving it, so have it ready before you start.
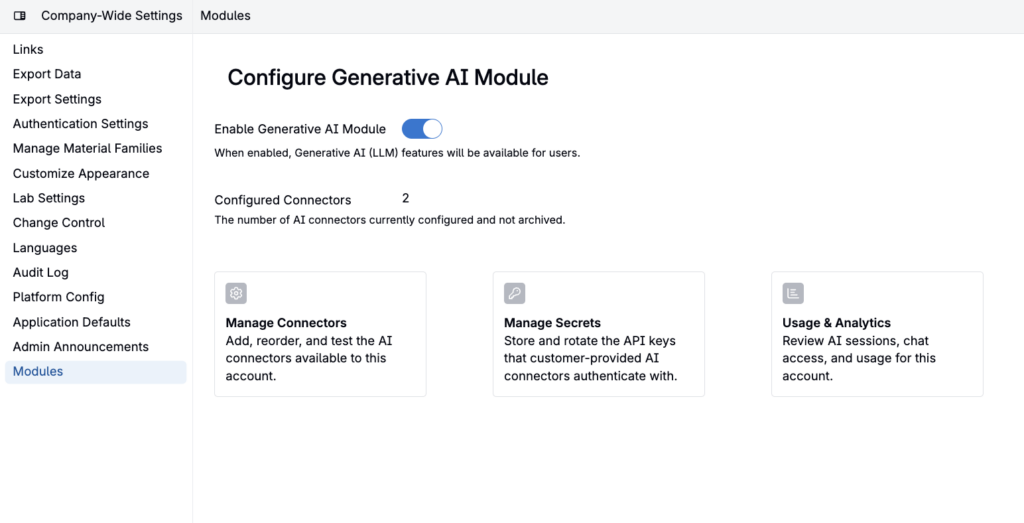
- In Uncountable, click your name or the settings icon in the top-right corner to open the admin menu, then click Company-Wide Settings.
- Go to Modules.
- Select Configure.
- Open Manage Connectors. If your connector setup requires a saved secret, open Manage Secrets from the connector setup flow.
- In the “Manage Secrets” panel that opens:
- Name: enter a human-readable label, e.g.,
My OpenAI KeyorMy Anthropic Key. - Ref Name: enter a machine-readable identifier with no spaces, e.g.,
my_openai_keyormy_anthropic_key. Use only lowercase letters, numbers, and underscores. - Under Secret Values, click Add. The Key field will default to
api_key; leave it as-is. Fill in Value with your API key.
- Name: enter a human-readable label, e.g.,
- Click Create Secret.
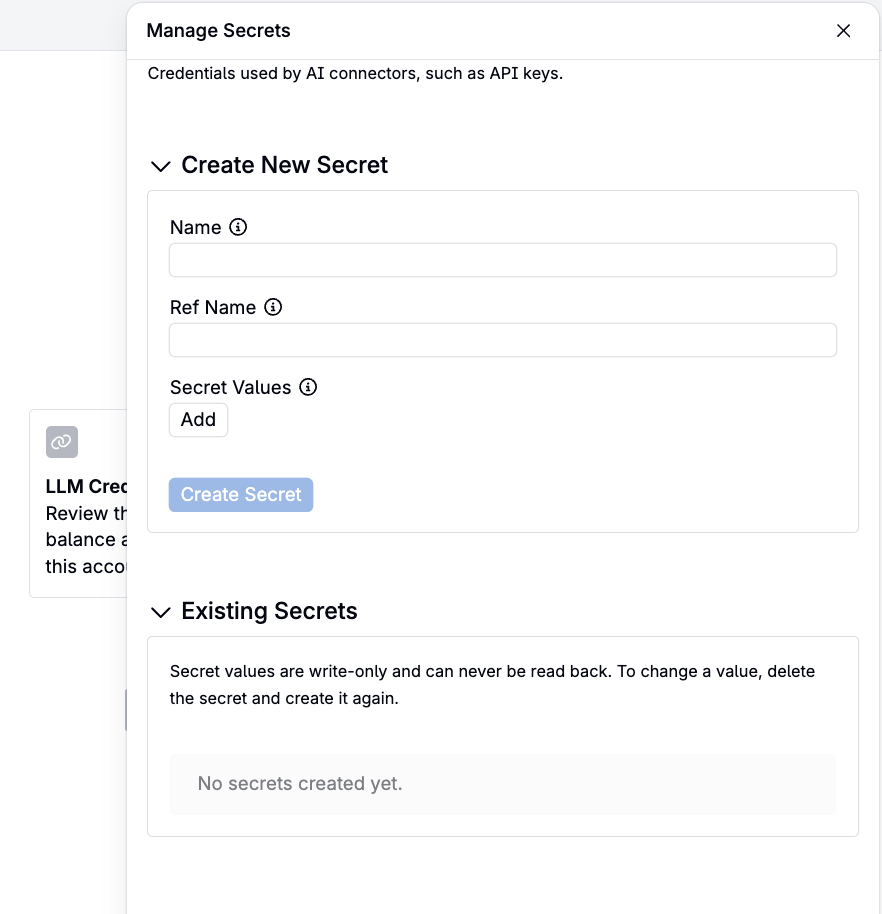
Your secret now appears in the “Existing Secrets” list. Note down the Ref Name you used; you will need it in the next step.
Step 3: Create the AI Connector
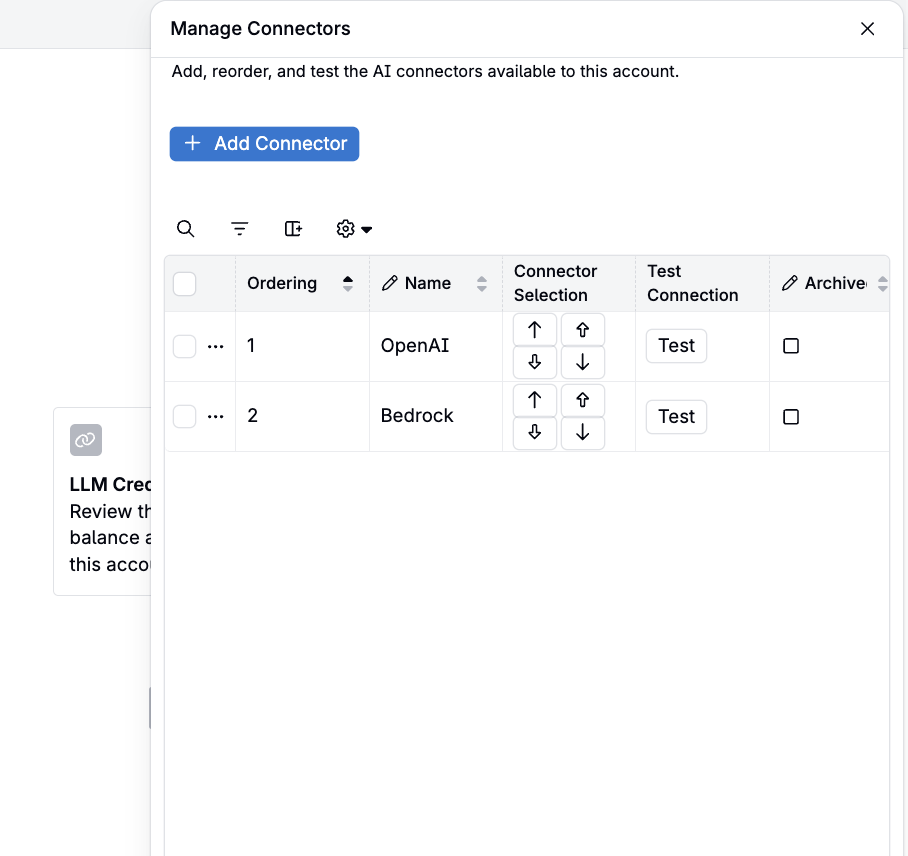
- From Configure Generative AI Module, open Manage Connectors.
- Click Add Connector.
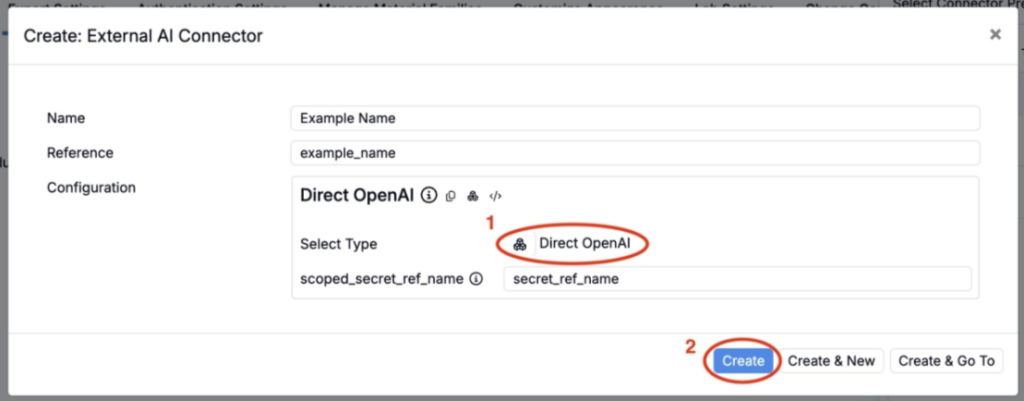
- Choose the setup type: Uncountable-managed, Use your own API key, or Custom model endpoint. Follow the guided form for the selected provider.
- A guided form opens. The exact fields depend on the provider and setup type you choose. For bring-your-own-key connectors, enter: Field Value Name A display name, e.g.,
OpenAI Direct,Anthropic Direct, orGemini DirectProvider / Type Select the provider you are connecting, such as OpenAI, Anthropic, Google Gemini, AWS Bedrock, or a custom endpoint Secret / API Key Select or create the saved secret for your provider key, or enter the endpoint details requested by the custom setup flow - Select Create.
Step 4: Verify the Connection
After creating, you will be returned to Manage Connectors. Find your new connector and click Test to smoke-test the connection.
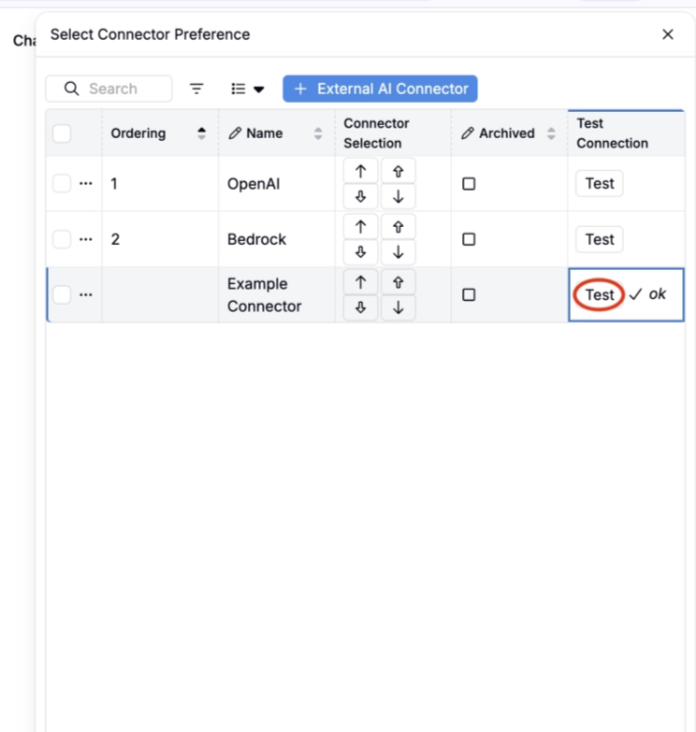
The test sends a short “Reply with ‘ok'” prompt to your provider. A checkmark means the connection is working. If you see an error, double-check that the API key you stored in Step 2 is correct and has not been revoked.
Step 5: Configure Connector Priority
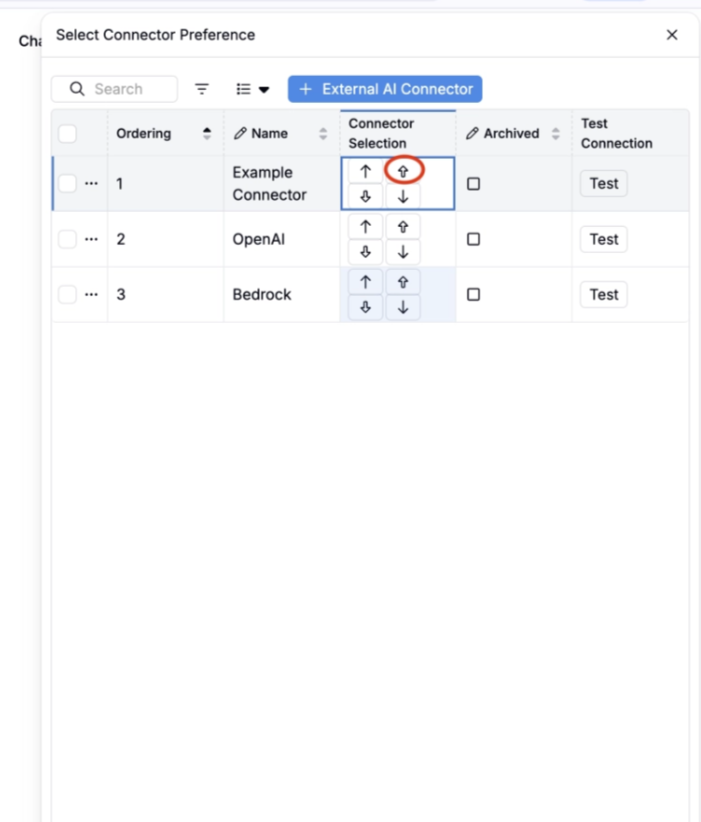
To ensure all AI features in your environment use your key exclusively, disable or archive the default Uncountable-managed connectors you are not using. In Manage Connectors, edit the connector and mark it inactive or archived. Archived connectors will not be used for Gen AI features.
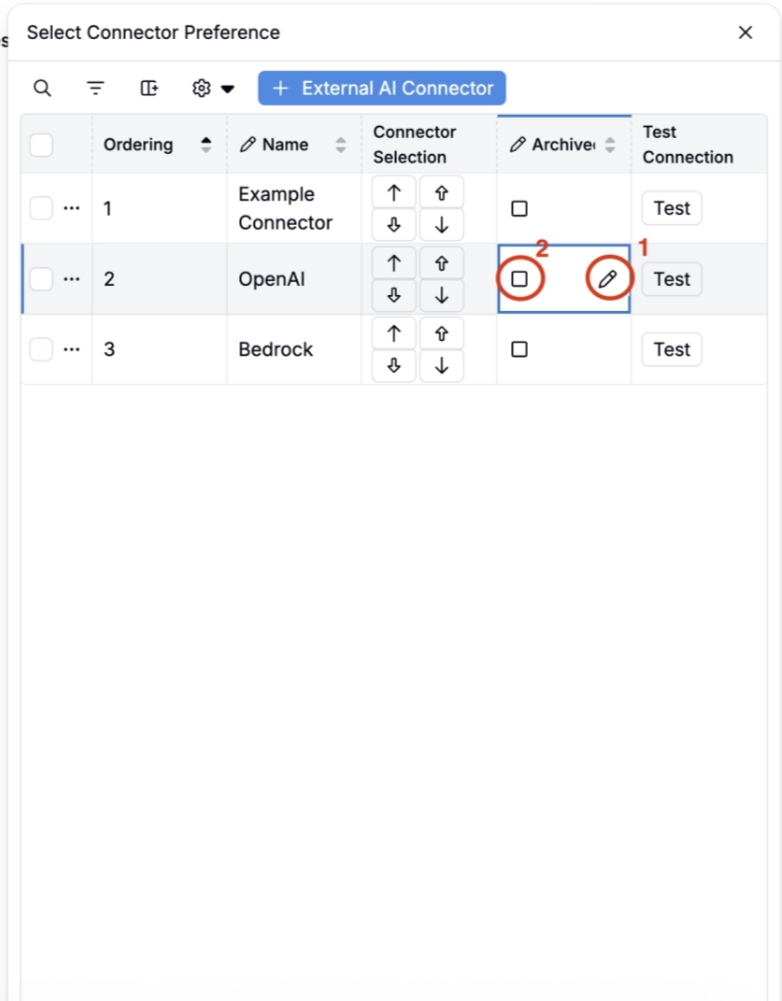
If you prefer to keep multiple connectors available and just set yours as the default, reorder the connector list so your preferred connector is first. The first-ranked active connector is used when multiple connectors support the requested AI capability. For AWS Bedrock connectors, admins can also restrict which model families are available to the account.